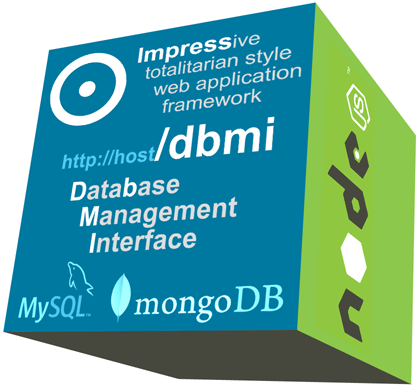
We make admin panel for MySQL and MongoDB on Node.js
We want "phpMyAdmin" (read web GUI) for node
The lack of universal web-based interfaces for managing common DBMS makes it somewhat difficult to learn Node.js , and deploying another web server and another language with infrastructure alongside, oh, I don’t want to. It is inconvenient and security considerations to open ports and manage databases by connecting from another server or from your work computer. Therefore, we decided to include such a tool in the platform for web applications Impress , which was announced , which I wrote a little about and which is available in open source for general benefit . The idea is this: to implement a simple and convenient unified interface for DBMS, which are most often used in conjunction with Node.js, take care of quick deployment (just copy the folder) and independence from the environment. In the beta version, MySQL , MongoDB are already supported, and soon the queue will reach PostgreSQL and Oracle .
DBMI features
For all database operations, scaffolding is used, i.e. building interfaces, queries and all data processing operations based on the dynamic acquisition of metadata about the database structure or introspection of the DBMS structures. The interface is shown below in the picture. The tree is three-level, the first level is the connections to the database (they are, of course, of the two types), the second level is the databases, the third level is the collections (for Mongo) and the tables (for MySQL). On the tree nodes, you can call the context menu with the right mouse button.

The functionality is as follows:
- Display tables and collections. This is a natural editing method for MySQL, but for MongoDB we used a grid, the columns are fields collected from all collection entries, I think this editing will be more convenient than editing JSON, tree or property inspector.
- Filters by fields. In the header of the grid there is a string for the filter, for MongoDB it works only by strict coincidence, and for MySQL, in addition to a full match, there is also a syntax for filtering conditions, enter without quotes: "> 5" is more than 5 and all other comparison signs like in SQL, those. “Not equal to 5” is written as “<> 5”, ranges “5..10” are converted to BETWEEN, templates with the characters “*” (any sequence, even empty, is converted to “%” in SQL LIKE expressions) and "?" (any character must be converted to "_" in SQL LIKE expressions), for example, "* str?" (these characters are more familiar to users), one value from the set "(1,2,4,10,11)" is converted to SQL IN-expression.
- Insert records. It works only for MySQL for now. The last blank line of the grid is used for insertion, if after editing one field you can already make INSERT, then the record is added immediately, its ID appears in the PRIMARY KEY column, and further editing is done via UPDATE, but if “NOT NULL” restrictions require you to fill more than one fields, the INSERT only happens after all the required fields are filled in).
- Editing records in tables and collections (always works for Mongo, and for MySQL so far only with a non-composite primary key, i.e. record ID, support for the primary primary key, composite and non-composite unique index will be later and already if nothing is found, then in the WHERE for the UPDATE statement we will put all the fields of the record being edited.
- Deleting records from tables and collections. It works for Mongo, for MySQL it also works for non-composite PRIMARY KEY.
- Log SQL statements. Naturally, it will be supported only for relational DBMS. Perhaps, then for MongoDB we will output JavaScript code to the log for copying and pasting into projects.
- Create and delete databases. It works for MySQL, and for Mongo there is a feature, the database is created only if you immediately create at least one collection in it, otherwise the base disappears when the screen is updated, these are the features of the DBMS, but maybe I don’t know something, lie back if I’m wrong .
- Rename bases. It works like in Mongo, but it doesn't work in MySQL yet, because, as you know, RENAME DATABASE was introduced in MySQL and then eliminated, and to rename the databases, you need to create a new one with a new name, copy all the tables there, then copy the users and access rights Perhaps, some other things will need to be taken into account, but so far they have not reached it.
- Creating collections and tables. Currently it works only in Mongo, but we will soon add a table constructor for MySQL.
- Deleting collections and tables. It works both in MySQL and in Mongo, but in MySQL, the relationship between the tables can interfere with the deletion, (FOREIGN KEYS), in this case the deletion fails and the table appears again in the tree.
- Rename collections and tables. Works in both MySQL and Mongo.
Installation and Setup
The complete setup procedure is as follows (this is due to security, but in most cases, it is significantly reduced):
1. Create a project directory and install Impress from the npm repository in it.
$ npm install impress 2. Copy from the folder / node_modules / impress / examples / copyContentToProjectFolder all the content in the root directory of the project.
3. In the file config.js we set the databases we need (connecting them to) in the “databases” section.
4. In the file /sites/localhost/dbmi/access.js we find the access settings
module.exports = { guests: true, // logged: true, // http: true, // http https: true, // https groups: [] // ( ) } 5. In order to close the admin panel with a password, you need to create a user base using the “node setup.js” command. And then start the "node server.js" system. Go to 127.0.0.1 and register (“Create account” at the top right). After that, you can close the registration option by adding the access.js file to /sites/localhost/api/auth/register.json and setting guests = false in it.
6. If you want to go to the database via HTTPS, then put your server.key and server.cer files in the root of the project, as well as adjust the servers.www.protocol = "https" parameter in config.js.
7. Well, you can enter via 127.0.0.1/dbmi or 127.0.0.1 and select the “DB Management Interface” item in the menu on the left.
')
DBMI Development Plans
The entire DBMI module is now 70kb, half of which consists of css and html, about a quarter - server js, and another quarter - client. I think that it is not so much to understand the code if you want to correct or add something. The small size is also because the Impress platform (of our own production) produces most of the infrastructure work, like URL routing, template processing, a huge number of database support functions, especially with MySQL ( data access methods , methods introspection , query generation methods , etc.). What do we plan to finish in the near future:
- Execution of arbitrary SQL queries. Including CREATE TABLE, DROP ..., ALTER ... etc. Saving the history of these requests and calling them to the query editor in the future.
- Saving filters in grids as named fourth-level nodes in a tree. And writing a custom SQL query, which can also be saved with the specified name, as the fourth tree level and work with its results in the same grid too.
- Navigating the relationships between tables: navigating to the “parent” table or to the “child” (one-to-many relationships).
- Generating forms for editing and inserting records in the same way scaffolding as grids.
- Display of values from reference books, instead of ID. And, accordingly, when editing using drop-down lists to display directories.
- Generating tables from their JSON meta descriptions, see examples in / node_modules / impress / schemas. The generation is already working, but it is not yet related to DBMI, you can see the result of the generation by running:
require('impress'); var schemaCore = require('./schemas/impress.core.schema.js'), schemaCMS = require('./schemas/impress.cms.schema.js'); impress.init(function() { console.log(db.schema.mysql.generateScript(schemaCore, true).script); console.log(db.schema.mysql.generateScript(schemaCMS, true).script); }); It moves fast, but you need a thing such that everyone needs and it is desirable - even faster. So, join the testing and refinement, we will be glad to your participation.
UPD: Added the ability to execute SQL code entered in the editor (on the “Command” tab) and output the results and execution errors to the log (on the “Logs” tab).
Source: https://habr.com/ru/post/192302/
All Articles