Core Data for iOS. Chapter number 2. Practical part
Good day, good day!
Today I want to start writing a series of lectures with practical tasks on the book “Pro Core Data for iOS” by Michael Privat and Robert Warner, which you can buy from this link. Each chapter will contain a theoretical and practical part.

Content:
')
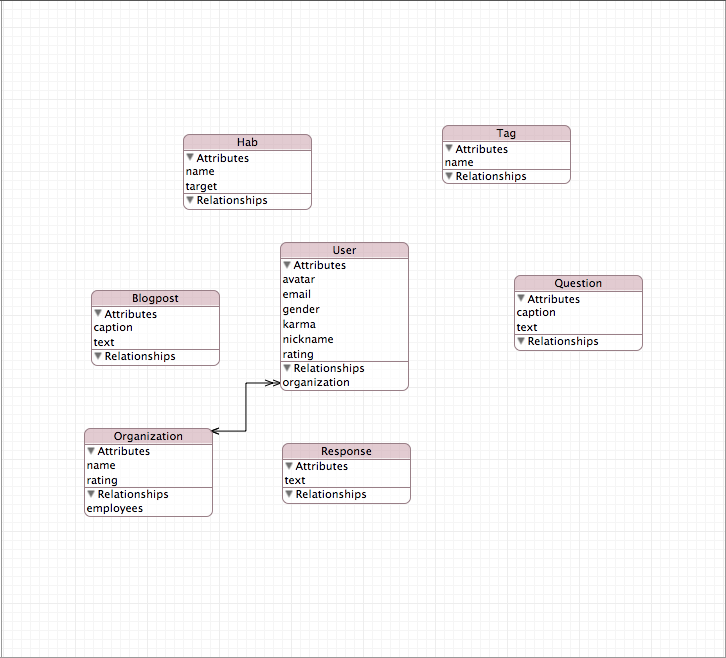
We will create such a model:

Then add some entries and request them. The output will be made in the console, so that we do not ask more and visual questions.
Ready? Then let's go!
Let's create an object graph of our favorite resource - Habra.
There are N main objects:
It'll be enough.
What data does each of the objects contain?
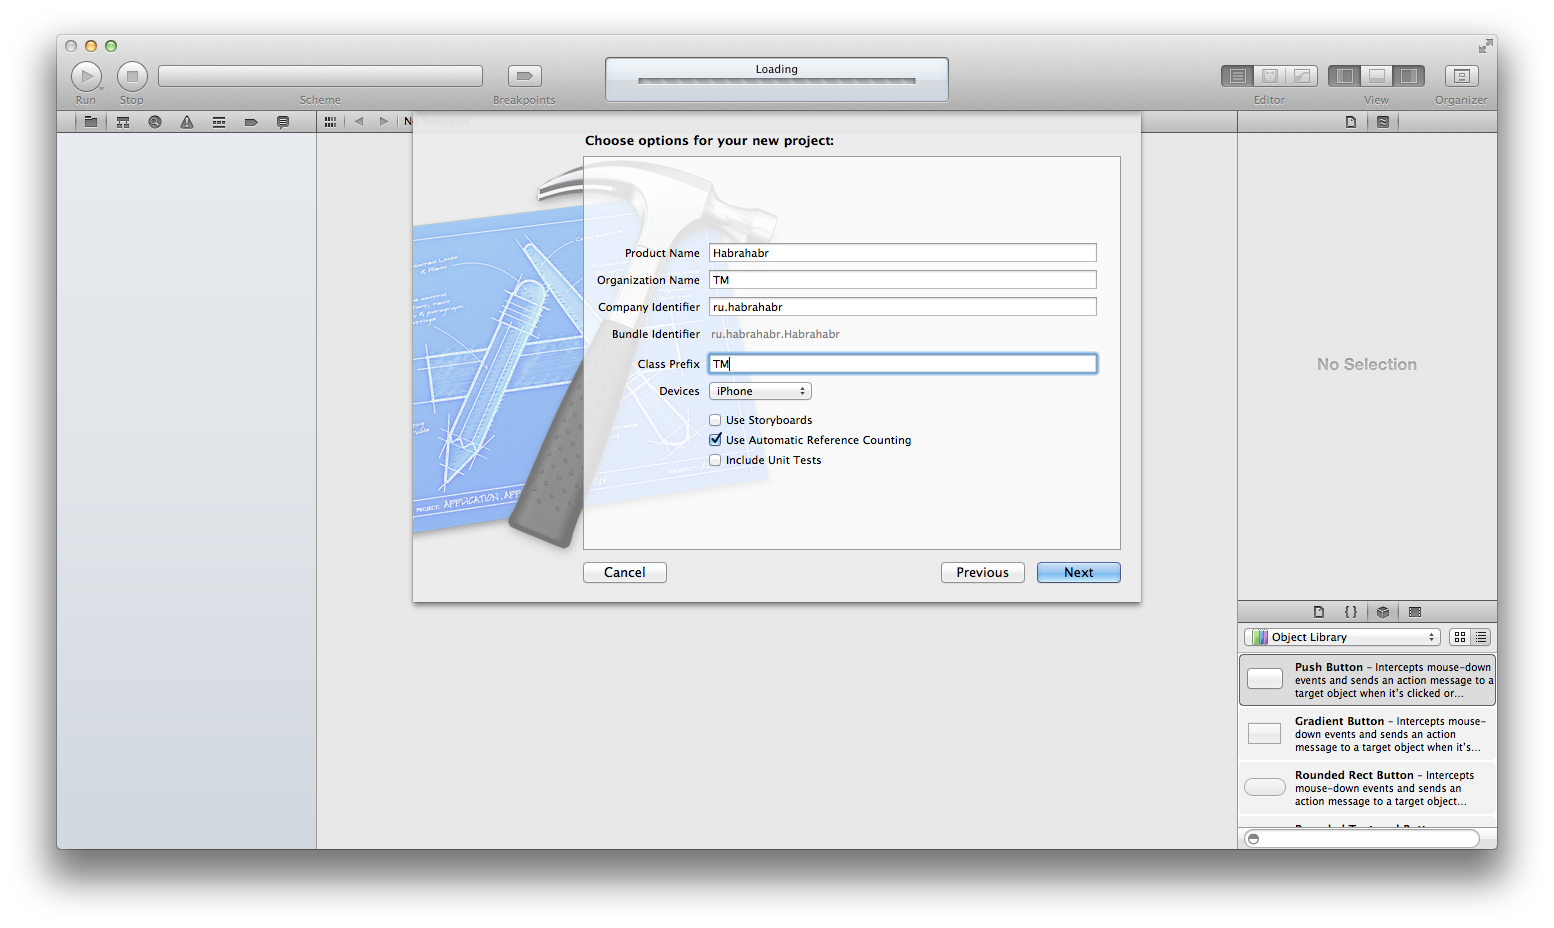
Open Xcode and create a new project, Single View Application:

Enter the project name, prefixes, etc.:
Familiar window:
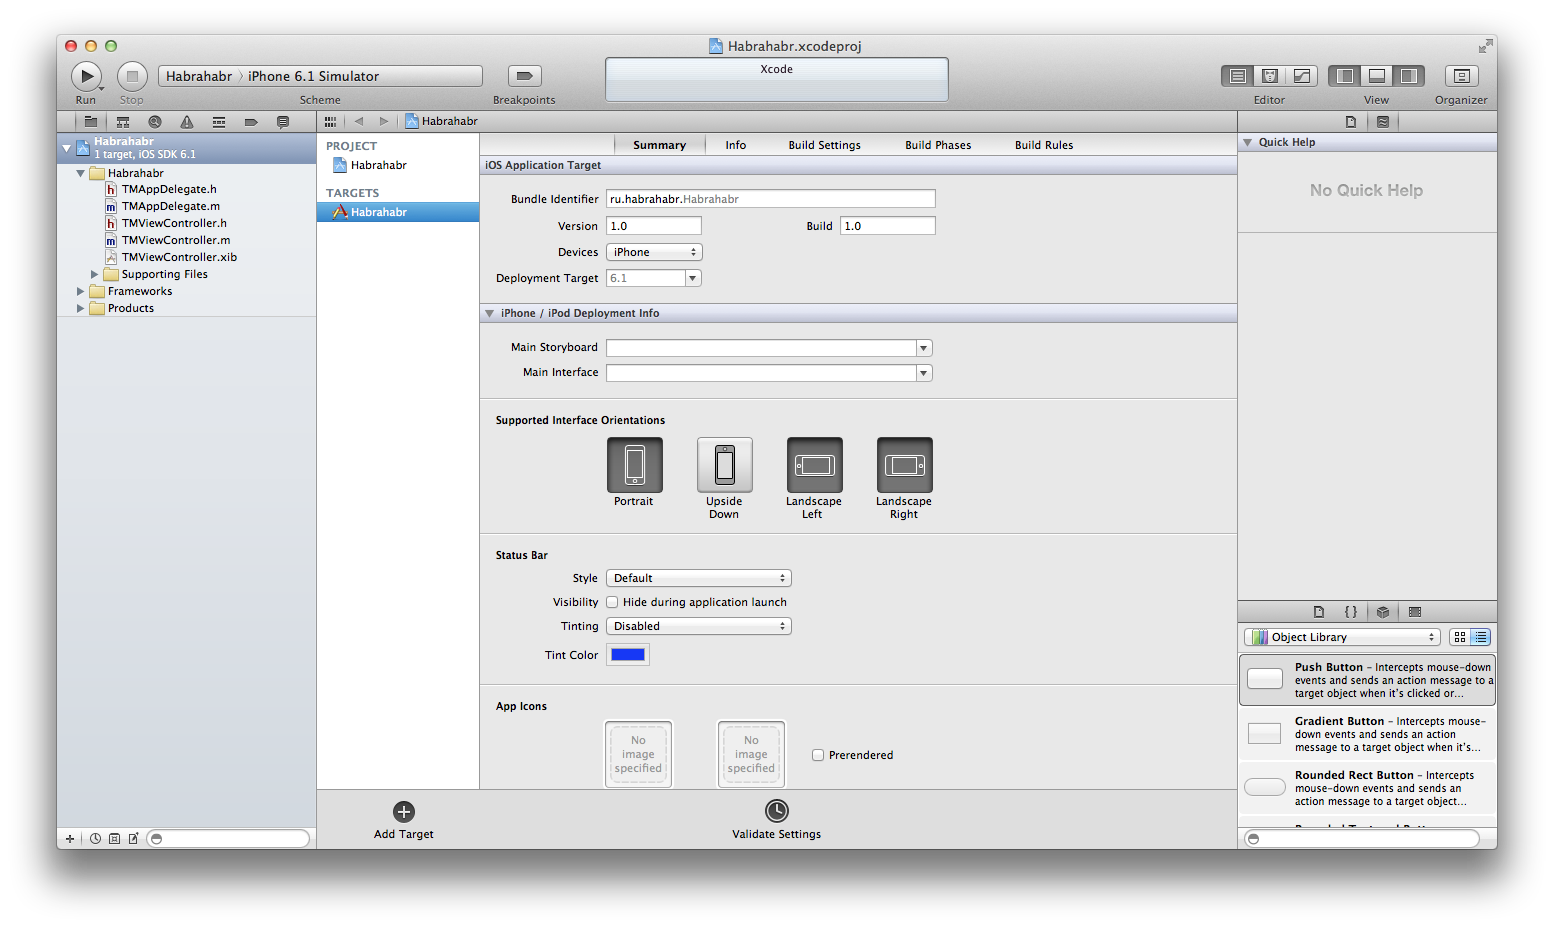
Add the Core Data Framework to the project:

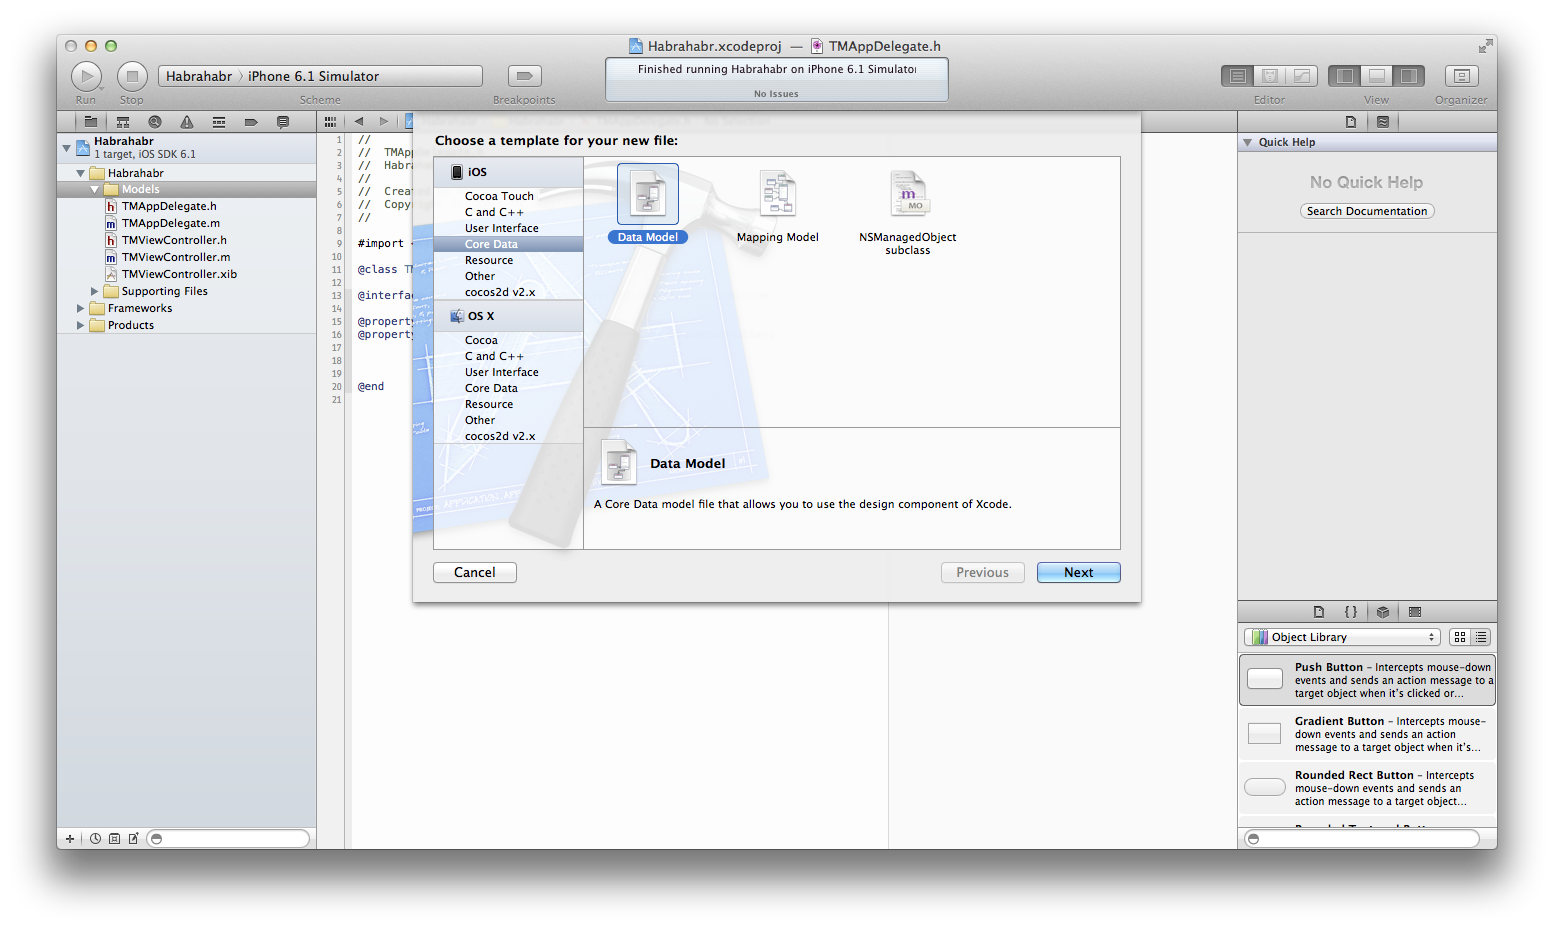
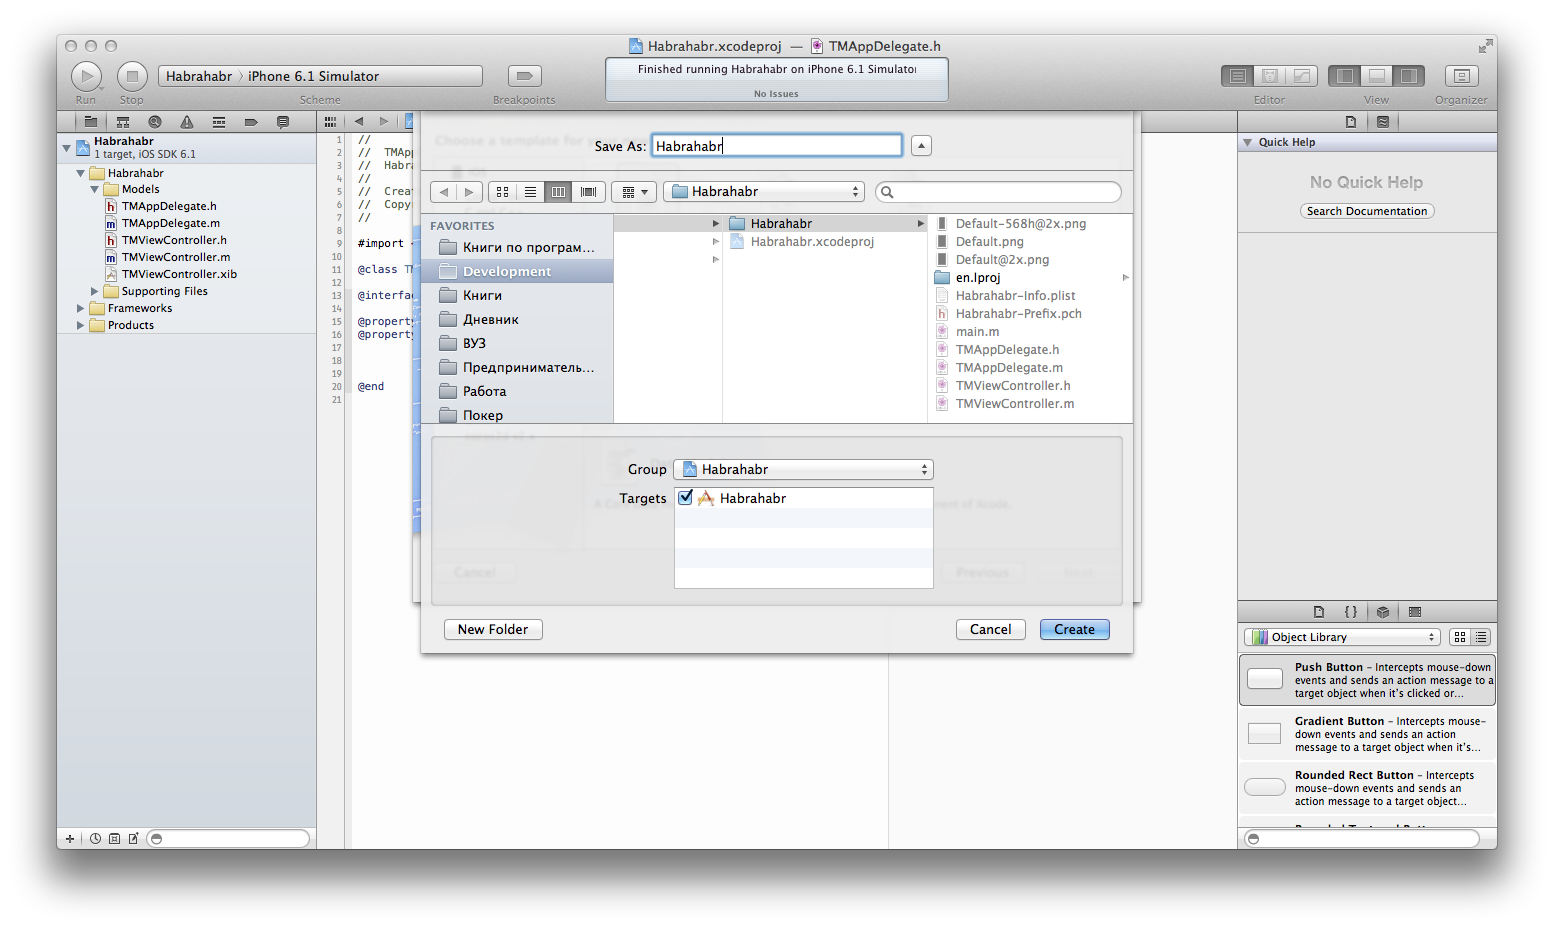
Add a new file -> iOS -> CoreData -> Data Model
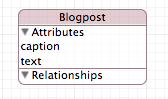
Let's start with a blog entry.
Create a new entity and call it Blogpost , add two attributes caption (String) and text (String).
Create a new entity and call it User , add attributes avatar (String), email (String), gender (Decimal), karma (Integer 16), nickname (String), rating (Integer 16).

Create a new entity and call it Tag , add just one attribute name (String).

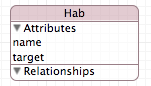
Create a new entity and call it Hab , add two attributes name (String), target (Boolean).
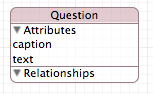
Create a new entity and call it Question , add two attributes caption (String), text (String).
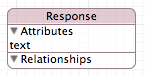
Create a new entity and call it Response , add one attribute text (String).
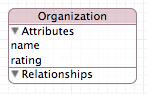
Create a new entity and call it Organization , add two attributes name (String), rating (Integer 16).
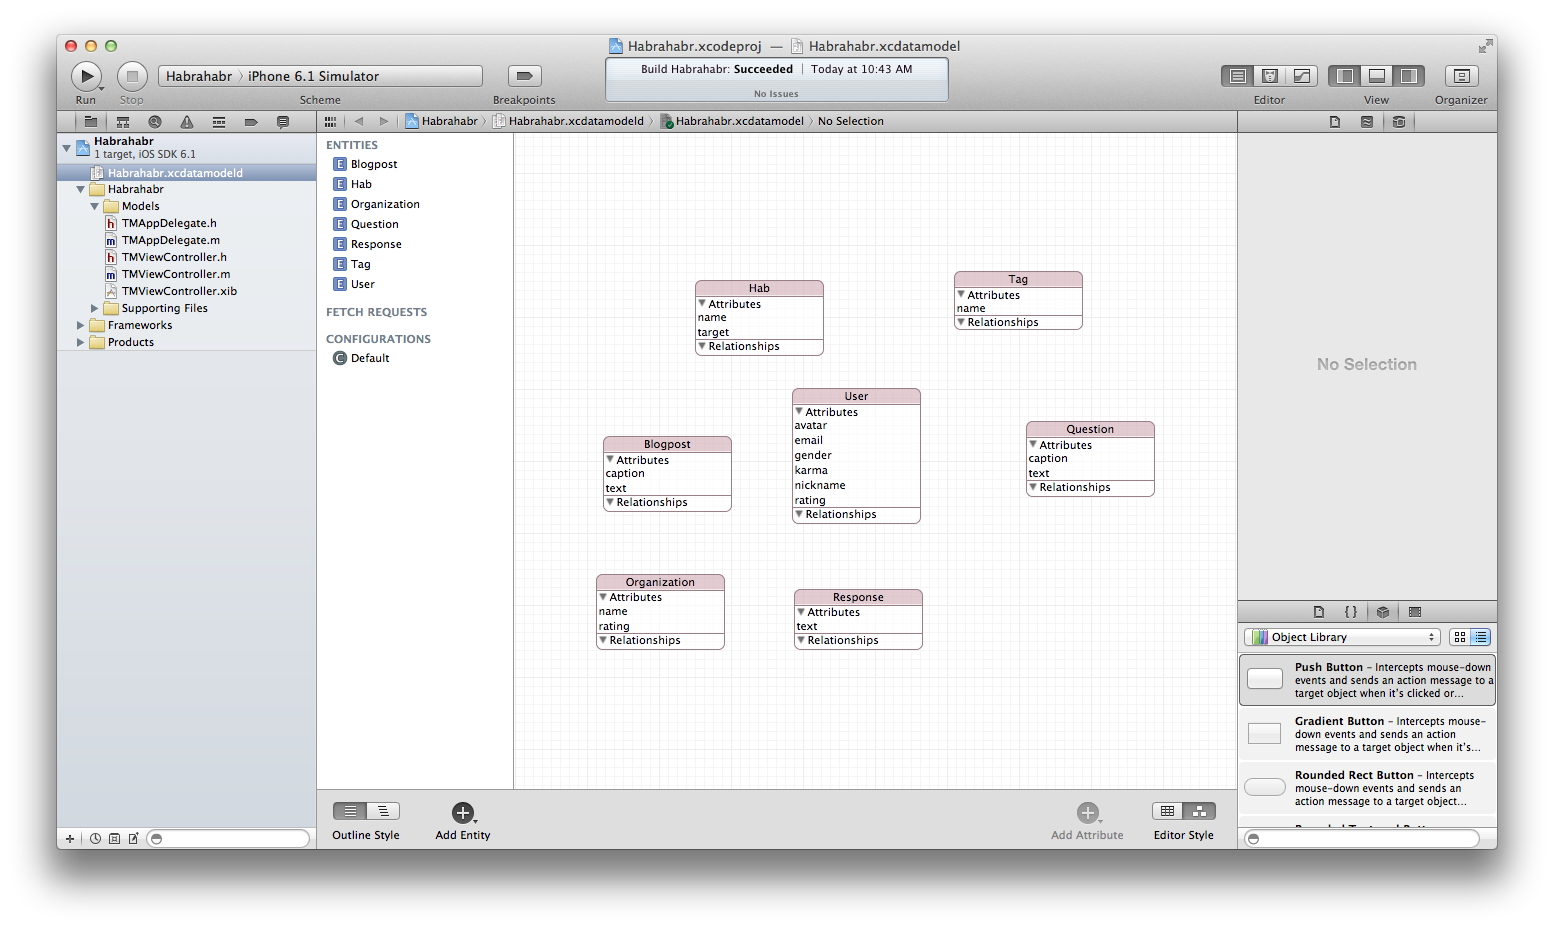
Here is what we have in the end:
Now let's set the relationship between objects.
The company account has many users (employees).
A user has many blog entries, a blog entry has many tags and hubs.
The user has many questions, and the question has many answers.
Let's start by building a link "company account" (one-to-many) "users".
Select the Organization from the list of entities and add a new relationship by clicking on the "+" in the Relationships section:

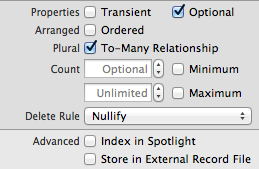
Since, by default, Xcode creates a one-to-one connection, we must change the type of connection:
Now every organization has many users. We will also establish the Inverse field (feedback) now, but first we will add a new connection to the User’s essence and call it organization (organization in which the user works, and if it doesn’t work anywhere, the field will be null):
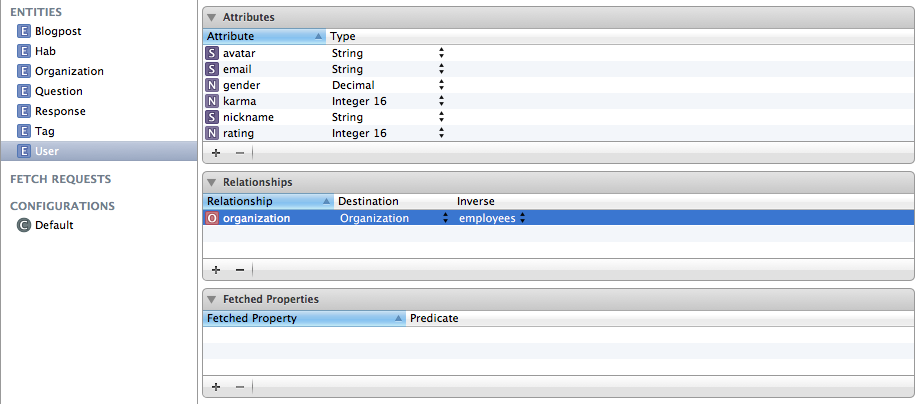
Now, we reopen the editing of the Organization entity and set the Inverse field in the organization :

This is how the object graph now looks like:
Try to arrange the rest of the connection yourself, and then check with what I did.
You know how to create a connection, you know how to change the type of connection from one-to-one to one-to-many - this will be enough.
The final picture:
Already have in AppDelegate.h is:
And in AppDelegate.m:
Rewrite the application: didFinishLaunchingWithOptions: method in this way:
Run the application. Data had to be saved. Check it out.
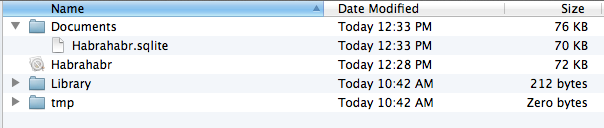
Find the file Habrahabr.sqlite:
Run the terminal and check the database structure:
Now we will add a question to one of the employees and create a post.
Run the application and check the database:
Add a blog post to employee Vasa Pupkin:
And the conclusion:
We derive all the employees and the names of the companies in which they work. We will write the code for reading data in the same method in which we wrote and write data.
We’ll get something like this (I’ve run the application several times and the data has been added several times):
Pay attention to how we got the name of the organization in which the user works. How do you? BUT? I thought I would like it!
Experiment! Do not be afraid if something breaks, the full project is on this link.
Good luck and thank you for your attention!
I hope you enjoyed the practical part.
Today I want to start writing a series of lectures with practical tasks on the book “Pro Core Data for iOS” by Michael Privat and Robert Warner, which you can buy from this link. Each chapter will contain a theoretical and practical part.
Content:
- Chapter number 1. Getting Started ( Practical Part )
- Chapter number 2. Digest Core Data ( practical part )
- Chapter number 3. Data storage: SQLite and other options
- Chapter 4 Creating a data model
- Chapter number 5. We work with data objects
- Chapter number 6. Processing Result Sets
- Chapter number 7. Performance tuning and memory usage
- Chapter number 8. Version Control and Migration
- Chapter number 9. Managing tables using NSFetchedResultsController
- Chapter number 10. Using Core Data in Advanced Applications
')
Introduction
We will create such a model:
Then add some entries and request them. The output will be made in the console, so that we do not ask more and visual questions.
Ready? Then let's go!
Description
Let's create an object graph of our favorite resource - Habra.
There are N main objects:
- Blog entry
- User
- Tags
- Hubs
- Questions
- Answers
- Company account
It'll be enough.
What data does each of the objects contain?
- Blog entry - title, text
- User - nickname, karma, rating, gender, avatar, mailbox
- Tag - name
- Hub - name, whether the profile hub
- Question - title, text
- Answer - text
- Company account - name of organization, rating
Getting Started
Open Xcode and create a new project, Single View Application:
Enter the project name, prefixes, etc.:
Familiar window:
Add Core Data
Add the Core Data Framework to the project:
We create models
Add a new file -> iOS -> CoreData -> Data Model
Let's start with a blog entry.
Create a new entity and call it Blogpost , add two attributes caption (String) and text (String).
Create a new entity and call it User , add attributes avatar (String), email (String), gender (Decimal), karma (Integer 16), nickname (String), rating (Integer 16).
Create a new entity and call it Tag , add just one attribute name (String).
Create a new entity and call it Hab , add two attributes name (String), target (Boolean).
Create a new entity and call it Question , add two attributes caption (String), text (String).
Create a new entity and call it Response , add one attribute text (String).
Create a new entity and call it Organization , add two attributes name (String), rating (Integer 16).
Here is what we have in the end:
Now let's set the relationship between objects.
The company account has many users (employees).
A user has many blog entries, a blog entry has many tags and hubs.
The user has many questions, and the question has many answers.
Let's start by building a link "company account" (one-to-many) "users".
Select the Organization from the list of entities and add a new relationship by clicking on the "+" in the Relationships section:
Since, by default, Xcode creates a one-to-one connection, we must change the type of connection:
Now every organization has many users. We will also establish the Inverse field (feedback) now, but first we will add a new connection to the User’s essence and call it organization (organization in which the user works, and if it doesn’t work anywhere, the field will be null):
Now, we reopen the editing of the Organization entity and set the Inverse field in the organization :
This is how the object graph now looks like:
Try to arrange the rest of the connection yourself, and then check with what I did.
You know how to create a connection, you know how to change the type of connection from one-to-one to one-to-many - this will be enough.
The final picture:
Create an organization
Already have in AppDelegate.h is:
// // TMAppDelegate.h // Habrahabr // // Created by AndrewShmig on 8/31/13. // Copyright (c) 2013 TM. All rights reserved. // #import <UIKit/UIKit.h> #import <CoreData/CoreData.h> @class TMViewController; @interface TMAppDelegate : UIResponder <UIApplicationDelegate> @property (strong, nonatomic) UIWindow *window; @property (strong, nonatomic) TMViewController *viewController; @property (nonatomic, strong) NSManagedObjectModel *managedObjectModel; @property (nonatomic, strong) NSPersistentStoreCoordinator *persistentStoreCoordinator; @property (nonatomic, strong) NSManagedObjectContext *managedObjectContext; @end And in AppDelegate.m:
// // TMAppDelegate.m // Habrahabr // // Created by AndrewShmig on 8/31/13. // Copyright (c) 2013 TM. All rights reserved. // #import "TMAppDelegate.h" @implementation TMAppDelegate - (BOOL)application:(UIApplication *)application didFinishLaunchingWithOptions:(NSDictionary *)launchOptions { return YES; } #pragma mark - Core Data Stack - (NSManagedObjectModel *)managedObjectModel { if(nil != _managedObjectModel) return _managedObjectModel; _managedObjectModel = [NSManagedObjectModel mergedModelFromBundles:nil]; return _managedObjectModel; } - (NSPersistentStoreCoordinator *)persistentStoreCoordinator { if(nil != _persistentStoreCoordinator) return _persistentStoreCoordinator; NSURL *storeURL = [[[[NSFileManager defaultManager] URLsForDirectory:NSDocumentDirectory inDomains:NSUserDomainMask] lastObject] URLByAppendingPathComponent:@"Habrahabr.sqlite"]; NSError *error = nil; _persistentStoreCoordinator = [[NSPersistentStoreCoordinator alloc] initWithManagedObjectModel:self.managedObjectModel]; if(![_persistentStoreCoordinator addPersistentStoreWithType:NSSQLiteStoreType configuration:nil URL:storeURL options:nil error:&error]){ NSLog(@"Unresolved error %@, %@", error, [error userInfo]); abort(); } return _persistentStoreCoordinator; } - (NSManagedObjectContext *)managedObjectContext { if(nil != _managedObjectContext) return _managedObjectContext; NSPersistentStoreCoordinator *store = self.persistentStoreCoordinator; if(nil != store){ _managedObjectContext = [[NSManagedObjectContext alloc] init]; [_managedObjectContext setPersistentStoreCoordinator:store]; } return _managedObjectContext; } @end Rewrite the application: didFinishLaunchingWithOptions: method in this way:
- (BOOL)application:(UIApplication *)application didFinishLaunchingWithOptions:(NSDictionary *)launchOptions { // NSManagedObject *yandex = [NSEntityDescription insertNewObjectForEntityForName:@"Organization" inManagedObjectContext:self.managedObjectContext]; [yandex setValue:@"Yandex Inc." forKey:@"name"]; [yandex setValue:@672 forKey:@"rating"]; // Yandex NSManagedObject *pupkin = [NSEntityDescription insertNewObjectForEntityForName:@"User" inManagedObjectContext:self.managedObjectContext]; [pupkin setValue:@"VaseaPup" forKey:@"nickname"]; [pupkin setValue:@"vasilisa@yandex.ru" forKey:@"email"]; [pupkin setValue:@1 forKey:@"gender"]; // 0 - unknown, 1 - male, 2 - female [pupkin setValue:@0 forKey:@"karma"]; [pupkin setValue:@0 forKey:@"rating"]; NSManagedObject *gosha = [NSEntityDescription insertNewObjectForEntityForName:@"User" inManagedObjectContext:self.managedObjectContext]; [gosha setValue:@"Goshka" forKey:@"nickname"]; [gosha setValue:@"gosha.k@yandex.ru" forKey:@"email"]; [gosha setValue:@0 forKey:@"gender"]; [gosha setValue:@0 forKey:@"karma"]; [gosha setValue:@0 forKey:@"rating"]; // NSMutableSet *employees = [yandex mutableSetValueForKey:@"employees"]; [employees addObject:pupkin]; [employees addObject:gosha]; // [self saveContext]; NSLog(@"Finish!"); return YES; } Run the application. Data had to be saved. Check it out.
Find the file Habrahabr.sqlite:
Run the terminal and check the database structure:
AndrewShmigs-MacBook-Pro:~ new$ cd "/Users/new/Library/Application Support/iPhone Simulator/6.1/Applications/95B0716A-9C2C-4BD8-8117-62FB46BB5879" AndrewShmigs-MacBook-Pro:95B0716A-9C2C-4BD8-8117-62FB46BB5879 new$ ls Documents Habrahabr.app Library tmp AndrewShmigs-MacBook-Pro:95B0716A-9C2C-4BD8-8117-62FB46BB5879 new$ cd Documents/ AndrewShmigs-MacBook-Pro:Documents new$ ls Habrahabr.sqlite AndrewShmigs-MacBook-Pro:Documents new$ sqlite3 Habrahabr.sqlite SQLite version 3.7.12 2012-04-03 19:43:07 Enter ".help" for instructions Enter SQL statements terminated with a ";" sqlite> .schema CREATE TABLE ZBLOGPOST ( Z_PK INTEGER PRIMARY KEY, Z_ENT INTEGER, Z_OPT INTEGER, ZAUTHOR INTEGER, ZCAPTION VARCHAR, ZTEXT VARCHAR ); CREATE TABLE ZHAB ( Z_PK INTEGER PRIMARY KEY, Z_ENT INTEGER, Z_OPT INTEGER, ZTARGET INTEGER, ZBLOGPOSTS INTEGER, ZNAME VARCHAR ); CREATE TABLE ZORGANIZATION ( Z_PK INTEGER PRIMARY KEY, Z_ENT INTEGER, Z_OPT INTEGER, ZRATING INTEGER, ZNAME VARCHAR ); CREATE TABLE ZQUESTION ( Z_PK INTEGER PRIMARY KEY, Z_ENT INTEGER, Z_OPT INTEGER, ZAUTHOR INTEGER, ZCAPTION VARCHAR, ZTEXT VARCHAR ); CREATE TABLE ZRESPONSE ( Z_PK INTEGER PRIMARY KEY, Z_ENT INTEGER, Z_OPT INTEGER, ZQUESTION INTEGER, ZTEXT VARCHAR ); CREATE TABLE ZTAG ( Z_PK INTEGER PRIMARY KEY, Z_ENT INTEGER, Z_OPT INTEGER, ZBLOGPOST INTEGER, ZNAME VARCHAR ); CREATE TABLE ZUSER ( Z_PK INTEGER PRIMARY KEY, Z_ENT INTEGER, Z_OPT INTEGER, ZKARMA INTEGER, ZRATING INTEGER, ZORGANIZATION INTEGER, ZGENDER DECIMAL, ZAVATAR VARCHAR, ZEMAIL VARCHAR, ZNICKNAME VARCHAR ); CREATE TABLE Z_METADATA (Z_VERSION INTEGER PRIMARY KEY, Z_UUID VARCHAR(255), Z_PLIST BLOB); CREATE TABLE Z_PRIMARYKEY (Z_ENT INTEGER PRIMARY KEY, Z_NAME VARCHAR, Z_SUPER INTEGER, Z_MAX INTEGER); CREATE INDEX ZBLOGPOST_ZAUTHOR_INDEX ON ZBLOGPOST (ZAUTHOR); CREATE INDEX ZHAB_ZBLOGPOSTS_INDEX ON ZHAB (ZBLOGPOSTS); CREATE INDEX ZQUESTION_ZAUTHOR_INDEX ON ZQUESTION (ZAUTHOR); CREATE INDEX ZRESPONSE_ZQUESTION_INDEX ON ZRESPONSE (ZQUESTION); CREATE INDEX ZTAG_ZBLOGPOST_INDEX ON ZTAG (ZBLOGPOST); CREATE INDEX ZUSER_ZORGANIZATION_INDEX ON ZUSER (ZORGANIZATION); sqlite> select * from ZORGANIZATION; 1|3|1|672|Yandex Inc. sqlite> select * from ZUSER; 1|7|1|0|0|1|0||gosha.k@yandex.ru|Goshka 2|7|1|0|0|1|1||vasilisa@yandex.ru|VaseaPup sqlite> Now we will add a question to one of the employees and create a post.
// NSManagedObject *whoAmI = [NSEntityDescription insertNewObjectForEntityForName:@"Question" inManagedObjectContext:self.managedObjectContext]; [whoAmI setValue:@"Who am I?" forKey:@"caption"]; [whoAmI setValue:@" ." forKey:@"text"]; NSMutableSet *goshasQuestions = [gosha mutableSetValueForKey:@"questions"]; [goshasQuestions addObject:whoAmI]; Run the application and check the database:
sqlite> select * from ZQUESTION; 1|4|1|4|Who am I?| . sqlite> Add a blog post to employee Vasa Pupkin:
// NSManagedObject *newPost = [NSEntityDescription insertNewObjectForEntityForName:@"Blogpost" inManagedObjectContext:self.managedObjectContext]; [newPost setValue:@"yandex. & yandex. & yandex." forKey:@"caption"]; [newPost setValue:@"Some text" forKey:@"text"]; // NSManagedObject *hab1 = [NSEntityDescription insertNewObjectForEntityForName:@"Hab" inManagedObjectContext:self.managedObjectContext]; [hab1 setValue:@"iOS" forKey:@"name"]; [hab1 setValue:@YES forKey:@"target"]; NSManagedObject *hab2 = [NSEntityDescription insertNewObjectForEntityForName:@"Hab" inManagedObjectContext:self.managedObjectContext]; [hab2 setValue:@"Objective-C" forKey:@"name"]; [hab2 setValue:@YES forKey:@"target"]; NSMutableSet *habs = [newPost mutableSetValueForKey:@"habs"]; [habs addObject:hab1]; [habs addObject:hab2]; [[pupkin mutableSetValueForKey:@"blogposts"] addObject:newPost]; And the conclusion:
sqlite> select * from ZBLOGPOST; 1|1|1|5|yandex. & yandex. & yandex.|Some text sqlite> select * from ZHAB; 1|2|1|1|1|iOS 2|2|1|1|1|Objective-C sqlite> Data output
We derive all the employees and the names of the companies in which they work. We will write the code for reading data in the same method in which we wrote and write data.
NSFetchRequest *fetchRequest = [[NSFetchRequest alloc] initWithEntityName:@"User"]; NSArray *allUsers = [self.managedObjectContext executeFetchRequest:fetchRequest error:nil]; for(NSManagedObject *user in allUsers){ NSString *nickname = [user valueForKey:@"nickname"]; NSString *organization = [user valueForKeyPath:@"organization.name"]; NSLog(@"%@ works at %@", nickname, organization); } We’ll get something like this (I’ve run the application several times and the data has been added several times):
2013-08-31 13:00:27.255 Habrahabr[18148:c07] Goshka works at Yandex Inc. 2013-08-31 13:00:27.257 Habrahabr[18148:c07] VaseaPup works at Yandex Inc. 2013-08-31 13:00:27.258 Habrahabr[18148:c07] VaseaPup works at Yandex Inc. 2013-08-31 13:00:27.258 Habrahabr[18148:c07] Goshka works at Yandex Inc. 2013-08-31 13:00:27.259 Habrahabr[18148:c07] VaseaPup works at Yandex Inc. 2013-08-31 13:00:27.259 Habrahabr[18148:c07] Goshka works at Yandex Inc. 2013-08-31 13:00:27.260 Habrahabr[18148:c07] Finish! Pay attention to how we got the name of the organization in which the user works. How do you? BUT? I thought I would like it!
In conclusion
Experiment! Do not be afraid if something breaks, the full project is on this link.
Good luck and thank you for your attention!
I hope you enjoyed the practical part.
Source: https://habr.com/ru/post/192090/
All Articles