From beginner to user. Step 1
In this guide, I will step by step examine the path from a beginner in Ubuntu to a confident user.
There will be not only information about the distribution of Ubuntu Linux, but also about Unix and Linux in general.
This guide uses the Ubuntu Linux 7.10 distribution.
The presentation method is text, screenshots and video (if possible).
Before you install Ubuntu, you should select all the necessary information in a separate logical partition ( NTFS / FAT32 ). Modern versions of Ubuntu allow you to read and write FAT , FAT32 , NTFS and many other sections.
Also write a resuscitation disk (for example, from Acronis), which would include working with disk partitions, installing a boot loader, installing boot markers on disk partitions.
')
I installed Ubuntu from a livecd . A fully functional Ubuntu environment was loaded, where a shortcut for installation was placed on the desktop. Double-clicking on the shortcut launches the distribution installation.
Choose the language of the installation process.

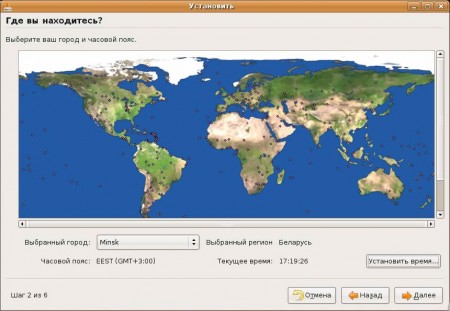
Choose a location.
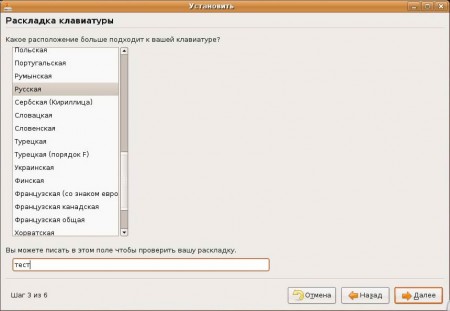
Specify the keyboard layout.
Specify login and password parameters.
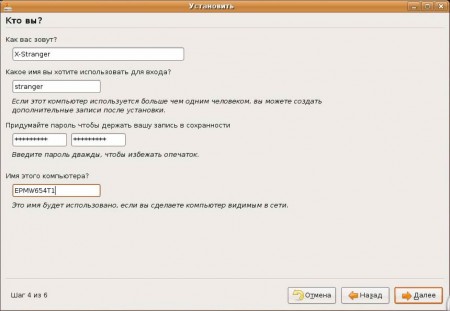
It is not necessary to invent a very long and complex password for your account. When setting up Ubuntu, we will have to enter it very often.
Select disk partitions and mount points.
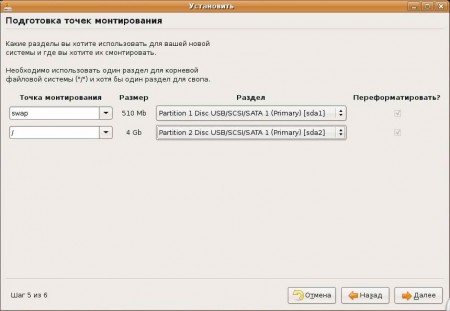
At least 3GB of free disk space is recommended for installing Ubuntu Linux 7.10.
In Ubuntu (as in any * nix system), a centralized file system with a single root ( / ) is used. When installing, you should choose where we are going to install the OS: it is necessary to select the root location section ( / ). This partition can be obtained by deleting old partitions, or by creating an ext3 partition (or ext2 ) in an unallocated space. You can also select the location of other system folders by assigning them to other sections. For example, I have 2 hard drives. I put / on one and / home on the other. As a result, I received that both disks were in operation. Do not forget to highlight the SWAP- section - is an analogue of the Windows swap file. The more RAM you have, the smaller the SWAP file. With my 2GB of RAM, the computer rarely gets into SWAP .
Note that the directory / home in the course of work becomes the most "heavy", so it should be allocated as much space as possible.
If you are going to use both Windows and Linux , then storing documents in / home / (user) , you can read them from Windows using ext2ifs or ext2fsd .
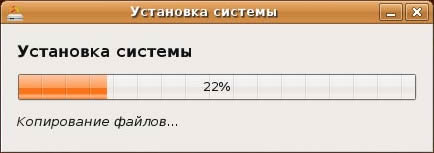
Everything is ready for installation
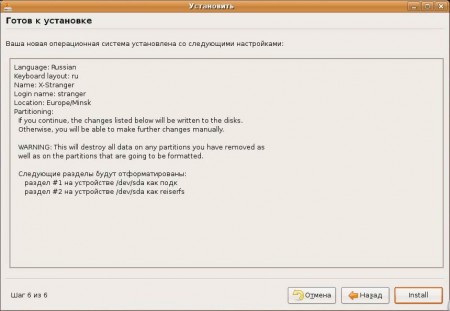
In the process of installing Ubuntu you can relax, playing solitaire or delving into the Internet.
1. Ubuntu may not boot from the livecd. Then the installation disk should be run in a Windows environment.
2. Ubuntu can search the Internet for a long time during installation. In this case, disconnect the network cables.
If you have any additions, I’ll happily improve the article.
Manual: Step Forward , Contents
There will be not only information about the distribution of Ubuntu Linux, but also about Unix and Linux in general.
This guide uses the Ubuntu Linux 7.10 distribution.
The presentation method is text, screenshots and video (if possible).
What you need to know before installing Ubuntu
Before you install Ubuntu, you should select all the necessary information in a separate logical partition ( NTFS / FAT32 ). Modern versions of Ubuntu allow you to read and write FAT , FAT32 , NTFS and many other sections.
Also write a resuscitation disk (for example, from Acronis), which would include working with disk partitions, installing a boot loader, installing boot markers on disk partitions.
')
I installed Ubuntu from a livecd . A fully functional Ubuntu environment was loaded, where a shortcut for installation was placed on the desktop. Double-clicking on the shortcut launches the distribution installation.
Installation process
Choose the language of the installation process.
Choose a location.
Specify the keyboard layout.
Specify login and password parameters.
It is not necessary to invent a very long and complex password for your account. When setting up Ubuntu, we will have to enter it very often.
Select disk partitions and mount points.
At least 3GB of free disk space is recommended for installing Ubuntu Linux 7.10.
In Ubuntu (as in any * nix system), a centralized file system with a single root ( / ) is used. When installing, you should choose where we are going to install the OS: it is necessary to select the root location section ( / ). This partition can be obtained by deleting old partitions, or by creating an ext3 partition (or ext2 ) in an unallocated space. You can also select the location of other system folders by assigning them to other sections. For example, I have 2 hard drives. I put / on one and / home on the other. As a result, I received that both disks were in operation. Do not forget to highlight the SWAP- section - is an analogue of the Windows swap file. The more RAM you have, the smaller the SWAP file. With my 2GB of RAM, the computer rarely gets into SWAP .
Note that the directory / home in the course of work becomes the most "heavy", so it should be allocated as much space as possible.
If you are going to use both Windows and Linux , then storing documents in / home / (user) , you can read them from Windows using ext2ifs or ext2fsd .
Everything is ready for installation
In the process of installing Ubuntu you can relax, playing solitaire or delving into the Internet.
Possible problems
1. Ubuntu may not boot from the livecd. Then the installation disk should be run in a Windows environment.
2. Ubuntu can search the Internet for a long time during installation. In this case, disconnect the network cables.
If you have any additions, I’ll happily improve the article.
Manual: Step Forward , Contents
Source: https://habr.com/ru/post/19123/
All Articles