Minimalistic RSS reader for the Yandex.Following service
After the closing of the Google reader, it became a bit sad and, perceptibly, inconvenient to read the rss. No alternative suited for 100%. After reading the post from Yandex about their new API (by the way, the last time weird subscriptions are working), an idea emerged, not whether to write me your “ideal” client, so as not to break my eyes about other people's interfaces, but to break about your own. At first, I waited for someone to make something like that, but did not wait, and then, one day, forced myself to sit down and start writing.
The result of writing was a little geek-antisocial reader. Almost all javascript + jquery code and a couple of lines in python / php. If you want to run on a hosting with python, then change in the rss.js file, request.php to request.py , but if python is not running as cgi, then performance is in question. Python / php code is just a proxy, at the moment, the simplest way to send cross-domain requests from javascript.
It should work fine, at least in more or less recent versions of Firefox and Webkit browsers. IE10, when opened, hangs the tab as if some furious cycles are running. Somehow I will figure out what is happening there, but it will be in the future, it is not yet known how far. (do not swear much on the curvature of my hands)
')
The client, initially, was conceived as a “simple reader for himself,” so there is minimal functionality and minimalistic interface. Control via hot keys (qwerty), i.e. there are no buttons and pimples. Here is a list:
Authorization is performed through oauth.yandex.ru.
ATTENTION! Minute paranoia. The client stores the unencrypted token in the browser cookies, if you have archival and top-secret tapes, then you should not use this client. Since both the client id and the token are unencrypted, by recognizing the id and the token, you can get full access to your tapes.
With the formalities finished, we continue as usual. If you have an account in subscriptions, you can watch and poke it here - http://forpre.bget.ru/rss.html (this address is temporary, so if you plan to use my section, download the source code and host it on your hosting, and local, below I will describe how to do it). If there is no account, then be content with screenshots:
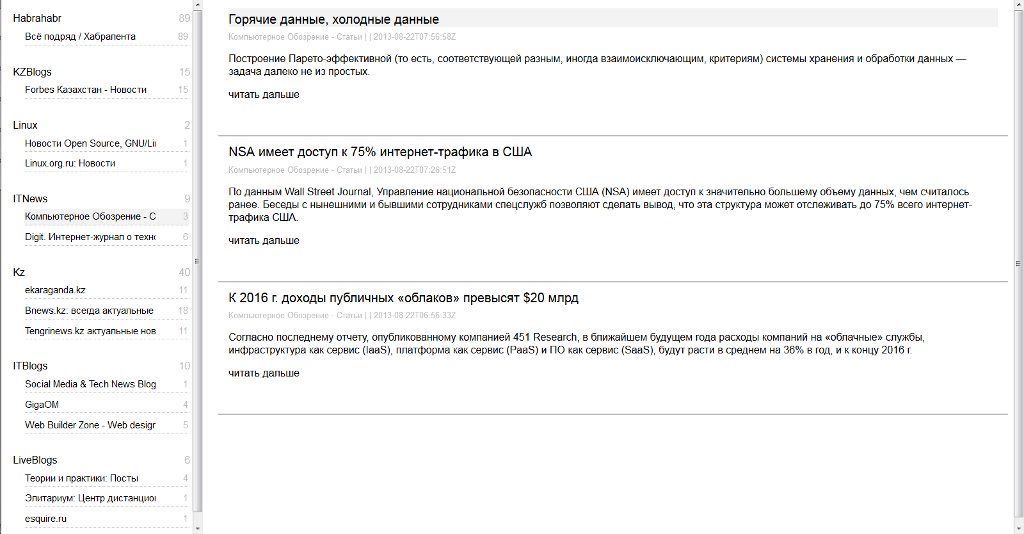
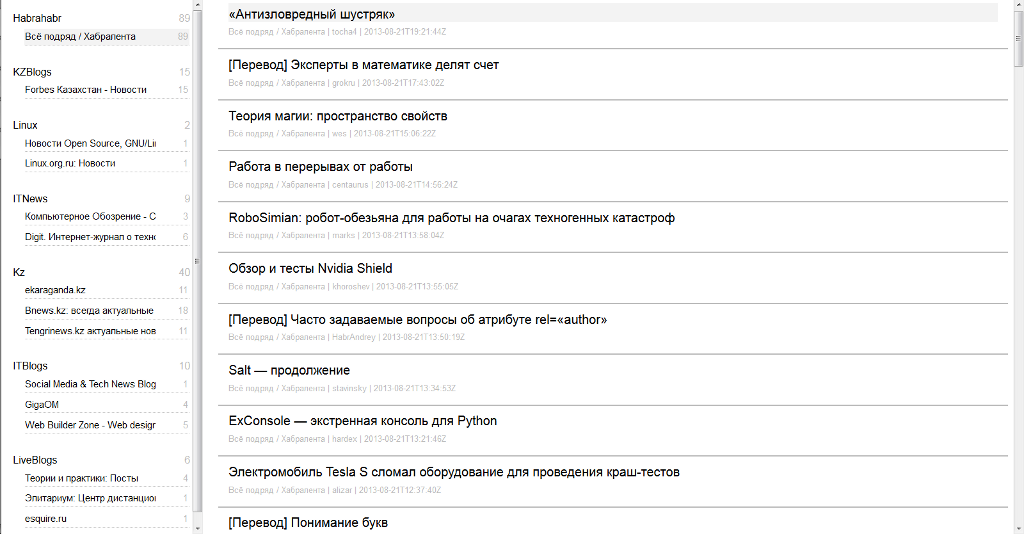
The client shows only unread folders / tapes / posts. Posts are displayed in two modes, the title of the post or the whole post (see screenshots). All posts from the selected tape / folder are loaded and displayed at once. This is done because I have seen enough of the braking loading of posts, while scrolling, in other readers and the pagination also did not stick.
Also, separately it is necessary to say about the work of hotkeys shift + x and shift + a . When you press shift + x , just like when you click on the number of unread posts, only one request is sent, which marks the entire tape / folder as “read”. And with shift + a , only those posts that were last loaded will be marked read, that is, those displayed in the window, so there will be as many requests as there are unread posts. Because during the time you read the loaded posts, new unread posts could appear in the same tape / folder and shift + x could “nail” them with all the rest.
Therefore, you should consider this if the number of requests (battery or traffic) is important or there are very important posts that you should not miss.
Now about how to get a balalaika on your hosting.
All, now go to rss.html, allow access and use.
PS
No matter how ridiculous it may sound, especially about three and a half lines of crooked code, but still, there are no restrictions or licenses on the code, do what you want.
<excuses> Wrote on the knee, so there are enough crutches. No comments, but variable names and functions are clear enough </ excuses>
The result of writing was a little geek-antisocial reader. Almost all javascript + jquery code and a couple of lines in python / php. If you want to run on a hosting with python, then change in the rss.js file, request.php to request.py , but if python is not running as cgi, then performance is in question. Python / php code is just a proxy, at the moment, the simplest way to send cross-domain requests from javascript.
It should work fine, at least in more or less recent versions of Firefox and Webkit browsers. IE10, when opened, hangs the tab as if some furious cycles are running. Somehow I will figure out what is happening there, but it will be in the future, it is not yet known how far. (do not swear much on the curvature of my hands)
')
The client, initially, was conceived as a “simple reader for himself,” so there is minimal functionality and minimalistic interface. Control via hot keys (qwerty), i.e. there are no buttons and pimples. Here is a list:
- H - show / hide help window
- R - update posts in the selected feed / folder
- V - show / hide the window post selection mode (Only title or Full post)
- N - transition to the next unread post
- B - go to previous unread post
- J - mark the current post as read and go to the next unread post
- K - mark the current post as read and go to the previous unread post
- X - mark current post as “read”
- S - expand / collapse the current post
- Shift + A - set a mark of reading only to those posts that are displayed in the window
- Shift + X - mark the selected tape / folder as “read”
- Shift + R - update folder / tape data
Authorization is performed through oauth.yandex.ru.
ATTENTION! Minute paranoia. The client stores the unencrypted token in the browser cookies, if you have archival and top-secret tapes, then you should not use this client. Since both the client id and the token are unencrypted, by recognizing the id and the token, you can get full access to your tapes.
With the formalities finished, we continue as usual. If you have an account in subscriptions, you can watch and poke it here - http://forpre.bget.ru/rss.html (this address is temporary, so if you plan to use my section, download the source code and host it on your hosting, and local, below I will describe how to do it). If there is no account, then be content with screenshots:
The client shows only unread folders / tapes / posts. Posts are displayed in two modes, the title of the post or the whole post (see screenshots). All posts from the selected tape / folder are loaded and displayed at once. This is done because I have seen enough of the braking loading of posts, while scrolling, in other readers and the pagination also did not stick.
Also, separately it is necessary to say about the work of hotkeys shift + x and shift + a . When you press shift + x , just like when you click on the number of unread posts, only one request is sent, which marks the entire tape / folder as “read”. And with shift + a , only those posts that were last loaded will be marked read, that is, those displayed in the window, so there will be as many requests as there are unread posts. Because during the time you read the loaded posts, new unread posts could appear in the same tape / folder and shift + x could “nail” them with all the rest.
Therefore, you should consider this if the number of requests (battery or traffic) is important or there are very important posts that you should not miss.
Now about how to get a balalaika on your hosting.
- We unpack archive with source codes in a folder where the client will live
- Go to https://oauth.yandex.ru/client/new , main fields Link to the application and Callback URI . In these fields we write where our rss.html file will be located. The address can be any, as long as your browser can go to it, for example http: //localhost/rss.html
- After registering the application, the client id is issued. Copy this id and paste in the rss.js file in line 3. It should work:
id : ' id'
All, now go to rss.html, allow access and use.
PS
No matter how ridiculous it may sound, especially about three and a half lines of crooked code, but still, there are no restrictions or licenses on the code, do what you want.
<excuses> Wrote on the knee, so there are enough crutches. No comments, but variable names and functions are clear enough </ excuses>
Source: https://habr.com/ru/post/191060/
All Articles