Tiny Tiny RSS on free hosting

This article continues the series of articles about life after the closure of Google Reader and will talk about the experience of setting up Tiny Tiny RSS on hostinger.ru, the obstacles that we had to face and, of course, how to overcome them. You are waiting for detailed step-by-step instructions with pictures, source code and comments.
The article should not be considered as hosting advertisement, since it will mainly describe Hostinger’s shortcomings and ways to overcome them.
Why hostinger.ru?
Immediately make a reservation, I have nothing to do with this service and I want to ask not to start the debate that free hosting is a solid problem and it is always better to switch to a paid one, and even better order a VPS / VDS or raise a server at home. I agree that full control is always better, but free always attracts, isn't it?
')
My path to finding a replacement for Google Reader has been quite long and may not have been completed yet. I immediately stopped at Tiny Tiny RSS, as one of the most functional alternatives, but I had to tinker with hosting. At first I tried the Tiny Tiny RSS cartridge for OpenShift, but the performance was so low that it was impossible to work with it. Then there was Heroku and the script for installing Tiny Tiny RSS “in one click”, in which, in order to run it successfully, I had to send a couple of commits. On Heroku Tiny Tiny RSS earned fine, but the limit of 10,000 entries in the database, which can be increased for $ 9 / month, ended rather quickly. This is the amount for which you can rent a VPS / VDS.
In the end, I was ready to switch to paid hosting, but came across Hostinger. The free tariff of this service imposed fewer restrictions than many paid hosting, and so I decided to try. Of course, the stability of Hostinger leaves much to be desired, but there is always the opportunity to pick up a backup and deploy your application anywhere, and the tempting pricing policy (for free) made you take a risk.
So, let's begin…
Step 1: Install Tiny Tiny RSS
Making an account on hostinger.ru. Go to hostinger.ru and click "Order Now!".
Confirm e-mail.
Order a free fare.
Choose a domain 3 level of the form <name> .p.ht and a separate password for this domain. After a pause, you will get a similar picture:

Click "Select".
Answer the question: "What is the main goal for you to use our hosting?". I replied: “Just learning and experimenting. I'm a newbie :)".
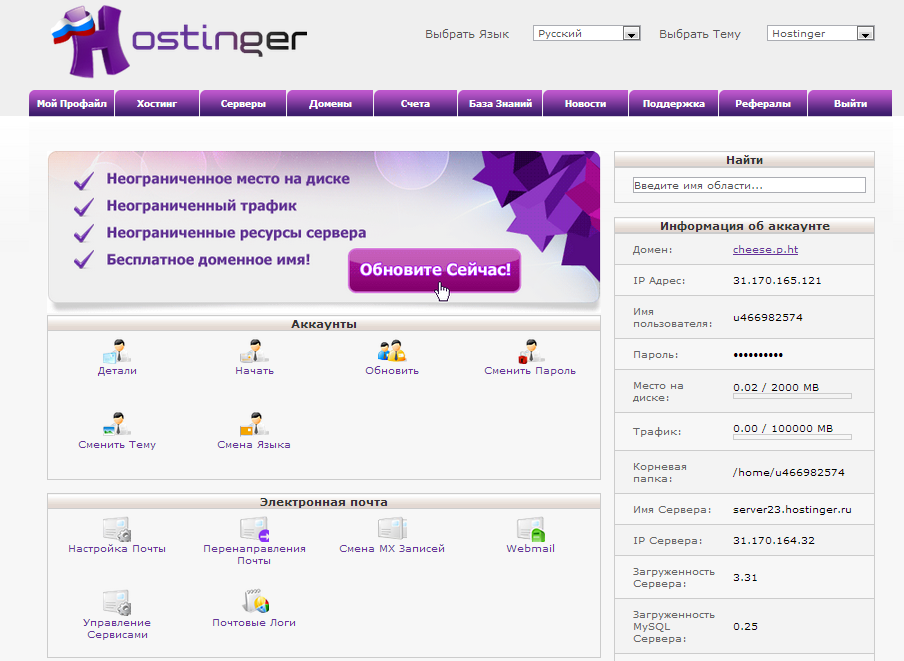
You will be taken to the control panel of your site. The main work will be carried out with it:
To begin with, we will configure FTP access. In the letter with the subject "Free Account Activated" should come data to connect. Use the password from the domain, which also had to come in the letter "Account Created". To access FTP, I used Total Commander and turned on "Passive transfer mode as a web-browser" and sending the NOOP command every 30 seconds. Such settings seemed to me the most stable.

Try to go to ftp, there should be a lonely default.php
Create a subdirectory and subdomain for our application. In the control panel, go to “Subdomains” and enter the name of the directory and subdomain, for example “rss” and you can open your reader with rss. <Name> .p.ht .

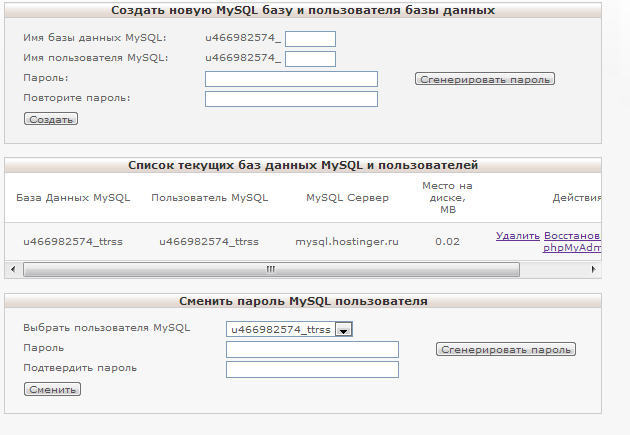
The next step is to create a database. Open the MySQL Databases item. Enter “ttrss” in the first two fields and the same password as ftp for the password.

Click Create.
It's time to finally download Tiny Tiny RSS. Go to tt-rss.org and at the bottom of the page will be a link "Download tarball, v1.9" .
When the download is complete, open ftp and upload the Tiny-Tiny-RSS-1.9.tar.gz to the public_html folder and delete the rss folder (Perhaps using the File Manager in the control panel, upload the file faster).
In the control panel, open the “SSH Console” and sequentially enter the following commands:
cd public_html tar zxfv Tiny-Tiny-RSS-1.9.tar.gz mv Tiny-Tiny-RSS-1.9 rss Remove Tiny-Tiny-RSS-1.9.tar.gz via FTP, we need it more.
Open your rss. <Name> .p.ht reader and you will see the Tiny TinyRSS settings page. Fill in the parameters of your database. And click "Test configuration".

After the check is successful, click “Initialize database” and then “Save configuration”.
That, in fact, ended pre-setting.
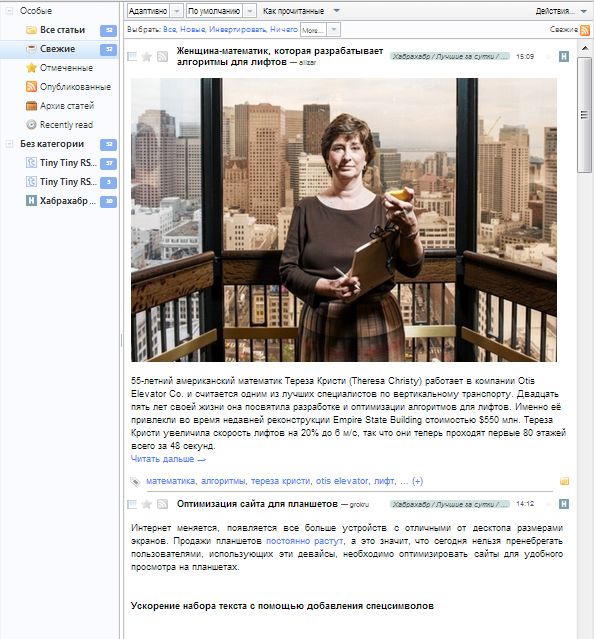
You can log into your reader using the login “admin” and the password “password” (which is better to change immediately).
Stage 2: Setting up logging
Configure the server to output logs to a specific file. To do this, add the following commands to the public_html / rss / .htaccess file, after replacing “u466982574” with your user name (indicated in the control panel)
# Increase execution time php_value max_execution_time 300 # PHP error handling for development servers # http://perishablepress.com/advanced-php-error-handling-via-htaccess/ php_flag display_startup_errors on php_flag display_errors on php_flag html_errors on php_flag log_errors on php_flag ignore_repeated_errors off php_flag ignore_repeated_source off php_flag report_memleaks on php_flag track_errors on php_value docref_root 0 php_value docref_ext 0 php_value error_log /home/u466982574/public_html/PHP_errors.log php_value error_reporting -1 php_value log_errors_max_len 0 <Files PHP_errors.log> Order allow,deny Deny from all Satisfy All </Files> This file, in addition to causing php to write all errors to a file, increases the maximum execution time of the script (not sure if it helps on Hostinger, but it won't be too much)
Open public_html / rss / config.php and replace the line
define('LOG_DESTINATION', 'sql'); on
define('LOG_DESTINATION', ''); This will force Tiny TinyRSS to write errors not in the database, but in the file from the previous item. The fact is that on Hostinger, at least for me, a frequent problem is the inaccessibility of the database, in the event of which the error message is simply lost.
Stage 3: Automatic Update
You need to set up an automatic update of the reader and the problems here already begin. Hostinger supports CRON tasks, that is, the ability to run an arbitrary script at regular intervals.
CRON-task and parameters update.php
In Tiny TinyRSS, for updating, you need to call the update.php script with the --feed parameter, but Hostinger prohibits transferring parameters in CRON tasks. So, you need to create a script that will call update.php and pass the necessary parameters to it. Let's call this script update_with_params.php :
#!/usr/bin/env php <?php ob_implicit_flush(true); echo "PHP version: " . phpversion() . PHP_EOL; echo "Max execution time: ".ini_get("max_execution_time")." seconds" . PHP_EOL; define( 'UPDATE_IMPLICIT_PARAMS', 'feeds' ); require_once "update.php"; ?> Also, we will have to change update.php and add the following code:
if (defined('UPDATE_IMPLICIT_PARAMS')) { $impl_params = array_map("trim", explode(",", UPDATE_IMPLICIT_PARAMS)); if( !is_array($options) ) $options=array(); $options = array_merge( $options, array_fill_keys($impl_params, '')); } after the line:
$options = getopt("", $longopts); CRON task and PHP version
The second problem with Hosting CRON tasks is that they are invoked under PHP 5.2, and Tiny TinyRSS requires nothing less than PHP 5.3. To solve this problem, we will create a new script that will call update_with_params.php remotely, as a browser, and call it update_external.php . Replace rss.name.p.ht with the address to your reader.
#!/usr/bin/env php <?php echo "PHP version: " . phpversion() . PHP_EOL; echo "Max execution time: ".ini_get("max_execution_time")." seconds" . PHP_EOL; $url = "http://rss.name.p.ht/update_with_params.php"; $ch = curl_init($url); try { if ( $ch === FALSE ) throw new Exception('failed to initialize'); $startTime = microtime(true); $result = curl_exec($ch); echo 'Execution time '. (microtime(true) - $startTime) . ' sec' . PHP_EOL; if (FALSE === $result ) throw new Exception('Curl error ' . curl_errno($ch) . ' , ' . curl_error($ch) ); $code = curl_getinfo($ch, CURLINFO_HTTP_CODE ); if ( $code != 200 ) throw new Exception( "Page returned error code $code" ); } catch(Exception $e) { trigger_error( sprintf('ERROR #%d: %s\n', $e->getCode(), $e->getMessage()), E_USER_ERROR ); } curl_close($ch); ?> Setting up a CRON task
It remains to configure our script to start automatically. To do this, go to the " Cron-Tasks " item in the control panel and configure it as in the picture:

Click "Create"
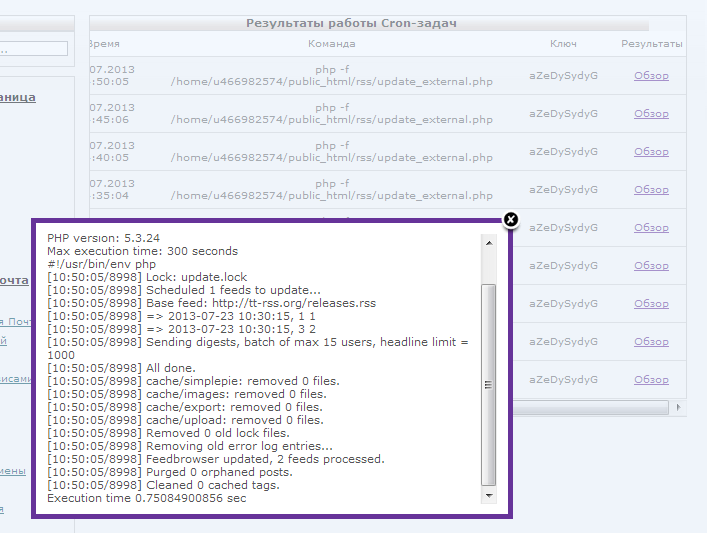
Now every 5 minutes the script will be called updating the reader. You can find the logs of his work in the item “ Cron-Task Results ” in the control panel:
That's all.
Debriefing
At the moment I use Tiny Tiny RSS on Hostinger and I am quite satisfied, however, I see several potential problems that may manifest themselves in the future:
- Restriction on the execution time of the script. It is difficult to say how Hostinger obeys the max_execution_time parameter in .htaccess , but now updating my tapes takes 45 seconds and Hostinger does not interrupt the execution.
- The messages “Too many connections” and “MySQL server has gone away” appear in the logs, indicating that the connection to the database is broken during the execution of the script. Theoretically, this should not be a problem if it doesn’t happen all the time and if the developers of Tiny Tiny RSS work carefully with transactions (which, at first glance, seems to be true)
- A few hours access to the reader was closed, then everything was restored. I had to wait
- The developers of Tiny Tiny RSS oppose the modification of their product under the restrictions of virtual hosting sites and my patch , with the changes described here, was not accepted. This may affect further with the release of new versions.
Conclusion
The article described the installation of Tiny Tiny RSS on Hostinger, and I tried to impartially assess the possibility of using such a solution. From my point of view, it is quite possible to use this solution, especially considering its main advantage - free of charge. But it's up to you to decide, of course, as always, good, in order to try it no longer need to go the way of setting from the beginning.
If you know how to improve scripts or settings, please indicate them in the comments. In addition, please describe the reason in the comments if you bet a minus.
Source: https://habr.com/ru/post/187564/
All Articles