Fanless mini-home server based on the HD-Plex H3.S chassis
I have long thought about a new toy, where you can run several virtual machines for experiments, but I didn’t want to set up a noisy vacuum cleaner at home. An alternative option - buying a VDS (VPS), or a car in any cloud has long been swept away, but the latest scandals in the field of information security only strengthened my opinion.
So the goal is defined - a silent and fairly productive home server.
Under the cut there are a lot of pictures, and a short, very brief description of how to use blue electrical tape in the server!
It is worth saying that I have assembled more than one hundred computers, including water-cooled ones, using automobile radiators, aquarium pumps, and other improvised means. A completely silent computer is my old dream. Unfortunately, until recently, this dream seemed impossible (the Zalman corps and pico itx and other exotic things do not count). The latest computer approaching total noiselessness is a Pegatron IPX7A-ION based home HTPC with an Intel Atom 330 on board. It was cooled by two fans recorded from 5 volts - ZALMAN ZM-F3 opposite the motherboard and ZALMAN ZM-F1 in the power supply. Unfortunately, this computer could not reach the ideal of silence, but its performance was enough only for watching movies. At first, he worked under XBMC (XBMCbuntu) and primarily acted as a media center (with the Microsoft MCE console, a very convenient device), but later was pushed into the far corner and worked as a home file server and redmine server.
And now, while reading the next HTPC review on Habré , I unwittingly studied the range of HD-Plex enclosures and realized that it was time to upgrade. Hands have long been itching to touch esxi and play on virtual machines with various technologies.
In general, fanless PCs are quite a rarity. Before ordering the case, I studied the possible alternatives - I still wanted to keep within a more modest budget, but I could not find anything worthy, and possible alternatives could be found on the fingers of one hand. Moreover, it became absolutely clear that it would not be possible to find anything like that in Moscow. After several days of reading reviews and articles on this topic, the toad was strangled and it was decided to order an HD-Plex H3.S package , complete with a 150 watt adapter with a PicoPSU.
Before making a purchase, I talked to Larry from HD-Plex. Answers to all my questions were provided very promptly, for which Larry is a special thank you! So, on June 26, at about 2 am, the order was paid for, and at the end of the same day, the DHL track received the parcel sent from Hamburg. Given the experience of delivering various goods from different parts of the world, I honestly did not expect to receive a parcel before the end of July, and as it turned out in vain. The package came surprisingly quickly, this is a record among all my packages in the last few years, everyone can follow the time of the passage on the track CL433686769DE.
')
Package arrived thoroughly packed. The parcel itself was hidden in such a bag:

This was followed by two boxes of cardboard:

Well, inside the case with all the necessary accessories:
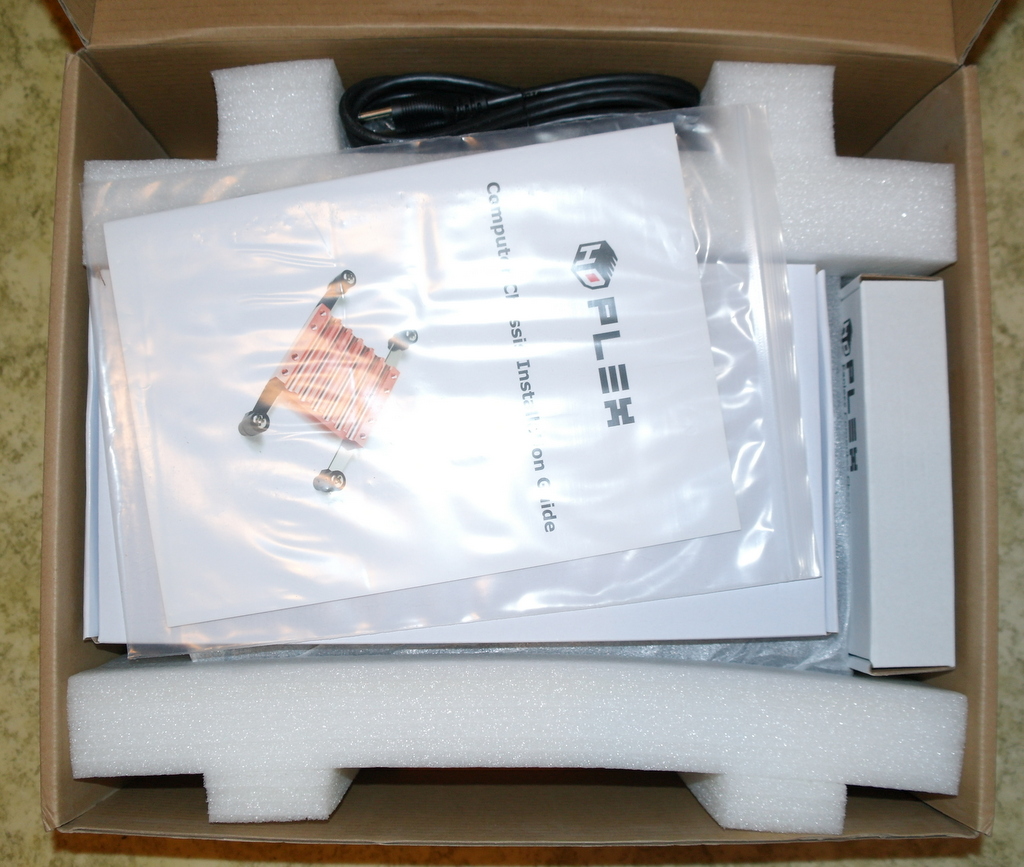
The set has everything you need to assemble, including instructions with large pictures and a sufficiently high-quality thermal grease. But in the process of assembling it still turned out a lot of nuances. In order not to be unfounded, I will give the complete configuration of the assembled PC. Before the arrival of the corps, the following glands were purchased:
In addition to them, they moved to the new PC:
So, what nuances I did not take into account in advance, and I had to solve them during the assembly process:
Features of the design of the case can enter into discord with the plug of the motherboard. The cap from my board did not want to sit in place until it was finalized with pliers (the photo is clickable):
Then I realized that the assembly process would be boring, and it is worth being especially attentive to trifles. The next slippery moment was the installation of the heat remover (clickable):
I was lucky, but it would still be a millimeter and I would have to take a long and tedious return of an unsuitable motherboard, and then look for a replacement for it (and this is still not easy even in Moscow). In addition to the location of elements around the socket, you should pay attention to the location of the socket itself. For example, the ASUS H87I-PLUS board is declared in the compatible list. Given the location of the socket, there will definitely be problems with it. For comparison, after installing heat pipes, my system looks like this:

As seen in the photo, the heat pipes slightly protrude beyond the limits of the heat remover. Accordingly, all the boards on which the socket is located closer to the “upper” edge will not be cooled with standard heat pipes, they simply will not be enough in length. I asked Larry about the compatibility of ASUS H87I-PLUS (and some other boards with a similar socket layout) and this case, to which he replied that it is possible to order extended heat pipes to solve this problem. I didn’t specify whether it was included in the price, or paid for separately, since I didn’t have such a need, so if this is your case, it’s best to clarify this before buying a case.
The difficulties did not end there, they were just beginning, but we are not looking for easy ways.
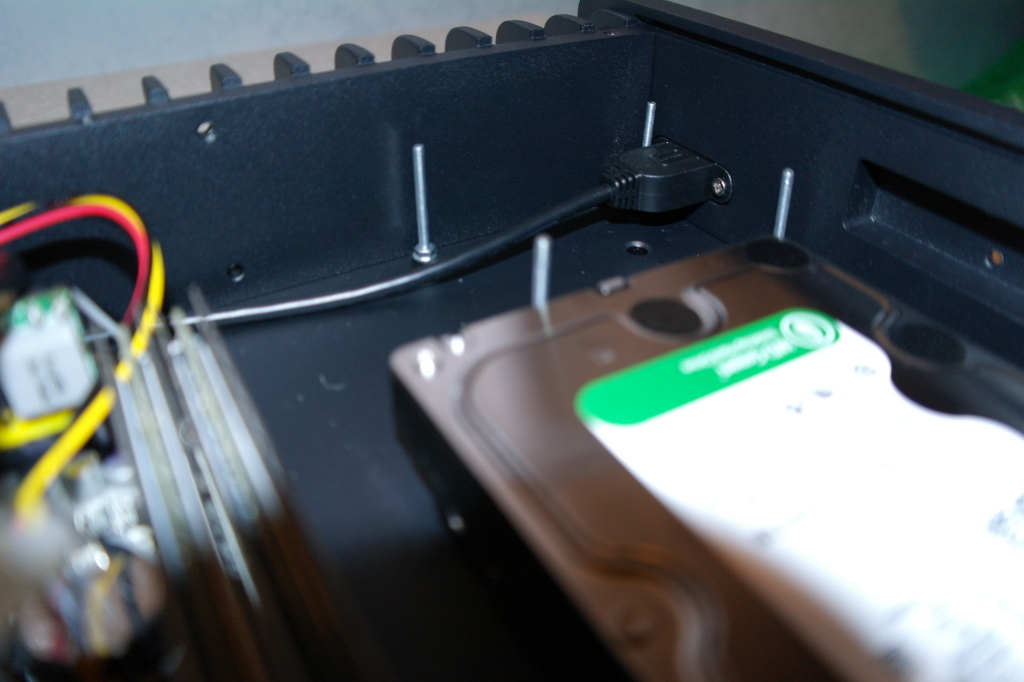
The site HD-Plex provides several examples of installing drives in the case, but not one of these options did not suit me as I planned to install a total of 4 drives, two of them 3.5. ” In general, the manufacturer’s website contains sufficiently detailed case sizes. Looking ahead, I will say that I got the impression that they are inaccurate. So the internal height is indicated equal to 55 mm, but despite this I managed to arrange two HDDs with a height of 30 mm, placing them on top of each other.
So, after examining the mounting options for the drives, and visiting the next hardware store, the following changes were made to the design: A 3.5 ”hard drive is mounted on a standard mount, but turned 180 degrees. This allowed freeing up the mounting holes for the 2.5 ”HDD:
As can be seen in the photo, the usb cable of the connector on the front panel did not allow two 2.5 "drives to be installed one above the other, therefore the 3x40 screws, which allowed the drives to be located above the cable, went into use. Using available materials (memory packaging is the first thing that turned out at hand, and its strength was more than enough, especially since the weight of the SSD drive is small.) The two drives were fixed on top of each other:
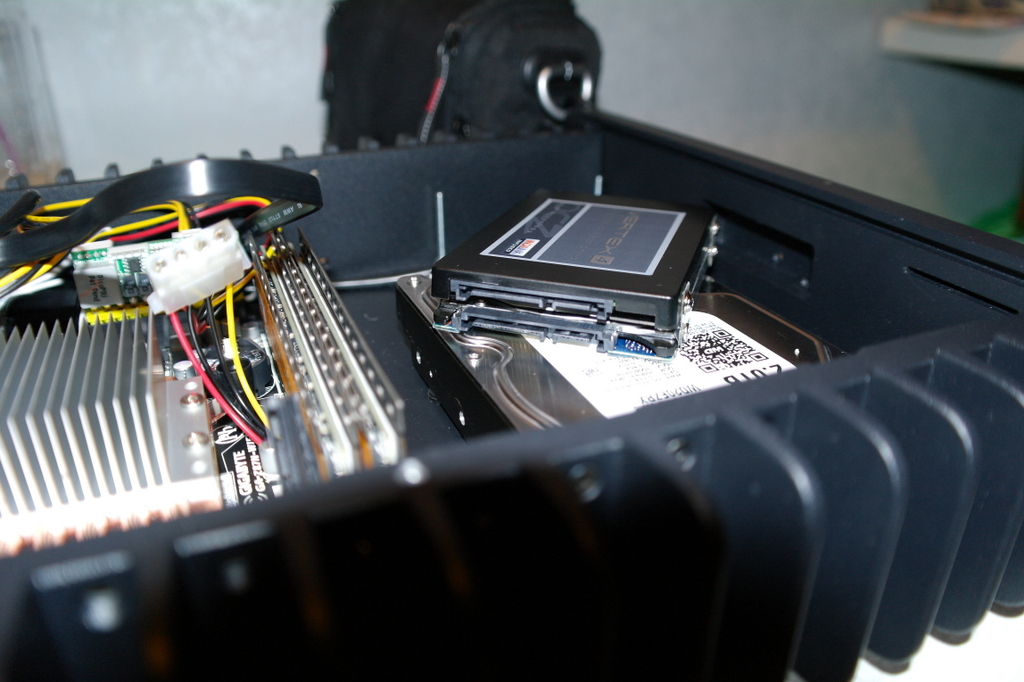
And then installed on the prepared place:
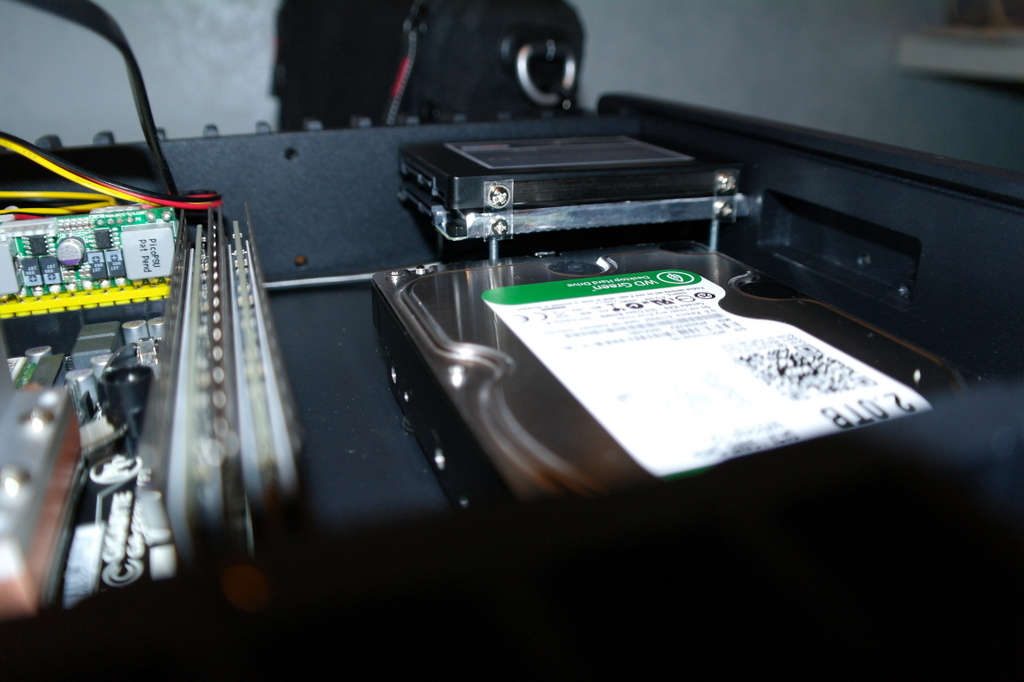
With 3.5 "HDD had to tinker a little longer. First, for fastening one above the other, it was required that something more durable than plastic packaging from memory, since and they weigh much more. Secondly, the measurements showed that it is not enough just to arrange them one above the other, since the top disk connectors would be blocked. As a result, the upper disk was turned upside down, and slightly offset from the lower one. Well, the hardware store helped me with the fasteners again - the assortment of various perforated tapes there is quite high:
In addition to the location I was a little worried about the thermal mode of the disks. The old Hitachi at 7200 rpm heats up quite strongly, and I don’t want it to warm its neighbor. Naturally, there were no heat-insulating materials at hand, and all the shops were closed late at night, so the packaging from the case was used. The case was packed in a bag of polyethylene foam, which, together with foil, is successfully used in thermal insulation. In addition to thermal insulation hard drives, it was decided to organize a heat sink from the lower "hot" drive. Here then the blue electrical tape came in handy - we isolate the motor contacts so that they do not close onto the aluminum case.

Rubber inserts for vibration damping have been removed from the HDD mounting holes:

On the protruding parts of the HDD can is applied thermal grease, and then the hard drives are installed in place:

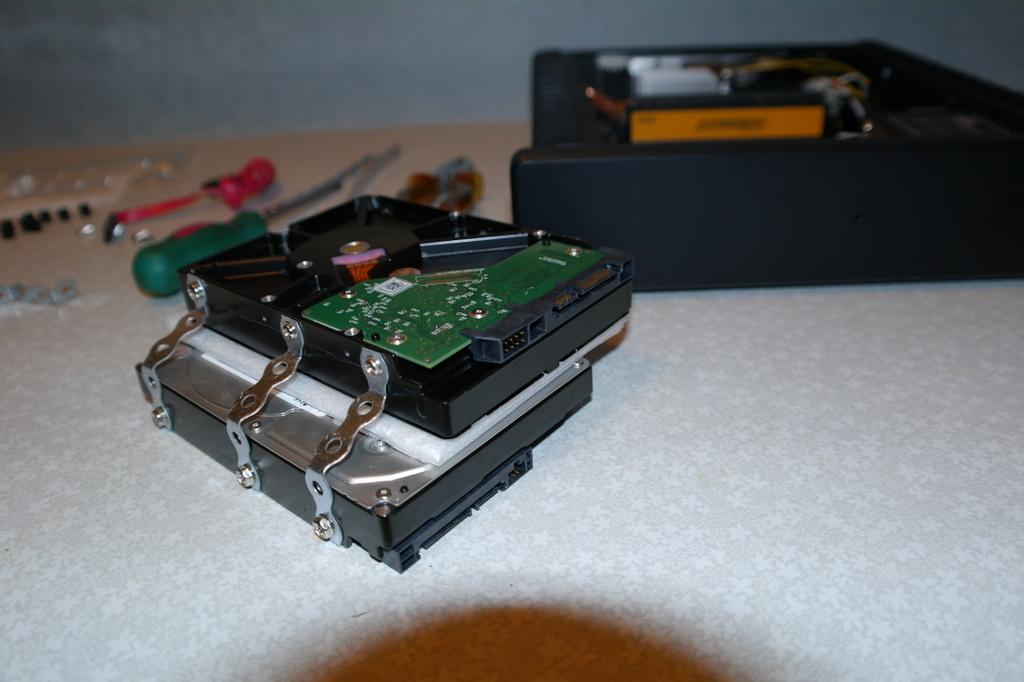
Unfortunately, after installing the disks, there was no space left for the board with the power button, so it was also secured with a perforated tape:
At this quest for the assembly was completed.
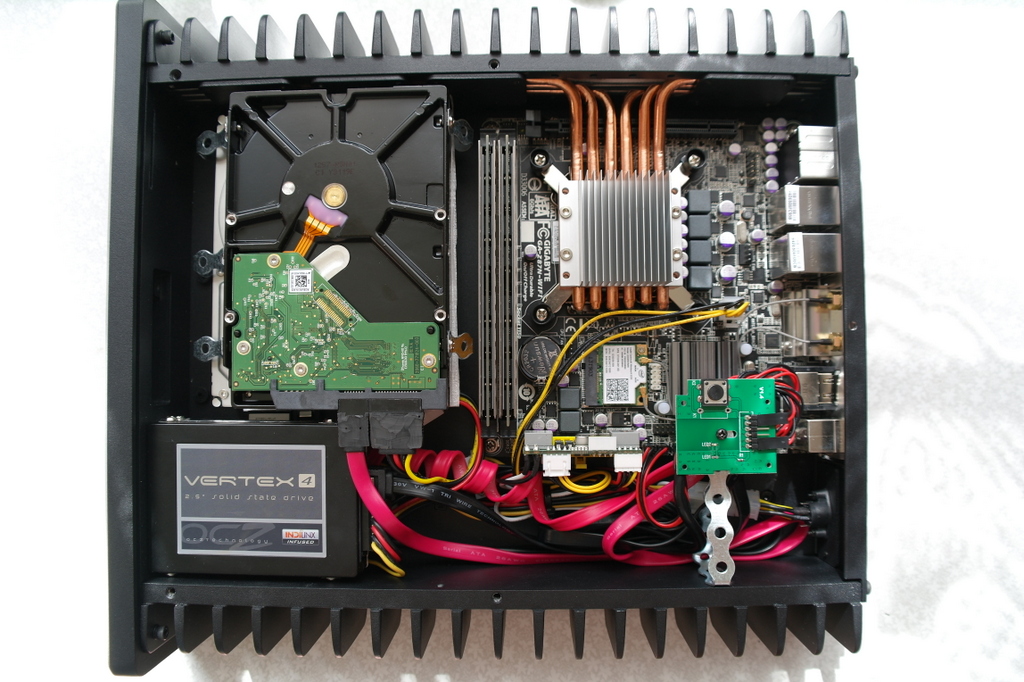
Unfortunately, I do not have an infrared thermometer, so I do not provide accurate temperature measurements as effectively as was done in the review of the eXodus habrayuzer . I will just note that the 4770s processor, obviously does not fit into the declared thermal package (65 watts) under load, which is also indicated by the intel extreme tuning utility, but even in spite of this, stress tests could not overheat the processor above the critical threshold. The maximum temperature was 86 degrees, which is quite acceptable.
At the moment, the assembled “server” is working under ESXI 5.1u1 (its installation also did not go smoothly, but this is a completely different story) and successfully replaces the retired Atom.
So the goal is defined - a silent and fairly productive home server.
Under the cut there are a lot of pictures, and a short, very brief description of how to use blue electrical tape in the server!
It is worth saying that I have assembled more than one hundred computers, including water-cooled ones, using automobile radiators, aquarium pumps, and other improvised means. A completely silent computer is my old dream. Unfortunately, until recently, this dream seemed impossible (the Zalman corps and pico itx and other exotic things do not count). The latest computer approaching total noiselessness is a Pegatron IPX7A-ION based home HTPC with an Intel Atom 330 on board. It was cooled by two fans recorded from 5 volts - ZALMAN ZM-F3 opposite the motherboard and ZALMAN ZM-F1 in the power supply. Unfortunately, this computer could not reach the ideal of silence, but its performance was enough only for watching movies. At first, he worked under XBMC (XBMCbuntu) and primarily acted as a media center (with the Microsoft MCE console, a very convenient device), but later was pushed into the far corner and worked as a home file server and redmine server.
And now, while reading the next HTPC review on Habré , I unwittingly studied the range of HD-Plex enclosures and realized that it was time to upgrade. Hands have long been itching to touch esxi and play on virtual machines with various technologies.
In general, fanless PCs are quite a rarity. Before ordering the case, I studied the possible alternatives - I still wanted to keep within a more modest budget, but I could not find anything worthy, and possible alternatives could be found on the fingers of one hand. Moreover, it became absolutely clear that it would not be possible to find anything like that in Moscow. After several days of reading reviews and articles on this topic, the toad was strangled and it was decided to order an HD-Plex H3.S package , complete with a 150 watt adapter with a PicoPSU.
Before making a purchase, I talked to Larry from HD-Plex. Answers to all my questions were provided very promptly, for which Larry is a special thank you! So, on June 26, at about 2 am, the order was paid for, and at the end of the same day, the DHL track received the parcel sent from Hamburg. Given the experience of delivering various goods from different parts of the world, I honestly did not expect to receive a parcel before the end of July, and as it turned out in vain. The package came surprisingly quickly, this is a record among all my packages in the last few years, everyone can follow the time of the passage on the track CL433686769DE.
')
Package arrived thoroughly packed. The parcel itself was hidden in such a bag:
This was followed by two boxes of cardboard:
Well, inside the case with all the necessary accessories:
The set has everything you need to assemble, including instructions with large pictures and a sufficiently high-quality thermal grease. But in the process of assembling it still turned out a lot of nuances. In order not to be unfounded, I will give the complete configuration of the assembled PC. Before the arrival of the corps, the following glands were purchased:
- Intel Core i7 4770s
- Gigabyte ga-z87n-wifi
- Crucial Ballistix Tactical 2x8Gb (pc-12800) 1600MHz CL8
- Western Digital WD20EZRX
In addition to them, they moved to the new PC:
- SSD OCZ Vertex4 256Gb - worked in a laptop, but at the same time with the upgrade was replaced by OCZ Vector (the main reason - the height of the Vector - 7mm. Vertex had to be disassembled to fit in the laptop)
- Hitachi 3.5 ”HDD, 1 Tb 7200 rpm
- Hitachi HDD 2.5 ”500 Gb
So, what nuances I did not take into account in advance, and I had to solve them during the assembly process:
Features of the design of the case can enter into discord with the plug of the motherboard. The cap from my board did not want to sit in place until it was finalized with pliers (the photo is clickable):
Then I realized that the assembly process would be boring, and it is worth being especially attentive to trifles. The next slippery moment was the installation of the heat remover (clickable):
I was lucky, but it would still be a millimeter and I would have to take a long and tedious return of an unsuitable motherboard, and then look for a replacement for it (and this is still not easy even in Moscow). In addition to the location of elements around the socket, you should pay attention to the location of the socket itself. For example, the ASUS H87I-PLUS board is declared in the compatible list. Given the location of the socket, there will definitely be problems with it. For comparison, after installing heat pipes, my system looks like this:
As seen in the photo, the heat pipes slightly protrude beyond the limits of the heat remover. Accordingly, all the boards on which the socket is located closer to the “upper” edge will not be cooled with standard heat pipes, they simply will not be enough in length. I asked Larry about the compatibility of ASUS H87I-PLUS (and some other boards with a similar socket layout) and this case, to which he replied that it is possible to order extended heat pipes to solve this problem. I didn’t specify whether it was included in the price, or paid for separately, since I didn’t have such a need, so if this is your case, it’s best to clarify this before buying a case.
The difficulties did not end there, they were just beginning, but we are not looking for easy ways.
The site HD-Plex provides several examples of installing drives in the case, but not one of these options did not suit me as I planned to install a total of 4 drives, two of them 3.5. ” In general, the manufacturer’s website contains sufficiently detailed case sizes. Looking ahead, I will say that I got the impression that they are inaccurate. So the internal height is indicated equal to 55 mm, but despite this I managed to arrange two HDDs with a height of 30 mm, placing them on top of each other.
So, after examining the mounting options for the drives, and visiting the next hardware store, the following changes were made to the design: A 3.5 ”hard drive is mounted on a standard mount, but turned 180 degrees. This allowed freeing up the mounting holes for the 2.5 ”HDD:
As can be seen in the photo, the usb cable of the connector on the front panel did not allow two 2.5 "drives to be installed one above the other, therefore the 3x40 screws, which allowed the drives to be located above the cable, went into use. Using available materials (memory packaging is the first thing that turned out at hand, and its strength was more than enough, especially since the weight of the SSD drive is small.) The two drives were fixed on top of each other:
And then installed on the prepared place:
With 3.5 "HDD had to tinker a little longer. First, for fastening one above the other, it was required that something more durable than plastic packaging from memory, since and they weigh much more. Secondly, the measurements showed that it is not enough just to arrange them one above the other, since the top disk connectors would be blocked. As a result, the upper disk was turned upside down, and slightly offset from the lower one. Well, the hardware store helped me with the fasteners again - the assortment of various perforated tapes there is quite high:
In addition to the location I was a little worried about the thermal mode of the disks. The old Hitachi at 7200 rpm heats up quite strongly, and I don’t want it to warm its neighbor. Naturally, there were no heat-insulating materials at hand, and all the shops were closed late at night, so the packaging from the case was used. The case was packed in a bag of polyethylene foam, which, together with foil, is successfully used in thermal insulation. In addition to thermal insulation hard drives, it was decided to organize a heat sink from the lower "hot" drive. Here then the blue electrical tape came in handy - we isolate the motor contacts so that they do not close onto the aluminum case.
Rubber inserts for vibration damping have been removed from the HDD mounting holes:
On the protruding parts of the HDD can is applied thermal grease, and then the hard drives are installed in place:
Unfortunately, after installing the disks, there was no space left for the board with the power button, so it was also secured with a perforated tape:
At this quest for the assembly was completed.
Unfortunately, I do not have an infrared thermometer, so I do not provide accurate temperature measurements as effectively as was done in the review of the eXodus habrayuzer . I will just note that the 4770s processor, obviously does not fit into the declared thermal package (65 watts) under load, which is also indicated by the intel extreme tuning utility, but even in spite of this, stress tests could not overheat the processor above the critical threshold. The maximum temperature was 86 degrees, which is quite acceptable.
At the moment, the assembled “server” is working under ESXI 5.1u1 (its installation also did not go smoothly, but this is a completely different story) and successfully replaces the retired Atom.
Source: https://habr.com/ru/post/187326/
All Articles