Windows Azure Recovery Services. Part 2: Preparation
Good day to all! Last time, we looked at the cost of storing data backups using Windows Azure Recovery Services, and also tried to compare it with costs when using Windows Azure Storage Services.
Let's now look at the specific process of setting up Windows Azure Recovery Services for storing backups.
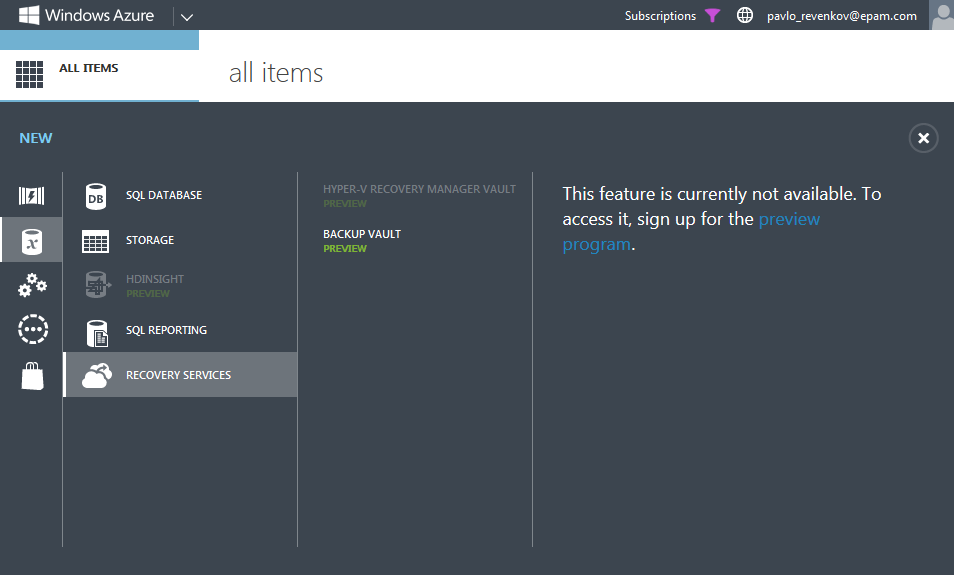
Since at the time of this writing, this service was in the “Preview” state, before you start working with it, you need to activate it for your Windows Azure subscription. To do this in the Windows Azure Management Portal, click the “New” button, then go to the “Data Services”, “Recovery Services” section and, by moving the mouse over the “Backup Vault” item, we will see a message that before using this feature - it must be activated. To do this, click on the link “preview program”.
')
In the list of services that are currently in the “Preview” state, we are interested in the “Backup” item. In order to activate it, click the “Try it now” button and in the window that appears, select the subscription for which the new service should be activated.

Let's go back to the Windows Azure Management Portal and go back to the “Backup vault” creation section: click the “New” button, then go to the “Data Services” section, “Recovery Services” and select the “Backup Vault”, “Quick Create” option.
All that we are asked to specify at this stage is the data center, which will allocate capacity for storing backups, as well as the name of the new storage.

Complete the vault creation by clicking the “Create vault” button.
After creating a new storage, select it from the list and go to the Dashboard tab. Let's take a closer look at it.
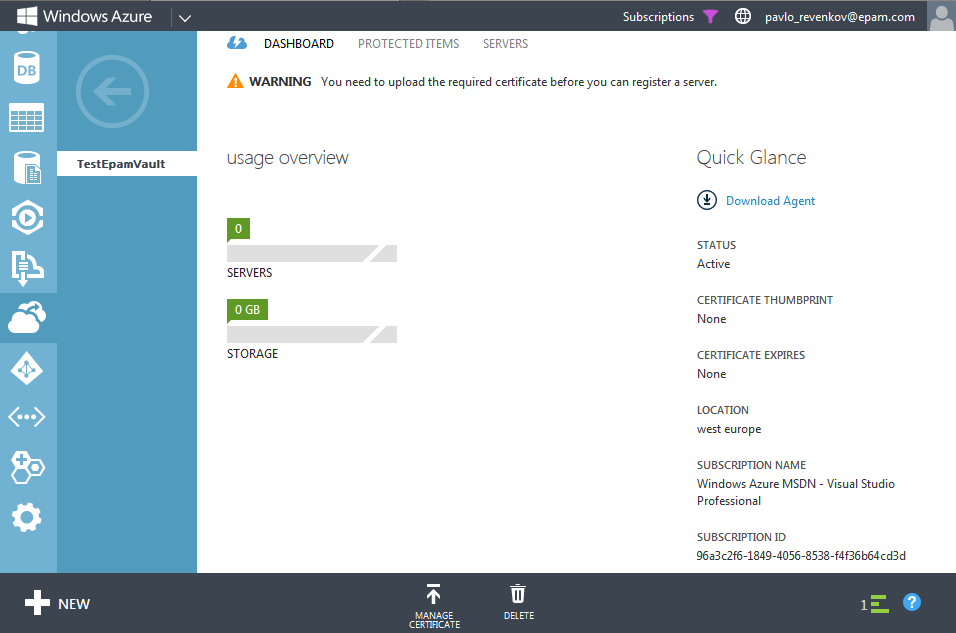
The first thing you should pay attention to is a warning that before registering a Windows Server machine whose backups will be stored in this storage, we need to upload a certificate.
Let's create the certificate we need. The certificate has the following requirements: it must be X.509 v3 type, the key length must be 2048 bits, on Windows Server machines the certificate must be stored in the Personal Computer (Local Computer) certificate store.
To create such a certificate, we need the utility makecert, which is included with Visual Studio or the Windows SDK. It is located at the following address: “C: \ Program Files (x86) \ Microsoft SDKs \ Windows \ v7.1A \ Bin”, where 7.1 is the SDK version installed on your computer. You can get the SDK from here .
So, go to the directory where the makecert utility is located and run the following command:
Here you must specify the parameters of CN - the name of the certificate. -len is the length of the key created by the certificate. -e - certificate expiration date. The last parameter specifies the file name of the certificate to be created.
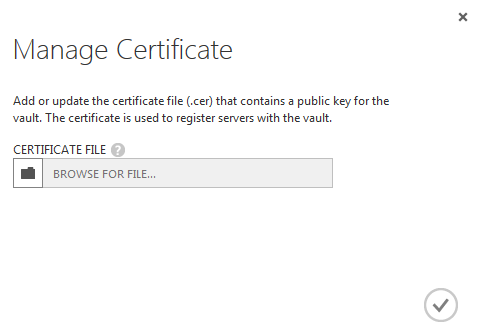
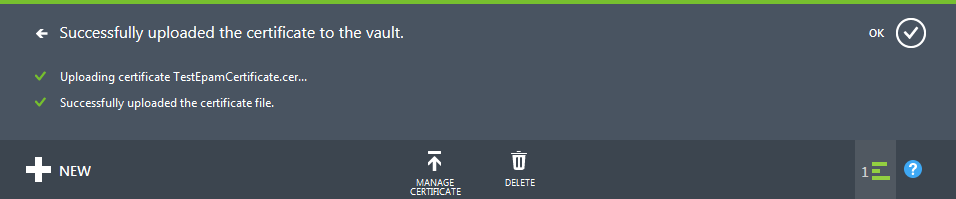
Now you should upload this certificate to the Windows Azure Management Portal. In order to do this, click the “Manage Certificate” button and in the appeared window specify the file of the generated certificate for uploading.
Now you need to upload this certificate to all Windows Server machines that will use this storage for storing backups. On the machine we used to generate the certificate, it will be imported automatically by the makecert utility, the localmachine parameter. For the rest of the machines, it is necessary to create the corresponding pfx file containing the Private Key of this certificate.
So, let's export the generated certificate with the contents of the Private Key (pfx). In order to export this certificate to the “Local Computer \ Personal” certificate store, we need the Microsoft Management Console utility (mmc.exe). Run it as an administrator.
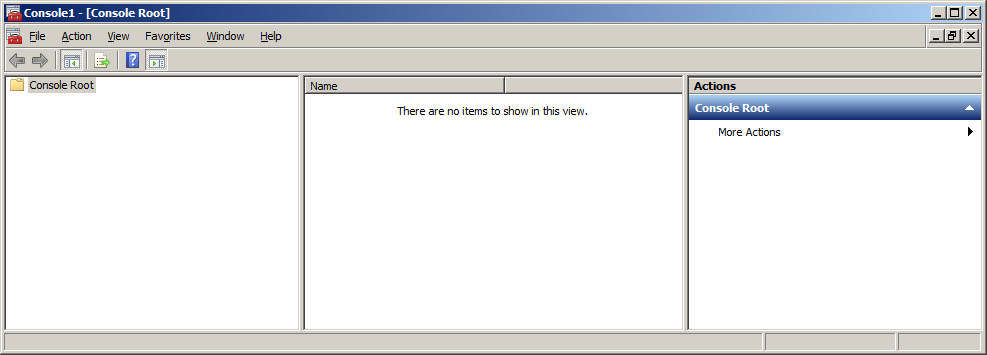
Select the menu item “File”, “Add / Remove Snap-in ...”. In the window that appears, select the certificates management tool (Certificates) and click the “Add” button.

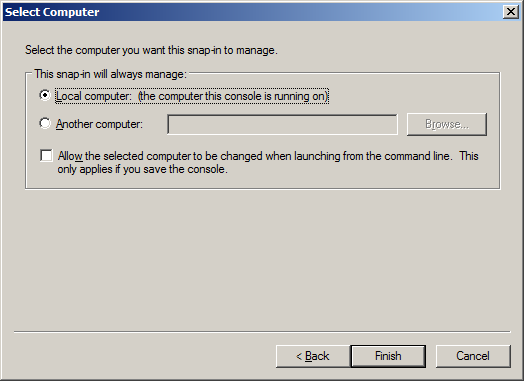
Next, select the “Computer account” and select the local computer certificate store.
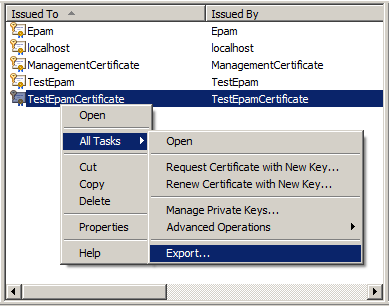
In the window that appears, we go to the “Personal \ Certificates” section and see all the certificates installed on this machine. Select the one we need and select the item “All Tasks”, “Export ...” in the context menu.
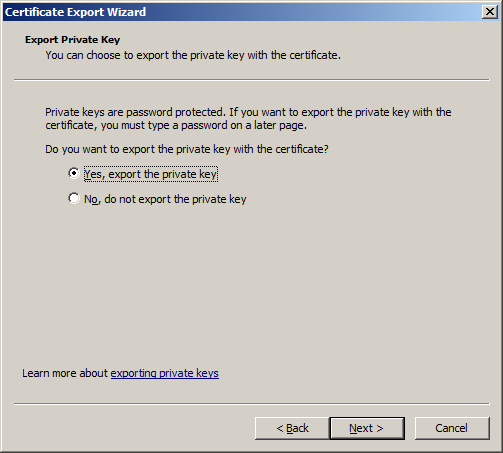
In the certificate export wizard, we need to specify that we want to export the Private Key with the certificate. To do this, select the item “Yes, export the private key”.
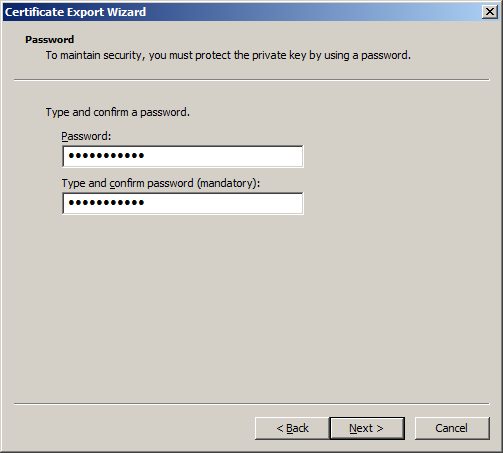
We proceed to the step of setting the password for this certificate.
In the last step, we specify which directory on the disk to export this certificate. Export is complete.
Now copy the resulting .pfx file to the Windows Server machines that will work with this backup repository. After that, we go back to the Microsoft Management Console on the other machines and add the certificate management snap-in, as described above.
To import a .pfx file, select the menu item “Action”, “All Tasks”, “Import ...”.

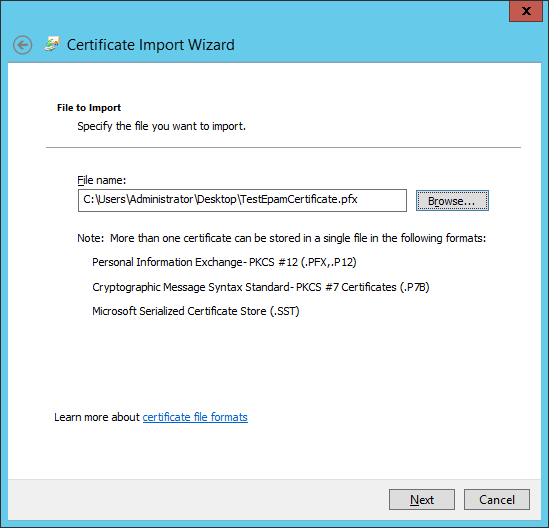
Specify the file containing the certificate and Private Key in the certificate import wizard.
And the password that we asked when exporting this certificate.

The last step is to specify the storage in which we import this certificate (Personal).

The certificate import is complete.
Next time we will look at working with the Windows Azure Backup Agent on machines running Windows Server. Thank you all for your attention and have a good working day!
Let's now look at the specific process of setting up Windows Azure Recovery Services for storing backups.
Activate Windows Azure Recovery Services
Since at the time of this writing, this service was in the “Preview” state, before you start working with it, you need to activate it for your Windows Azure subscription. To do this in the Windows Azure Management Portal, click the “New” button, then go to the “Data Services”, “Recovery Services” section and, by moving the mouse over the “Backup Vault” item, we will see a message that before using this feature - it must be activated. To do this, click on the link “preview program”.
')
In the list of services that are currently in the “Preview” state, we are interested in the “Backup” item. In order to activate it, click the “Try it now” button and in the window that appears, select the subscription for which the new service should be activated.
Creating backup storage
Let's go back to the Windows Azure Management Portal and go back to the “Backup vault” creation section: click the “New” button, then go to the “Data Services” section, “Recovery Services” and select the “Backup Vault”, “Quick Create” option.
All that we are asked to specify at this stage is the data center, which will allocate capacity for storing backups, as well as the name of the new storage.
Complete the vault creation by clicking the “Create vault” button.
Creating a certificate
After creating a new storage, select it from the list and go to the Dashboard tab. Let's take a closer look at it.
The first thing you should pay attention to is a warning that before registering a Windows Server machine whose backups will be stored in this storage, we need to upload a certificate.
Let's create the certificate we need. The certificate has the following requirements: it must be X.509 v3 type, the key length must be 2048 bits, on Windows Server machines the certificate must be stored in the Personal Computer (Local Computer) certificate store.
To create such a certificate, we need the utility makecert, which is included with Visual Studio or the Windows SDK. It is located at the following address: “C: \ Program Files (x86) \ Microsoft SDKs \ Windows \ v7.1A \ Bin”, where 7.1 is the SDK version installed on your computer. You can get the SDK from here .
So, go to the directory where the makecert utility is located and run the following command:
makecert.exe -r -pe -n CN=CertificateName -ss my -sr localmachine -eku 1.3.6.1.5.5.7.3.2 -len 2048 -e 01/01/2016 CertificateName.cerHere you must specify the parameters of CN - the name of the certificate. -len is the length of the key created by the certificate. -e - certificate expiration date. The last parameter specifies the file name of the certificate to be created.
Now you should upload this certificate to the Windows Azure Management Portal. In order to do this, click the “Manage Certificate” button and in the appeared window specify the file of the generated certificate for uploading.
Import certificate on Windows Server machines
Now you need to upload this certificate to all Windows Server machines that will use this storage for storing backups. On the machine we used to generate the certificate, it will be imported automatically by the makecert utility, the localmachine parameter. For the rest of the machines, it is necessary to create the corresponding pfx file containing the Private Key of this certificate.
So, let's export the generated certificate with the contents of the Private Key (pfx). In order to export this certificate to the “Local Computer \ Personal” certificate store, we need the Microsoft Management Console utility (mmc.exe). Run it as an administrator.
Select the menu item “File”, “Add / Remove Snap-in ...”. In the window that appears, select the certificates management tool (Certificates) and click the “Add” button.
Next, select the “Computer account” and select the local computer certificate store.
In the window that appears, we go to the “Personal \ Certificates” section and see all the certificates installed on this machine. Select the one we need and select the item “All Tasks”, “Export ...” in the context menu.
In the certificate export wizard, we need to specify that we want to export the Private Key with the certificate. To do this, select the item “Yes, export the private key”.
We proceed to the step of setting the password for this certificate.
In the last step, we specify which directory on the disk to export this certificate. Export is complete.
Now copy the resulting .pfx file to the Windows Server machines that will work with this backup repository. After that, we go back to the Microsoft Management Console on the other machines and add the certificate management snap-in, as described above.
To import a .pfx file, select the menu item “Action”, “All Tasks”, “Import ...”.
Specify the file containing the certificate and Private Key in the certificate import wizard.
And the password that we asked when exporting this certificate.
The last step is to specify the storage in which we import this certificate (Personal).
The certificate import is complete.
Next time we will look at working with the Windows Azure Backup Agent on machines running Windows Server. Thank you all for your attention and have a good working day!
Source: https://habr.com/ru/post/186886/
All Articles