Video for a startup with their own hands. Without experience and budget
As a result, we shot the video ourselves, with no experience and with a minimum budget. It turned out better than they thought: in the first day, 1500+ views and a record many likes on our fb page. Positive in the comments added what they did everything themselves. For a young banking service with a special approach to service, this positive was very helpful.
As the main performer in the whole idea of shooting a video, I will talk about the process and our mistakes. At once I will make a reservation that I am not a professional neither in video filming, nor in video processing. My professional activity is related to project management and marketing, from a relevant experience - only an amateur passion for photography. Therefore, our experience will be more interesting for startups and enthusiasts who, like us, without experience will want to do something better than we did.
First I will describe the process, and then I will give practical conclusions and tips in a simple list. If the story gets bored - go straight to the chapter "dry residue for those who want to repeat."
')
We chose the video format because we wanted to talk about the iPhone application, in which we embodied the ideas of the super-bank in terms of usability and design. It is known that when it comes to lightness, beauty and convenience - it’s better to show than to tell. At about the same time, interesting videos from Mailboxapp and Simple caught my eye. From these works, we drew inspiration and confidence to make a video of ourselves.
The first thing we went to communicate with people who do this professionally. We talked about prices, organizational and time costs. More or less decent studios called the minimum price of $ 8,000– $ 10,000 per minute video (similar to the one at mailboxapp) and 2–3 weeks per process. They were also interested in such videos as izettle and runes - these cost from $ 25k and from $ 35k, respectively. For our video for 1 minute, the calculation was as follows:
Communication with the studios turned out to be very useful: we learned what stages the creation of video consists of, what specialists are required, how much these or other effects cost, etc. For example, in practice, an understanding of the features of working with voice and sound came in handy. This is a separate work, sometimes labor-intensive, comparable to the creation of the video sequence itself, so we decided to abandon the scenes with a voice in time, which made our lives about twice as easy.
It was during the discussion of the order that we came to the conclusion that everything looks not so difficult and we need to try to shoot ourselves. They reasoned like this: in the worst case, we will return and pay $ 10,000, but at least we will understand that we are paying for work that we cannot do ourselves; and at the best - we will save, also it will be interesting. Of course, everything was not so simple, but then the decision was made.
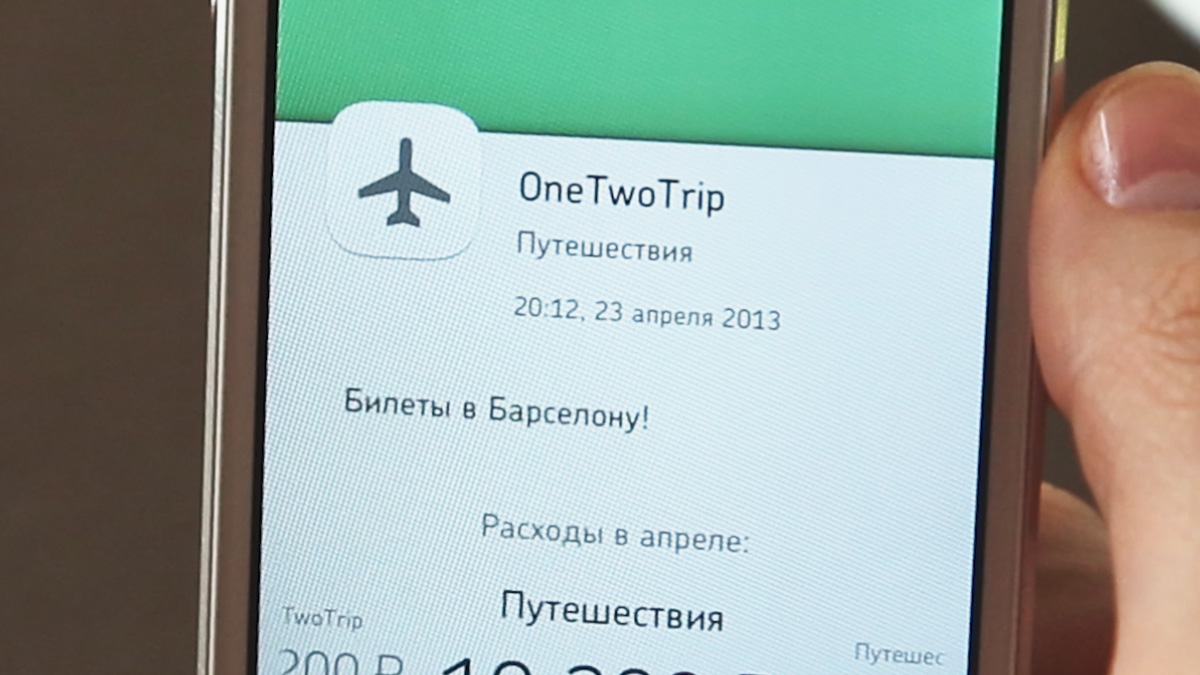
Our first scenario consisted of 20 bulletpoint in evernote, the second - from 18, and the last - from 14. Here it is:
From the very beginning we decided to limit the timing to 60-75 seconds. According to our observations, longer rollers watch only if they have a lot of dynamics and suspense. If you are not sure that you are well versed in the laws of drama and are able to keep the viewer's attention, then do not make a long video - it simply will not be watched, and everything will be in vain.
When you make a script about your product, you quickly get a taste and want to show a lot. There is a tendency to increase the volume of the script. We fell into this trap and ended up cutting the script twice, because the long script not only leads to too much timekeeping, but also erodes the accents and mixes the main ideas with details that only seem important.
For the future, we concluded that the script is very, very important. More than we thought. Besides the fact that a good script protects you from unnecessary work (see our experience below), it allows you to test the video for “interestingness” even before you spend your first money. Just tell the script to your friends and look at their reaction. Are they interested in the outset, are they following the development of events and do they cause emotions to end? If the answers to all - “no”, then the script is better to remake. We had one “yes” and we continued.
Filmed on a personal Canon camera 5d m3, with a Canon 24-70mm lens and a Vanguard tripod. Everything else - a slider for camera movement, a pair of light sources and a microphone - were rented for a modest 900 rubles per day. The camera would fit even simpler, in our opinion, a modern base reflex camera for $ 800 would suffice.

According to the scenario, we needed to shoot in a cafe. Usually they rent a place for this and rent it in a comfortable environment. We went the other way and agreed with Progress Bar. We were allowed to shoot for free, but so that we will not interfere with visitors. We didn’t hire professional actors - the familiar girl Ekaterina kindly agreed to help us with the main role of Liza for free, agreed with the bartender on the spot, and all the other people in the frame were real visitors to the restaurant and the waiters participated without knowing it.
Props are minimal: cookies from the store, a cup from the house, bought coffee on the spot.
Since the sunlight gives us a beautiful picture in the morning, we were there by 8 am and started shooting street scenes. There were four of us: a model, I as an operator and 2 assistants who kindly agreed to participate. Assistants carried the equipment and kept the light. We filmed the material in the street in 1.5 hours. From it only a couple of seconds entered the final video. This is because we shot the street scenes right away, not having previously been in place and not having decided on specific plans. This error led to the fact that almost all the frames included not very beautiful street objects and most of the material had to be rejected.
Closer to the opening of the cafe (9-30 am), we moved inside and began shooting indoors. The main difficulty in our case was that the bar was quite dark, with mixed light from the window and from the lights turned on. I had to tinker a bit and add my own light (well, that they rented) so that the faces in the frame were bright and natural in color. We cost two add. light sources, which compensated for the shadows on the faces that appeared in the original conditions. It took another hour to shoot this episode.
Then I shot close up plans for the bar. Such atmospheric shots are required to make the video series more vibrant and dynamic. Just the work of the coffee machine, the actions of the barista, how the calculation is performed, and so on. Many of these frames got into the final movie. It took another 40 minutes.
When we decided to move to shooting the main scenes from the iPhone, the administrator suddenly began to rush us. It turned out that the administration gave us only a couple of hours, and then the event was to begin. So unexpectedly, we only had one hour left, and we had to shoot another 80% of what we had planned. In general, be prepared for such situations if you do everything the way we did. I had to quickly rebuild - I decided to remove all the general plans, in which the interior is visible, and the scenes with the interface (close-ups) are put off for later or even made elsewhere.
We shot scenes where the girl sits at the table and holds the iPhone. During the shooting, the camera was moving with a slider. This added to the dynamics of shots, poor events. Nevertheless, there were no surprises here - there was a jitter in the footage. The rented rails were no longer in the best condition, and we used them in a hurry. Exactly an hour later we were asked to leave, so all the problems had to be solved later.
Going out into the street, we began to decide what to do next, because we did not have time to shoot frames with the application interface itself. It was possible to wait and negotiate for another day, but we decided to finish everything in our office. To do this, put brown paper on the table, put coffee and cookies so that the still life looked like a cafeteria. The table was placed next to the window and set up additional lighting so that the light image repeated the cafe's decor. It turned out that the light from the window at lunchtime was too harsh - then they glued together several sheets of paper with scotch tape and glued them to the glass as a diffuser. In the office, we could only shoot close-ups (with a table in the background), but that was enough. It is important that now there was no hurry.

Removed from a tripod, because the focus in the frames accounted for exclusively on the phone screen. The screen itself was filmed just for the camera, without the use of screencasts or add. technical means. Shooting these scenes took the remaining half a day. And in the evening a couple of problems surfaced:
Having done the work on the bugs, a few days later we gathered again and took all the shots with the phone that were in the final version. True, now, due to the exact focus, we received a new problem - the so-called moire, which manifested itself in the form of an unpleasant pixel grid pattern:
For editing, I used Adobe Premiere cs6 and quite a bit of Adobe After Effects (for a 2-second episode).
The work was built in three stages:
In total, I spent 7-8 days on post-production. It took a lot of time to figure out the program interfaces. Almost immediately it became clear that we needed a separate computer, more powerful than the old macbook air that was available. We bought a modern PC - and the work went more fun.
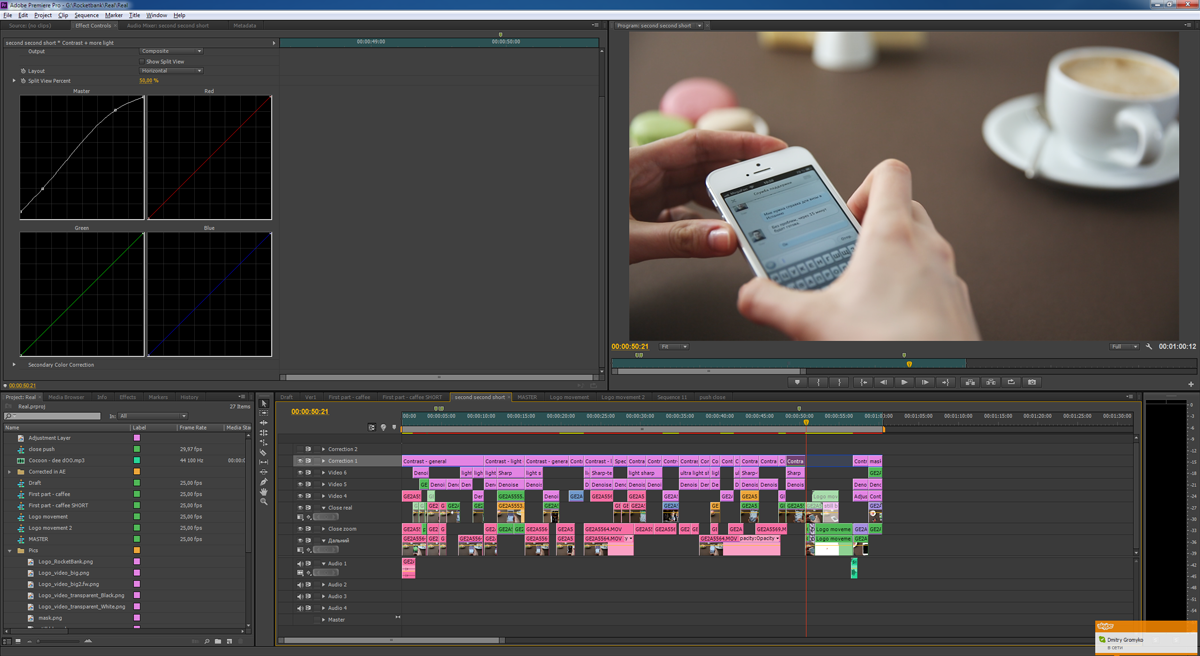
So, first a sequence of scenes and frames is assembled, the rate of change of plans is chosen. This task can be performed in any video editor, including the standard iMovie or Windows Video Editor, which you can master in a couple of hours. The Adobe Premiere window with the episode ready for display looks like this:
The jitter of the picture was eliminated by the Premiere built-in anti-shark (warp stabilizer). I had to tinker with moire a little longer; there was no ready-made “boxed” solution for it. In the end, I used the Neat Video noise suppressor and a combination of blur effects (Blur) and unsharp masking (Unsharp mask). This did not completely eliminate the moire, but it became less noticeable and, let's say, approached an acceptable level for my taste. By the way, if you decide to shoot the screen of the smartphone on an external camera, you will most likely encounter a moire problem.
After eliminating defects, you can improve the image using color correction, brightness and contrast settings. In our case, we did not pursue the goals of creating artistic effects, but only “aligned” the episodes in colors and tones. Therefore, the final changes are not the most dramatic, yet there are:
The final file was placed on Vimeo, which, according to rumors, distorts colors less and offers more flexible settings for compression, privacy, etc. To do this, it was necessary to buy a paid account for $ 60 per year, which we did. Before the launch, we showed the video to friends and collected feedback. When they were convinced that the grades were good, they considered the work completed.
On June 11, the video was presented as part of a new rocketbank.ru. As we said above, on the first day, the video gained more than 1,500 views, collected the most likes on our Facebook page and, in general, caused a positive response. Now, over time, the video consistently gains 100-150 views per day. We spent $ 15 on promotion - to pay for the boost post button on facebook.
Let's sum up
As a result, all the pleasure cost us 2,950 rubles and 3 weeks for everything about everything:
Of course, we had our own camera, lens, tripod, and later - a computer. We did not pay salaries to survey participants. If we had rented all the equipment and computer, and paid the working time to all the participants, this would have resulted in an additional 15-17 thousand rubles. The total amount would be about 20,000 rubles, or $ 650, which is still significantly cheaper than the minimum $ 8,000-10,000 that we called studios.
And yet, saving is not the main thing. The main thing is that the process brought a lot of positive emotions and satisfaction from the result. Difficulties jumped on us here and there - but with them it was only more fun. As with any creative process, working on the video brought many dividends to the whole team - we argued, then generated, discussed and killed ideas, and the survivors modified and turned into a picture. A couple of weeks the main topic of conversation at lunchtime was the plot and video, and all were involved, from support staff to the CEO. Very useful adventure for the young team.
We will be happy if you can use our experience and take off even better. Write to us! And, of course, become the clients of our progressive Rocketbank . You can be friends with us, read and even follow - fb , blog , twitter .
P.S. My name is Alex, greetings and questions can be by mail .
As the main performer in the whole idea of shooting a video, I will talk about the process and our mistakes. At once I will make a reservation that I am not a professional neither in video filming, nor in video processing. My professional activity is related to project management and marketing, from a relevant experience - only an amateur passion for photography. Therefore, our experience will be more interesting for startups and enthusiasts who, like us, without experience will want to do something better than we did.
First I will describe the process, and then I will give practical conclusions and tips in a simple list. If the story gets bored - go straight to the chapter "dry residue for those who want to repeat."
')
How it all began
We chose the video format because we wanted to talk about the iPhone application, in which we embodied the ideas of the super-bank in terms of usability and design. It is known that when it comes to lightness, beauty and convenience - it’s better to show than to tell. At about the same time, interesting videos from Mailboxapp and Simple caught my eye. From these works, we drew inspiration and confidence to make a video of ourselves.
The first thing we went to communicate with people who do this professionally. We talked about prices, organizational and time costs. More or less decent studios called the minimum price of $ 8,000– $ 10,000 per minute video (similar to the one at mailboxapp) and 2–3 weeks per process. They were also interested in such videos as izettle and runes - these cost from $ 25k and from $ 35k, respectively. For our video for 1 minute, the calculation was as follows:
- $ 2,000 script and storyboard
- $ 5,000 - 1 shooting day (equipment, specialists,),
- $ 500 - actress fee
- $ 1000-2500 - postproduction.
Communication with the studios turned out to be very useful: we learned what stages the creation of video consists of, what specialists are required, how much these or other effects cost, etc. For example, in practice, an understanding of the features of working with voice and sound came in handy. This is a separate work, sometimes labor-intensive, comparable to the creation of the video sequence itself, so we decided to abandon the scenes with a voice in time, which made our lives about twice as easy.
It was during the discussion of the order that we came to the conclusion that everything looks not so difficult and we need to try to shoot ourselves. They reasoned like this: in the worst case, we will return and pay $ 10,000, but at least we will understand that we are paying for work that we cannot do ourselves; and at the best - we will save, also it will be interesting. Of course, everything was not so simple, but then the decision was made.
Scenario
Our first scenario consisted of 20 bulletpoint in evernote, the second - from 18, and the last - from 14. Here it is:
From the very beginning we decided to limit the timing to 60-75 seconds. According to our observations, longer rollers watch only if they have a lot of dynamics and suspense. If you are not sure that you are well versed in the laws of drama and are able to keep the viewer's attention, then do not make a long video - it simply will not be watched, and everything will be in vain.
When you make a script about your product, you quickly get a taste and want to show a lot. There is a tendency to increase the volume of the script. We fell into this trap and ended up cutting the script twice, because the long script not only leads to too much timekeeping, but also erodes the accents and mixes the main ideas with details that only seem important.
For the future, we concluded that the script is very, very important. More than we thought. Besides the fact that a good script protects you from unnecessary work (see our experience below), it allows you to test the video for “interestingness” even before you spend your first money. Just tell the script to your friends and look at their reaction. Are they interested in the outset, are they following the development of events and do they cause emotions to end? If the answers to all - “no”, then the script is better to remake. We had one “yes” and we continued.
Equipment and training
Filmed on a personal Canon camera 5d m3, with a Canon 24-70mm lens and a Vanguard tripod. Everything else - a slider for camera movement, a pair of light sources and a microphone - were rented for a modest 900 rubles per day. The camera would fit even simpler, in our opinion, a modern base reflex camera for $ 800 would suffice.
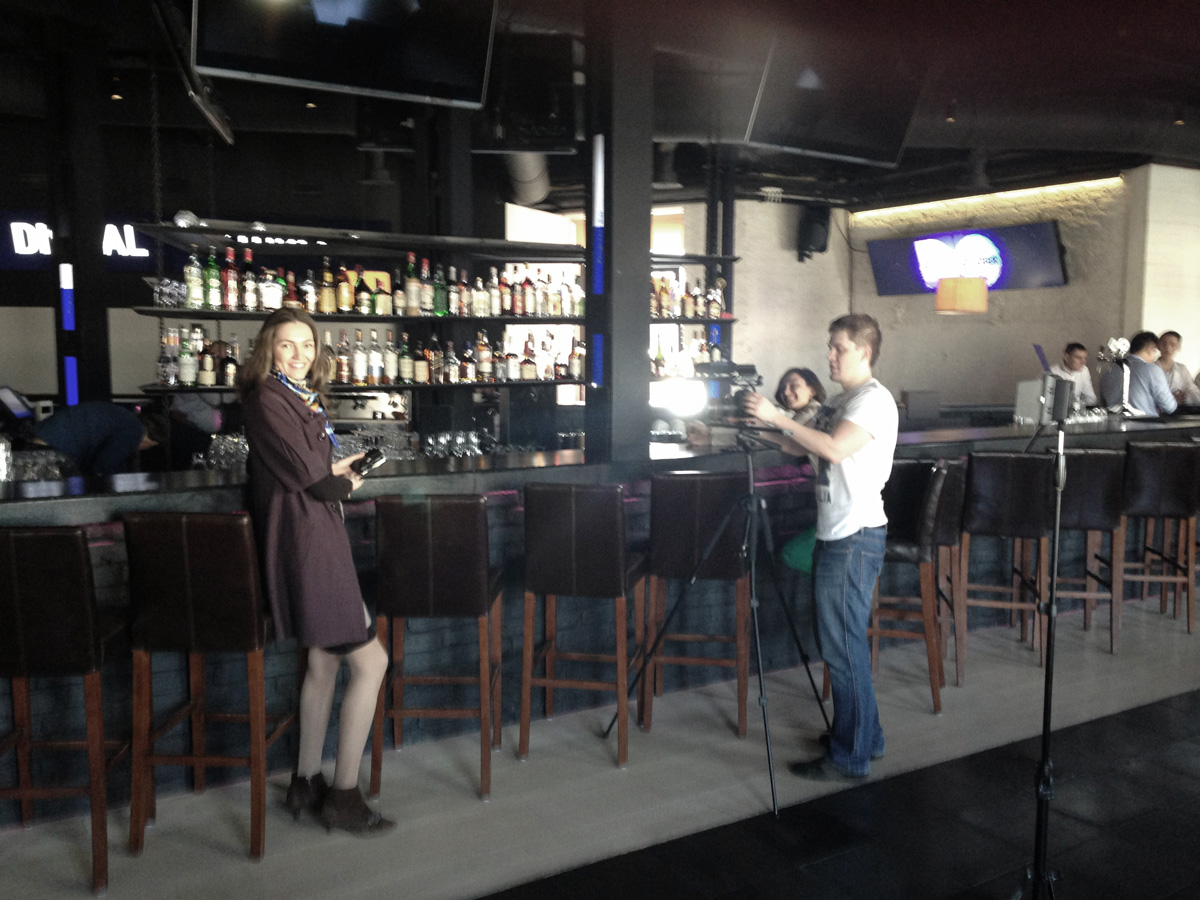
According to the scenario, we needed to shoot in a cafe. Usually they rent a place for this and rent it in a comfortable environment. We went the other way and agreed with Progress Bar. We were allowed to shoot for free, but so that we will not interfere with visitors. We didn’t hire professional actors - the familiar girl Ekaterina kindly agreed to help us with the main role of Liza for free, agreed with the bartender on the spot, and all the other people in the frame were real visitors to the restaurant and the waiters participated without knowing it.
Props are minimal: cookies from the store, a cup from the house, bought coffee on the spot.
Shooting Episode 1 - Progress Bar
Since the sunlight gives us a beautiful picture in the morning, we were there by 8 am and started shooting street scenes. There were four of us: a model, I as an operator and 2 assistants who kindly agreed to participate. Assistants carried the equipment and kept the light. We filmed the material in the street in 1.5 hours. From it only a couple of seconds entered the final video. This is because we shot the street scenes right away, not having previously been in place and not having decided on specific plans. This error led to the fact that almost all the frames included not very beautiful street objects and most of the material had to be rejected.
Closer to the opening of the cafe (9-30 am), we moved inside and began shooting indoors. The main difficulty in our case was that the bar was quite dark, with mixed light from the window and from the lights turned on. I had to tinker a bit and add my own light (well, that they rented) so that the faces in the frame were bright and natural in color. We cost two add. light sources, which compensated for the shadows on the faces that appeared in the original conditions. It took another hour to shoot this episode.
Then I shot close up plans for the bar. Such atmospheric shots are required to make the video series more vibrant and dynamic. Just the work of the coffee machine, the actions of the barista, how the calculation is performed, and so on. Many of these frames got into the final movie. It took another 40 minutes.
When we decided to move to shooting the main scenes from the iPhone, the administrator suddenly began to rush us. It turned out that the administration gave us only a couple of hours, and then the event was to begin. So unexpectedly, we only had one hour left, and we had to shoot another 80% of what we had planned. In general, be prepared for such situations if you do everything the way we did. I had to quickly rebuild - I decided to remove all the general plans, in which the interior is visible, and the scenes with the interface (close-ups) are put off for later or even made elsewhere.
We shot scenes where the girl sits at the table and holds the iPhone. During the shooting, the camera was moving with a slider. This added to the dynamics of shots, poor events. Nevertheless, there were no surprises here - there was a jitter in the footage. The rented rails were no longer in the best condition, and we used them in a hurry. Exactly an hour later we were asked to leave, so all the problems had to be solved later.
Shooting Episode 2 - Office
Going out into the street, we began to decide what to do next, because we did not have time to shoot frames with the application interface itself. It was possible to wait and negotiate for another day, but we decided to finish everything in our office. To do this, put brown paper on the table, put coffee and cookies so that the still life looked like a cafeteria. The table was placed next to the window and set up additional lighting so that the light image repeated the cafe's decor. It turned out that the light from the window at lunchtime was too harsh - then they glued together several sheets of paper with scotch tape and glued them to the glass as a diffuser. In the office, we could only shoot close-ups (with a table in the background), but that was enough. It is important that now there was no hurry.
Removed from a tripod, because the focus in the frames accounted for exclusively on the phone screen. The screen itself was filmed just for the camera, without the use of screencasts or add. technical means. Shooting these scenes took the remaining half a day. And in the evening a couple of problems surfaced:
- The footage script turned out to be too long - it did not fit in a minute, too many ideas gathered without a pronounced main message. We decided to focus on the work of support in the application and shortened the script to 13 points.
- The text was not always in focus, the largest plans were not read well.
Having done the work on the bugs, a few days later we gathered again and took all the shots with the phone that were in the final version. True, now, due to the exact focus, we received a new problem - the so-called moire, which manifested itself in the form of an unpleasant pixel grid pattern:
Installation and correction
For editing, I used Adobe Premiere cs6 and quite a bit of Adobe After Effects (for a 2-second episode).
The work was built in three stages:
- Mounting the sequence of scenes, the choice of rhythm and dynamics,
- Elimination of defects (jitter, moire, artifacts),
- Color correction and toning (contrast, curves, toning, as in instagram)
In total, I spent 7-8 days on post-production. It took a lot of time to figure out the program interfaces. Almost immediately it became clear that we needed a separate computer, more powerful than the old macbook air that was available. We bought a modern PC - and the work went more fun.
So, first a sequence of scenes and frames is assembled, the rate of change of plans is chosen. This task can be performed in any video editor, including the standard iMovie or Windows Video Editor, which you can master in a couple of hours. The Adobe Premiere window with the episode ready for display looks like this:
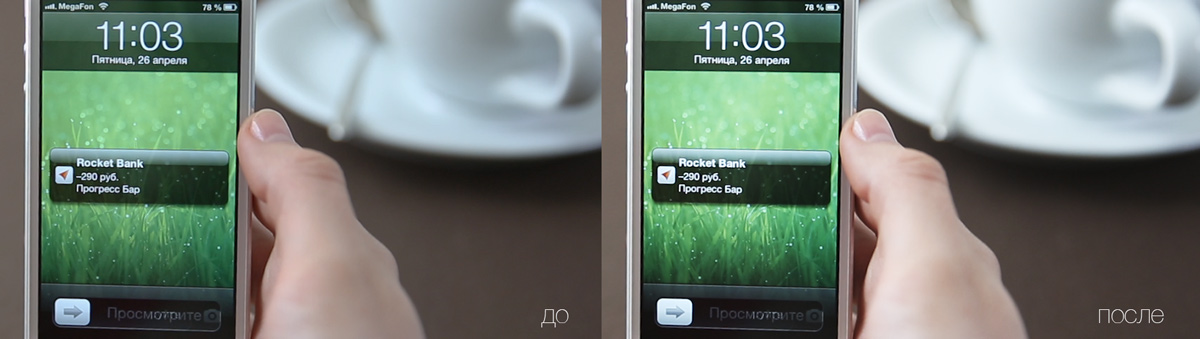
The jitter of the picture was eliminated by the Premiere built-in anti-shark (warp stabilizer). I had to tinker with moire a little longer; there was no ready-made “boxed” solution for it. In the end, I used the Neat Video noise suppressor and a combination of blur effects (Blur) and unsharp masking (Unsharp mask). This did not completely eliminate the moire, but it became less noticeable and, let's say, approached an acceptable level for my taste. By the way, if you decide to shoot the screen of the smartphone on an external camera, you will most likely encounter a moire problem.
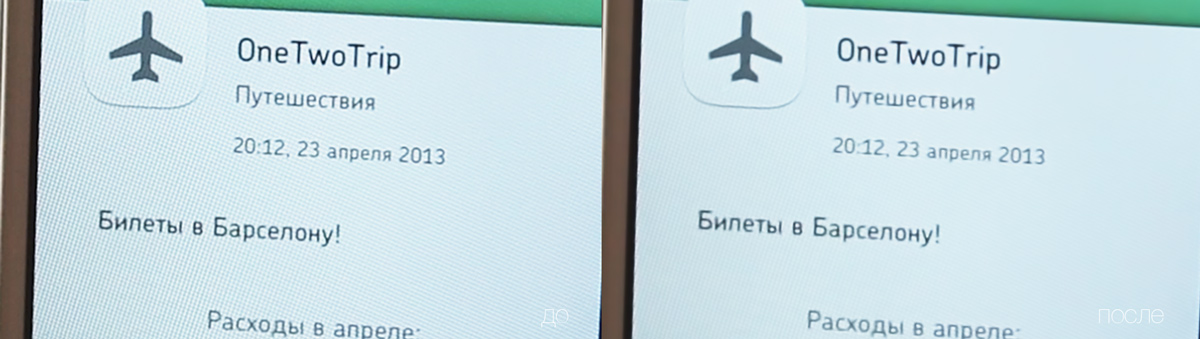
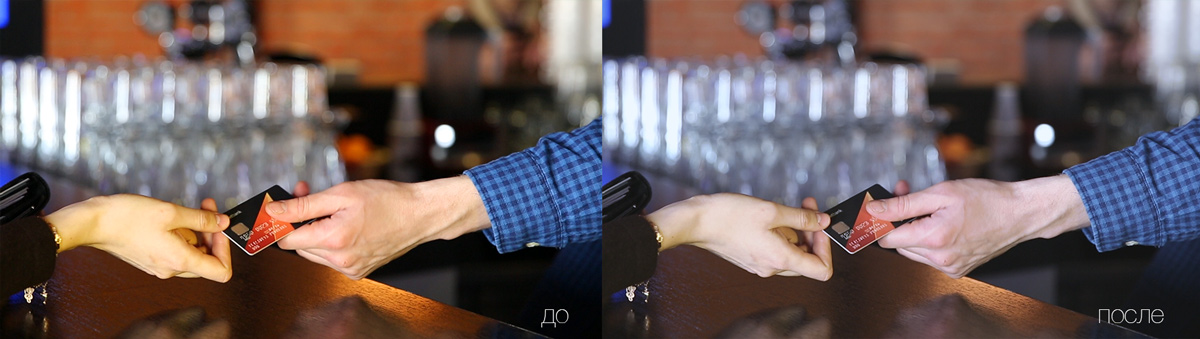
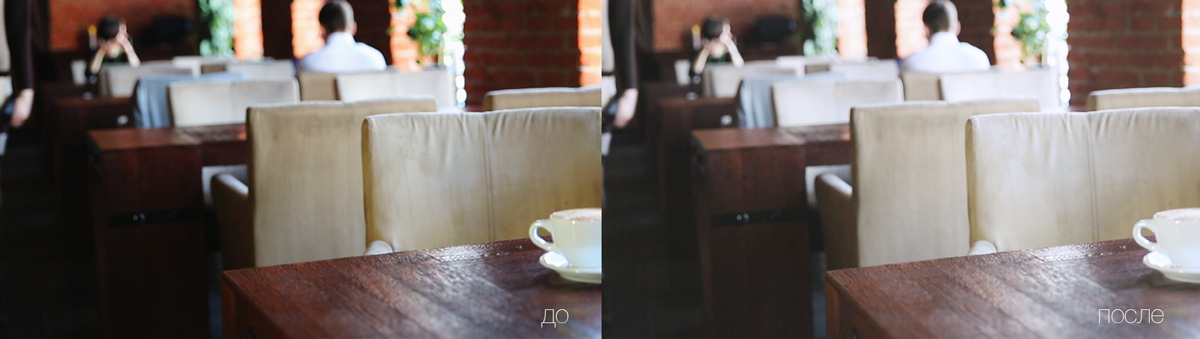
After eliminating defects, you can improve the image using color correction, brightness and contrast settings. In our case, we did not pursue the goals of creating artistic effects, but only “aligned” the episodes in colors and tones. Therefore, the final changes are not the most dramatic, yet there are:
The final file was placed on Vimeo, which, according to rumors, distorts colors less and offers more flexible settings for compression, privacy, etc. To do this, it was necessary to buy a paid account for $ 60 per year, which we did. Before the launch, we showed the video to friends and collected feedback. When they were convinced that the grades were good, they considered the work completed.
Launch
On June 11, the video was presented as part of a new rocketbank.ru. As we said above, on the first day, the video gained more than 1,500 views, collected the most likes on our Facebook page and, in general, caused a positive response. Now, over time, the video consistently gains 100-150 views per day. We spent $ 15 on promotion - to pay for the boost post button on facebook.
Let's sum up
As a result, all the pleasure cost us 2,950 rubles and 3 weeks for everything about everything:
- 900 rubles - equipment rental,
- 1000 rubles - props (cookies and some coffee, subsequently eaten and drunk, respectively, so that they can not be considered),
- 450 rubles ($ 15) - promotion on facebook,
- 600 conditional rubles - depreciation of the computer.
Of course, we had our own camera, lens, tripod, and later - a computer. We did not pay salaries to survey participants. If we had rented all the equipment and computer, and paid the working time to all the participants, this would have resulted in an additional 15-17 thousand rubles. The total amount would be about 20,000 rubles, or $ 650, which is still significantly cheaper than the minimum $ 8,000-10,000 that we called studios.
And yet, saving is not the main thing. The main thing is that the process brought a lot of positive emotions and satisfaction from the result. Difficulties jumped on us here and there - but with them it was only more fun. As with any creative process, working on the video brought many dividends to the whole team - we argued, then generated, discussed and killed ideas, and the survivors modified and turned into a picture. A couple of weeks the main topic of conversation at lunchtime was the plot and video, and all were involved, from support staff to the CEO. Very useful adventure for the young team.
And now the dry residue for those who want to repeat:
- Do not be afraid to try! If it doesn't work, you won't show it to anyone.
- The script is the main thing. As long as you don't have visual effects professionals, the script is your only super-weapon. The biggest mistake is to think that the script is a formality. If you don’t know where to start at all, read something about the theory of cinema and drama, for example, this book.
- Determine the timing in advance, do not shoot long videos, until you are sure that you can keep the viewer's attention. In our opinion, the optimal timing for the first samples is a minute plus minus 20 seconds.
- Videos for the Internet can be shot on almost any modern amateur camera. But be sure to spend a few days before filming with the camera. Take off your cat, people in the subway, cars on the street. Then view the footage on the computer. If you don't like the picture, figure out why.
- Spend some time exploring the role of light in photography and film. This is useful to you at least so that the people in your frames do not look dark. Start with this 10-minute video about the basic location of light sources for shooting people.
- If you like the blurred background in the video (I think it's cool) - figure out what the diaphragm is and learn how to control it on your camera. If you shoot on your iPhone - skip this item.
- If you do not understand anything in the technical side of the case, you can look through the free book.
- Do not rush to rent or even buy complex equipment. You can always do something simple and improvised. Even brains are developing. We took off the screen of the phone against a background of brown cardboard, and for the view from above, we simply clamped a tripod between the table and the nightstand.
- All equipment that you decide to use, take in good condition and check before use.
- Visit the place of shooting in advance, decide on the angles and plans. Look at them through the camera's viewfinder.
- Agree with all participants in advance, no one should hurry anywhere. If you have no experience of shooting, “extra” time will allow you to make more duplicates, they will definitely come in handy.
- Take an assistant for a day of shooting - there will be many tasks for him, from “holding the light” to “going to get some water”.
- During the shooting, take the leadership of yourself - decide for yourself where to stand and what to do. During the break, treat everyone with something tasty and give the goodies goodies. It helps in incredible ways.
- Even my grandmother could deal with basic video editing. Pay attention to simple editors, for example, iMovie or Windows Movie Maker, you can get along with them for a couple of hours, and they will allow you to do the main thing - cut scenes, as you want, make transitions between them and add music. If you are not blundered with the script, then at this stage you will already get a great video that can be put on the network.
- If you have the strength and desire to make the picture more juicy and more interesting - sort it out with tools such as brightness, contrast and curves (curves). Read about the basics of color correction. A good, but thick book on color correction - by reference . For these tasks, it is better to use a slightly more advanced program, for example, Adobe Premiere. If there is no strength to read, but you want beauty - look at the plug-ins like Magic Bullet .
- For psychos and maniacs: if you are ready to go to the end - sort things out with Adobe After Effects. Here you can retouch video and create complex video effects. Without experience there will have to sweat, but you yourself want it. Personally, I think that effects can add a lot to a good video, but they cannot save a bad script and win the battle for sympathy, so if you decide where to spend your time on Adobe After Effects or work on the script, I recommend the script.
We will be happy if you can use our experience and take off even better. Write to us! And, of course, become the clients of our progressive Rocketbank . You can be friends with us, read and even follow - fb , blog , twitter .
P.S. My name is Alex, greetings and questions can be by mail .
Source: https://habr.com/ru/post/186250/
All Articles