Infinite non-repeating textures using Van's mosaic
There are always some problems with textures! It turns out that you can not take any pictures and stick on the model. Then at the junction of the textures, stitches appear, which you are trying to smooth down. It seems that he has already smoothed everything, but an eye, such a prankster, still notices repetitive patterns and destroys the illusion.
You can make the texture bigger so that the repeating pieces are further separated from each other and are not so noticeable. You can even make it absolutely huge, for a couple of hundred thousand pixels, so that it covers the entire scene without any seams or repetitions. Such a technique is called mega-texture. But mega-textures and virtual textures close to them complicate the work with memory, special tools are required to work with them, and in general it is still a young technology.
')
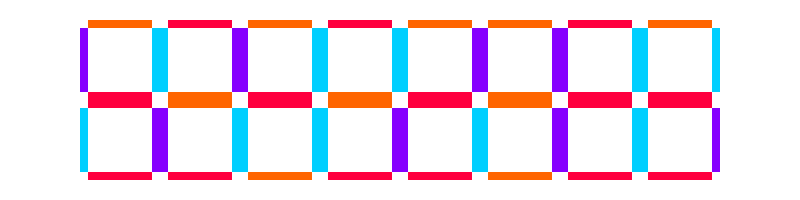
How to be? There is one trick - non-periodic mosaics. They lack the repeatability problem and are fairly simple to implement. One of these mosaics was invented by the Chinese mathematician Wang Hao in 1961. Elements of this mosaic can be represented as rectangles with multi-colored edges. But in order to understand the principle of its work, you must first understand the classic method of filling areas with textures.
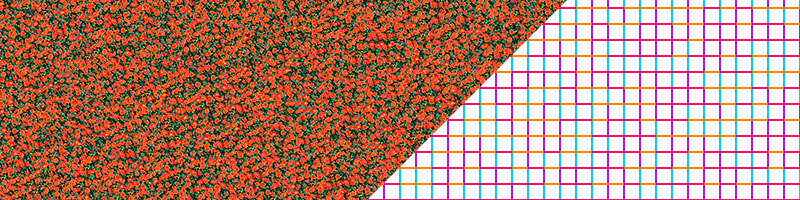
And the classical method is as follows: take the picture you like, we pave a small area with it for the test and immediately see all the bad border places. After that, we alter the picture so that the right side coincides with the left, and the top with the bottom. Done, texture can be used.
In other words, it is necessary to ensure that the horizontal and vertical edges of adjacent textures smoothly flow into each other. It turns out a container for the image, which fits well next to other containers.
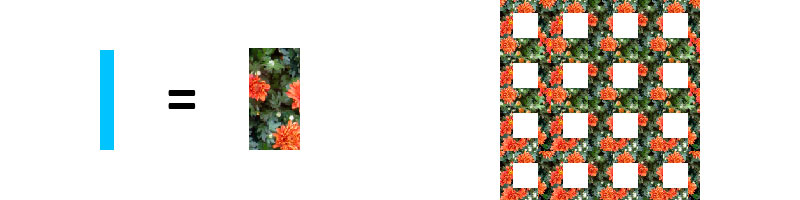
Develop the idea further. Internal filling of containers can be anything. You can make many different variants of the same texture and pave the area with random tiles from the set. But whatever one may say, even with this approach, there remains a repeating mesh from the edges of the tile. Therefore, you need to come up with a way to mix the edges.
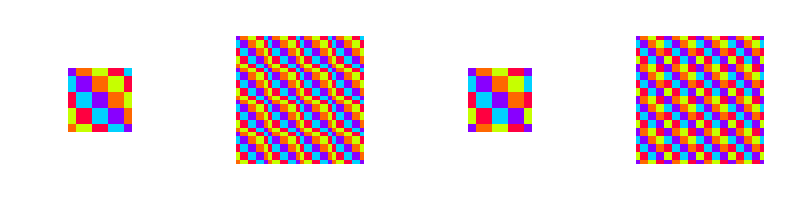
In fact, the right and left sides of one tile do not have to be combined with each other, as long as they are combined with adjacent tiles. You can make several texture variants with different edges and pack them into an atlas. Then, during the laying of the textures, simply take a random tile with a edge that matches the adjacent laid tiles.
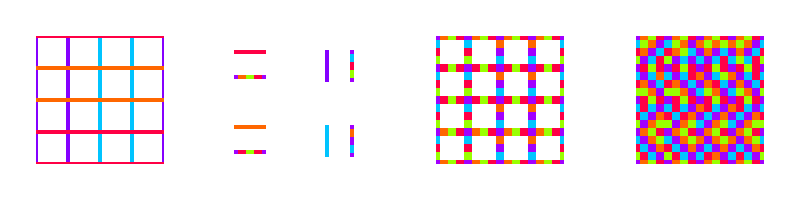
Unfortunately, the size of the atlas for a full set of tiles grows very quickly with the number of facet variations. The calculation is carried out according to the following formula: N 2 * M 2 , where N is the number of horizontal faces, M is the number of vertical faces. For example, for two options on the horizontal and vertical there are sixteen different tiles. If you just need a guaranteed opportunity to continue the mosaic, the formula will be simpler: 2 * N * M.
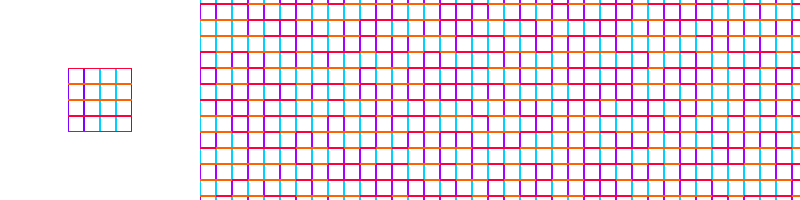
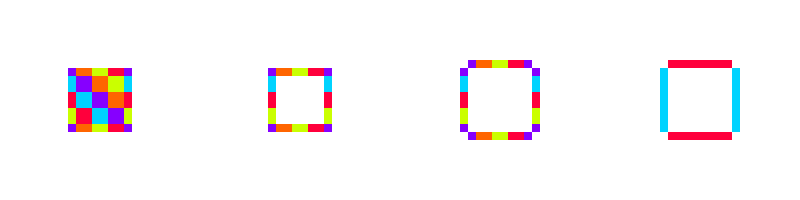
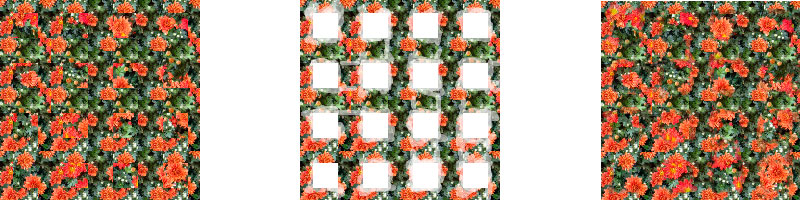
Tiles of satin can pave an arbitrarily large space. One random tile is taken, the second with a suitable face is applied to it, the third is applied to the second tile, and so on until the end of the row. When choosing a tile in the second row, neighbors from the first row are additionally taken into account. The picture above shows an atlas on the left and a mosaic on the right.
How to create an atlas of tiles? You can take one large picture and put a grid of colored faces on top of it. Then select the appropriate stitch for each color and multiply it along the grid. Or go from the reverse: first make a grid, then fill in the empty spaces. Below are links to more detailed instructions.

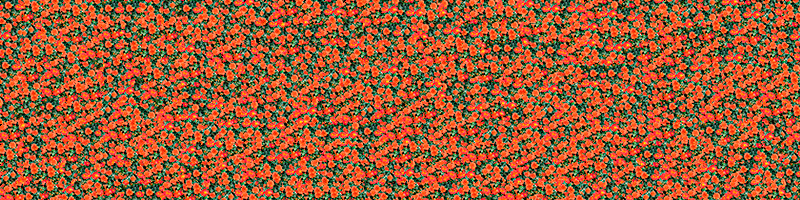
In the illustration above, on the left, the simple repetition of the created atlas, on the right, the mosaic of Van collected from it. The resulting mosaic has no noticeable repetitions, it looks random and fluid.
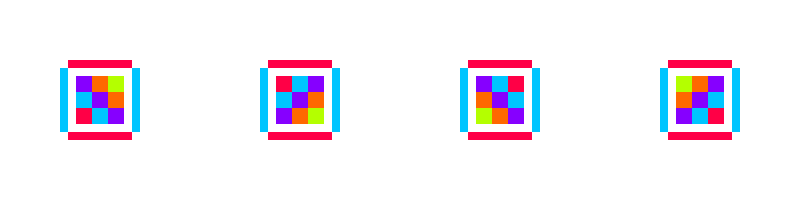
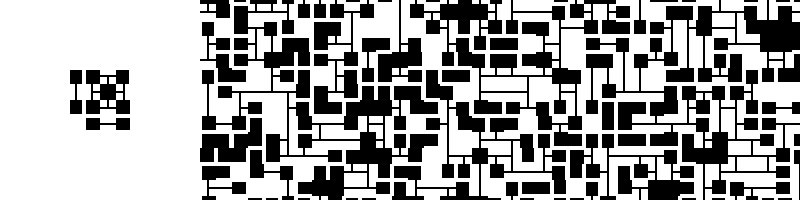
Of course, Van's mosaic is not perfect, it has a problem with the corners of the tiles. Mosaic solves the problem of horizontals and verticals, but there are still diagonals, because of which artifacts may appear at the junction of four tiles. But this mosaic is simple and can be used not only for texturing, but also for procedural generation of floor plans or dungeons.
I sketched a simple C # code for Unity3d for working with Van's mosaic, you can look at it at the links below.
Unity Web Player | Windows | Linux | Mac | Sources on GitHub
Spacebar - new random texture, 1, 2, 3 - select atlas, Esc - exit.
For Linux users: Make the WangTiles file executable using “chmod + x WangTiles” and run.
Useful links on the topic:
Instructions for creating atlases
Procedural dungeon generation
Read more about creating atlases of different sizes.
Semi-automatic atlas generator
At the request of the workers a small addition about creating atlases:
Take the big picture you like, put a grid on top for convenience in Photoshop or wherever.
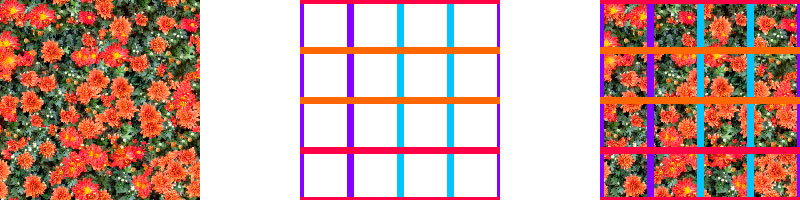
For each color of the grid, you need to select a segment of the image to create a new grid. Simply multiply each segment and put the copies in columns and columns.
The grid initially turns out very curve and with a bunch of ugly seams. We apply all the available photoshop magic and make the seams invisible. In the example below, I just anointed the grid with a little eraser. It turns out the atlas - a new picture that can be cut into pieces that will be combined with each other.
Further, without elementary programming is not enough, you can collect everything by hand, but it will take a lot of time. Use the atlas created in the code, select pieces from it and make a mosaic. Elementary. The hardest thing is to make a beautiful satin, but with textures it is always like that.
Actually, I just retold the instructions from here . Read, everything is well painted there.
Source: https://habr.com/ru/post/185760/
All Articles