Plasmoid in pure QML and JavaScript
On Habré there was not a single post about creating a plasmoid on pure QML using JavaScript. This post is intended to correct this shortcoming.
A bit of theory and history
Plasmoid is a widget of the Plasma shell that appeared in KDE 4. At the stage of the appearance of the first versions of KDE 4, all the plasmoids were written exclusively in C ++, then python support appeared. In C ++ it was, say, not very easy (because of the labor intensity, knowledge of all the basics of the language, etc.), it was already much easier in python. Since KDE is written in C ++ using Qt, it would be preferable to use this same Qt (at least in KDE they think so). When QML appeared, KDE immediately made full support for creating plasmoids in QML + JS + C ++, and now they insist on creating plasmoids exclusively in QML.
Habré already had posts about creating plasmoids in Python and C ++, now it’s time for QML. But this series of posts (I expect to write more than one post) is not just about creating a plasmoid using a bunch of QML + JS + C ++, but about all the pitfalls that a novice widget developer may encounter. The fact is that there is still too little information on QML-plasmoids on techbase.kde.org , in view of this, I constantly led discussions with developers on # kde and # plasma @ irc.freenode.net . By the way, they all help absolutely always and in all cases, without exception, for this they are a big and fat plus in karma.
')
Tools
Generally speaking, any text editor can be used to write a plasmoid, but relatively recently a remarkable plasmate was born . Plasmate is part of the Plasma SDK , it is a mini-IDE (mini, because there are still a lot of bugs, a lot of unrealized features, and in general this is the alpha version, however, it is quite suitable for writing plasmoids) to create everything with Plasma : plasmoids, window switches (alt-tab), kwin effects, plasma themes, etc.
Using Ubuntu as an example, everything is very simple:
sudo apt-get install kde-sdk or even easier:
sudo apt-get install plasmate But for proper installation, you need to install kubuntu-ppa backports , you can read about it here .
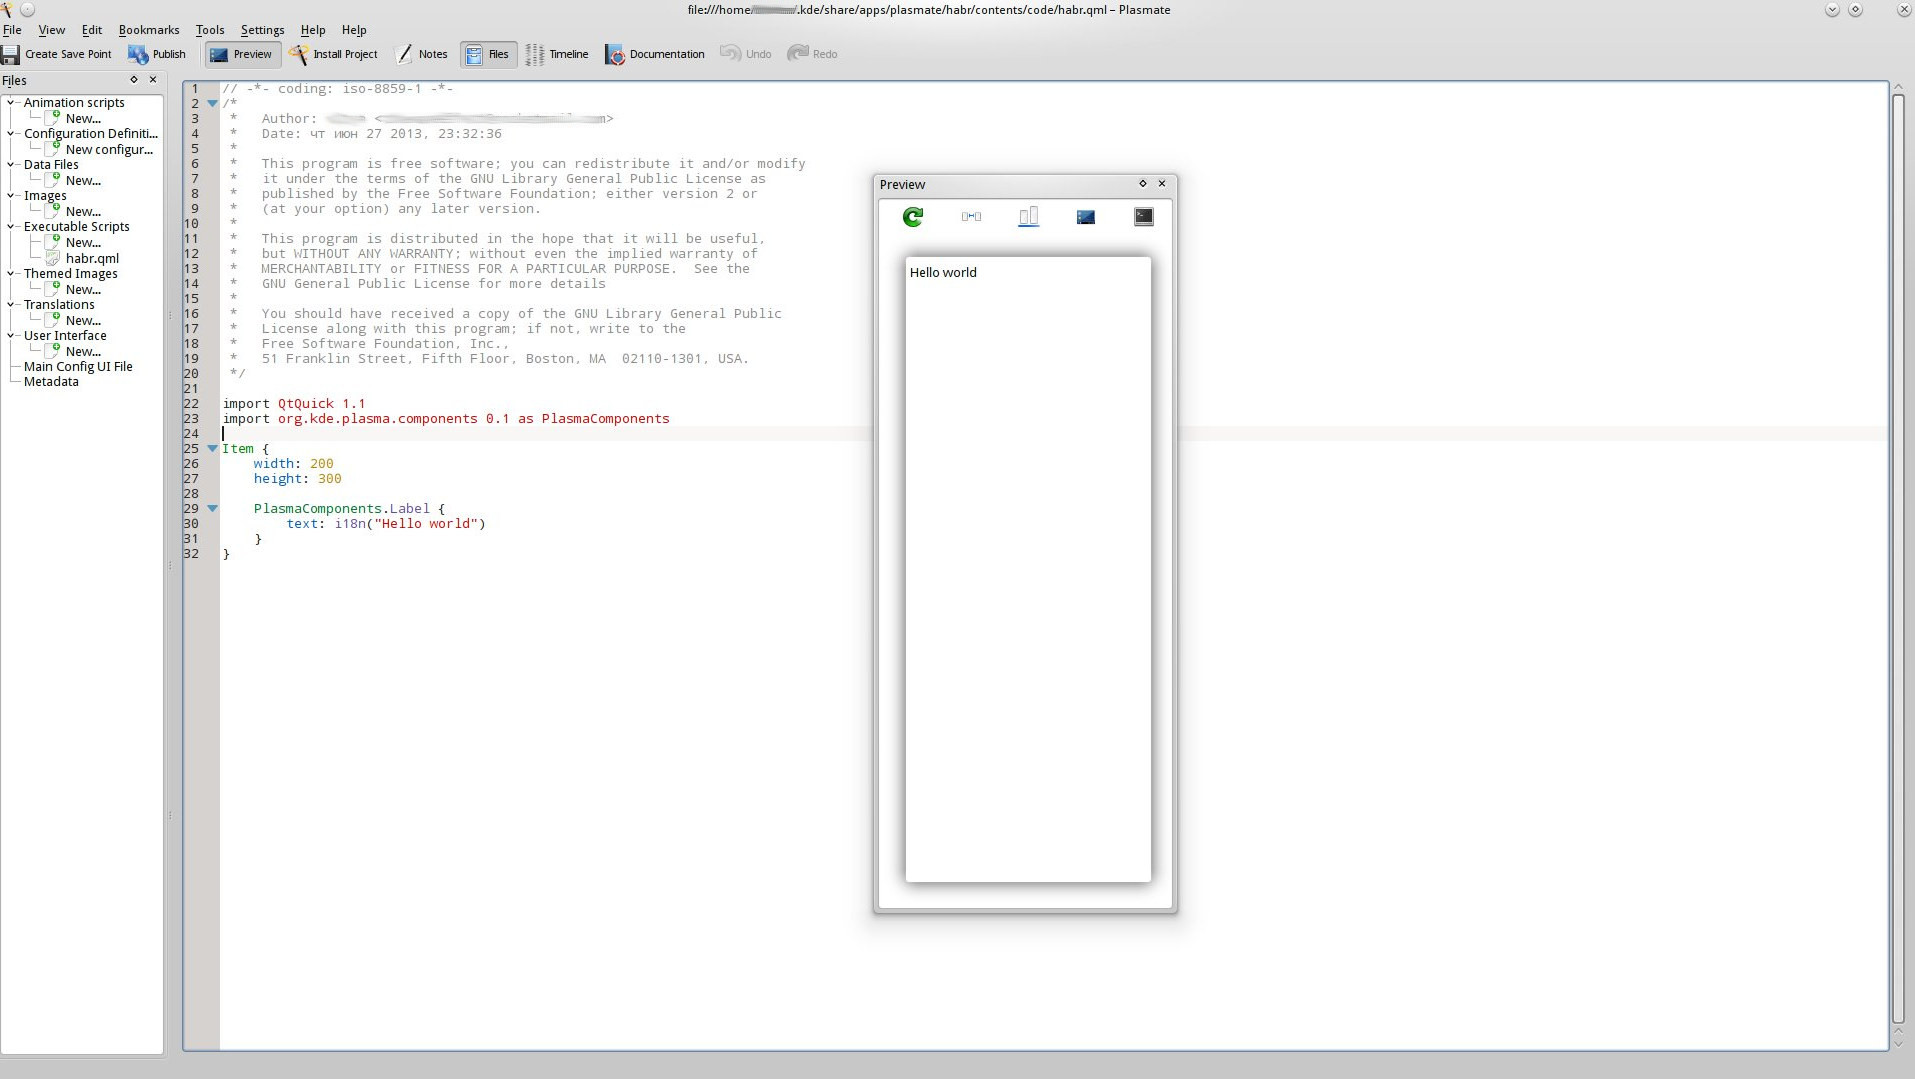
After installation, launch plasmate, click Plasma Widget . We call the future plasmoid - set the value of Addon name , click on the Create button and get to the editor window. The default mode is " Preview ", it is especially convenient if you have two monitors - on one you can arrange a window with a widget, leave the code editor on the other.
So, further the most interesting.
Plasma QML components
At the moment, plasma components are already enough to describe any visual interface, and not only visual, but also interfaces for working with data (for example, DataSource ).
All components can be found at http://api.kde.org , namely here . PlasmaExtraComponents and PlasmaComponents are usually used to build a visual interface, but most often there is one last. Their detailed description can be found there.
When creating a plasmoid in plasmate, the future widget's layout is ready for installation on the desktop. Immediately I want to draw your attention to the workpiece - the necessary imports are already connected to it and even i18n is used, which is very useful for localization. By the way, at the moment QtQuick 1.1 is specified in the workpiece, although you can already have Qt5 with QtQuick 2.0 in the system. If you try to connect it - plasmate will swear because The plasma in the latest KDE (and up to version 5.0) does not have QtQuick 2 support.
So, the simple “Hello world” we already see in the workpiece. But in order to make something more complicated it is necessary to realize something, namely: any information about the system, computer, and everything else in the plasmoid is not available, because he simply does not have access to all of the above. And since QML is a technology that is often tied to C ++, then with plasmoids as well - all data is provided by the so-called DataSource and DataEngine .
DataSource is something like a “data provider” in QML from C ++. For example, we cannot find out the current time in QML, and using C ++ and the corresponding header files completely. In this case, we need to write DataEngine , which will supply this information (time) to all plasmoids that use it as a source ( DataSource ), by the way, plasmoids in this case can be written in any language.
DataEngine is the same C ++ code that sends data to QML. Of course, you need to write it according to the special rules of KDE, but in this post I’ll not go into it, maybe in the following, if anyone is interested. And by the way, DateEngine can also be written not only in C ++.
Next, I will explain with the example of my plasmoid - KFilePlaces (https://bugs.kde.org/show_bug.cgi?id=180139). In fact, he is not ready yet, but I will lay out the alpha version to see what plasmoids are molded from and feel this dough.
Plasmoid creation “Places”
Overview of existing DataEngine
To create a plasmoid showing the "Entry Points", we first need to understand how everything works. Here you need to know two things: if this functionality already exists - most likely in the source code (in this case in the source code of the Dolphin file manager) you can find out how we take the data we need. If it is not there, then you can search for the appropriate DataEngine in the system and figure it out there (believe me, this is very simple). To do this, you can call the Plasma Engine Explorer :
plasmaengineexplorer A small window will come out in which it will be possible, as the name implies, to see all the DataEngine installed on the system. In my case, the required DataEngine is “places”. Immediately after we select it from the list, a tree-like list of objects that this “engine” delivers to the outside will appear. It looks like this to me:
Here, from 0 to 11 are data sources, since DataSources. This array is all entry points. To use this engine in QML you need to write something like this:
PlasmaCore.DataSource { id: placesDataSource engine: "places" interval: 1000 connectedSources: sources } Here sources are all these DataSource from 0 to 11, i.e. array It would be possible to indicate clearly:
PlasmaCore.DataSource { id: placesDataSource engine: "places" interval: 1000 connectedSources: ["0", "2", "11"] } But in my case, you need to handle all the entry points, so leave “sources”.
After creating a data source, you cannot use it immediately; you need to create a model. To do this, there is a " DataModel " object, which simply takes data from the DataSource and from which data can already be output. Creating a DataModel is also very simple:
PlasmaCore.DataModel { id: placesDataModel dataSource: placesDataSource } Sorting and filtering data source items
So, we got the data. But, as you can see, they are not in order, and it is quite possible that we need to sort them out by any sign (variable). In my case, I need to show all non-hidden items (the hidden : false parameter), and sort by the isDevice parameter (device or location). To do this, use the PlasmaCore.SortFilterModel tools:
PlasmaCore.SortFilterModel { id: sortedEntriesDataModel filterRole: "isDevice" filterRegExp: "false" sourceModel: PlasmaCore.SortFilterModel { sourceModel: placesDataModel filterRole: "hidden" filterRegExp: "false" sortRole: "isDevice" sortOrder: "AscendingOrder" } } Here, sortRole is the variable by which sorting will be performed, sortOrder is the order; filterRole is the variable by which filtering will be performed (i.e., all inappropriate elements will be cut off), and filterRegExp is an expression that will be checked for selection. There is one catch here: if you want to filter by some other attribute besides “isDevice”, you will have to wrap this SortFilterModel element in the same way as in the example with the hidden variable.
PlasmaCore.SortFilterModel is an extension of PlasmaCore.DataModel, so they are compatible.
Creating a visual list
To create a list, I first recommend using the ScrollArea component from PlasmaExtras , it is needed for almost everything where the sizes of the child are unknown. It is suitable for reasons such as:
- Flickable container. Content can be scrolled not only by the side scrolling bar, which can be turned off, but also by mouse or touchscreen gestures.
- It is strongly recommended to use wrappers from other components of the Plasma runtime , for example, such as creating an Item / Page , etc. instead of creating a
bicycleyourself. with PlasmaComponents.ScrollBar .
Create:
PlasmaExtras.ScrollArea { id: entriesScrollArea anchors.top: parent.top anchors.left: parent.left anchors.right: parent.right anchors.horizontalCenter: plasmoidItem.horizontalCenter height: 40 * (entriesListView.count + 1) flickableItem: ListView { Here I specifically stopped at ListView to explain: the flickableItem element is a container for any element that can be scrolled / scrolled if it does not fit in the width and / or height of the parent (our ScrollArea) element. This is useful for lists, as they are easy to scroll through and can be expanded.
In order not to clutter up the screen, I deliberately made the creation of the list into a spoiler:
Create a list
PlasmaExtras.ScrollArea { id: entriesScrollArea anchors.top: parent.top anchors.left: parent.left anchors.right: parent.right anchors.horizontalCenter: plasmoidItem.horizontalCenter height: 40 * (entriesListView.count + 1) flickableItem: ListView { id: entriesListView highlightRangeMode: ListView.NoHighlightRange orientation: ListView.Vertical focus: true clip: true model: sortedEntriesDataModel delegate: listViewItemTemplate header: PlasmaComponents.Switch { id: entriesHeaderSwitch anchors.top: parent.top anchors.left: parent.left anchors.right: devicesHeaderLabel.left text: i18n("Places") checked: true } highlight: Rectangle { id: highlightListViewItem anchors.left: parent.left color: "lightgrey"; radius: 6; opacity: 0.6 } } } I don’t see any reason to explain here, because The list is a regular ListView element of QML, starting with QtQuick 1.0 .
Go ahead.
Creating a delegate for list items
It would seem, why bother to pay attention to such a simple step at all, but I spent a long time with him. The fact is that the container element for a delagate must be PlasmaComponents.ListItem . If you just wrap items in Item or just a container (not ListItem) - all items are mixed into a heap. Alas, nowhere about this nuance was written.
We try!
If you did everything right, we will have something like this:
Code
import QtQuick 1.1 import org.kde.locale 0.1 import org.kde.plasma.components 0.1 as PlasmaComponents import org.kde.plasma.core 0.1 as PlasmaCore import org.kde.plasma.extras 0.1 as PlasmaExtras Item { width: 200 height: 300 PlasmaCore.DataSource { id: placesDataSource engine: "places" interval: 1000 connectedSources: sources } PlasmaCore.DataModel { id: placesDataModel dataSource: placesDataSource } PlasmaCore.SortFilterModel { id: sortedEntriesDataModel filterRole: "isDevice" filterRegExp: "false" sourceModel: PlasmaCore.SortFilterModel { sourceModel: placesDataModel filterRole: "hidden" filterRegExp: "false" sortRole: "isDevice" sortOrder: "AscendingOrder" } } Component { id: listViewItemTemplate PlasmaComponents.ListItem { id: placeListItem anchors.left: plasmoidItem.left anchors.right: plasmoidItem.right x: 20 height: 40 Item { id: listItemObject anchors.left: plasmoidItem.left anchors.right: plasmoidItem.right PlasmaCore.IconItem { id: placeIconItem anchors.left: parent.left anchors.leftMargin: 5 source: icon } PlasmaComponents.Label { id: placeNameLabel anchors.left: placeIconItem.right anchors.leftMargin: 10 text: name font.pointSize: 12 } PlasmaComponents.ProgressBar { id: placeFreeSizeProgressBar anchors.top: placeNameLabel.bottom anchors.left: placeNameLabel.left width: placeNameLabel.width height: 10 value: kBUsed / kBSize opacity: 0 } } } } PlasmaExtras.ScrollArea { id: entriesScrollArea anchors.top: parent.top anchors.left: parent.left anchors.right: parent.right anchors.horizontalCenter: plasmoidItem.horizontalCenter height: 40 * (entriesListView.count + 1) flickableItem: ListView { id: entriesListView highlightRangeMode: ListView.NoHighlightRange orientation: ListView.Vertical focus: true clip: true model: sortedEntriesDataModel delegate: listViewItemTemplate header: PlasmaComponents.Switch { id: entriesHeaderSwitch anchors.top: parent.top anchors.left: parent.left anchors.right: devicesHeaderLabel.left text: i18n("Places") checked: true } highlight: Rectangle { id: highlightListViewItem anchors.left: parent.left color: "lightgrey"; radius: 6; opacity: 0.6 } } } } Or externally like this (in my case):

The code can be copied and pasted into plasmate .
Unfortunately, the post was too extensive, so to be continued!
Help
# plasma , # kde @ irc.freenode.net
PS I can not understand the bug with the attribute “align: 'center'” in - after it, the text is also centered and does not go back after \ <br clear= theleft \ \>, as a result of which my post looks crooked.
Source: https://habr.com/ru/post/185266/
All Articles