Work with sound in Adobe Premiere Pro CS 6

Good day! Today I will tell you how to work correctly with sound in the Premiere Pro video editor. Lately, I often come across the fact that I see how novice editors are dismissive of working with sound, explaining that the main thing is all the same video, and in general they are not sound engineers to deal with such things. And with further communication, it turns out that more than half of novice editors simply do not know the tools for working with sound.
So, in the program Premiere Pro there are two ways to work with sound, and now I will talk about these methods and in which cases which method is better to use. To start, look at my timeline [Timeline] here you can see a rather simple sound mix consisting of three sound tracks.
')

When working with sound, you can have three types of audio tracks, these are stereo tracks, mono tracks, or a track with 5.1 circular sound, but because few cameras record sound in our time in 5.1 format and such material is unlikely to get into your work often . So today we will not talk about this type of tracks.
As I wrote above, you have two different ways to apply effects to your audio clips. The first way, exactly the same as you work with the video. You can take a separate sound clip go to the Effects [Effects] section to open the Audio Effects folder.
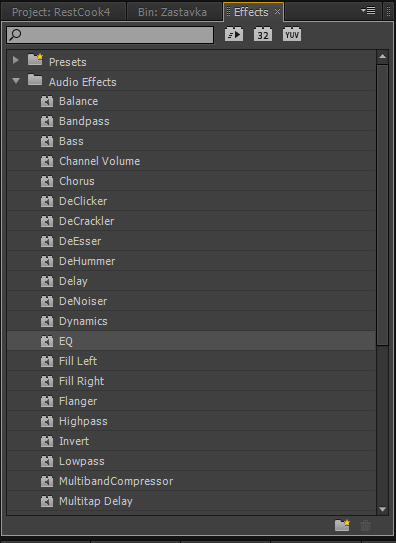
Suppose I chose one of these effects and want to apply it to an audio clip, then all I need to do is take the effect I need and drag it to the desired segment of audio. The effect is controlled in the Effects Control window.

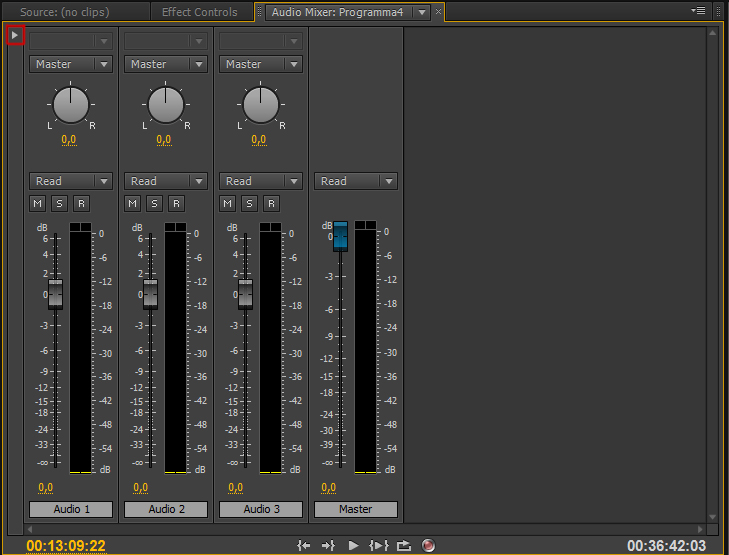
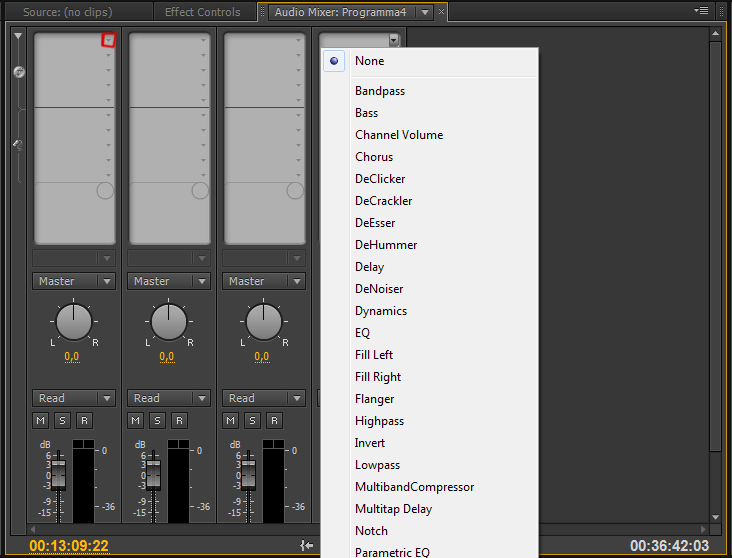
If I want to apply one effect to all the different audio clips on this track, then there is another way to do it - the audio mixer [Audio mixer] now you don’t see any effects or window to add effects to it. But if you click on this little triangle, you will see a special panel with which you can control for each of your tracks.
These are the two ways to work with audio in Premiere Pro. In the second method, we will focus in more detail.
Suppose I need to apply the equalizer effect [EQ] to the second audio track, to do this, simply click on the triangle above the desired track and the effect selection menu will appear, select EQ and now it has already been applied to the entire track of interest if we double-click on the effect that interests us then a separate window will open where you can select the necessary Equalizer settings, I would like to note that all changes will work in real time, that is, you can play the sound and apply any changes to it at the same time.

Now let's say I need to apply some effect to the common output file. As soon as we have achieved that all our levels are fully balanced we go to the audio mixer (Audio Mixer) at the very edge of the window we can see the track called Master and if we apply any effect to it, it will be applied directly to all the audio files in this sequence [ Sequence].
That's all for today. In the next tutorial, we will examine in detail all the sound effects of Premiere Pro.
P / S Just in case someone in the pictures may be that it was not clear I recorded a short video
Source: https://habr.com/ru/post/183844/
All Articles