Create a personal cloud for 3 TB
I would like to share one way to create a personal cloud on the basis of a three-byte WD MyBook Live. No, I will not even mention about wd2go and their “semi-cloud”, which in essence are only access to the NAS itself through WD services with the help of rather clumsy Java applets. This article will focus on the “honest” cloud running on MBL using its ownCloud.
This solution is suitable for those who dream of a personal analogue of Dropbox, the files in which are stored not “somewhere there”, but on a specific physical medium, and are limited only by its volume, without having to pay monthly for this volume (ignoring the subscription fee for Internet and cost of electricity).
Most of the solutions to this problem require a lot of digging on the Internet and rely on a good knowledge of Linux-systems. In this post I will try to give the most complete and adequate HOW-TO in Russian, which I myself have not found on the Internet. So much had to be done by trial and error at your own peril and risk. The implementation of this solution does not require any fundamental knowledge of Linux, and I will try to describe everything in the most accessible way, in steps.
If you are interested in what came of it - welcome under cat.
First of all, I would like to say that all the manipulations over your MyBook Live you do only at your own responsibility. Theoretically, with the wrong sequence of actions, it is possible to make it not workable, and although in most cases the box can be resurrected and the data saved , still try to backup the contents to another medium. Or, if there is such an opportunity, it is better to work on a clean carrier.
The current WD MyBook Live line is a 800 MHz processor, 256 MB of RAM, and a nearly full-fledged version of Debian Linux as firmware, though this is no longer supported by Lenny with a mix of WD firmware files, and even for PPC, so it’s time to pack I still have to, but apt-get, wget and dpkg are the most common here, which means working with repositories is possible to the full.
On Habré there was already an article about ownCloud , so I’ll not dwell on what it is and how it is installed in the general case, I’ll go straight to the specifics for MBL. First of all, ownCloud is a server application that works as close as possible to Dropbox services, Google Drive and the like, it is only hosted on your hardware, which is completely free of charge, and MBL is not the worst option for hosting such a solution.
')
First of all, we will need to enable access to our MBL over SSH for further work. This is done quite simply - by going to
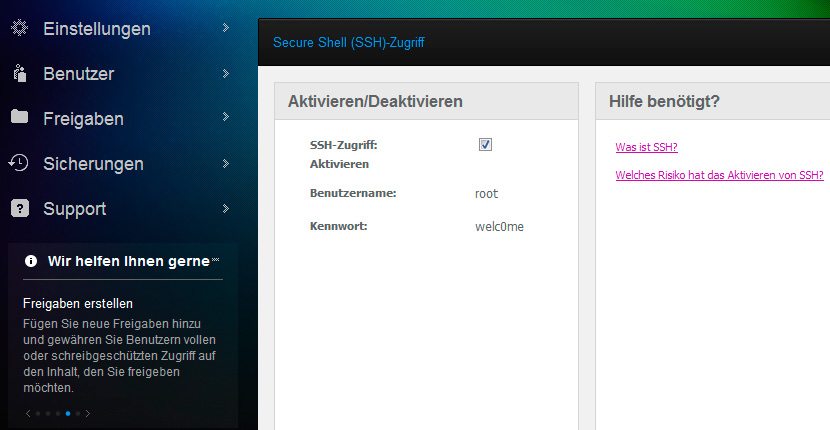
As you can see, the default password for access is welc0me .
Then you will only have to log in via SSH through the terminal (PuTTY can be used on a windows machine):
I suggest first of all, also change the password to a stronger one (especially if you continue to open access via the Internet), with the passwd command, after which you will need to enter the new password twice.
Then, we need to prepare a platform for installing third-party software. And the key here will be the removal of wd-nas packages, so that apt-get does not swear in the future for every trifle. Strangely enough, this information is practically nowhere, except for the official source :
This will eliminate firmware dependent packages.
As a next step, we will need to add two links to the list of available repositories. This is most conveniently done in the nano editor, with the command:
And here is what you need to add:
Maybe someone will have questions, why add squeeze repositories if the version of the WD MBL itself is lenny? I will answer - simply because lenny since February 2012 is no longer supported, and most of the necessary packages for it have become outdated long ago, which can lead to intractable dependencies (I had to roll back to factory settings after the first unsuccessful attempt). There are a lot of tips on the Internet on what other repositories you can add, including test branches, but I advise you not to get too carried away, because without knowing what you are doing, you can turn this smart box into a lifeless brick.
After adding the necessary lines and saving the list of repositories, you need to try to update with the command:
Do not forget that ownCloud is written in PHP, so for its full work we will need to install a number of necessary packages, including the current version of PHP5 and several necessary modules:
The installer may swear on untrusted packages. This is because the signed keys for the Debian repositories are no longer relevant. There is a solution to this problem, however, you can ignore the warning simply by pressing “Y” a couple of times. Also, during the installation process, conflicts with different versions of the packages are possible, some of which were preinstalled on the system. By default, preference will be given to already installed packages (this is Debian), so it is quite possible to agree with this decision (although nothing bad should happen even if you replace these packages with new ones).
If everything went well, it's time to go directly to installing your ownCloud. This is a fairly simple part. You need to go to the directory / www / and download the web installer there with wget. Also, make sure that the appropriate group write permissions are set:
Next, you need to go to the browser address
If at the end of the installation, you will see
Although I would not do this at the moment, because a little later we will restart it anyway.
After we have decided on the installation directory, we’ll only have to do a bit of file access from outside for http and SSL https, and also return group rights for / www / . For this, you will need to register the following lines:
between similar modules
Now you can restart Apache and return access rights to / www / :
Technically, the data of the newly installed owncloud is on the hard disk, but logically it belongs to the MBL system partition, which has a limit of 2 GB. In order to be able to use all the available volume under owncloud (honestly, I don’t imagine who and why this may be needed and how many years all 3TB clogged with data will synchronize), and not be limited to the system partition, we will make a symbolic link to the main DataVolume section, having stopped the Apache for the time of our manipulations:
I strongly advise not to link to the Public folder for security reasons.
In fact, we will only have to restart Apache and the main goal will be achieved:
Now at
Looks like a win.
In truth, this is far from a victory, but only halfway, because the address
Oddly enough, this problem has a fairly simple solution. No, do not even think that we will look towards the inconvenient wd2go service (although there were a couple of ideas on how to use it as well) - on the contrary, we will work again with our head and use such a useful thing as Dynamic DNS.
For this we need:
For the first item, even any free third-level domains are fine (google with a bang), but it is better to register your own domain, of course. There are quite cheap domain zones, for example, a domain in the .pw zone (Palau Islands, although some registrars promote it as a Professional Web ) will cost a little less than 7 € per year. As an option - look at the shares on GoDaddy (there often you can grab some tidbit for just 5 bucks).
As a DynDNS server, I personally chose a completely free from freedns.afraid.org , because I didn’t want to pay for unused chips from dyn.com/dns even the minimum subscriber per year. The most minimal functionality is perfect for our task. I will not describe in detail the procedure for registering a domain and linking it to the DynDNS service within this article. Simply register on the service and on the page freedns.afraid.org/domain to find the item “Add A Domain into FreeDNS”, and then add the following ns-server as your registrar's DNS:
You should not be afraid of the red status of Broken - if everything is normal, it will disappear itself within 24 hours.
Next, we need to select and install any Dynamic DNS client on MyBookLive. In fact, this is not an easy task, because such solutions are really a huge variety in Perl, Python, PHP, there are also separate demons for * nix of all kinds and kinds. Before finding a suitable solution, I had to try quite a lot of options, but everywhere something didn’t suit - setting in one place, then stability doesn’t suit, incompatible with the selected server, version of the protocol, or too slow. As a result, I decided to stop at the smallest, simplest and simplest client inadyn . Of the benefits - fast operation, very small size, compatibility with the selected server, quite flexible configuration, support for crones, starting in daemon mode, and updating IP at a specified interval. Of the minuses except the absence of any GUI, and even that is a minus difficult to call for such a console utility.
It is installed simply by the command:
It is also important to note that inadyn may require curl to work if it has not been installed. It is solved like this:
Next, we need to login under your account at freedns.afraid.org/dynamic and select the Direct URL option in front of the domain that we linked earlier. Please note that the browser line will have something like this:
Are we interested in everything that stands to the right of ? . This is a hash valid only for your domain (the values in the example have changed). Copy it somewhere, we will need it soon.
Now create the inadyn configuration file with the command:
In which we insert the necessary settings and save:
Now we need to add inadyn to cron as an automatic reboot event, so that each time MyBookLive restarts, it will start automatically. For this:
Add a line:
To check the functionality of the program after our manipulations, you can reload the MBL command
Then wait 3-5 minutes until it reboots and starts, then check the processes:
We will only have to check the availability of our Maybook by the domain name with the ping command:
If everything went well, and the sent packets reach, you can safely go to
When setting up your owncloud desktop and mobile clients, you need to specify the entire line as the address
PS during the writing of the article, by trial and error, I had to do a full software reset to the factory settings once and disassemble the device twice to resurrect (according to the instructions from here ), so I beg you to take all the warnings seriously, with an understanding of your own responsibility and possibility spoil the piece of iron and lose information. Also, do not forget that first of all, MyBookLive is just a budget nas, and you should not use it as a full-fledged server, there are much more suitable solutions for this.
PPS about any errors or inaccuracies, please write in personal messages. I personally find the topic very interesting, and I do not have much fundamental knowledge in the administration of Linux, so the comments can be very useful. It is possible that the article will be supplemented, expanded, and if it is in demand, it is possible that it will get the second part (there are a few more ideas on how to upgrade MyBookLive)
Q: Do I need to install apache? In the article about this is not a word.
Answer: No, apache on MyBookLive is installed by default. When you first connect, the configuration takes place via the web interface at:
Question: On which version of the firmware was the experiment conducted?
Answer: Everything was done at 02.42.03-027, but in theory, it should work with earlier ones. Unfortunately, there is no information on various firmware.
Question: Can the Feature Pack Manager influence in any way what is described in the article?
Answer: At its core, fpkmgr is simply some kind of advanced package manager that installs the set of packages that the user chooses. On my MBL, Transmission from fpkmgr and owncloud worked quietly in parallel. Perhaps there are some packages installed with fpkmgr that may conflict, but I do not yet have information about this. If someone came across and wrote about it, I will include a comment here.
Question: After the actions described in the article, will the owncloud shut off when the MBL goes to sleep?
Answer: The most interesting thing is that judging by the behavior of the LED, it did go to sleep until I turned off the power saving. In fact, I worked with some delay to “wake up” and show the contents of my owncloud when entering from the browser, although I did not study this aspect technically. With power off, everything works fine.
Question: I did everything according to the instructions, but when I try to access it, it says that it is impossible to connect to the server. What to do?
Answer: For proper work of owncloud, it is necessary to forward ports 80 and 443 on the router. How to do this will prompt Google when requesting port-forwarding.
Materials:
This solution is suitable for those who dream of a personal analogue of Dropbox, the files in which are stored not “somewhere there”, but on a specific physical medium, and are limited only by its volume, without having to pay monthly for this volume (ignoring the subscription fee for Internet and cost of electricity).
Most of the solutions to this problem require a lot of digging on the Internet and rely on a good knowledge of Linux-systems. In this post I will try to give the most complete and adequate HOW-TO in Russian, which I myself have not found on the Internet. So much had to be done by trial and error at your own peril and risk. The implementation of this solution does not require any fundamental knowledge of Linux, and I will try to describe everything in the most accessible way, in steps.
If you are interested in what came of it - welcome under cat.
First of all, I would like to say that all the manipulations over your MyBook Live you do only at your own responsibility. Theoretically, with the wrong sequence of actions, it is possible to make it not workable, and although in most cases the box can be resurrected and the data saved , still try to backup the contents to another medium. Or, if there is such an opportunity, it is better to work on a clean carrier.
The current WD MyBook Live line is a 800 MHz processor, 256 MB of RAM, and a nearly full-fledged version of Debian Linux as firmware, though this is no longer supported by Lenny with a mix of WD firmware files, and even for PPC, so it’s time to pack I still have to, but apt-get, wget and dpkg are the most common here, which means working with repositories is possible to the full.
On Habré there was already an article about ownCloud , so I’ll not dwell on what it is and how it is installed in the general case, I’ll go straight to the specifics for MBL. First of all, ownCloud is a server application that works as close as possible to Dropbox services, Google Drive and the like, it is only hosted on your hardware, which is completely free of charge, and MBL is not the worst option for hosting such a solution.
')
First of all, we will need to enable access to our MBL over SSH for further work. This is done quite simply - by going to
mybooklive/UI/ssh mybooklive/UI/ssh and mybooklive/UI/ssh the SSH protocol:As you can see, the default password for access is welc0me .
Then you will only have to log in via SSH through the terminal (PuTTY can be used on a windows machine):
ssh root@192.168.XX I suggest first of all, also change the password to a stronger one (especially if you continue to open access via the Internet), with the passwd command, after which you will need to enter the new password twice.
IMPORTANT!
In no case do not try to upgrade the distribution kit to the major version, and it is better to forget about the existence of the full-upgrade, safe-upgrade or any other upgrade commands, this inevitably leads to the fact that you can no longer load the device. I had to pay for my curiosity by manually disassembling the device and restoring it through anbrik. Nothing fatal, but extremely unpleasant and takes a lot of time.
Also, I advise you to carefully monitor the packages that you install or delete. So you can, at best, take away a lot of unnecessary garbage, and at worst, when removing any unnecessary package along with dependencies, you can bang something vital. So, for example, if you manage to bang ssh, then the only option to bring the box back to life will also be through parsing and anbrik clean.
And lastly, what you shouldn’t do at all is to touch udev , even updating it is dangerous, in this case you risk getting a brick that cannot be restored instead of My Book Live. It is best to stay away from sin, to forbid it to be updated with the command:
This will freeze the package, thereby preventing the possibility of updating it.
Also, I advise you to carefully monitor the packages that you install or delete. So you can, at best, take away a lot of unnecessary garbage, and at worst, when removing any unnecessary package along with dependencies, you can bang something vital. So, for example, if you manage to bang ssh, then the only option to bring the box back to life will also be through parsing and anbrik clean.
And lastly, what you shouldn’t do at all is to touch udev , even updating it is dangerous, in this case you risk getting a brick that cannot be restored instead of My Book Live. It is best to stay away from sin, to forbid it to be updated with the command:
aptitude hold udev This will freeze the package, thereby preventing the possibility of updating it.
Then, we need to prepare a platform for installing third-party software. And the key here will be the removal of wd-nas packages, so that apt-get does not swear in the future for every trifle. Strangely enough, this information is practically nowhere, except for the official source :
rm -f /var/lib/dpkg/info/wd-nas.* This will eliminate firmware dependent packages.
As a next step, we will need to add two links to the list of available repositories. This is most conveniently done in the nano editor, with the command:
nano /etc/apt/sources.list And here is what you need to add:
deb http://ftp.us.debian.org/debian/ squeeze main deb-src http://ftp.us.debian.org/debian/ squeeze main Maybe someone will have questions, why add squeeze repositories if the version of the WD MBL itself is lenny? I will answer - simply because lenny since February 2012 is no longer supported, and most of the necessary packages for it have become outdated long ago, which can lead to intractable dependencies (I had to roll back to factory settings after the first unsuccessful attempt). There are a lot of tips on the Internet on what other repositories you can add, including test branches, but I advise you not to get too carried away, because without knowing what you are doing, you can turn this smart box into a lifeless brick.
In order to avoid confusion, I cite the contents of my sources.list, with which everything works
After adding the necessary lines and saving the list of repositories, you need to try to update with the command:
apt-get update Do not forget that ownCloud is written in PHP, so for its full work we will need to install a number of necessary packages, including the current version of PHP5 and several necessary modules:
apt-get install php5 php5-gd php-xml-parser php5-intl zlib1g The installer may swear on untrusted packages. This is because the signed keys for the Debian repositories are no longer relevant. There is a solution to this problem, however, you can ignore the warning simply by pressing “Y” a couple of times. Also, during the installation process, conflicts with different versions of the packages are possible, some of which were preinstalled on the system. By default, preference will be given to already installed packages (this is Debian), so it is quite possible to agree with this decision (although nothing bad should happen even if you replace these packages with new ones).
If everything went well, it's time to go directly to installing your ownCloud. This is a fairly simple part. You need to go to the directory / www / and download the web installer there with wget. Also, make sure that the appropriate group write permissions are set:
cd /var/www/ wget https://download.owncloud.com/download/community/setup-owncloud.php --no-check-certificate chmod 755 setup-owncloud.php chgrp www-data /var/www chmod g+w /var/www Next, you need to go to the browser address
mybooklive/setup-owncloud.php mybooklive/setup-owncloud.php to continue the installation. You can install ownCloud in any directory, but in order not to get confused in the future, I advise you to put it in the directory / owncloud / with the same name.If at the end of the installation, you will see
a similar picture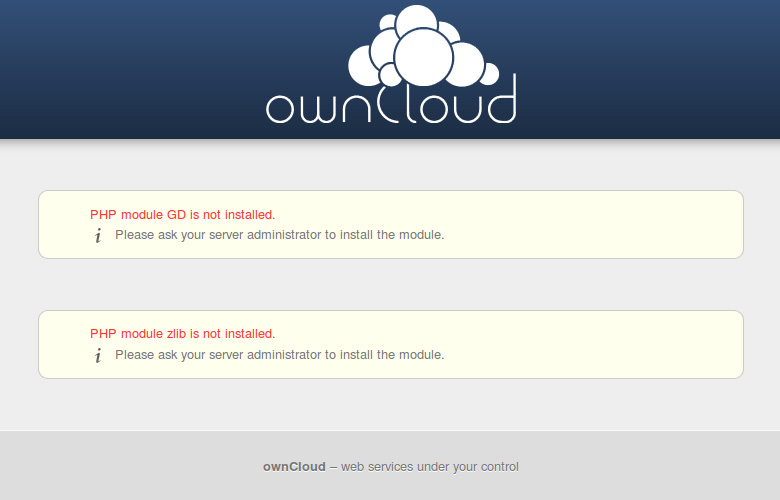
don't be scared. We installed all the required modules at the last step, but in order for them to work, you just need to restart the apache web server: /etc/init.d/apache2 restart Although I would not do this at the moment, because a little later we will restart it anyway.
After we have decided on the installation directory, we’ll only have to do a bit of file access from outside for http and SSL https, and also return group rights for / www / . For this, you will need to register the following lines:
<Directory /var/www/owncloud/> AllowOverride All Options +FollowSymLinks </Directory> <Directory /var/www/owncloud/data> Order deny,allow Deny from all </Directory> between similar modules
... in the following files: nano /etc/apache2/sites-enabled/000-wdnas nano /etc/apache2/sites-enabled/000-wdnas-ssl Now you can restart Apache and return access rights to / www / :
/etc/init.d/apache2 restart chmod gw /var/www Technically, the data of the newly installed owncloud is on the hard disk, but logically it belongs to the MBL system partition, which has a limit of 2 GB. In order to be able to use all the available volume under owncloud (honestly, I don’t imagine who and why this may be needed and how many years all 3TB clogged with data will synchronize), and not be limited to the system partition, we will make a symbolic link to the main DataVolume section, having stopped the Apache for the time of our manipulations:
/etc/init.d/apache2 stop mv /var/www/owncloud/data /DataVolume/owncloud_data chgrp www-data /DataVolume/owncloud_data chmod 770 /DataVolume/owncloud_data ln -s /DataVolume/owncloud_data /var/www/owncloud/data I strongly advise not to link to the Public folder for security reasons.
In fact, we will only have to restart Apache and the main goal will be achieved:
/etc/init.d/apache2 start Now at
mybooklive/owncloud mybooklive/owncloud has its own cloud in which you can keep and synchronize a huge number of documents that can be accessed from Win, Mac, Linux, Android and even iOS using native clients for each of the axes simply by setting up the client to synchronize with the above address.Looks like a win.
But...
In truth, this is far from a victory, but only halfway, because the address
mybooklive/owncloud mybooklive/owncloud is local, and our cloud will work only within the home network, so there will be little use for it. But what can you do to use your ownCloud from anywhere? Of course, the happy owners of static IP will say that you just need to replace the “mybooklive” in the address with the IP of the device, having previously forwarded the necessary ports through the router, and they will be right. But not everyone has this luxury, and the vast majority of users have the most usual dynamic IP, which change constantly, so that each time the device will have a new address.Oddly enough, this problem has a fairly simple solution. No, do not even think that we will look towards the inconvenient wd2go service (although there were a couple of ideas on how to use it as well) - on the contrary, we will work again with our head and use such a useful thing as Dynamic DNS.
For this we need:
- Register a domain.
- Register with any service that provides DynDNS.
- Install DynDNS client on our MyBookLive
For the first item, even any free third-level domains are fine (google with a bang), but it is better to register your own domain, of course. There are quite cheap domain zones, for example, a domain in the .pw zone (Palau Islands, although some registrars promote it as a Professional Web ) will cost a little less than 7 € per year. As an option - look at the shares on GoDaddy (there often you can grab some tidbit for just 5 bucks).
As a DynDNS server, I personally chose a completely free from freedns.afraid.org , because I didn’t want to pay for unused chips from dyn.com/dns even the minimum subscriber per year. The most minimal functionality is perfect for our task. I will not describe in detail the procedure for registering a domain and linking it to the DynDNS service within this article. Simply register on the service and on the page freedns.afraid.org/domain to find the item “Add A Domain into FreeDNS”, and then add the following ns-server as your registrar's DNS:
NS1.AFRAID.ORG NS2.AFRAID.ORG NS3.AFRAID.ORG NS4.AFRAID.ORG You should not be afraid of the red status of Broken - if everything is normal, it will disappear itself within 24 hours.
Next, we need to select and install any Dynamic DNS client on MyBookLive. In fact, this is not an easy task, because such solutions are really a huge variety in Perl, Python, PHP, there are also separate demons for * nix of all kinds and kinds. Before finding a suitable solution, I had to try quite a lot of options, but everywhere something didn’t suit - setting in one place, then stability doesn’t suit, incompatible with the selected server, version of the protocol, or too slow. As a result, I decided to stop at the smallest, simplest and simplest client inadyn . Of the benefits - fast operation, very small size, compatibility with the selected server, quite flexible configuration, support for crones, starting in daemon mode, and updating IP at a specified interval. Of the minuses except the absence of any GUI, and even that is a minus difficult to call for such a console utility.
It is installed simply by the command:
apt-get install inadyn It is also important to note that inadyn may require curl to work if it has not been installed. It is solved like this:
apt-get install curl Next, we need to login under your account at freedns.afraid.org/dynamic and select the Direct URL option in front of the domain that we linked earlier. Please note that the browser line will have something like this:
http://freedns.afraid.org/dynamic/update.php?OHphN3RsHY0SEFtZ1JrQ2V2Z1pTOjk2NzEwOTTVM1cc= Are we interested in everything that stands to the right of ? . This is a hash valid only for your domain (the values in the example have changed). Copy it somewhere, we will need it soon.
Now create the inadyn configuration file with the command:
nano /etc/inadyn.conf In which we insert the necessary settings and save:
--username <_> --password <> --update_period_sec 60 --forced_update_period 120 --alias <_>,<> --background --dyndns_system default@freedns.afraid.org --syslog Who cares, decoding
- username - here we indicate the user name with which we registered on freedns.afraid.org
- password - password from there
- update_period_sec - check and update frequency (if changed) IP in seconds
- forced_update_period - the frequency of the forced IP update in seconds
- alias is a string in which we specify our domain and its hash, which we recorded earlier, using a comma
- background - an instruction to perform in the background
- The string dyndns_system default@freedns.afraid.org is left unchanged, it tells the program with which server the information is working (indicates the internal exchange protocol)
- syslog - write events to the system log
Now we need to add inadyn to cron as an automatic reboot event, so that each time MyBookLive restarts, it will start automatically. For this:
crontab -e Add a line:
@reboot /usr/sbin/inadyn To check the functionality of the program after our manipulations, you can reload the MBL command
reboot Then wait 3-5 minutes until it reboots and starts, then check the processes:
ps -A | grep inadyn We will only have to check the availability of our Maybook by the domain name with the ping command:
ping <yourdomain.com> If everything went well, and the sent packets reach, you can safely go to
yourdomain.com/owncloud yourdomain.com/owncloud and rejoice in the great work done.When setting up your owncloud desktop and mobile clients, you need to specify the entire line as the address
yourdomain.com/owncloud yourdomain.com/owncloud , so that they understand where our / owncloud / is .PS during the writing of the article, by trial and error, I had to do a full software reset to the factory settings once and disassemble the device twice to resurrect (according to the instructions from here ), so I beg you to take all the warnings seriously, with an understanding of your own responsibility and possibility spoil the piece of iron and lose information. Also, do not forget that first of all, MyBookLive is just a budget nas, and you should not use it as a full-fledged server, there are much more suitable solutions for this.
PPS about any errors or inaccuracies, please write in personal messages. I personally find the topic very interesting, and I do not have much fundamental knowledge in the administration of Linux, so the comments can be very useful. It is possible that the article will be supplemented, expanded, and if it is in demand, it is possible that it will get the second part (there are a few more ideas on how to upgrade MyBookLive)
Answers on questions:
Q: Do I need to install apache? In the article about this is not a word.
Answer: No, apache on MyBookLive is installed by default. When you first connect, the configuration takes place via the web interface at:
mybooklive.local mybooklive.local . It is important that if apache is not updated or modified correctly, you can lose the web interface and find yourself in a situation where it cannot be started without resetting it to factory settings. Thoughtlessly update it also is not worth it, because You can stumble upon intractable dependencies, and Lenny, and even under the PPC architecture, there are not so many alternatives.Question: On which version of the firmware was the experiment conducted?
Answer: Everything was done at 02.42.03-027, but in theory, it should work with earlier ones. Unfortunately, there is no information on various firmware.
Question: Can the Feature Pack Manager influence in any way what is described in the article?
Answer: At its core, fpkmgr is simply some kind of advanced package manager that installs the set of packages that the user chooses. On my MBL, Transmission from fpkmgr and owncloud worked quietly in parallel. Perhaps there are some packages installed with fpkmgr that may conflict, but I do not yet have information about this. If someone came across and wrote about it, I will include a comment here.
Question: After the actions described in the article, will the owncloud shut off when the MBL goes to sleep?
Answer: The most interesting thing is that judging by the behavior of the LED, it did go to sleep until I turned off the power saving. In fact, I worked with some delay to “wake up” and show the contents of my owncloud when entering from the browser, although I did not study this aspect technically. With power off, everything works fine.
Question: I did everything according to the instructions, but when I try to access it, it says that it is impossible to connect to the server. What to do?
Answer: For proper work of owncloud, it is necessary to forward ports 80 and 443 on the router. How to do this will prompt Google when requesting port-forwarding.
Materials:
- wstd.lithium.com/t5/My-Book-Live/GUIDE-Installing-OwnCloud-Server-on-My-Book-Live/td-p/561699
- ubuntuforums.org/showthread.php?t=1758930
- support.wdc.com/product/download.asp?groupid=902&lang=en
- doc.owncloud.org
- www.inatech.eu/inadyn/readme.html
- wstd.lithium.com/t5/My-Book-Live/Access-My-Book-Live-across-internet-without-WD2GO/mp/534963#M18215
- colekcolek.com/2011/12/20/hack-wd-book-live
- mybookworld.wikidot.com/mybook-live
- vas3k.ru/blog/338
Source: https://habr.com/ru/post/183490/
All Articles