HTML5 ASCII Art Generator
 Good day, dear chabrozhiteli.
In this article I will discuss how using HTML5 you can make a simple application that will generate ASCII art based on ordinary images. The article is aimed at those who are just starting their acquaintance with such a wonderful technology, like HTML5, which I myself am. Professionals are unlikely to find something new for themselves.
It was evening, there was nothing
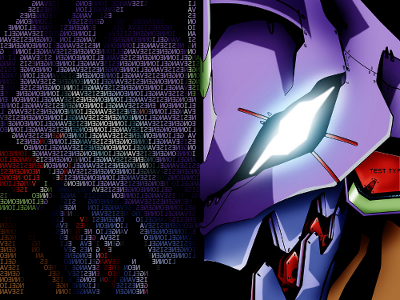
I recently dug on the Internet in search of wallpaper and came across one interesting image (1.1mb). And I was “hooked” by the idea of drawing images in multi-colored letters. Having rummaged through the Internet I learned that it is called ASCII-art . And of course, the first thought: “And I will fill in the application, so that my favorite wallpaper would be drawn like this!”
No sooner said than done. There is a time, there is a desire - why not try.
')
It was decided to implement the application in the browser. I have been looking at HTML5 for a long time and licked my lips, but my hands could not play. Why? Technology is fashionable, promising, why not try? And the project is not difficult, to learn something new - the most it. On this and stopped.
Formulation of the problem
The application must meet the following requirements:
- the presence of two ways to load the original image: through the file selection field and dragging into a special area (hereinafter, we will call the “receiving area”);
- no complicated settings. Only the most necessary: background color, used text and font size;
- the ability to process images with a transparent background;
- Work should occur only in the browser, without accessing the server and without reloading the page.
It is clear that the question of support for old browsers does not arise.
To begin with, we will scroll an html marking. The application page is divided into three logical parts:
1. Source Image Download Area
<h2>Source image</h2> <div class="row"> <div class="source-image-area-out"> <!-- ( ) --> <div id="source-image-area"> Drop source image here... </div> </div> </div> <div class="row"> <!-- --> <label for="source-image-file" style="width: 150px">Or select this here:</label> <input type="file" id="source-image-file" /> </div> 2. Settings area
<h2>Settings</h2> <div class="left"> <!-- --> <div class="row"> <label for="input-used-text">Used text:</label> <input type="text" id="input-used-text" value="B" /> </div> <!-- --> <div class="row"> <label for="input-font-size">Font size:</label> <input type="number" id="input-font-size" min="3" max="20" step="1" value="8" style="width: 65px" /> px </div> </div> <div class="right"> <!-- --> <div class="row"> <label for="input-background-color">Background:</label> <input type="color" id="input-background-color" /> </div> <!-- --> <div class="row"> <label for="input-background-transparent">Transparent:</label> <input type="checkbox" id="input-background-transparent" /> </div> </div> 3. Preview area
<h2>Previews</h2> <!-- --> <div id="preview-result" class="left"> <img src="" id="image-result" alt="" /> </div> <!-- --> <div id="preview-source" class="right"> <img src="" id="image-source" alt="" /> </div> Loading original image
First, let's look at how to load the original image.
In order to gain access to the file selected by the user, without sending it to it, the server uses the
FileReader class. Its readAsDataURL() method returns the contents of the file as a data: URL scheme. Well, let's try. // , . var fileData = null; // . var loadFromField = function(event) { loadFile(event.target.files[0]; }; // “ ”. var loadFromArea = function(event) { event.stopPropagation(); event.preventDefault(); loadFile(event.dataTransfer.files[0]); }; // dragover “ ”. var areaDragOverHandler = function(event) { event.stopPropagation(); event.preventDefault(); event.dataTransfer.dropEffect = "copy"; }; // . // fileData. var loadFile = function(file) { var reader = new FileReader(); reader.onload = function(data) { fileData = data.target.result; } reader.readAsDataURL(file); } // . // document.getElementById("source-image-file").addEventListener("change", loadFromField, false); // “ ”. document.getElementById("source-image-area").addEventListener("drop", loadFromArea, false); document.getElementById("source-image-area").addeventListener("dragover", areaDragOverHandler, false); Now we have the original image in the form of data: URL. what can we do with him? It can be used as the
src attribute value for an image. So let's show the user the original image. var sourceImage = document.getElementById("mage-source"); sourceImage.src = fileData; Here, so much clearer. Now the most important thing: you need to process this image.
Settings
We will not save the settings every time the user changes them. Instead, we count them only once, just before processing the image.
var usedText = document.getElementById("input-used-text").value; var fontSize = document.getElementById("input-font-size").value; var backgroundColor = (document.getElementById("input-background-transparent").checked == true) ? "rgba(0,0,0,0)" : document.getElementById("input.background-color").value; We now turn directly to the generation of our art.
Image processing
The whole process can be divided into several stages:
- receiving data about the original image. Or rather, we need the color of each pixel;
- calculating the size of the characters with which the art will be formed;
- calculating the color of each character and its color;
- generation of art itself;
- representation of art as an image, so that the user can save the fruit of their efforts.
Getting data about the source image
In order to know the colors of the pixels of the original image, you need to create a canvas and apply the image on it. First, add an outline to the page:
<canvas id="canvas"></canvas> Now we will give it the same dimensions as the original image and apply this image to it. And then we will receive information about the canvas, and as a result - about the original image.
var canvas = document.getElementById("canvas"); var context = canvas.getContext("2d"); canvas.width = sourceImage.width; canvas.height = sourceImage.height; context.drawImage(sourceImage, 0, 0); var sourseData = context.getImageData(0, 0, canvas.width, canvas.height).data; The
getImageData() method returns canvas information. The data field contains a description of each pixel, just what we need.Now we have the necessary information. That's just it is presented not in the best shape. This is a one-dimensional array, where the first four elements describe the first pixel (rgba), the fifth through eighth elements represent the second pixel, and so on. to end. How to work with this, I have little idea. So let's bring this bunch of numbers into a human form.
var getPixelsGrid = function(source) { var res = []; for (var i = 0; i < source.length; i += 4) { var y = Math.floor(i / (canvas.width * 4)); var x = (i - (y * canvas.height * 4)) / 4; if (typeof res[x] === "undefined") { res[x] = []; } res[x][y] = { r: source+0], g: source[i+1], b: source[i+2], a: source[i+3] } } return res; } var pixelsGrid = getPixelsGrid(sourseData); Now we have a two-dimensional array where each pixel is represented by an object. We will continue to work with him.
Calculating the size of the symbol
How to get the exact size of the character? Not the font size, but the area that the character occupies on the screen? Not to bother, just create a temporary span with this symbol and measure its size.
var countUsedTextSize = function(symbol, size) { var block = document.createElement("span"); block.innerHTML = symbol; block.style.fontSize = size + "px"; block.style.fontFamily = "Monospace"; document.body.appendChild(block); var re = [(block.offsetWidth, Math.floor(block.offsetHeight * 0.8)] document.body.removeChild(block); return re; }; // , . var size = countUsedTextSize(usedText[0], fontSize); var usedTextWidth = size[0] var usedTextHeight[1];  The attentive reader most likely noticed that not all the height of the symbol is taken into account, but only 80%. This is done because the visible part of the letter does not occupy the entire height it takes. Because of this, empty horizontal lines between the lines appear on the final image. They are especially noticeable if the letters are large. I adjusted, so that with different font sizes the distance between the lines was minimal - it turned out 80%. So leave.
Calculation of the position and color of characters
Now you need to create a “map of symbols” - a list containing information about each symbol from which the final image will be formed. You need to know the coordinates of the symbol and its color.
As the color of the symbol, we will use the color of the pixel located in the center of the area of the original image occupied by this symbol. Well, or next to it, in the case of an area with an odd number of pixels on one side.
var getAvgPixelsList = function(grid) { var res = []; var stepX = usedTextWidth; var stepY = usedTextHeight; var countStepsX = canvas.width / stepX; var countStepsY = canvas.height / stepY; for (var y = 0; y < countStepsY; y++) { for (var x = 0; x < countStepsX; x++) { res.push({ x: x * stepX, y: y * stepY, r: grid[x * stepX][y * stepY].r, g: grid[x * stepX][y * stepY].g, b: grid[x * stepX][y * stepY].b, a: grid[x * stepX][y * stepY].a }); } } return res; }; var avgPixelsList = getAvgPixelsList(pixelsGrid); We also define a function that will return the next character from the text entered by the user. And when you reach the end, start over.
var nextUsedChart = 0; var getNextUsedChart = function() { var re = usedText.substring(nextUsedChart, nextUsedChart+1); nextUsedChart++; if(nextUsedChart == str.length) { nextUsedChart = 0; } return re; }; Art generation
Now we have everything we need: a list of positions and colors of characters from which we will form an image and the function that will return these characters. Let's generate our art.
var getResultData = function(list) { // . context.clearRect(0, 0, canvas.width, canvas.height); context.fillStyle = backgroundColor; context.fillRect(0, 0, canvas.width, canvas.height); // . for (var i = 0; i < list.length; i++) { var px = list[i]; context.fillStyle = "rgba(" + px.r +", " + px.g + ", " + px.b + ", " + px.a + ")"; context.font = fontSize + "px Monospace"; context.fillText(getNextUsedChart(), px.x, px.y); } return canvas.toDataURL(); }; var resultData = getResultData(avgPixelsList); Fine! Our art is ready. It remains only to show it to the user.
var resultImage = document.getElementById("image-result"); resultimage.src = resultData; Results
Congratulations, our generator is ready! Moreover, it even works.
Here are some examples:
~ 150Kb

~ 750Kb

But with a transparent background ~ 300Kb

Here you can look at what we did.
And here are the sources. They are somewhat different from those described in the article (the functionality is separated into classes), but the logic of the work is the same.
There are some interesting points:
- in chrome, the application works many times faster than in other browsers;
- when processing a large image (more than 1000x1000). Chrome refuses to open it in a new window, while killing the tab with the message "out of memory". In other browsers, it works, albeit slowly. I think this is due to the fact that when the image is transmitted via the url, the string is too long;
Conclusion
Today we met with some interesting and useful aspects of HTML5, such as working with canvas and uploading files. At the same time, we wrote a workable and, most importantly, practically useful application. Of course, this is not the end. The application must be finalized:
- Now, if a user logs in with an outdated browser, the application will not say anything, it just will not work. It is necessary to add a check for the support of the technologies used. It is also necessary to add verification of user input;
- if the size of the original image is not a multiple of the character size, empty bands appear at the bottom and on the right. It is necessary to solve this problem.
- Well, cross-browser compatibility. I had the opportunity to check only in chromium 25, chrome 27, firefox 21, opera 12 and safari on the iPhone (I did not find the version). In other browsers, you need to test and fix bugs.
But it will be later. Here I wanted to show only the principle of work.
On this I finish. Thank you for reading to the end. I hope you find something useful for yourself. Slender you code.
Source: https://habr.com/ru/post/182782/
All Articles