Automatic installation of the operating system on dedicated servers Selektel

In the previous article, we already talked about managing the loading of dedicated servers and promised to show something more interesting. We are glad to present a fully automatic installation of the operating system on dedicated servers.
For many of our clients, installing an OS on a server is troublesome and not very interesting. Usually our engineers did this, spending more and more time as the number of servers and clients grew. Therefore, it was decided to fully automate this process, while making it as flexible and simple as possible for the client.
')
It was also decided to slightly diversify the format of the articles and show the whole process as a screencast (at the end of the article) on the example of installing the recently released CentOS 6.4.
The original post is posted on our blog .
Perhaps the easiest howto to install the OS
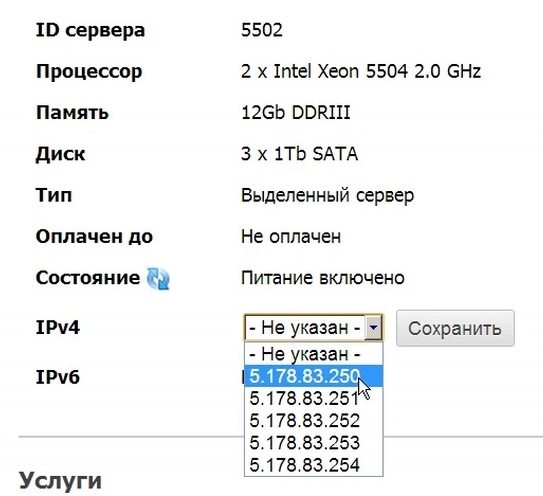
We begin naturally with the server questionnaire - open the server list, find the server you need and go to it. Be sure to assign an IPv4 address to the server, if this has not been done before.
Next, go to the server reinstall page and specify the data required for installation:
- Hostname of the server, the default is the unique server number of the form csNNNN;
- We select the OS distribution in accordance with your requirements and personal preferences;
- OS architecture (bit depth), we recommend x86_64 if you do not have special requirements;
- OS version, we recommend the latest release (for Ubuntu, the latest LTS release).

Select the type of software RAID consider in more detail. On most of our dedicated servers, there are two or more hard drives, but there is no hardware RAID controller. Therefore, we strongly recommend that our customers use software RAID1 (mirroring) or RAID10 (mirroring plus interleaving, but this raid requires 4+ disks) to increase the reliability of data storage. For the same reason, we refused to add the option RAID0 (interleaving), because when it is used and if one of the HDDs fails, all information stored on the server will be lost. Total available at the moment:
- Without RAID, we recommend to use if there is only one disk in the server or when using a hardware RAID controller. The installation will be performed on the first disk, the rest will be left unmarked;
- RAID1 will assemble an array of the first 2 disks, the remaining disks will be left unmarked;
- RAID10 uses the first 4 disks, the rest will be left unmarked.
Pay attention to the fact that you should not try to build a RAID10 on a server with 1 disk, the OS installer will most likely not understand this joke. It is not possible to take into account all possible combinations of servers, especially taking into account arbitrary configuration servers. Therefore, in this matter we rely on your prudence.
Next, the last, but very important step - the choice of disk layout. Required sections: / boot (1 GB), / (at least 5 GB), swap (at least 4 GB). You can add any number of sections and delete them. For each section, the size is indicated in GB, and one of the sections must be marked to fill the space. As a file system, we recommend using the default ext4, also note that some operating systems impose certain restrictions on the choice of filesystem.

After selecting and checking all the settings, click “Start Reinstall” and confirm in the dialog box. Once again we draw attention to the fact that when you reinstall all data from all disks are deleted. Even if you chose the “Non-RAID” markup on a server with 4 disks, all 4 disks will be erased. This is necessary since most installers get into a stupor when finding RAID / LVM metadata remnants on disks during their markup.

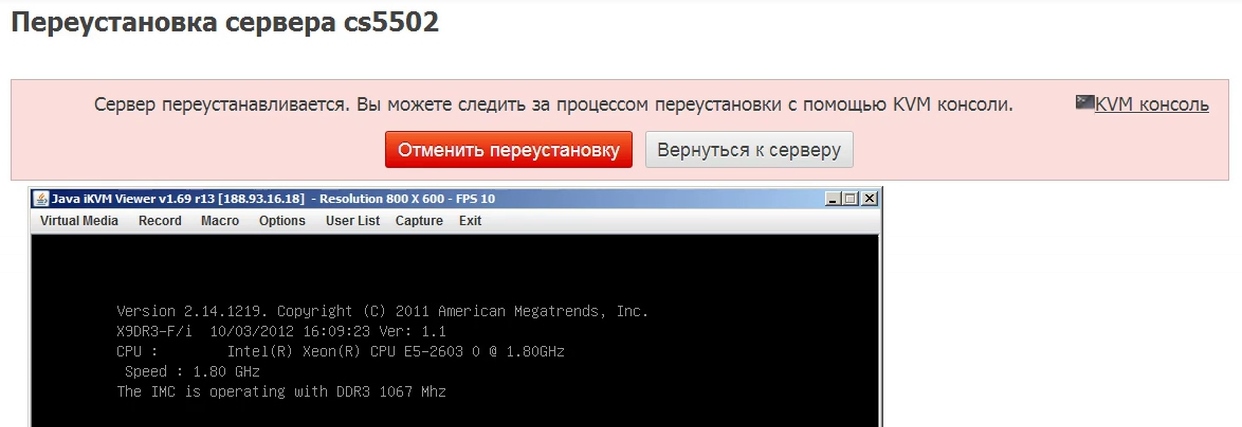
Immediately after confirmation, the server will restart via IPMI and begin downloading the appropriate OS installer over the network. The reinstallation page will be blocked at the time of the OS installation, a corresponding message will be displayed in its place. If you realized that you were mistaken by the server, you can interrupt the installation at any time by clicking the “Cancel reinstall” button. At the same time, the server will be immediately rebooted, and booting from the network will switch to booting from the first hard disk. The installation process can be observed through the KVM console, the link to which is located on the same page.
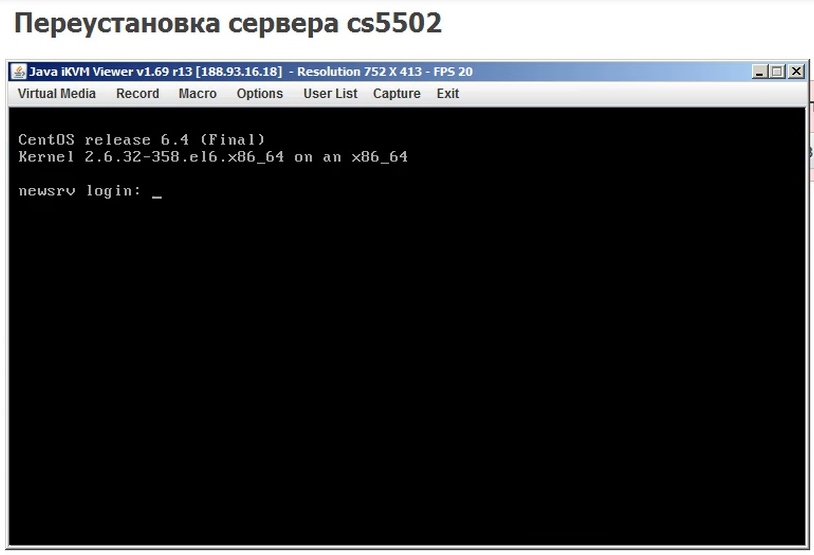
Server installation takes 5-10 minutes, depending on server performance and OS distribution. To reduce installation time and increase reliability, our mirror mirror.selectel.ru is used. If during the server installation any error occurred, for example, Internet access was interrupted, then first try to restart the server, the installation will start over. If this does not help, then contact technical support through the ticket system, they will help you.
So, the server is loaded and ready for further configuration and operation.
All systems are installed in the lowest possible default configuration, no system settings are changed unless absolutely necessary. On all systems, only an ssh server is automatically installed and enabled. The password during the installation can be viewed after the installation on the server reinstallation page, with each reinstallation a new password is generated. When installing Ubuntu OS, the root user is disabled, a user is created with the login 'user', on all other systems the single user is 'root'. We also always recommend changing the password yourself after installing the server, creating a new user and disabling root user access via ssh.

Screencast
Technical FAQ
How are the disks marked up? LVM and mdraid are used when partitioning disks:
- No RAID
- sda1 / boot 1GB;
- sda2 PV for LVM;
- all other sections as LV inside vg0;
- RAID1
- sda1, sdb1- md0 RAID1 / boot 1GB;
- sda2, sdb2- md1 RAID1 PV for LVM;
- all other LV sections inside vg0;
- RAID10
- sda1-sdd1- RAID1 / boot 1GB;
- sda2-sdd2- RAID10 PV for LVM;
- all other sections as LV inside vg0.
Why LVM? Using LVM adds flexibility when editing sections, makes it relatively easy to resize, merge, add and delete sections. Also, the use of LVM allowed to unify the installation templates and get around some problems when partitioning disks (eliminating the need for using extended partitions and their numbering).
Why is / boot separately and so big? Most operating systems recommend removing the / boot partition separately when using LVM or RAID for the root partition. 1GB is not at all a lot - it is ~ 0.2% of a 500GB disk (the minimum non-SSD disk available for our servers). At the same time, this is enough to store several dozens of normal kernels with an initrd or several dev kernels, the size of which may exceed 200MB. Given the fact that changing the size of the / boot partition is extremely troublesome, we decided not to be greedy.
I want to leave free space on the disk, but I can not uncheck the “fill the space” box. Is this a bug? No, this is not a bug, most installers require you to stretch one of the sections to the entire free space. As a solution, we recommend creating a dummy partition, ticking it with “fill space” and deleting it after installing the system.
How it works? All systems are installed by their own installers using preseed, kickstart or autoyast, depending on the distribution. Currently available:
- Debian 6, 7;
- Ubuntu from 12.04 to 13.04;
- CentOS current versions from branches 5. * and 6. *;
- RedHat Enterprise Linux 6.4 without a license (purchased separately);
- OpenSUSE 12.3.
Source: https://habr.com/ru/post/182740/
All Articles