Install the latest (4.2.2) Android on the old man HTC Desire S
HTC Desire S can rightly be called an old man, it is sold for more than two years. I have a machine for more than a year and a half. Nevertheless, this is a device with a very good “filling”, high-quality screen and a metal case.
Surely, like all HTC fans, I dragged from their proprietary shell “Sense” . The stock machine included Android 2.3.5 and Sense 3.0 .
Then there was a whole saga in anticipation of the official firmware for Android 4 , the completed version of which never came out. Even before the release of this firmware “for developers”, my “nerve” cracks and “custom” ones, unofficial assemblies began to be poured into the phone one by one. It was tested and official with Android 4.0.4 . Some time passed and the choice was CM10.1 with Android 4.2.2 and all its charms, for which the hardware of the device is enough.
Let's start!
')
The instruction is relevant for Windows.
It is worth warning that you do all the manipulations with your device on your own, carefully and on your own initiative, the author of this post is not responsible for everything that may happen to your device in the process.
Also in the process of flashing data will be erased. Contact log, SMS and so on. Phonebook is restored from a Google account. The SMS archive cannot be restored as it was possible to do in “Sense”. You need to take care of this before manipulating the phone. Data on the SD card will not be affected.
What do we need from the software during the flashing process:
1) HTC Sync driver for working with your phone
2) Elements of the Android SDK - drivers for working with the phone
3) Recovery - a program that allows you to work with the phone, with a memory card, firmware, etc., without an operating system on the phone itself
4) Firmware CM10.1 from Andromadus
5) Set GAPPS - a set of services from Google
6) just in case, I attach Recovery , the one that stands by default on the phone. It is useful if you need to roll back to the official firmware. For rollback, you also need to lock the bootloader back (see point 3 - Unlocking the bootloader).
It should be noted that for Desire S there are other assemblies on Android 4.2.2, such as AOKP, PACman, AOSP, JellyTime, etc. For this article, I have chosen the assembly CyanogenMod 10.1.
Go!
1) Install the HTC Sync package. It contains the necessary drivers for working with the phone through a PC.
2) Unpack the android-tools.zip archive on the C drive (you can do it anywhere, for our convenience, the address should be shorter, because the command line will refer to the files). Let after unpacking the files we have are located at C: \ android \
3) Unlocking the bootloader . Necessary to replace the standard Recovery and install custom builds. How to unlock the bootloader look here . We do not pay attention that our model is not in the list, we choose - "All Other Supported Models". Step 5 and 6 instructions for unlocking the bootloader - skip, because we already have the necessary files in the folder C: \ android \ .
Did you do it? Let's go further!
4) Install third-party recovery . It is necessary for working with firmware files, directly installing firmware, creating backups and formatting system memory and caches.
To enter the phone's bootloader , you need to pull out the battery for a couple of seconds, insert it back. Pressing the button- rocker phone volume down, press the power button. After a couple of seconds, the bootloader 's blue-red-green menu will appear.
We connect the phone to the PC, select the line with the volume rocker - fastboot (it is selected by default) and press the power button.
Archive from point 3 of the software for flashing - Recovery.zip is unpacked in C: \ android \ .
Open the command prompt. If Windows XP: Start - Run - cmd. If later versions: Start - in the "Find programs and files" field we write cmd, and then run the program found.
Using the command line, go to the folder with our files C: \ android \ . To do this, type in the command line:
cd c: \ android \
Enter the following code on the command line:
fastboot flash recovery recovery.img and press enter. After a couple of seconds, Recovery is installed.
5) Formatting the system memory of the phone . To do this, we need to go to a new, installed Recovery . How to enter the bootloader was discussed in the previous paragraph. In the bootloader's menu, use the volume rocker to select the green line - Recovery and press the phone's power button. To be able to recover data and past firmware, it is recommended to make a backup in the corresponding item of the Recovery menu.
In Recovery (touch control), select the line wipe | format and select further - wipe data / factory reset . After a few seconds, the system memory of the phone will be cleared.
6) Install the firmware. . Copy the files from points 4 and 5 of the software for flashing to the memory card in the phone. To do this, in the main Recovery menu, select the item - toggle usb storage . After a couple of seconds, the memory card will be determined in the PC and you can copy the firmware file and GAPPS to it.
After copying is completed, click - Disconnect in Recovery and get back to the main menu. Select install from sdcard , find the copied archive firmware flinnycm101_saga_22 and install it. After installing the firmware set GAPPS in the same way. After the installation is completed, we return to the bootloader , for this it is not necessary to do any manipulations with the battery. In Recovery, select the bottom line - the power menu and in it - reboot into bootloader
Is it done? left just a little bit.
7) Kernel firmware . To do this, open the flinnycm101_saga_22 archive from point 4 of the software on the PC and copy the boot.img file to C: \ android \ .
Go back to the Windows command prompt and enter:
fastboot flash boot boot.img press input. Is done. Now go to the fastboot option on the bootloader's menu and select - reboot
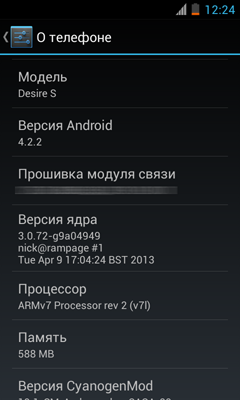
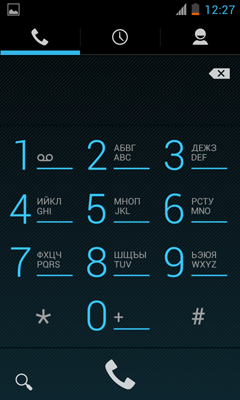
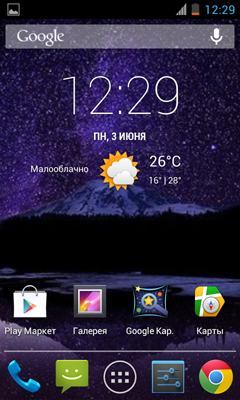
The phone will boot with new firmware. It will be necessary to make the initial setting of the language, Google account and so on. Some screenshots:


The system has many interesting settings, for example - setting the time of the vibration feedback of the touch keyboard.
Thank.
I completely forgot, I myself studied this here , in the section Desire S
Surely, like all HTC fans, I dragged from their proprietary shell “Sense” . The stock machine included Android 2.3.5 and Sense 3.0 .
Then there was a whole saga in anticipation of the official firmware for Android 4 , the completed version of which never came out. Even before the release of this firmware “for developers”, my “nerve” cracks and “custom” ones, unofficial assemblies began to be poured into the phone one by one. It was tested and official with Android 4.0.4 . Some time passed and the choice was CM10.1 with Android 4.2.2 and all its charms, for which the hardware of the device is enough.
Let's start!
')
The instruction is relevant for Windows.
It is worth warning that you do all the manipulations with your device on your own, carefully and on your own initiative, the author of this post is not responsible for everything that may happen to your device in the process.
Also in the process of flashing data will be erased. Contact log, SMS and so on. Phonebook is restored from a Google account. The SMS archive cannot be restored as it was possible to do in “Sense”. You need to take care of this before manipulating the phone. Data on the SD card will not be affected.
What do we need from the software during the flashing process:
1) HTC Sync driver for working with your phone
2) Elements of the Android SDK - drivers for working with the phone
3) Recovery - a program that allows you to work with the phone, with a memory card, firmware, etc., without an operating system on the phone itself
4) Firmware CM10.1 from Andromadus
5) Set GAPPS - a set of services from Google
6) just in case, I attach Recovery , the one that stands by default on the phone. It is useful if you need to roll back to the official firmware. For rollback, you also need to lock the bootloader back (see point 3 - Unlocking the bootloader).
It should be noted that for Desire S there are other assemblies on Android 4.2.2, such as AOKP, PACman, AOSP, JellyTime, etc. For this article, I have chosen the assembly CyanogenMod 10.1.
Go!
1) Install the HTC Sync package. It contains the necessary drivers for working with the phone through a PC.
2) Unpack the android-tools.zip archive on the C drive (you can do it anywhere, for our convenience, the address should be shorter, because the command line will refer to the files). Let after unpacking the files we have are located at C: \ android \
3) Unlocking the bootloader . Necessary to replace the standard Recovery and install custom builds. How to unlock the bootloader look here . We do not pay attention that our model is not in the list, we choose - "All Other Supported Models". Step 5 and 6 instructions for unlocking the bootloader - skip, because we already have the necessary files in the folder C: \ android \ .
Did you do it? Let's go further!
4) Install third-party recovery . It is necessary for working with firmware files, directly installing firmware, creating backups and formatting system memory and caches.
To enter the phone's bootloader , you need to pull out the battery for a couple of seconds, insert it back. Pressing the button- rocker phone volume down, press the power button. After a couple of seconds, the bootloader 's blue-red-green menu will appear.
We connect the phone to the PC, select the line with the volume rocker - fastboot (it is selected by default) and press the power button.
Archive from point 3 of the software for flashing - Recovery.zip is unpacked in C: \ android \ .
Open the command prompt. If Windows XP: Start - Run - cmd. If later versions: Start - in the "Find programs and files" field we write cmd, and then run the program found.
Using the command line, go to the folder with our files C: \ android \ . To do this, type in the command line:
cd c: \ android \
Enter the following code on the command line:
fastboot flash recovery recovery.img and press enter. After a couple of seconds, Recovery is installed.
5) Formatting the system memory of the phone . To do this, we need to go to a new, installed Recovery . How to enter the bootloader was discussed in the previous paragraph. In the bootloader's menu, use the volume rocker to select the green line - Recovery and press the phone's power button. To be able to recover data and past firmware, it is recommended to make a backup in the corresponding item of the Recovery menu.
In Recovery (touch control), select the line wipe | format and select further - wipe data / factory reset . After a few seconds, the system memory of the phone will be cleared.
6) Install the firmware. . Copy the files from points 4 and 5 of the software for flashing to the memory card in the phone. To do this, in the main Recovery menu, select the item - toggle usb storage . After a couple of seconds, the memory card will be determined in the PC and you can copy the firmware file and GAPPS to it.
After copying is completed, click - Disconnect in Recovery and get back to the main menu. Select install from sdcard , find the copied archive firmware flinnycm101_saga_22 and install it. After installing the firmware set GAPPS in the same way. After the installation is completed, we return to the bootloader , for this it is not necessary to do any manipulations with the battery. In Recovery, select the bottom line - the power menu and in it - reboot into bootloader
Is it done? left just a little bit.
7) Kernel firmware . To do this, open the flinnycm101_saga_22 archive from point 4 of the software on the PC and copy the boot.img file to C: \ android \ .
Go back to the Windows command prompt and enter:
fastboot flash boot boot.img press input. Is done. Now go to the fastboot option on the bootloader's menu and select - reboot
The phone will boot with new firmware. It will be necessary to make the initial setting of the language, Google account and so on. Some screenshots:
The system has many interesting settings, for example - setting the time of the vibration feedback of the touch keyboard.
Thank.
I completely forgot, I myself studied this here , in the section Desire S
Source: https://habr.com/ru/post/182464/
All Articles