DVR AdvoCam FD5 - decent work on the bugs
About a year ago I had a chance to test the AdvoCam FD3 recorder in detail. It showed very good quality Full HD recording, worked stably and had excellent bundling and functionality. But there were some annoying moments that did not allow us to definitely recommend it for purchase as a car DVR.
A year later, AdvoCam offers the 5th generation of devices - the FD5 Profi model, two versions, with GPS and without. Judging by the characteristics stated on the website, they paid attention to the indicated defects and tried to correct them.
')
In this review, I tried to check how successful the work on the bugs was.
Characteristics and features
For a start, here are the official specifications:
- Record Formats - 1080p @ 30fps, 720p @ 60fps, MOV
- Viewing angle - 120 ° horizontal
- Processor - Ambarella A5s
- Display - TFT LCD 2.7 ”, 16: 9, 960x240
- Matrix - Aptina, 3.1 mpix, CMOS 1/3 "
- Lens - 4 glass lenses, focal length 3.4 mm, F = 2.0
- Video outputs - AV, HDMI
- Interface - miniUSB
- Memory cards - microSD up to 32 GB, class 6+, built-in memory 256 MB (about 200 available)
- Operation temperature - -20 ° C ... + 50 °
- Backlight - manual LED backlight
- Battery - 500 mAh, lithium (up to 20 minutes of autonomous video recording)
- Dimensions - 110 x 45 x 32 mm
- Weight - 80 g
- Recommended price - 5 990 rubles
The manufacturer claims the following benefits:
- clear night-time video recording thanks to a highly sensitive matrix, glass lens and powerful Ambarella A5 processor
- fast installation, power through the bracket
- one-touch control of main functions
- opportunity to enter your license plate in credits
- high quality recording Full-HD 1080p
- the possibility of high-speed shooting 60 frames / s in 720p mode
The package bundle, unlike the FD3, is minimalist:
- DVR
- car adapter
- USB cable
- arm for fastening to glass
- instruction
This concludes the official introduction and move on to the author’s part of the review.
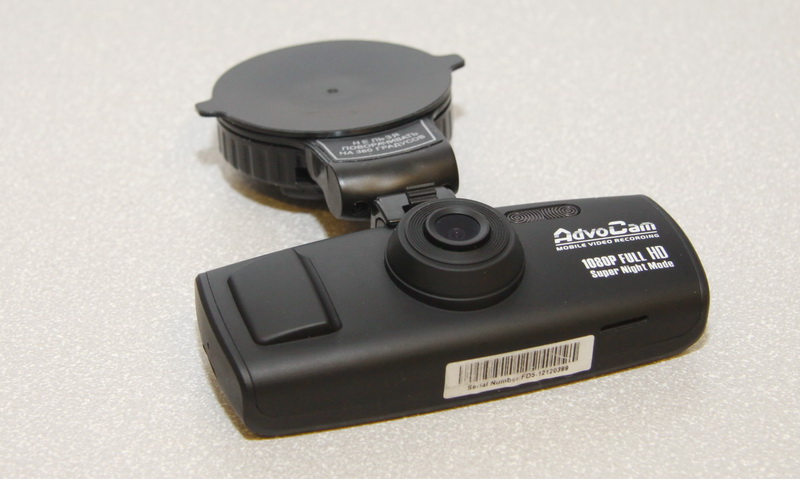
Appearance
Starting with the FD4 version, AdvoCam changed the design of DVRs. Now it is an oblong, slightly rounded body at the corners and fully mechanical (non-touch) buttons. The refusal of the touch buttons especially pleased me - driving it, in my opinion, the only right decision.
The recorder is not so small, so the hidden installation is in question. But it is possible to fix it behind the rear-view mirror, provided that the top of the windshield is not heavily toned. What was not pleasant was the bright white lettering with the name on the front of the case - it is perfectly visible from the street, and the registrar does not add the desire to leave it in the car. However, the inscription is painted, and, I believe, it is relatively easy to erase.
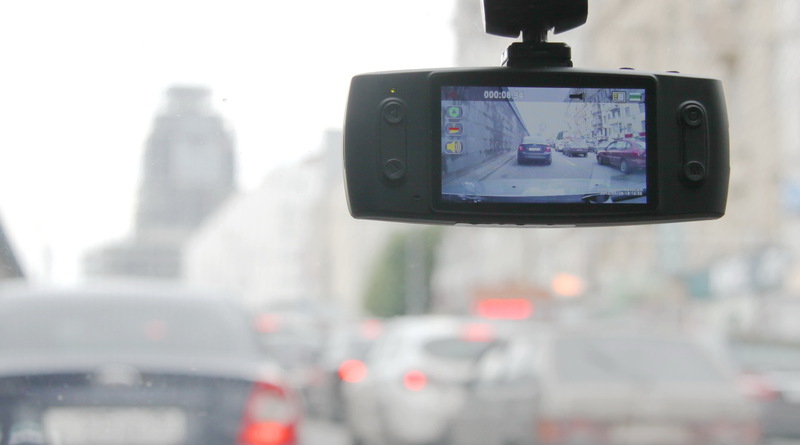
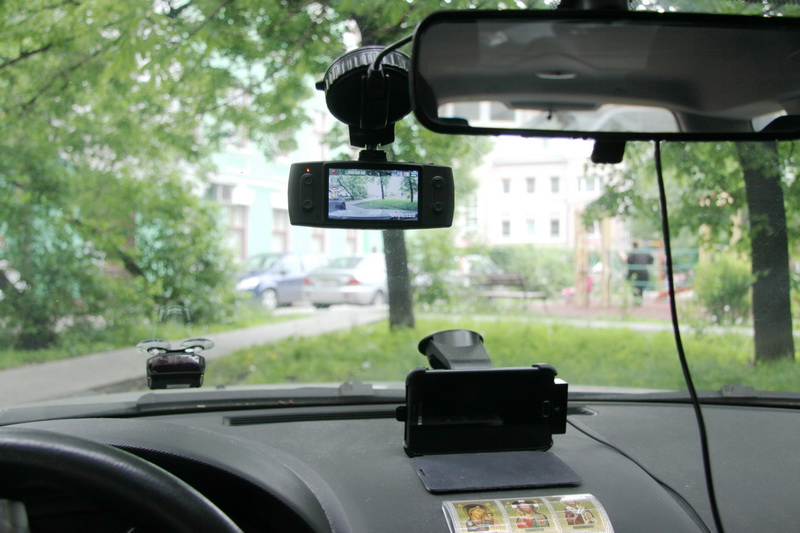
This is how it looks in the car (in the context of testing, I did not try to mask the wire, nor did the recorder itself hide it behind the mirror):
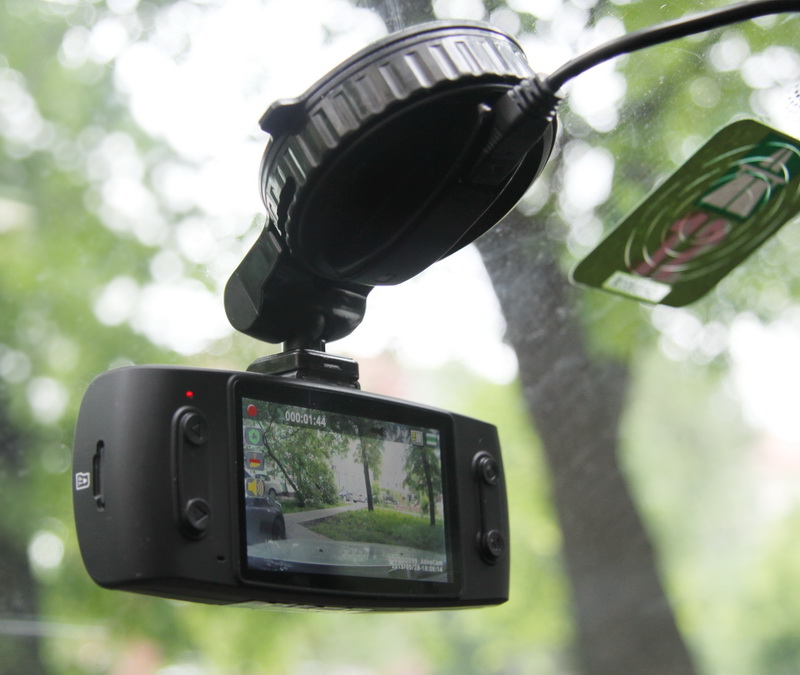
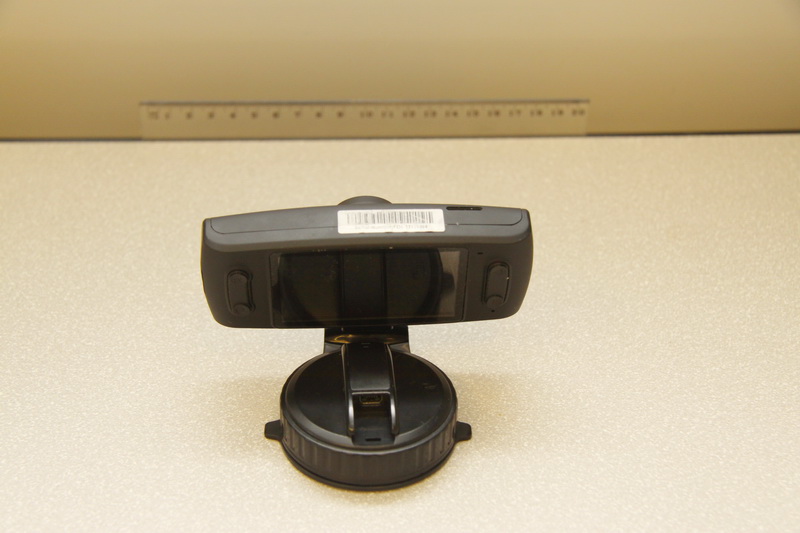
I liked the mount. It can be seen that progress here is not worth it.
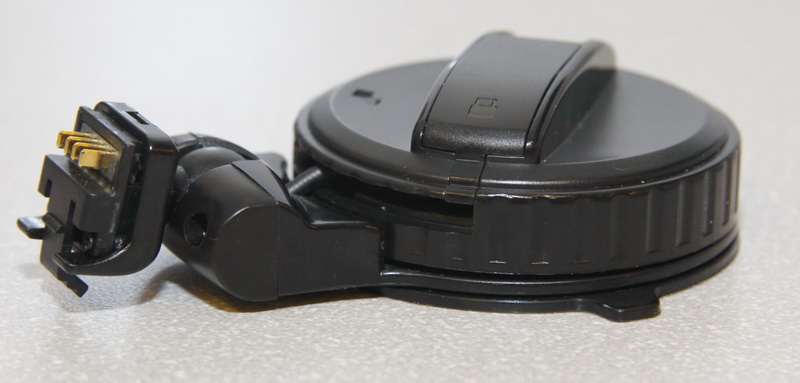
First, the sucker is installed very easily and securely fixed by turning 90 degrees.
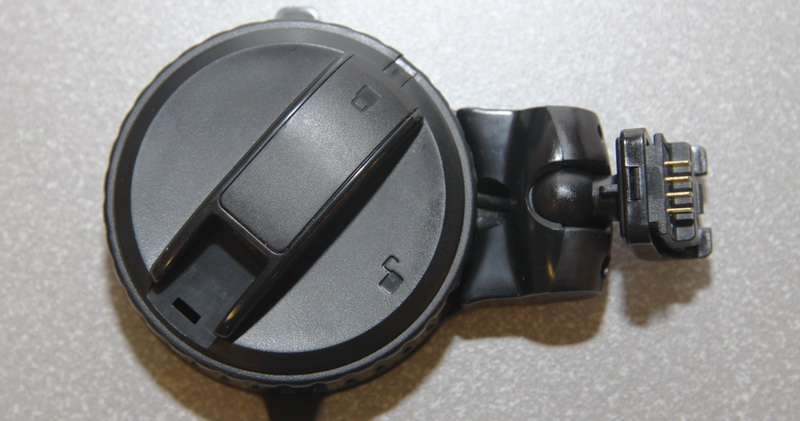
As always, it is recommended to thoroughly wipe the glass at the installation site and the suction cup itself, otherwise the contact may become loose. Secondly, the swivel allows you to rotate the recorder at fairly large angles, including in the direction of the side driver's window. The hinge is moderately tight and provides both ease of rotation and reliable fixation.
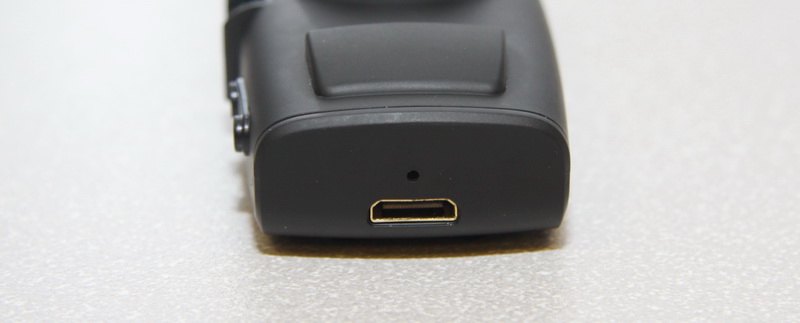
Well and, thirdly, the mount has a mini-USB power connector, which allows you to lead the wire to it so that it will not stick out of the device and will not cause the recorder to turn if you accidentally pull the wire.

On a GPS model, a GPS receiver is inserted into this connector, and the power is already connected to it, providing an end-to-end connection. Of course, there is a second mini-USB input on the recorder body. By the way, the one that works through the mount provides only power, and even when connected to a computer, the system does not detect it. Rewriting clips is possible only when connected to the main entrance.
In fact, it is not very clear how the recorder is supposed to be removed from the glass - with or without a suction cup. When removing the suction cup, you will first have to unplug the power cord, which complicates the procedure. If, however, only the recorder is removed, then it is rather difficult to do this, because it snaps onto the mount very rigidly, and the removal requires considerable effort, which is capable, in the end, of loosening the suction cup. Also, when removed because of the stiffness and low degree of freedom, it is very easy to scratch the top of the lens housing, which, in fact, was done (seen in the photo below). On the other hand, fastening rigidity is a necessary measure to avoid body shaking during movement. In short, we still need to work on ergonomics.
The power cord is traditionally long - 3 meters. This allows you to lay it along the edge of the windshield and torpedoes and make it almost imperceptible. Unfortunately, I forgot to check whether the manufacturer fixed the annoying minus of the FD3 model - when using a non-native power wire, the recorder only charged, but could not record video. A quick search did not give any results, so I hope this is fixed.
Now look at the DVR itself. The case is assembled with high quality, the buttons are reliable, they click when clicked. Near the lens on the front of the lamp is located. For shooting the road, it is quite useless, but when recording a conversation with a DPS officer at night, it can even help. I, fortunately, was not useful. The backlight is turned on by briefly pressing the power button.

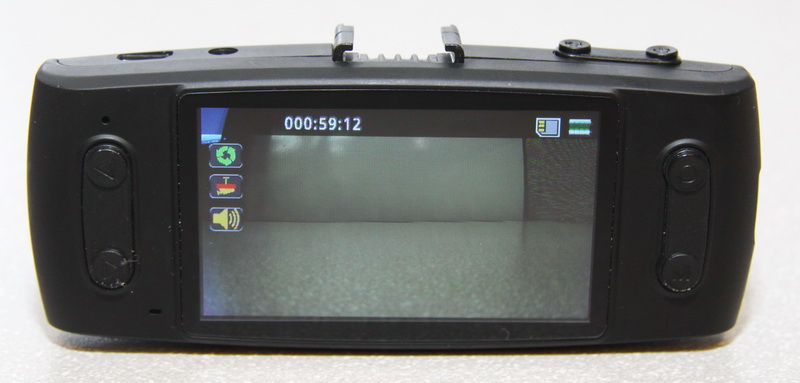
On the back panel there is a 2.7-inch screen, 4 multifunction buttons (which is discussed below), a LED for recording / charging and a microphone. The hole for the indicator is small, and the diode does not blind. On the other hand, during the day it is practically invisible, especially if you look a little to the side.
On the right side is the HDMI output and a hole for resetting the device.
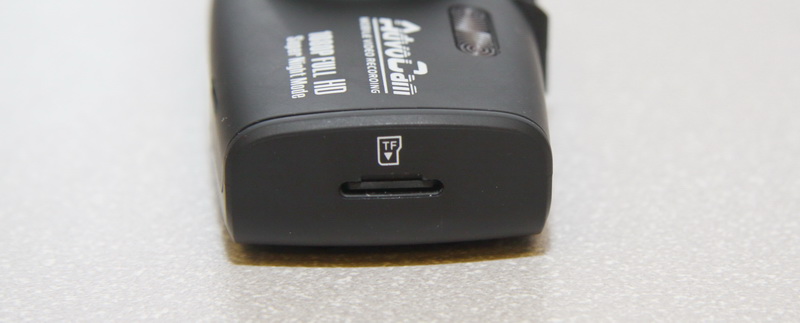
On the left side - a slot for a micro-SD card.
Above - micro-USB power connector, AV-out, two control buttons and a connector for mounting. On the one hand, it seems more appropriate to place the power inlet on the right side so that the wire does not hang on the driver’s side. But, apparently, it is assumed that the power will be used through the holder, and therefore we decided to place the buttons on the right - here it is more convenient to press them with my right hand, capturing the recorder's body, like a camera.

Below is the speaker.

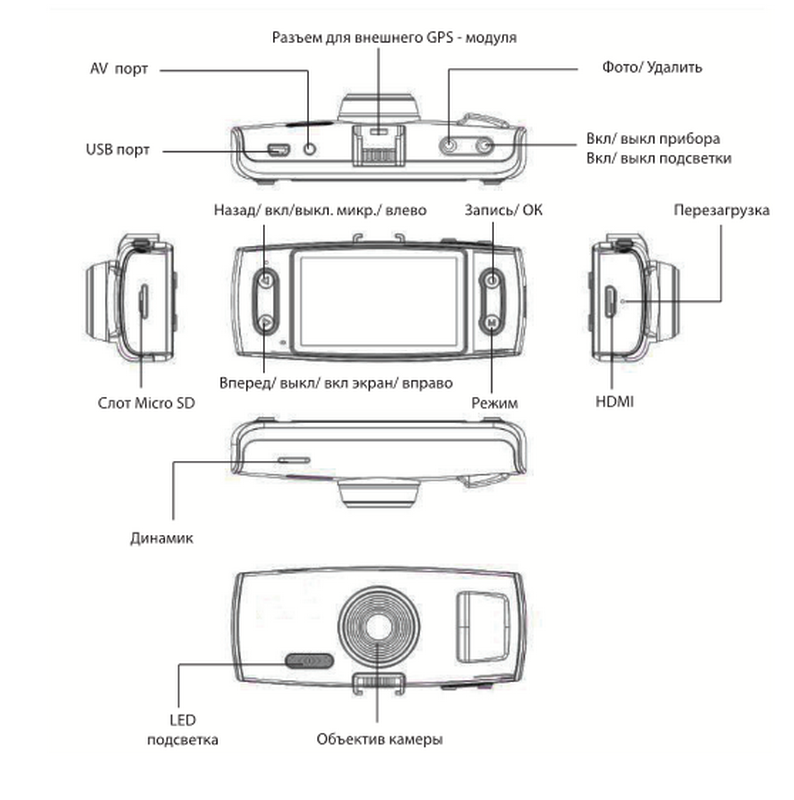
Now about the buttons. There are many of them and it’s not even immediately possible to remember the purpose of each. In addition, some buttons perform different functions depending on the current status of the recorder. But the abundance of buttons is justified - most of the most important operations are done in one click. And this is really very cool! For example, with one click you can protect the video from erasing (implemented by setting the read-only flag on the current file), turn on / off the backlight, screen, microphone, take a photo, start / stop recording. More rare operations and settings are made through the menu. For clarity, I will give the control scheme from the manual:
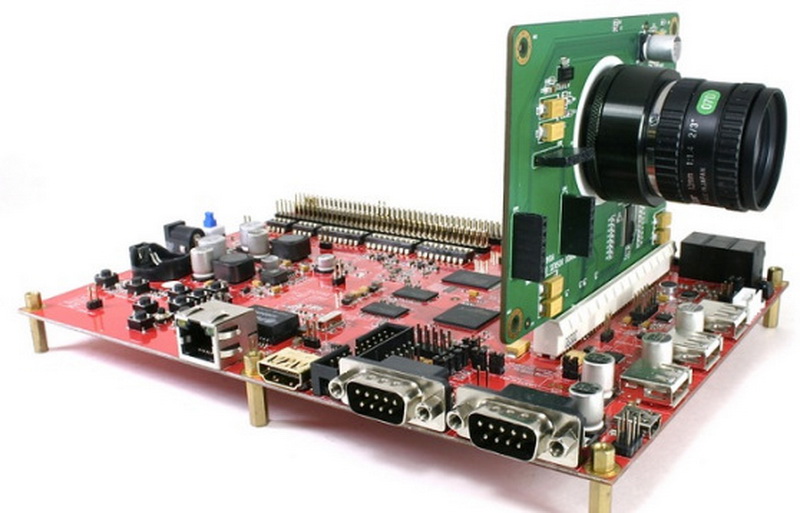
And I will say a few words about the processor - what I managed to find here :
“Ambarella 5 is not exactly a processor. More precisely, not a processor at all. This is a ready-made hardware platform for compact photo-video cameras, in common people gently called “soap cases”. It was built on the basis of the 528 megahertz ARM1136J-S. Characteristics impressive - the platform allows you to process images obtained from an 8-megapixel matrix at a speed of 30 fps. This automatically adjusts the exposure, corrects color and geometric distortion. There is the possibility of recognition and tracking of faces. ISO sensitivity is up to 6400 (although with such sensitivity you can take only one frame per second). Able to work with DDR3 memory. In general, for its size - a monster cheburashka. By the way, this platform came out already in 2009. Now the manufacturer with might and main is promoting the next generation - A7 ".
DVR operation
If you connect power, the recorder is turned on, and recording starts automatically. It takes 10 seconds from power up to start recording. Starting a power recording is something that was so lacking in the FD3 model, which had to be moved by a mechanical switch.
The minimum initial settings that need to be made are to set the quality of the video and select the memory for storing the clips. Honestly, I do not see much point in having 256 MB on the device - this allows you to record approximately 4 minutes of Full HD video.
The device menu looks like this:

Available settings are listed below. Screenshots of all screens will not be attached. When you press the Menu button once, we switch to the mode of viewing the clips, if you double-click, we get into the menu itself:
- Recording mode: 1080p 30 fps, 720p 60 fps, 720p 30 fps.
- TV type - PAL / NTSC
- Size of commercials: 2, 5, 10 minutes. The recording is cyclic - when the memory card is full, the oldest videos are erased. By the way, old photos are also erased, which is strange. Write-protected videos can be up to 25% of the card volume. I would not be so hard to limit.
- It is also not clear whether you can protect the photo.
- Power On Delay - Power on options are available immediately or 10 seconds after power is applied. I believe that this was done to protect against a voltage surge, but I will not say.
- Shutdown delay - you can specify a shutdown delay when the power is lost for 10, 20, 30 seconds.
- Motion sensor - start recording at the beginning of the movement. It works inconveniently - the recording starts constantly at any movement in the frame.
- I would not add this feature at all.
- Audio recording - on / off sound when shooting.
- Set date and time.
- Formatting a memory card.
- Volume when playing videos.
- Stamp - here you can set the type of stamp superimposed on the video during recording: date / time, AdvoCam logo, car number (entered in the settings in Latin letters). I do not know how much the availability of a room can help in court, but it will not be superfluous.
- Settings for the active slot - a memory card (up to 32 GB) or built-in memory (256 MB).
- Display auto-off is useful either when running on battery power or at night if the screen blinds, which is unlikely.
Regarding the convenience of management, I can say that I liked it. As mentioned above, everything that needs to be done quickly is done quickly, in one click. It is difficult, however, to memorize immediately the purpose of all the buttons. I would make them colored for convenience. The fact that the buttons are spaced apart in 3 places on the body is, in fact, a plus, because it is easier to remember them that way than if they were all arranged in a row. A little late opening of the menu - about 1.5 seconds, but you can get used to this, besides, it is required infrequently.
The microphone is quite sensitive, all sounds are heard well. The level is adjusted automatically. This leads to loud background noise when the car is quiet. However, when the sound of the voice sensitivity decreases automatically, and the noise disappears.
Connection to the computer, analysis of rollers
When connected to a computer, the device is defined as USB Mass Storage with two partitions. It is necessary to connect when the recorder is off. If this is done on a working device, it will not be determined by the system. It is strange that Windows 7 offers to format the internal memory section every time the recorder is connected. The external card registrar formats in FAT32.
I had some kind of not the fastest micro-SD card, and when rewriting videos from the recorder via USB, the read speed was about 4.5 MB / s. The instructions say that the recording may be interrupted if the card does not correspond to class 6 or higher. I did not encounter such phenomena.
The size of the 5-minute Full HD movie while moving varies from 266 - 309 MB. At night more due to more noise. At 8 GB memory card fits 130-150 minutes. The documentation shows the time of 144 minutes.
Here are the video stream settings in the video:

Overlap adjacent clips not. But at the same time docking is implemented perfectly - frame by frame. I conducted a special test - I videotaped a stopwatch. Here’s what happened for 25 frames per second (you shouldn’t pay attention to some blurring - the lens has a fixed focus and is not suitable for shooting at such a distance):

Test conducted 3 times. The difference between the last frame of the first video and the first frame of the second video was 50, 62 and 55 ms. With a frequency of 25 frames / s (PAL - 25 frames, NTSC - 30), the difference between the stopwatch in two adjacent frames should be 40 ms. Here we see a little more, most likely due to the inaccuracy of the millisecond timer on the phone or due to missing keyframes in the MPEG4 video stream. But it is obvious that we still fit in one frame and do not lose anything.
I also noted an interesting feature: even inside one video, the time between adjacent frames jumps like this: 60-30-30-60-30-30 ms. I believe that the features of MPEG4 compression with its reference frames also have an effect here. In general, the most important thing is that the frames between the rollers are not lost.
Viewing angle
The documentation states that the viewing angle of the AdvoCam FD5 is 120 degrees horizontally . At the same time, the widest horizontal angle known to me from recorders of mass use in Full HD mode is 108 degrees . Therefore, it is obvious that here the manufacturer mistakenly indicated a review along the diagonal.
I tried to measure the real horizontal angle in 1080p mode. The technique is simple, based on school trigonometry:
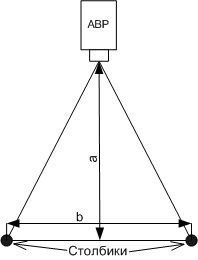
From a distance of 11.5 cm in the frame, the entire ruler is 20 cm long and about 1.5 centimeters at the edges.

Applying a simple formula, we get a real horizontal angle of about 88 degrees.
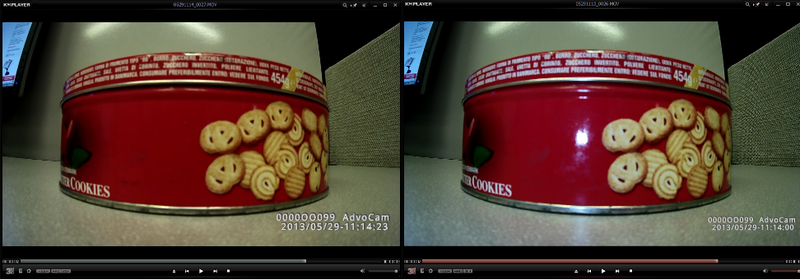
What is even strange, with AdvoCam FD5, the viewing angle is the same for 720p and 1080p, whereas usually the angle with a lower resolution is significantly larger.
In the photo below, frames from 720p and 1080p are nearby.
Roller examples
I will give examples of videos for different shooting conditions. To achieve maximum quality, I highly recommend carefully wiping the lens and washing the windshield inside. On my car, additional noise is created by the windshield heating threads. Unfortunately, mostly managed to shoot on cloudy days. With the sun, as a rule, clarity is even higher.
Do not forget to enable HD in the settings!
1. Cloudy day without rain, slow motion, fast motion, tunnel, 1080p. The rooms in their own and adjacent rows can be seen very well, including in the tunnel. But at high relative speed with the oncoming number to distinguish the number is not always possible. However, I have never seen a confident number recognition at high speed.
2. Day, moving along the pavement when the car jumps - this is usually a noticeable degrading factor, 1080p. No problem distinguishing numbers.
3. Day, heavy rain, 1080p.
4. Day, light rain, 720p, 50 fps.
5. Night, 1080p. I would say not bad.
6. It is an overcast day, confidently distinguishing numbers with medium lighting and fairly fast driving, 1080p.
Sample photo

They write, you can take a photo while shooting, but I did not check it.
Advantages and disadvantages
Below I will try to systematize the impressions.
Pros:
- high-quality picture day and night, readable numbers in its own and neighboring traffic lanes at average relative speeds
- accurate recording of clips without gaps
- mechanical buttons, basic functions with one touch
- backlight
- reliable fastening, excluding recorder jitter
- opportunity to enter the registration number in the video directly in the registrar
- relatively affordable price compared to its predecessors
Minuses:
- inconvenient to remove the recorder from the mount
- horizontal viewing angle less than the stated - about 88 degrees
- hidden installation is problematic because of the bright inscription on the front side and not very compact dimensions
findings
In general, AdvoCam did a very good job on the bugs, taking into account comments on previous models. I would like not to stop at improving the quality of the recording. The processor copes with the video stream, it's about optics. I think that after some time the notorious number distinction will become possible even in more difficult shooting conditions. I can recommend for purchase - among the competitors this DVR has quite tangible advantages.
Source: https://habr.com/ru/post/182188/
All Articles