SaaS Site Builders. Google sites

SaaS is an abbreviation of English Site as a Service ( Site as a Service ). This means that simultaneously with the designer to create your site. You are provided with hosting for this site. That is, you can create and place your website on the Internet yourself. Without the services of Web Studio. Fast, easy and free.
Google Sites Designer is one of the many Google services. Who does not know Google+, Google Analytics, Google AdWords. Therefore, to create a site on the Google Sites designer, you need to register and get a Google Account.
Link to Google Sites. sites.google.com
')
Sign up and sign in with your Google Account.
In the Account section there is a subsection Products. In the Products section, find the blue Sites icon

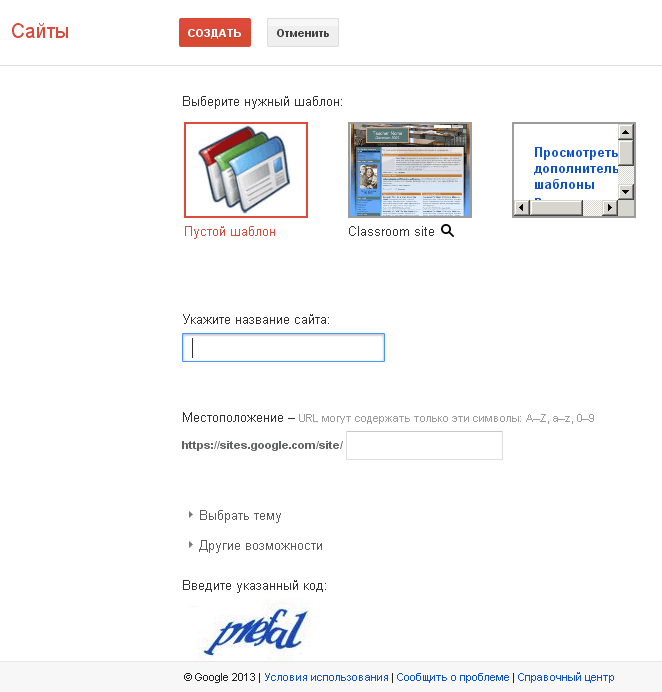
Clicking on the icon will open the Sites window with a red Create button.
Think up and enter a name (this is important, then you will not correct it). Select a Template (it does not matter, then you can change it) Create a Website.
Updating and editing the site is considered on the Live example of my site.
Live Site: sites.google.com/site/technograderu
Google Sites Designer provides 2 main interfaces.
- Site editing
- Site management
From the Edit site mode, when you click the More button (additional actions), the menu pops up, where there is a Manage site link in the Actions section of the site.
From the Site Management mode, you can access the Edit Site mode by clicking on the Site Name link at the top.
Site editing
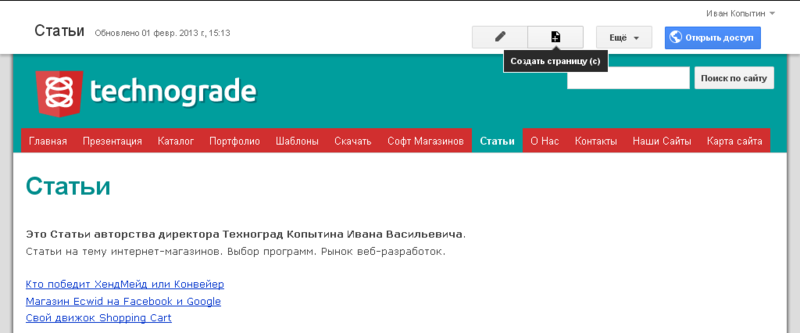
In edit mode at the top right there are 4 buttons. Changes take place right on the live site. It's comfortable. The site is always before your eyes. All changes are immediately visible. You do not need to open an additional window for viewing changes.
- Edit Page (pencil icon)
- Create page (pictogram list +)
- Additional actions (more inscription)
- Open Access (blue labeled)
Site management
This is a Google Account page with sections.
- Recent site activity
- Pages
- Applications
- Page Templates
- Google Apps Scripts
- Deleted items
- Are common
- Sharing and permissions
- Adsense
- Web address
- Colors and Fonts
- Topics

Editing
Create page
When you click on the New page button on the top right (the sheet + icon), the New page window appears.

Enter the title. If necessary, select a template. The default is a regular web page. Select a location. It will be the parent root page. Or a subpage related to the parent page. When everything is complete, click the red Create button . After creating the Page on the website, the Edit Page editor will immediately load.
Edit page
The page can be changed immediately after creation. Or when necessary, when editing a site. To do this, click the Edit page button at the top right (pencil icon)
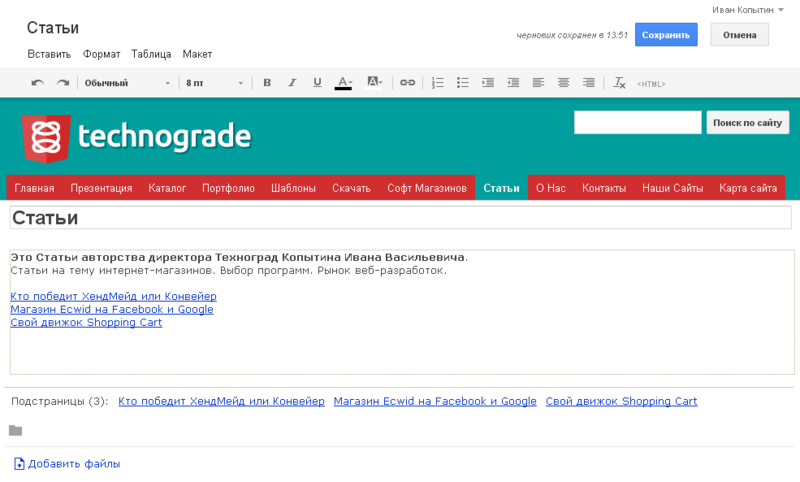
This is the main tool of Google Sites.
At the top is a horizontal page formatting bar. You can change the page title in the top field. You can simply write the text in the main field. You can add files (this allows the layout of the web page). At the top right, the Save and Cancel buttons appeared to confirm the changes made.
Change menu
- Insert
- Format
- Table
- Layout
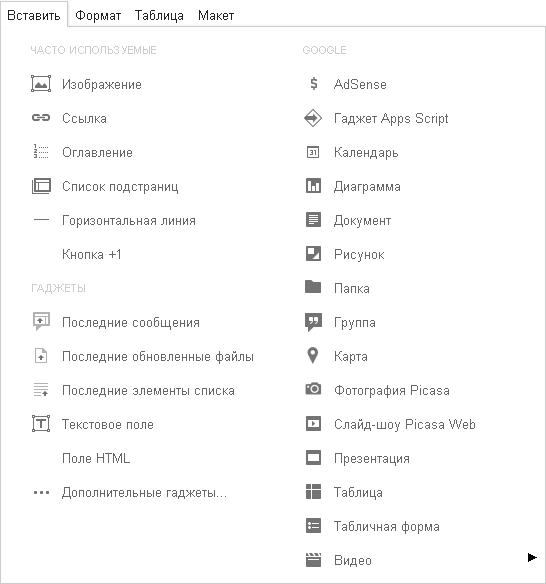
Insert menu
Allows you to embed on the page a huge number of different types of content. Gadgets are third-party applications. You can insert Google applications.
Often used
- Picture
- Link
- Table of contents
- List of sub-pages
- Horizontal line
- +1 button
Gadgets
- Last messages
- Last updated files
- Last items in the list
- Text field
- HTML field
- Additional gadgets
- Adsense
- Apps Script Gadget
- The calendar
- Diagram
- Document
- Picture
- Folder
- Group
- Map
- Picassa Photography
- Picassa Web Slideshow
- Presentation
- Table
- Tabular form
- Video
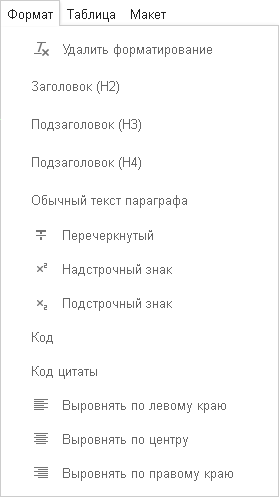
Format
Duplicate Panel top horizontal format bar
- Remove formatting
- Headline
- Subtitle
- Plain Paragraph Text
- Crossed out
- Superscript
- Subscript
- Code
- Quote Code
- Align Left
- Center align
- Align right
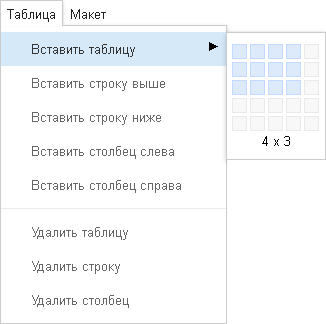
Table
Allows you to work with tables.
- Insert table
- Insert row above
- Insert row below
- Insert left column
- Insert column to the right
- Delete table
- Delete row
- delete column
Layout
Allows you to select the page layout.
- One column (plain)
- Two columns (simple)
- Three columns (plain)
- One column
- Two columns
- Three columns
- Left sidebar
- Right sidebar
- Left and right side panels

Page layout is different from the layout of the entire site. The link Changing the site layout is available in the Additional Actions menu (the More button) when Editing a site.

Insert image
Click the following. Edit Page button (pencil icon) Insert menu. Link Image. The Add Image window opens. Download an image file from your computer. Or select an image from the already uploaded. Click OK.
The image will appear on your page.

Setting item
In order to change the inserted item. You must first go to the page where this element is located. Then click the Edit Page button (pencil icon). When you click on the desired item (when changed, it represents a gray square with a title). A small settings menu will appear at the bottom of the item.

You can center the element on the page. Set the wrap element text. You can delete an item. The gear wheel opens the item settings window
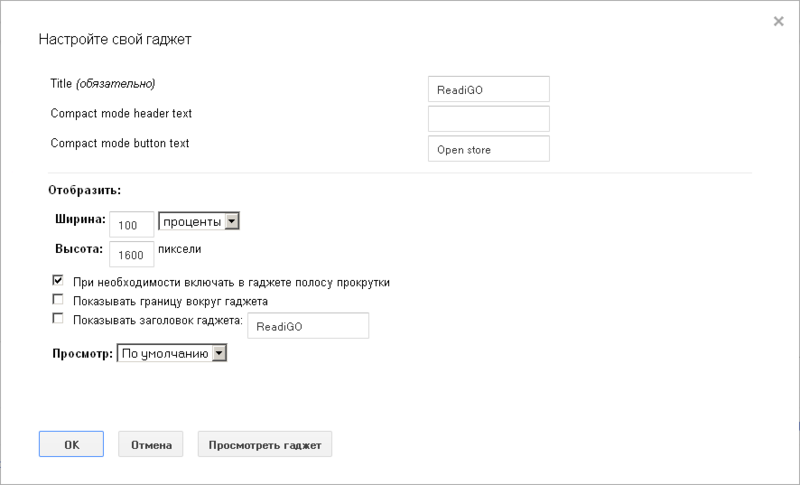
Other settings of the gadget were set when it was inserted (in the example, this is the Ecwid online store gadget)
In this window, you can adjust the size of the gadget on the page, its title, everything you need to edit the page.
Control
This is a page in a Google Account with sections. From the Edit site mode when you click the More button (additional actions), the menu pops up, where there is a link called Site Management in the Actions section on the site
Pages
This is a live (editable) page tree. You can use the mouse to move the page to any level of the hierarchy.

Applications
This is a materials manager. That is, you can download, delete, watch, download. All media used on the site
Page Templates
There are Standard Templates and User-created Templates.
Standard Templates
- Ads - Mini Blog with Ads
- File Manager - File Storage Location
- List - Create lists to track various information
- Webpage (default) - Standard webpage
The user himself can create any templates he needs for his site. And when creating pages to use them, rather than the standard. It is much more efficient.
Web address
The site can be linked to your personal domain (for example, www.example.com ). To do this, first confirm that you own the domain.
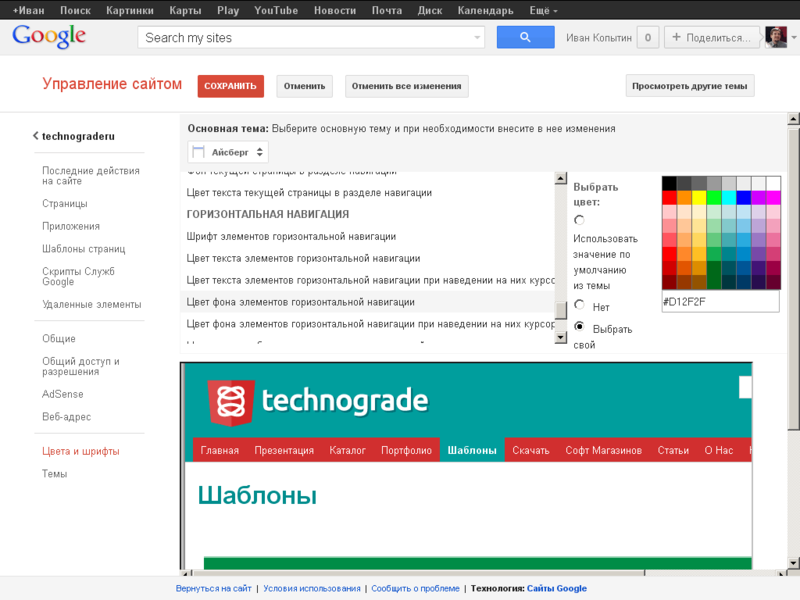
Colors and Fonts
- The whole page - 6 settings
- Website header - 5 settings
- Content area - 9 settings
- Content Area Gadgets - 10 Settings
- Sidebar Gadgets - 10 Settings
- Navigation Gadget - 2 Settings
- Horizontal navigation - 7 settings
- Horizontal navigation dropdown menu - 2 settings
A total of about 50 font settings and colors. It's a lot. And it’s quite enough to customize Colors and Fonts well.
Themes
The designer offers 52 templates to choose from. Additionally, each template can be customized in the section Colors and Fonts. Color, Font, Heder, Footer, Von. Who knows how to customize all this, selects the first template in the list. Who does not know how, chooses the one you like.
Besides. Anyone can publish their site, made on Google Constructor, as a Template. And share design with the community. Published - popularity. Users - choice. There are a lot of templates. Loading as prokupki.
Sections
- Popular
- Business cooperation
- Events and events
- Schools and educational institutions
- Clubs and organizations
- Personal and family
- State and non-profit

Source: https://habr.com/ru/post/181614/
All Articles