Installing Debian Wheezy on Buffalo Linkstation Pro

Let's start with the fact that I needed nasik. And I bought myself even though it was used, but with a gigabit and two USB ports. I will not tell you about the standard firmware of nasov, of course, apart from synology, and judging by the subject, it is clear that we will change it. In general, the NAS model was originally chosen with the ability to install something else, native — debian for example. After Gents, Debian is of course a very conservative distibtive. Therefore, I am sure that the tango with this nasikom is not over yet. Expect gently soon :) In the meantime, let's take a look at debian. The nature of this nasika still the same. 2 weeks spent (usually after robots 3-4 hours). Not only did the console cable not yet make, it was difficult to understand. And now as a native.
I must say that there are bugs in the wedge install that prevent you from installing a working system. Here I will give you all the details. If you decided to%% username% please your network drive with a fresh kernel, then you are under the cat!
Let's start with the technical specifications. Of course, in 2013, this is already a reality,
')
Technical characteristics of this device:
Buffalo Linkstation Pro V1
Processor: Marvell 88F5182
Technology: System on Chip (SOC)
Technology: ARM926EJ-Sid (wb) [41069260] revision 0 (ARMv5TEJ)
Frequency 400Mhz
Bus: = 200Mhz
RAM: 128MB 2 NANYA NT5TU32M16AG or Elpida EDE5116AF DDR2 SDRAM
Flash Memory: SST 256K CMOS Multi-Purpose
NIC: Marvell 88E1111 Gigabit Ethernet Transceiver ("Alaska" series).
USB: 2 - USB 2.0 Max: 480 Mbps (HS Mode), Max: 12 Mbps (FS Mode)
SATA Controller: Marvell Serial ATA Adapter
besides SATA inside there is still a place for eSATA wiring, thanks for the present, Buffalo!
For installation, I used the Serial cable to ... yes, it’s clear what the console cable is for. The main thing is that you do not need to have a Serial connection. After all, not everyone wants (knows how to) unpack the board.
Let's start
To install you need:
TFTP server (I used tftpd32, you can download it from tftpd32.jounin.net)
The uImage.buffalo installation files are the kernel, and the initrd.buffalo ramdisk (you can download http.us.debian.org/debian/dists/wheezy/main/installer-armel/current/images/orion5x/network-console/buffalo/ lspro).
Only these two files. we will not need config-debian.
It is also desirable router, and configure it with a subnet to 192.168.11.x
Register the address 192.168.11.1 to the computer from which we will do all the operations.
Or if you are on the laptop, and the router is far away, and you are too lazy just like me, you can safely set the% username% subnet on the router, or just change the mask to / 16 (255.255.0.0) and bridan the network card of the laptop with Wi-Fi, set on the bridge, the desired address, and connect the patchcord to the linkstation.
In addition, a NAS with a reboot in tftp will produce a “sound cardiogram”, this is normal. By briefly pressing the POWER button, you can turn off the sound, if that :)
I will not describe the installation of debian (I took a video screen). Here are the main nuances:
If possible, copy all the data from your NAS. To avoid data loss.
When setting up the disk layout, you can safely use Guided, that is, to give the installer the opportunity to do the% username% for you yourself. But then you will need to change a couple of values: change the formatting of / boot and / to ext3 and remove the boot-flag from the / boot partition
Install debian on a USB drive fails. After all, the USB controller is initialized only after the system is booted.
To boot from tftp you need to do in the correct sequence:
1. Turn off the NAS completely. And then pull out the power cord for 3-4 seconds, and connect the power naturally.
2. Press and hold the RESET button on the back of the device and press the POWER button. Must start playing the melody. At this moment you have an already enabled and configured tftp server. (port 69, if you forgot. in the tftp root only 2 uImage.buffalo and initrd.buffalo files downloaded from the debian repository).
The disk layout should be msdos. The first ext3 partition (where only the kernel and ramdisk will be). Section without boot flag. For uBoot, the boot flag is not needed. It was also encountered that you can install on the ext2 / boot partition, but did not try.
Recommended partition table:
1. primary, size 128M, mount / boot, ext3
2. primary, size 7G, mount /, ext3
3. logical, size 384M, mount swap, swap
4. logical, size -inf, mount / home, ext3 | 4
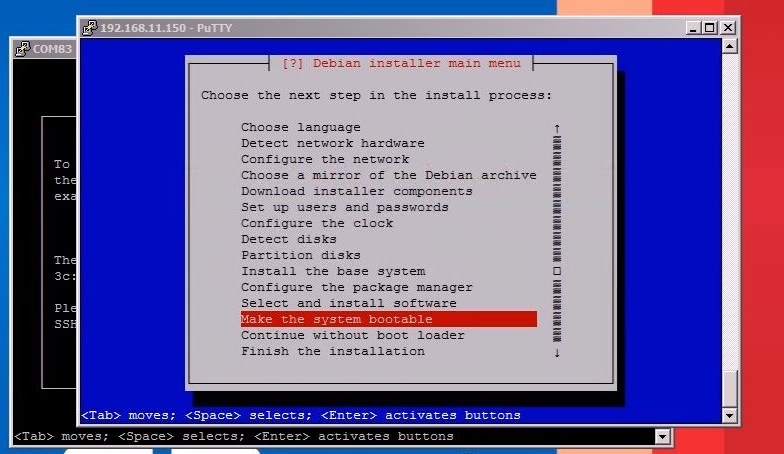
As I already mentioned, there is a bug in the installer that does not install three packages:
uboot-envtools - responsible for controlling the memory of uBoot.
uboot-mkimage - creates a uBoot compatible kernel image and ramdisk.
flash-kernel is an add-in for automatically creating a kernel and ramdisk, using uboot-mkimage, then writing it to the / boot partition, while backing up old kernels.
You will need to install them yourself before the item make the system bootable.
To install the necessary packages, open an additional terminal window, go to the shell, mount the proc and dev. chroot to target and there is already apt-get what you need.
mount -t proc none / target / proc
mount -o bind / dev / target / dev
chroot / target / bin / bash
apt-get install uboot-envtools uboot-mkimage flash-kernel
After successful installation of the packages, press make the system bootable and complete the installation.
If you want to access from the system in the flash uBoot and you already have uboot-envtools installed - run the following command:
echo “/ dev / mtd0 0x3F000 0x1000 0x1000”> /etc/fw_env.conf
You can extract the kernel and ramdisk (for recovery) from the firmware files.
You can load on tftp, and flash the nasik with a stock firmware, in case you want to return everything back.
buffalotech.com/support-and-downloads/download/LSPro_103.zip
A useful utility written in Java for stock (original) firmware.
need JRE.
(reference sourceforge.net/projects/linkstationwiki/files/acp_commander )
java -jar acp_commander.jar
ACP_commander out of the linkstationwiki.net project.
Used to send ACP-commands to Buffalo linkstation® LS-PRO.
WARNING: This is an experimental software that might your linkstation!
Version 0.4.0 (beta)
Usage: acp_commander [options] -t target
options are:
-t target ... IP or network name of the Linkstation.
-m MAC ... define targets mac address set in the ACP package.
-na ... no authorization, skip the ACP_AUTH packet.
-ba ... use bug / bufferoverflow on LS to bypass usuall password
authentication. Standard until acp_commander 0.4.
-pw passwd your LS admin password.
-i ID ... define a connection identifier, standard: random value.
-p port ... define alternative target port, default = 22936
-b localIP ... bind to local address.
-f ... find linkstation (s).
-o ... open the telnetd 'and' passwd -d root '.
-c cmd ... sends the shell command cmd to the linkstation.
-s ... interactive shell.
-cb ... clearoot, output of df follows for control of success.
-ip newIP ... change IP to newIP (basic support).
-save ... save configuration.
-load ... load configuration.
-blink ... blink LED's and play some tones.
-gui nr ... set WEB GUI language 0 = Jap, 1 = Eng, 2 = Ger
-addons ... install addons.tar from local or linkstationwiki.
-diag ... run some diagnostics on LS settings (lang, backup).
-emmode ... Linkstation reboots next into EM-mode.
-normmode ... Linkstation reboots next into normal mode.
-reboot ... reboot linkstation.
-shutdown ... shut Linkstation down.
-d1 | -d2 ... set debug level, generate additional output
-q ... quiet, surpress header, doesn’t work with -h or -v
-h | -v ... extended help
-u ... usage (this output)
*) this address is not the MAC address
the ACP packet. ACP packets if they
carry the correct (its) MAC address or FF: FF: FF: FF: FF: FF
At nas-central.org (linkstationwiki.net), which is
not related with Buffalo® in any way.
Experimental software, it might be your linkstation!
code by Georg, readme here by mindbender
Video tutorial, as promised. I recommend to watch the video before installation.
Stock fw_printenv just in case.
baudrate = 115200
loads_echo = 0
ipaddr = 192.168.11.150
rootpath = / nfs / arm
cpuName = 926
CASset = min
MALLOC_len = 4
bootargs_end = ::: DB88FXX81: eth0: none
ethact = egiga0
ethaddr = 00: 68: 61: 62: 72: 61 is your poppy address. it is desirable not to change.
buffalo_minor_ver = BOOT_MINOR_VER = 1.00
ethprime = egiga0
usb0Mode = host
usb1Mode = host
bootargs = console = ttyS0,115200 root = / dev / sda2 rw initrd = 0x00800040,15M panic = 5 BOOTVER = 1.10
serverip = 192.168.11.1
buffalo_ver = BOOTVER = 1.01
build_time = 10: 35: 38
initrd = initrd.buffalo
kernel = uImage.buffalo
bootargs_base = console = ttyS0,115200
bootargs_root = root = / dev / sda2 rw initrd = 0x00800040,15M panic = 5
def_tftp = tftp 0x00100000 $ (kernel); tftp 0x00800000 $ (initrd); setenv bootargs $ (bootargs_base) $ (bootargs_root) $ (buffalo_ver); bootm 0x00100000 0x00800000
stdin = serial
stdout = serial
stderr = serial
enaMonExt = no
enaFlashBuf = yes
enaCpuStream = no
bootdelay = 3
disaMvPnp = no
overEthAddr = no
force_tftp = 1
bootcmd = ide reset; ext2load ide 1: 1 0x00100000 / $ (kernel); ext2load ide 1: 1 0x00800000 / $ (initrd); setenv bootargs $ (bootargs_base) $ (bootargs_root) $ (buffalo_ver); bootm 0x00100000 0x00800000
Environment size: 1010/4092 bytes
Note: if you stop uboot via serial or netconsole, and select tftp booting, bootcmd will assume a different value:
bootcmd = tftp 0x00100000 $ (kernel); tftp 0x00800000 $ (initrd); setenv bootargs $ (bootargs_base) $ (bootargs_root) $ (buffalo_ver); bootm 0x00100000 0x00800000
If you disassembled your nasik and accidentally put a handkerchief on an aluminum case, and then turn it on. And now he no longer starts, do not worry - most likely the fuses are blown. Try using a multimeter to check the fuse near the power inlet (black ones). One fuse for + 12V another for + 5V. Most likely they burned down. In order not to look for replacement parts for a long time, a hint: almost any PCI> USB card. They have such fuse. :)

Immediately answer some questions:
1. Yes, you can put owncloud, but mother will be lagging dear. 400 MHz processor.
2. Yes, Nasik sees 2TB hard drives. and he has not yet unsoldered eSATA port, which is not so difficult to put himself.
3. Yes, it is very quiet and cold. On debian there is even a tuzla to control the fan, the LED and other things.
4. Yes, it can also be used as an alarm clock. he has a speaker. loud by the way.
5. According to NFS, the read / write speed is up to 42/38 Mb / s (samba hasn’t been lifted yet).
6. Yes, percents can be overclocked. but why?
7. Price? Took for 26 euros on ibey with delivery and hard disk 250 GB.
Thank you for your attention. I will be glad to answer all the questions.
Source: https://habr.com/ru/post/181486/
All Articles