Search for networks and connect to Wi-Fi in C #
Once I was looking for an opportunity to connect from my program to the WI-Fi network, for someone this may not be a problem, but for me it turned out to be a big stone on the road.
Let's divide our project into two parts, conditionally, just to better understand.
To begin with, we will create a project in Visual Studio in the C # language - Windows FormsApplication and call it the way we like it the most, I called “Wifi”.
So, we throw on the form two kotrola:
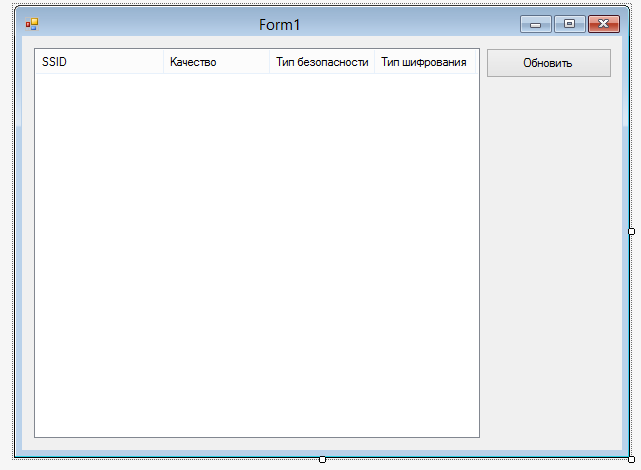
This is all we need, my window looks like this:
After that we will add two new files to the project, this is the “Native Wifi” library, - somewhere I found it on the Internet.
Sources can be found here.
Declare the namespaces we need
')
Now we create the procedure for processing the click of our button and add this code there:
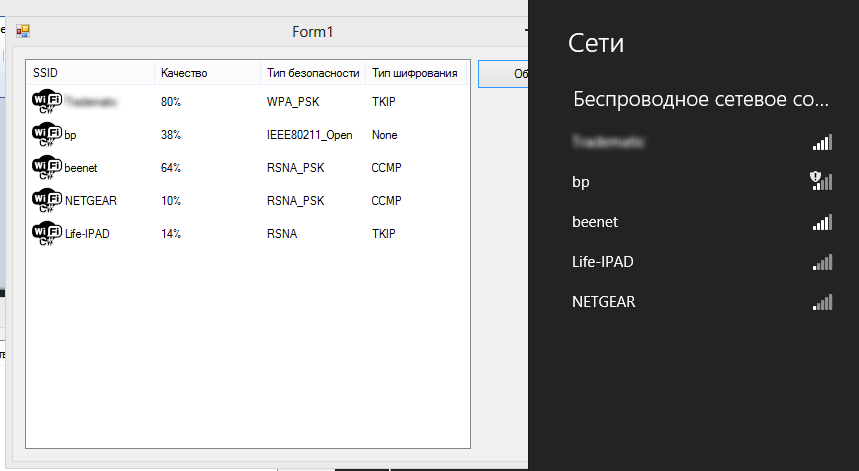
Now you can try to start the application and see that all the necessary networks are found, you should have something like this, it looks like that to me, the dark bar on the right is the field for connecting to the network in Windows 8:
And so, with the simplest, we are finished. Now you need to connect to the required network, I will consider an example of connecting to my network, it is the first in the list in the program.
Create another button and add this code there:
Let me explain only the most important thing, this line:
Here we create a profile for our connection, the template (strTemplate) looks like this:
I chose it, because I know in advance what my network is. More details on the various options can be found here:
http://msdn.microsoft.com/en-RU/library/windows/desktop/aa369853(v=vs.85).aspx .
Simply put, we fill our XML document with previously known data that we already know (network key) and previously found (name, security, encryption), add a profile and connect.
We start the project, update the list of networks, select ours and connect.
The example is certainly not universal, but what's stopping you to check what kind of encryption the network uses and choose the desired template for the profile.
You can download the project in Visual Studio 2012 via this link .
Thanks for attention.
Let's divide our project into two parts, conditionally, just to better understand.
To begin with, we will create a project in Visual Studio in the C # language - Windows FormsApplication and call it the way we like it the most, I called “Wifi”.
Part One: Finding Available Networks
So, we throw on the form two kotrola:
- ListView - let's call listNet, and add 4 columns to it, just for clarity.
- Button - let's call it btnRefresh
This is all we need, my window looks like this:
After that we will add two new files to the project, this is the “Native Wifi” library, - somewhere I found it on the Internet.
Sources can be found here.
Declare the namespaces we need
using System; using System.Collections.Generic; using System.ComponentModel; using System.Data; using System.Drawing; using System.Linq; using System.Text; using System.Windows.Forms; using NativeWifi; ')
Now we create the procedure for processing the click of our button and add this code there:
WlanClient client = new WlanClient(); foreach (WlanClient.WlanInterface wlanIface in client.Interfaces) { Wlan.WlanAvailableNetwork[] wlanBssEntries = wlanIface.GetAvailableNetworkList( 0 ); // , istNet.Items.Clear(); foreach (Wlan.WlanAvailableNetwork network in wlanBssEntries) { // ListViewItem listItemWiFi = new ListViewItem(); // , - Trim((char)0) listItemWiFi.Text = System.Text.ASCIIEncoding.ASCII.GetString(network.dot11Ssid.SSID).Trim((char)0); // , . listItemWiFi.SubItems.Add(network.wlanSignalQuality.ToString() + "%"); // listItemWiFi.SubItems.Add(network.dot11DefaultAuthAlgorithm.ToString().Trim((char)0)); // listItemWiFi.SubItems.Add(network.dot11DefaultCipherAlgorithm.ToString().Trim((char)0)); // // listNet.Items.Add(listItemWiFi); } } Now you can try to start the application and see that all the necessary networks are found, you should have something like this, it looks like that to me, the dark bar on the right is the field for connecting to the network in Windows 8:
Part Two: Connection
And so, with the simplest, we are finished. Now you need to connect to the required network, I will consider an example of connecting to my network, it is the first in the list in the program.
Create another button and add this code there:
try { WlanClient client = new WlanClient(); foreach (WlanClient.WlanInterface wlanIface in client.Interfaces) { Wlan.WlanAvailableNetwork[] wlanBssEntries = wlanIface.GetAvailableNetworkList(0); foreach (Wlan.WlanAvailableNetwork network in wlanBssEntries) { String profileName = System.Text.ASCIIEncoding.ASCII.GetString(network.dot11Ssid.SSID).Trim((char)0); // if (listNet.SelectedItems[0].Text.Equals(profileName)) { String strTemplate=""; String authentication=""; switch ((int)network.dot11DefaultAuthAlgorithm) { case 1: // Open break; case 3: // WEP break; case 4: // WPA_PSK strTemplate = Properties.Resources.WPAPSK; authentication = "WPAPSK"; String encryption = network.dot11DefaultCipherAlgorithm.ToString().Trim((char)0); // String key = "0000000000"; String profileXml = String.Format(strTemplate, profileName, authentication, encryption, key); wlanIface.SetProfile(Wlan.WlanProfileFlags.AllUser, profileXml, true); wlanIface.Connect(Wlan.WlanConnectionMode.Profile, Wlan.Dot11BssType.Any, profileName); break; default: break; } } } } } catch (Exception ex) { MessageBox.Show(ex.Message); } Let me explain only the most important thing, this line:
String profileXml = String.Format(strTemplate, profileName, authentication, encryption, key); Here we create a profile for our connection, the template (strTemplate) looks like this:
<?xml version="1.0"?> <WLANProfile xmlns="http://www.microsoft.com/networking/WLAN/profile/v1"> <name>{0}</name> <SSIDConfig> <SSID> <name>{0}</name> </SSID> </SSIDConfig> <connectionType>ESS</connectionType> <connectionMode>manual</connectionMode> <MSM> <security> <authEncryption> <authentication>{1}</authentication> <encryption>{2}</encryption> <useOneX>false</useOneX> </authEncryption> <sharedKey> <keyType>passPhrase</keyType> <protected>false</protected> <keyMaterial>{3}</keyMaterial> </sharedKey> </security> </MSM> </WLANProfile> I chose it, because I know in advance what my network is. More details on the various options can be found here:
http://msdn.microsoft.com/en-RU/library/windows/desktop/aa369853(v=vs.85).aspx .
Simply put, we fill our XML document with previously known data that we already know (network key) and previously found (name, security, encryption), add a profile and connect.
We start the project, update the list of networks, select ours and connect.
The example is certainly not universal, but what's stopping you to check what kind of encryption the network uses and choose the desired template for the profile.
You can download the project in Visual Studio 2012 via this link .
Thanks for attention.
Source: https://habr.com/ru/post/181251/
All Articles