“Tile Hunt” - tiling texture in 5 minutes based on a photo (cycle: Working with textures and images)

Introduction
To balance the acid-alkaline balance after my previous, most likely unsuccessful, from the point of view of audience sympathies, publication and in order to bring more benefit to the resource than harm, I publish a new tutorial. Unlike all previous lessons, it will be shorter and resemble this article in length. I will say even more, he will repeat it, as if singing in a low voice. I hope we will be able to sing and together we will issue a harmonious blowing. There it was a question of blending the tiles - here we will talk about the tiles themselves. On the creation of a hidden texture based on any photo. This is a basic knowledge, more basic than it can only be learning the interface of the Photoshop package. If my tenor is fake - chase him away.
So, the main question of this night is how to make a quality tile texture in 5 minutes? I think a good question, and it is quite possible to spend 5-10 minutes of your time on it. Maybe after that, for your own prototypes, you will use the original tiles created by your hands, without wasting time searching for an artist or texture maker who could help you. Tempting?
')
First of all, we find a photo that satisfies you from those that do not have copyright (usually in the margins or in the center of the image). Watch out for this, because the gaming industry is rich in funny situations and this is not the last one that can happen to you. Although. What can be more fun to forget in the pre-release version of the texture date texture from the game Unreal Tournament? And it happened. True, I have not seen smiles on people's faces and have not heard their joyful laughter.
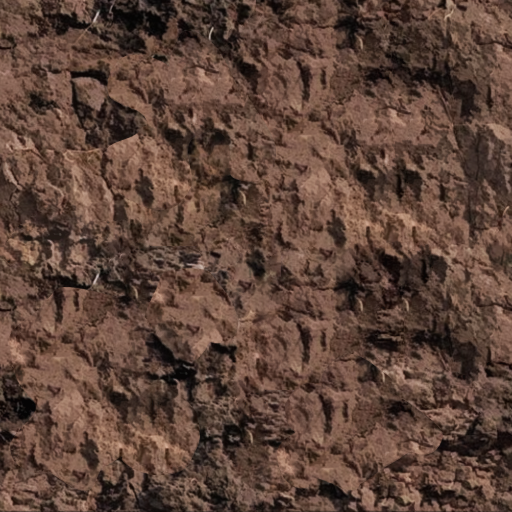
Let's get started 5 minutes. All honest. Your learning process will take a little more. You will get from the photo on the left - the tile texture on the right. Already, classically, all this will be served with a sauce of humor and small mini-industrial stories.
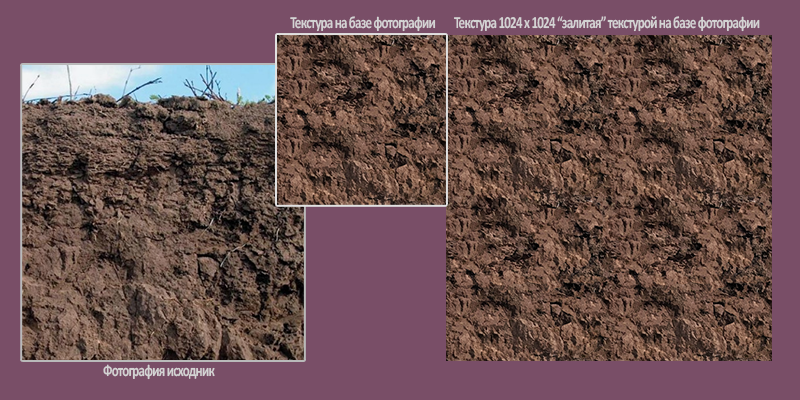
I took this photo from the abstract of Olga Vasilyevna Kuzmina . Not too big and contains all the upcoming problems that a person who manufactures tile textures (or tile textures, or simply "tiles") may face. First, she is small. Secondly, there is sky. Third, the texture is not uniform, which can lead to the emergence of a periodic pattern with repeated repetition.
Texture Normalization
And if with the first - we reconcile, then the second requires some permission. Let's bring the future tile to a digestible view. At least get rid of the sky, so that the soil was more or less uniform. This can be done in two ways. With a classic frame selection using the Rectangular Marquee Tool (M) or using the M key. After you have selected the required volume, click on the standard copy-paste operation for most packages - Ctrl + C and Ctrl + V. Drag the resulting shred into the desired place (using the mouse) and repeat the operation so that you never see the sky again in the life of this tile. If something went wrong and you do not trust your hands, switch to the Move Tool mode (V) and drag objects using the cursor keys (arrows). This method is important when you need to accurately position the element.
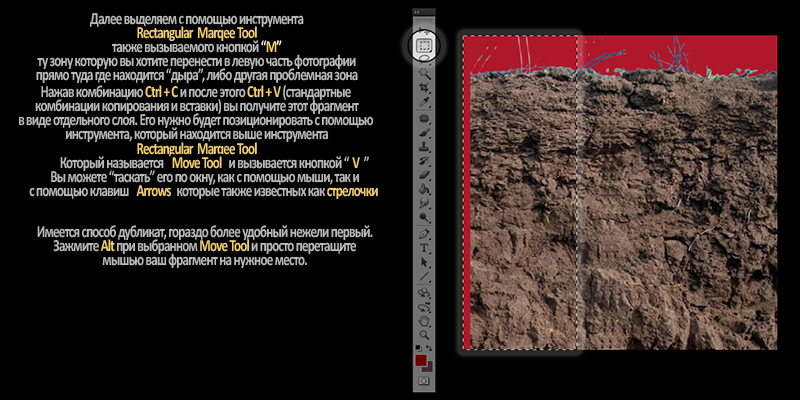
Note: The sky of my tile in the illustration is red. And this is not because I made a sly or applied a “mask”, but because I wanted to express the problem explicitly. Repeating the same as me - you get the same result. No tricks.
Also, the cloning operation can be performed with the Alt key held down while the Move Tool (V) is on, it is used to move any objects (layers, groups). That is, you select the volume you need, hold down the Alt key and drag the selection to where you need it. Selection can be any. Made with the help of Magic Wand, Lasso Tool - so you can copy all possible selections and their contents. If you hold Shift while doing this, your clone object will move in a straight line, either to the left, or to the right, or upwards, or downwards, without moving down from the selected direction.
First seams (Path Tool)
- We have a problem cap. Stitches have appeared! Whistle Mr. Patch on the bridge!
In other words, we call the Path Tool (J) from the same toolbar (to the left of the working canvas).
Important note: By default, this tool can be closed by others. In Photoshop, under one icon can hide and three. They will appear if you click on the icon, which for a terry rookie (you and me) may not be obvious. If you are too lazy to drag the mouse pointer to them - click Shift + J on the keyboard. Almost all important operations, as in real-time strategies, are protected on short-cat. You will not see firmware like in StarCraft here, but it will be possible to speed up the work process by orders of magnitude. Over time, this will come to automatism.

With the help of Path Tool (J), we highlight the problem area of the seam, in order to drag it to the place where the texture will be removed that does not contain defects and other artifacts. For me, a comparison with a plastic surgeon is much more interesting. If we assume that the seams are scorched skin, well ... or wrinkles, then clean, good skin will be a texture that does not contain problems in the neighborhood. Its something we take for the sample.
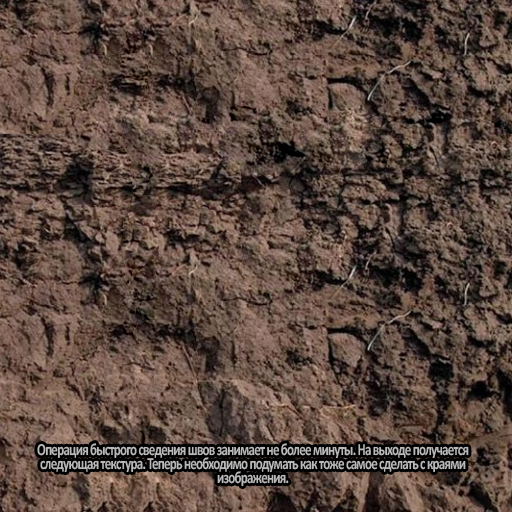
Total ... already turned out a good texture. For the time while I was writing this text (see above), it would be possible to sprinkle a dozen of such textures. If not more. However, we are not interested in the speed of my set now, but rather in what to do with the edges of this photo. This is our tile.
In ancient times…
... well, I could tell you the stories about the fact that there used to be no necessary tools and we went through hell. And then getting used to going through hell, I spent a couple of years as a macaque doing this, ignoring the convenient tool Offset.
Writhing seams with a shift (Filter Offset)
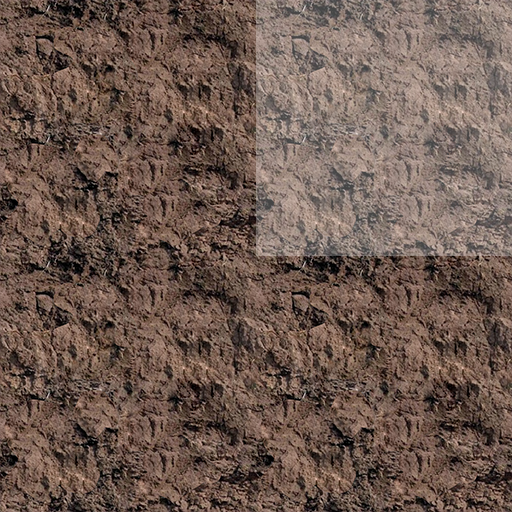
This wonderful filter allows you to save you from routine operations. You need to open the problematic texture, preferably after all post-processing operations, select the Filter / Other / Offset option and set the required offset in pixels. If your texture, as in our case 512x512, then the most convenient Offset will be 256 pixels. Thus, we do not put an end to this texture, but remove it using the already familiar Path Tool (J).

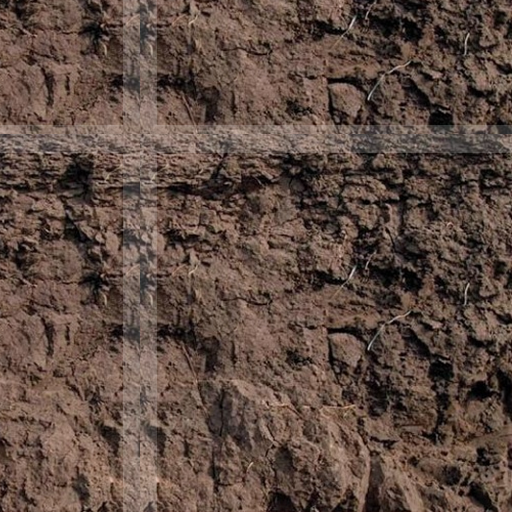
Next, we return the Offset values back. And ... the texture is ready. If you try to lay it out like a tile, it will become noticeable that a certain periodic pattern appears in certain places. Your task is to quickly eliminate it.

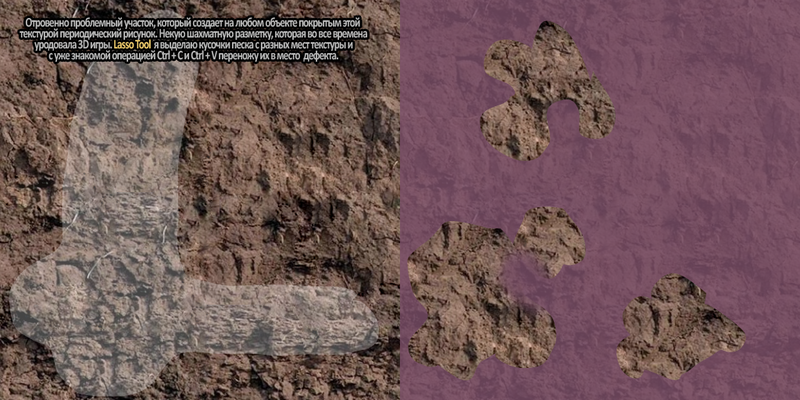
In the following picture I have indicated the zone of these troubles in a whitish color. We will put the patches on these zones. At the same time, we will do this not with the help of the Path Tool (J), but with the help of the Lasso Tool (L). Why is this, and not vice versa, I will tell in the tips, at the end of the lesson.
We catch the buggy lasso (Lasso Tool)
Take the Lasso Tool Lasso Tool (L) and select the ground, which lies on top of the pressed ground, which damn hinders us. Then through Ctrl + C and Ctrl + V we transfer them to the right places. The task is about an eye to get rid of the obvious shadows and explicit elements of the texture that are present in a single number and will be noticeable during repetition. Yes, of course, this will make the texture less unique. But we need to cover the whole ravine here, and any black spot that repeats along the entire perimeter is worthless.
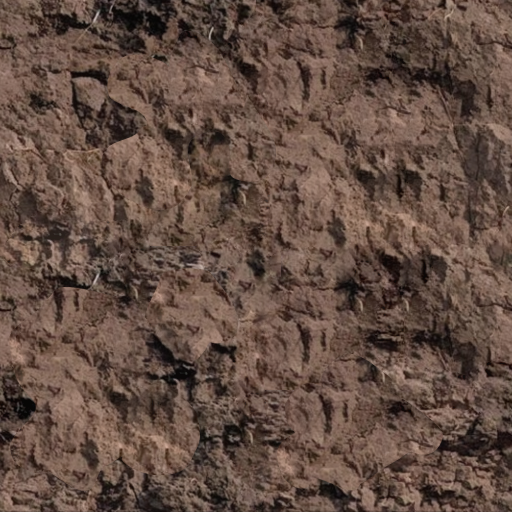
Now our texture looks like this.

And when you lay it out in the form of a tile, it looks much better. Nowadays, things like blends, decals, detailed textures are used and God knows what else. But still the main texture is photo-texture. And as long as this happens - we will work with raster images.
What can I add? It seems like nothing, but ... wait. Are you bothered to lay out your textures in a tile of a higher resolution file? If you are tired, please proceed to the penultimate section of our speed lesson.
Making a pattern (Define Patern)
Select the texture using the Rectangular Marquee Tool (M) or using the sparkling Ctrl + A. Then go to the Edit tab. The second tab after the item File. Choose there Define Pattern. Write for the pattern any name convenient to you.
Now, when creating any file of any size, you can use the Fill operation from the same sub-item Edit, or by pressing the key combination Shift + F5. By selecting your pattern there, you can fill it with any surface, thereby saving yourself from the routine file scan operations.
Epilogue
It is hard to believe, but each of these micro-knowledge came gradually. For example, you learned it in 5 minutes. I learned in 5 months because I was digging on my own, and because once upon a time no one liked sharing. What would happen to you if you knew that the whole process of learning this simplest operation fell on a period of 5 years? I am not so far from the truth. Because every element of this little equation I did in different years. And the filter offset in it was the last unknown.
Bonus for patient
For those who could withstand five minutes of reading and two more on the epilogue. There is a very important filter. Which can turn your image into a drawing. This is a secret, and do not open it to anyone. Since Proper use of this filter allows you to achieve amazing results. But here, as in any culinary process, a very accurate recipe is needed. Olives should be no more than ten, onion circles with a diameter of seven centimeters can be put more, not forgetting about the thickness of the cut ... do you feel? Well ... probably nothing but tears. If we ignore the bow - the proportions, percentages, and the sequence of overlay images - is very important. Nobody can reach it right away. All this is the way to experiment. For many, often perennial. Moreover, Level Ups will happen after a dozen years. I'm serious. Not only a slacker like me.
So here. Our goal is the Filter / Atistic / Cutout filter. See what he does with the texture.
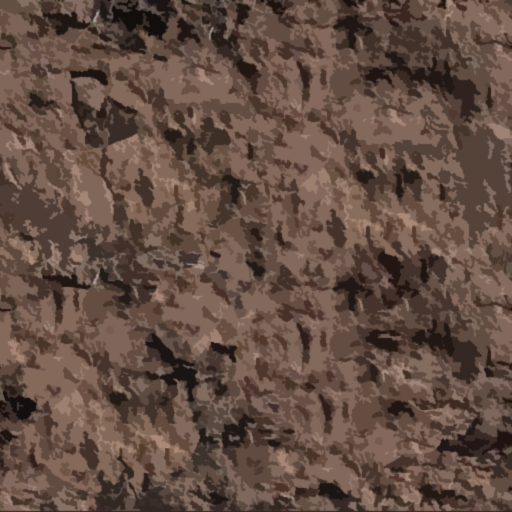
Now another important point. Everything has its own measure. Just as a filter - no one needs it. But if you change the percentage level of the layer with it lying on top of our original texture by 37%, then that texture will be visible from below (saving us the photo-texture), and that texture from above (leveling the black fragments of the photo-texture). Together they complement each other. The texture is no longer such a photo, and, as it were, with a slight claim to art. Feel like I'm talking about them? How about the taste of wine.
Frankly, I never understood the wines, and did not understand all the richness of their taste. Alas, I am not educated in this matter. But I was always touched by films about winemakers in love with their work. That is how they described the drink. His taste. That is how it absorbs emotions. Don't think that the texture is any different. In all that we do - we put a bit of our emotions. What did we get with our interest?
And now add our texture again from above. In the style at random. With a percentage level of transparency of 37% but changing the texture mapping to Overlay. Blending methods are properties of a layer with which a texture (or an image on it, or a mask) is superimposed on the layer that lies under it. One could do this in a dozen other ways - but I prefer this one. Fast color correction and contrast enhancement. Only one duplicated layer.
You know. Most likely, it will be hard for you to believe in it, and you may consider me crazy, but I believe in two things. The fact that some bit of our soul goes into a soul-made object. And in fact that there is magic numbers. I selected these values for myself a long time ago. Doctors saw some scoundrels from me ... what is it called? Yes, limited color blindness. We, men, it often happens. And it so happened that I see the world a little differently. I managed to pick up such figures that allow me to draw in the usual contrast for me and even in the usual scale. And then I twist the image. Often it does not save from nuclear colors, but solves a number of other problems.
Small gif example. These are minor at first glance changes. Trivial. But in the complex they can give an amazing result. Everything in this world consists of trifles.
At additional half-hour work with a texture from it can turn out a sweetie. But I do not have these 20-30 minutes. We needed to fast.
And of course, if you think about it, this is Hochma. The color blind man works as a cocept artist in the industry, the main artist and God knows who else. True and the doctors said - limited. So ... everything is relative. Let those who laugh - laugh and more. The main thing is that you now know that there are certain numbers and some magic. And maybe I'm not alone in my thoughts.
Now I think any programmer, and indeed anyone can quickly make a test material for himself without resorting to the help of an artist ... who would teach me to program this way.
Observations
Perfect raster tile. There is no perfect raster tile based on photos in nature. He's like the “elusive Joe,” remember that? Do not try to find it. An ideal tile is a color fill, a fractal tile, a program-generated tile, and they are unlikely to suit your superiors.
There will always be some flaws, and something will not like. Similar things can be avoided in the case of pixel-art or fully painted textures. There periodic elements will be minimized due to the skill and experience of the artist. Often the “perfect” tile being perfect doesn’t please the eye at all, because many elements are transformed into a kind of “chessboard” from which either it dazzles or it does not attract.
Working hours. Yes, I made it in five minutes. But in the case of other, more complex tiles, time can be greatly stretched. Other textures can be processed for hours. So tell your superiors, which after reading this micro-lesson, will offer you to “repair” 12 textures in an hour. This is not a conveyor, even in this routine work there is a creative link. You need a minimal sense of taste. Well, the knack of course.
Funny fact. In addition to the fact that a tile is a tiled or “tiled” structure consisting of repeating image fragments, a periodic pattern arising from the repeated repetition of a tile is called a tile. “I don’t like the explicit tile” - a phrase that speaks about the occurrence of a well-read periodic pattern, and not about the quality of the tile work. Speaking briefly and clearly - "the fucking spot can be seen and repeated everywhere, when you finally remove it?".
Source: https://habr.com/ru/post/180893/
All Articles