Wasted Dreams. Quick Start Guide
Yesterday, a respected Weilard published a wonderful post about the game Wasted Dreams .
The description turned out so colorful that I (I think, and many others) wanted to look at the game. Unfortunately, in the original article there is no sequence of steps to launch the game in the emulator.
Surely this is not a problem for those who have known the Amiga platform for a long time, however, I hope this post will help someone to start the game and look at the old, but rather unusual platform.
In addition, the seemingly trivial approach with CD-emulation for CD-ROM boxes did not work in this case, I had to go simple, but consisting of many small steps.
Welcome to the cat for the details of running Wasted Dreams on your computer!
Something the game hooked, and the process of launching and bringing to performance is interesting in itself. I myself am not a player, however, despite this, I promised the author yesterday that I would reproduce and describe the launch process.
')
Note: this is not the only, and may not be the easiest or fastest way. Nevertheless, it is efficient, does not require searching for rare ROM images and mounting CDs in the Amiga (I did not manage to reliably run ROMs from CDTV and CD32).
I can not fail to note that working with the platform itself and with the WInUAE emulator is not entirely obvious; so, now it seems unusual that the user has the choice to either launch the game or the shell. Thus, the games are not tied to the OS, and the developers had to implement a significant part of the OS functionality in each game.
So. What do we need?
Download all the necessary files. The image of Wasted Dreams was packed with some kind ofmaniac ; in fact, it is a Rar-archive of 41 volumes, the file with the .000 extension needs to be opened using the archiver and start unpacking the files. If the archiver asks for the next part, specify the file with the .001 extension, then it will pick up itself.
I recommend to mount the image with the game as a CD-drive or unpack the files from it into a temporary directory.
Unpack the ROM files somewhere (for example, in Public / Amiga Files / KS-ROMs) and a disk image from the Workbench (for example, in Public / Amiga Files / Harddrives).
Install WinUAE, run.
She curses the absence of ROM files. To solve the problem, go to the Paths tab in the window that opens and specify in the first field - System ROMs - the path to the directory containing the Kickstart ROM 3.1 for the Amiga 1200.
Go back to the Quickstart tab, select the A1200 model, no other settings need to be changed.
As you know, on devices from the Amiga were used about the following joysticks:
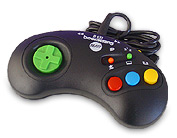 or
or 
Leaman Computing Ltd
Wasted Dreams is a game for one or two players, so on the Game ports tab you will need to configure joysticks like that. In my opinion, playing with a mouse is extremely uncomfortable and inaccurate, I set up the first joystick on wasd, and the second on hjkl. If you have a numpad, the second joystick uses the keys on it by default.
You can switch between the control method for each player in the game itself (Keyboard, Joystick 1, Joystick 2), while the menu control is tied to the first player, that is, if you reconfigure it from Keyboard to Joystick 1, and he turn, the default WinUAE will remain configured on the mouse - get ready to change the settings with the mouse.
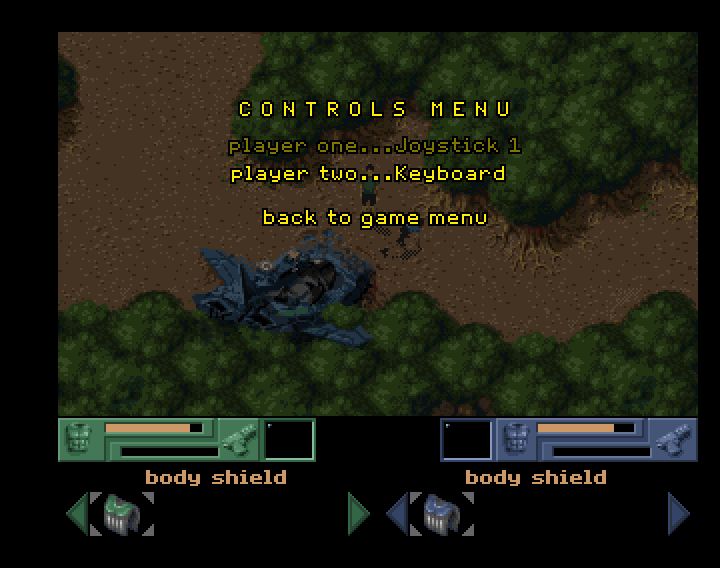
In the game itself, keyboard control is not the most familiar (arrows to move, Shift is assigned to perform an action — pick up an object, hit), but generally comfortable.
Or rather, the last one before you plunge into the game.
In the WinUAE Settings window, finally click Start. If you have correctly configured the ROM and the first hard disk, you will see the Workbench desktop.
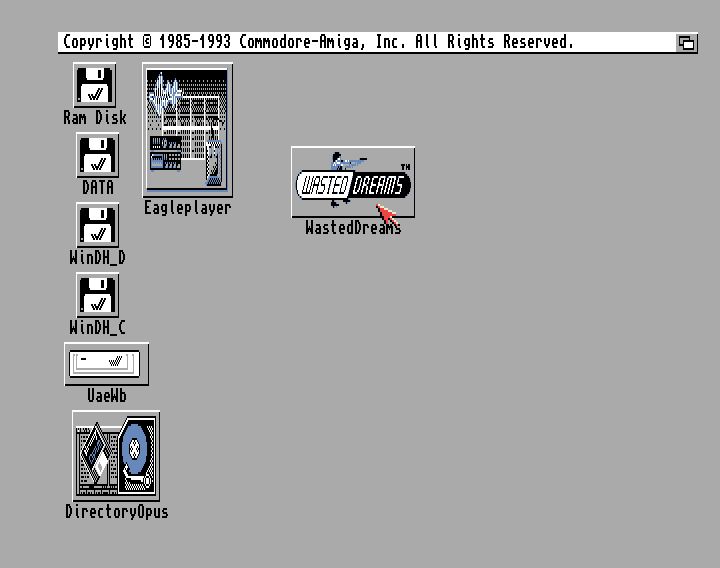
If you have correctly specified the second hard disk, it will be displayed as an icon on the desktop.

I repeat the title of the WinUAE window: in order to “return” the mouse cursor in Windows, you can switch to another window by Alt + Tab, or call the settings window by F12.
After completing all the settings, go to the Configurations tab and click Save there if you want to replace the default configuration, or name it differently.
Attention! “Default” (at least for version 2.6.0) is not a configuration that will be loaded when the program is restarted, but a configuration that will be selected first when switching to this tab. On the other hand, it is better than re-adjusting the parameters from scratch.
Initially, I planned to make some kind of assembly from the emulator and the game, so that it can be downloaded and launched with one click.
Technically, this does not cause problems, WinUAE works well with relative paths. Unfortunately, to run the game you need too many components that are linked by licenses and therefore the distribution of such an assembly will be illegal.
Nevertheless, I hope this article will help you complete the necessary steps and launch this unusual game.
The description turned out so colorful that I (I think, and many others) wanted to look at the game. Unfortunately, in the original article there is no sequence of steps to launch the game in the emulator.
Surely this is not a problem for those who have known the Amiga platform for a long time, however, I hope this post will help someone to start the game and look at the old, but rather unusual platform.
In addition, the seemingly trivial approach with CD-emulation for CD-ROM boxes did not work in this case, I had to go simple, but consisting of many small steps.
Welcome to the cat for the details of running Wasted Dreams on your computer!
Something the game hooked, and the process of launching and bringing to performance is interesting in itself. I myself am not a player, however, despite this, I promised the author yesterday that I would reproduce and describe the launch process.
')
Note: this is not the only, and may not be the easiest or fastest way. Nevertheless, it is efficient, does not require searching for rare ROM images and mounting CDs in the Amiga (I did not manage to reliably run ROMs from CDTV and CD32).
I can not fail to note that working with the platform itself and with the WInUAE emulator is not entirely obvious; so, now it seems unusual that the user has the choice to either launch the game or the shell. Thus, the games are not tied to the OS, and the developers had to implement a significant part of the OS functionality in each game.
So. What do we need?
- Image of the game: http://www.emuparadise.me/Amiga_CD_ISOs/Wasted_Dreams_(1999)/137027-download . It should download quickly and without problems.
- Amiga Emulator. WinUAE is quite suitable: www.winuae.net/files/InstallWinUAE2600.exe
- DirectX. not required, but it speeds up the process. I don’t cite the link, because in the absence of any components (for example, on bare Windows 8), WinUAE will offer to download and install them. Microsoft's web installer does not require a reboot, the only thing is to think about whether you need a Bing Bar.
- Image with Amiga Workbench: planetemu.net/index.php?section=roms&dat=116&action=showrom&id=82954
- ROM files with kickstart. They are the intellectual property of Cloanto, and you need to purchase an Amiga Forever emulator or create an image of a chip in your Amiga.
Exclusively for owners of the Amiga 1200 I will provide a link to Kickstart 3.1 rev. 40.68 for the Amiga 1200, to save them from having to read it manually. Other users, I recommend to buy Amiga Forever from Cloanto or in another way to get the pack Amiga Kickstart ROMs.
Step one. File preparation
Download all the necessary files. The image of Wasted Dreams was packed with some kind of
I recommend to mount the image with the game as a CD-drive or unpack the files from it into a temporary directory.
Unpack the ROM files somewhere (for example, in Public / Amiga Files / KS-ROMs) and a disk image from the Workbench (for example, in Public / Amiga Files / Harddrives).
Step two. Emulator preparation
Install WinUAE, run.
She curses the absence of ROM files. To solve the problem, go to the Paths tab in the window that opens and specify in the first field - System ROMs - the path to the directory containing the Kickstart ROM 3.1 for the Amiga 1200.
Go back to the Quickstart tab, select the A1200 model, no other settings need to be changed.
Step three. Fine tuning
- Go to the CPU tab. Choose 68020, remove the 24-bit addressing checkbox, enable JIT and FPU 68881.
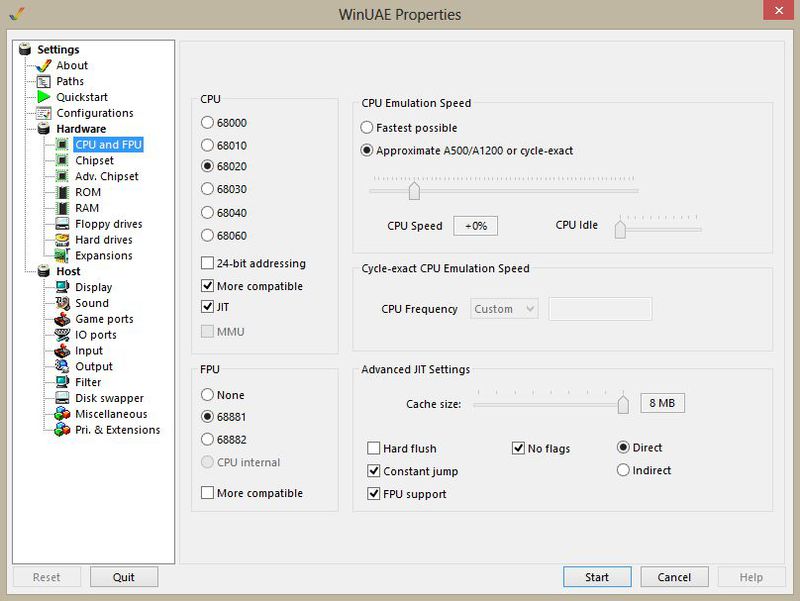
- On the Chipset tab, make sure that AGA is selected.
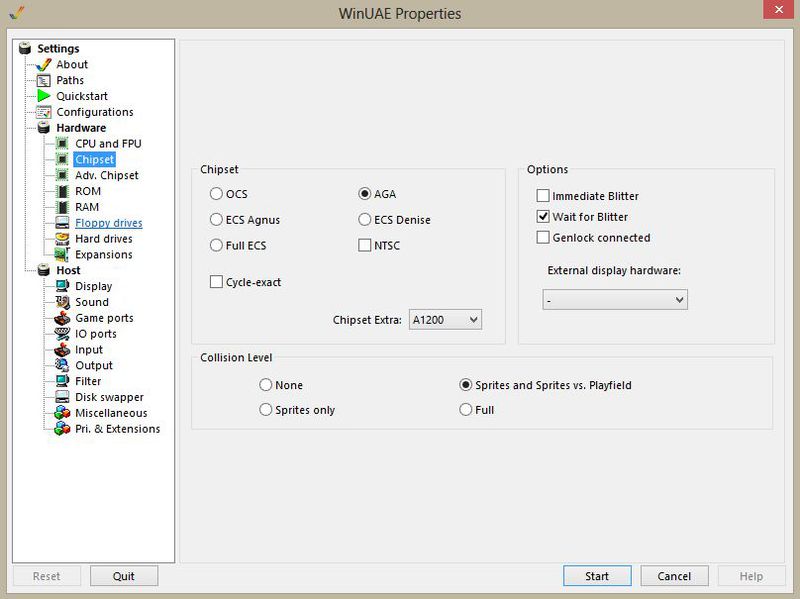
- On the ROM tab, only the first slot should be non-empty. Work verified with KS ROM v3.1 (A1200) rev 40.68 (512k) [391773-01 / 391774-01].
- On the RAM tab add fast RAM up to 8 megabytes
- The most interesting thing happens with the disks. On the Hard drives tab, first add the Hardfile with the Workbench, the device must be DH0 and bootable.
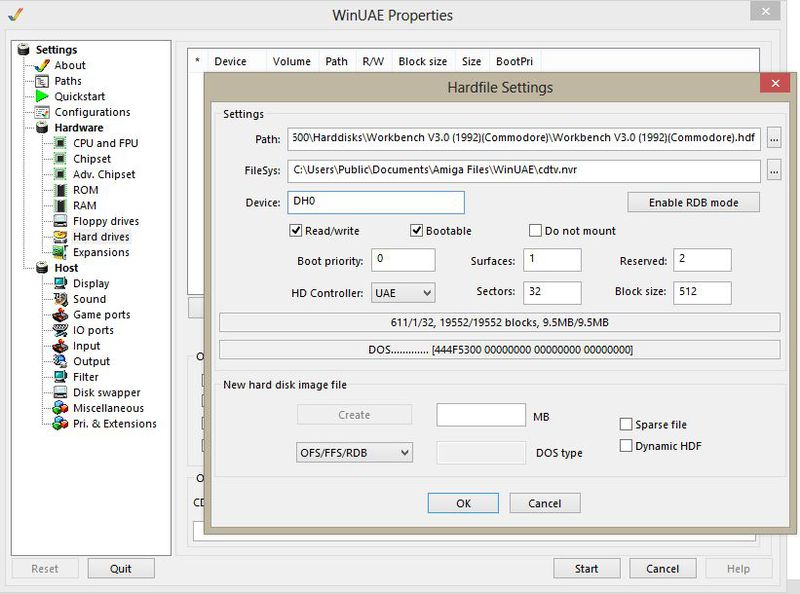
Then add “Directory or Archive”, namely the directory with the game files. In my case, this is the mounted image of Wasted Dreams on J :. Remove the Bootable checkbox, the device can be called DH1, DH2 and so on.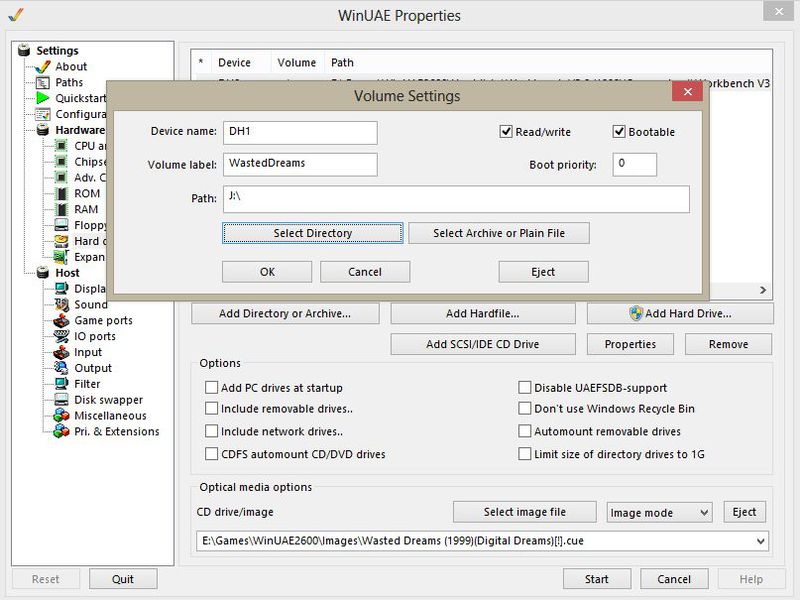
Step Four. Control setting
As you know, on devices from the Amiga were used about the following joysticks:
or Leaman Computing Ltd
Wasted Dreams is a game for one or two players, so on the Game ports tab you will need to configure joysticks like that. In my opinion, playing with a mouse is extremely uncomfortable and inaccurate, I set up the first joystick on wasd, and the second on hjkl. If you have a numpad, the second joystick uses the keys on it by default.
You can switch between the control method for each player in the game itself (Keyboard, Joystick 1, Joystick 2), while the menu control is tied to the first player, that is, if you reconfigure it from Keyboard to Joystick 1, and he turn, the default WinUAE will remain configured on the mouse - get ready to change the settings with the mouse.
In the game itself, keyboard control is not the most familiar (arrows to move, Shift is assigned to perform an action — pick up an object, hit), but generally comfortable.
Step last. Launch
Or rather, the last one before you plunge into the game.
In the WinUAE Settings window, finally click Start. If you have correctly configured the ROM and the first hard disk, you will see the Workbench desktop.
If you have correctly specified the second hard disk, it will be displayed as an icon on the desktop.
I repeat the title of the WinUAE window: in order to “return” the mouse cursor in Windows, you can switch to another window by Alt + Tab, or call the settings window by F12.
After completing all the settings, go to the Configurations tab and click Save there if you want to replace the default configuration, or name it differently.
Attention! “Default” (at least for version 2.6.0) is not a configuration that will be loaded when the program is restarted, but a configuration that will be selected first when switching to this tab. On the other hand, it is better than re-adjusting the parameters from scratch.
Instead of conclusion
Initially, I planned to make some kind of assembly from the emulator and the game, so that it can be downloaded and launched with one click.
Technically, this does not cause problems, WinUAE works well with relative paths. Unfortunately, to run the game you need too many components that are linked by licenses and therefore the distribution of such an assembly will be illegal.
Nevertheless, I hope this article will help you complete the necessary steps and launch this unusual game.
Source: https://habr.com/ru/post/180189/
All Articles