TP-Link TL-WR703N. Small but useful mod
The TP-Link TL-WR703N miniature router became the successor to the famous D-Link DIR-320 - you can find many designs based on this device, like robots with a webcam and control via a web interface, Internet radio receivers, etc. d. I ordered it for use for its intended purpose, but my hands still itched to make some change to the design - and the idea was born to embed a display into the case for displaying system information. Under the cut - a little text and a lot of photos)
We disassemble the router with the most suitable tool for this - an old credit card, remove the card.
')

Next to the ethernet connector there is a free area, here we place the connector to which we will display the UART from the TP_IN and TP_OUT, +5 and +3.3 volts for the display, and the ground.
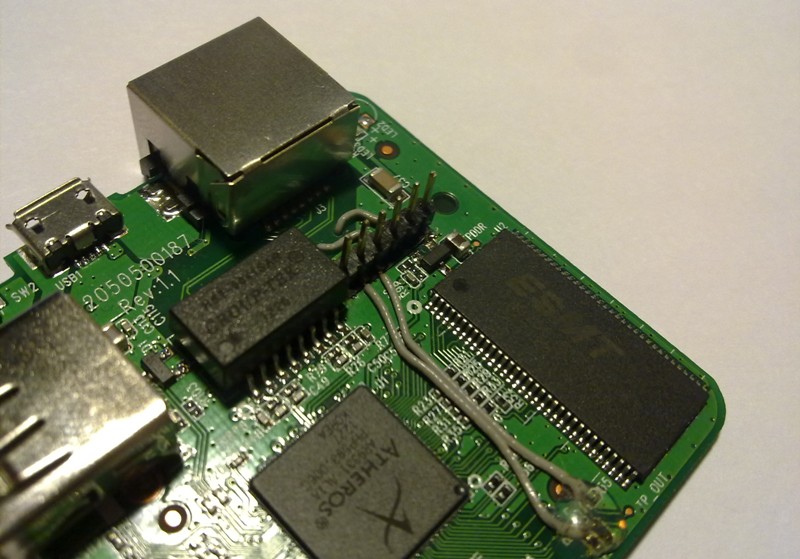
According to the scheme of the router is easy to find where to power.
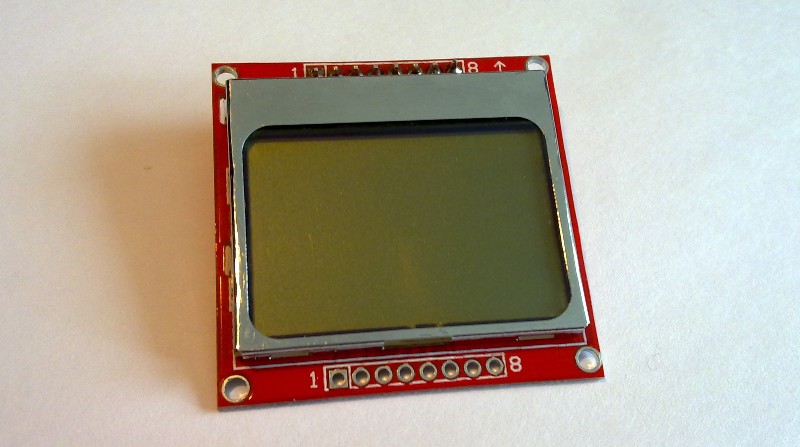
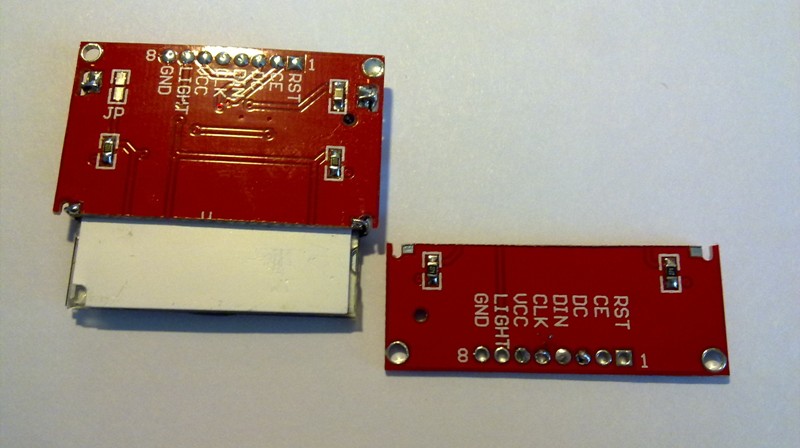
And the display itself, on Ebay, is searched for on the Nokia 5110 LCD Module.
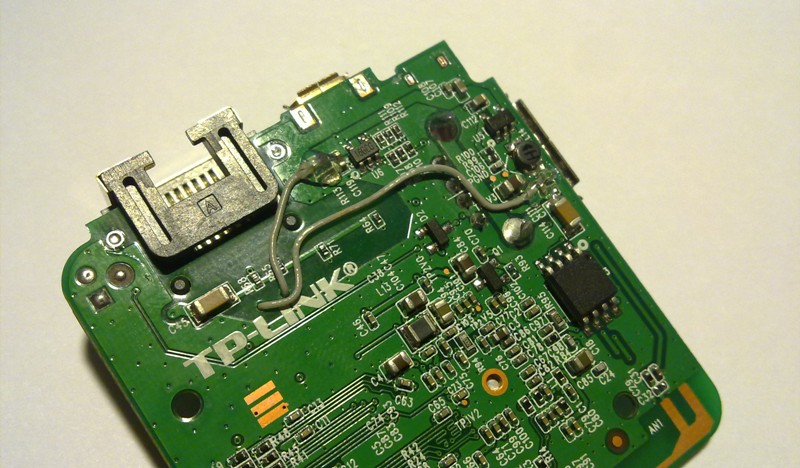
But even such a small display won't fit in just like that. Part of the board along with two of the four LED backlights will have to be cut.
Try on in the case ...

... and we cut out the window for the display in the lid, and at the same time we check its performance
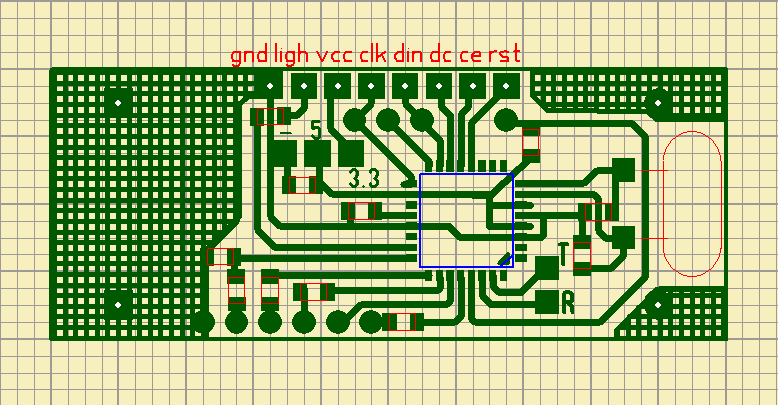
We will connect the display to the ATmega48p controller, and it will already read the characters from the UART router. The schematic diagram does not see the point of view because of its extreme simplicity. The port and pins to which the display is connected can be viewed in the lcd_nokia3310pin.h file from the archive at the end of the article. The library itself is taken from here.
Printed circuit board.
We are flashing the controller ...
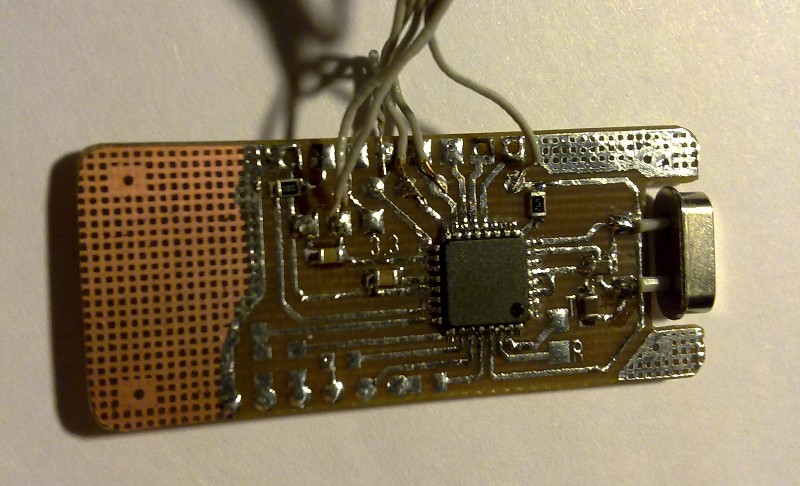
... and solder the board on the reverse side of the display.

We connect with the router. Connector pins are bent - otherwise the display will not fit.

Everyone is here. You can collect.
The display is pressed against the usb-connector on the board with a cover, not very much, but it is enough that it is fixed.

The display with the controller is understood by only three commands:
! s00Test ^ - display “Test” on the first line, starting with the first character;
! c - clear the display;
! b - turn on / off the backlight.
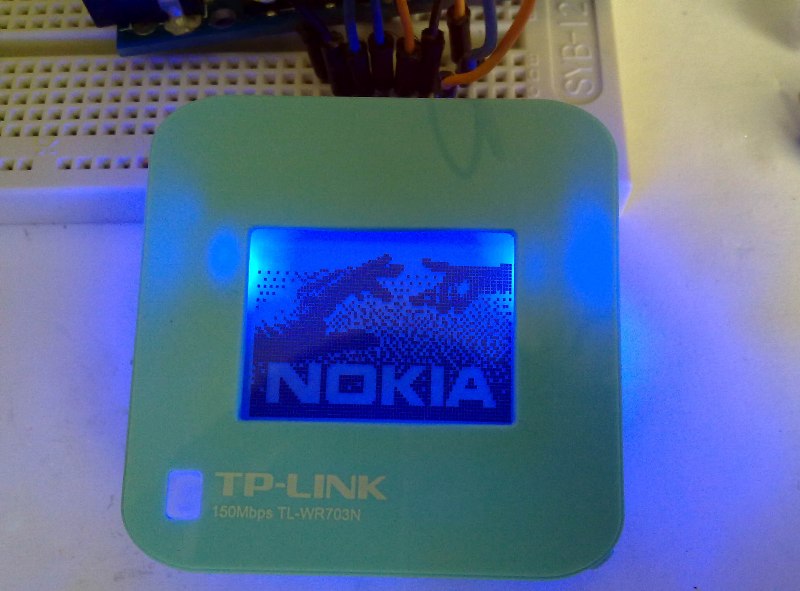
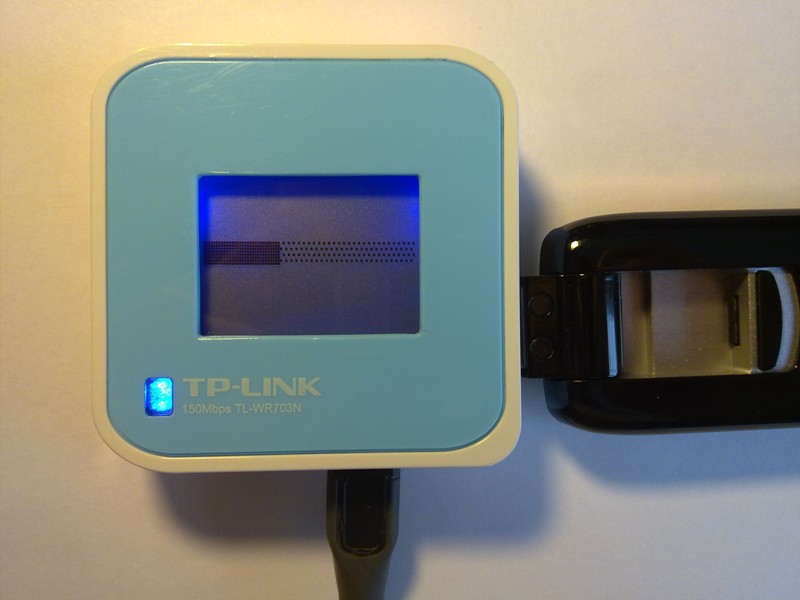
The router is loaded for quite a long time, and until the first line arrives on the UART, the fake text progress bar is filled in on the display.
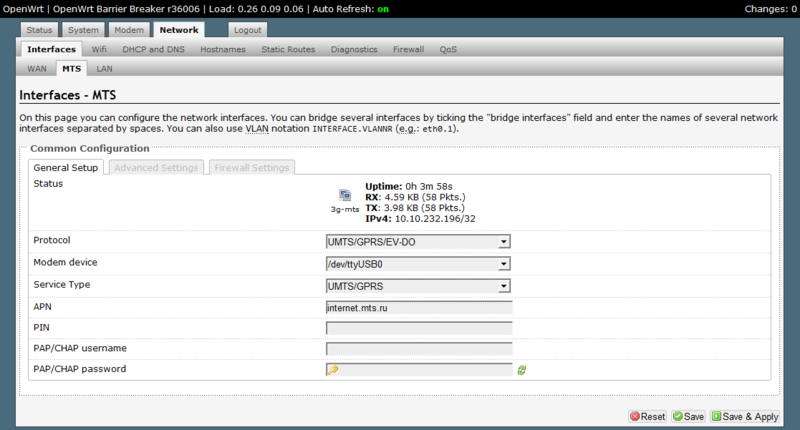
The firmware of the router is, of course, OpenWRT , although I had to use a slightly modified build , in which I managed to get a Huawei E3276 modem. Add a new UMTS / GPRS / EV-DO connection (“MTS” in my case)
And in the convenient directory we will create a script that will send the current time, uptime, the number of clients connected via Wi-Fi, traffic statistics of the connection created by us and load average to the serial port (/ dev / ATH0). To set the port speed (9600 baud), you will need to install the stty package, because At the standard speed of 115200, the controller did not want to receive any data.
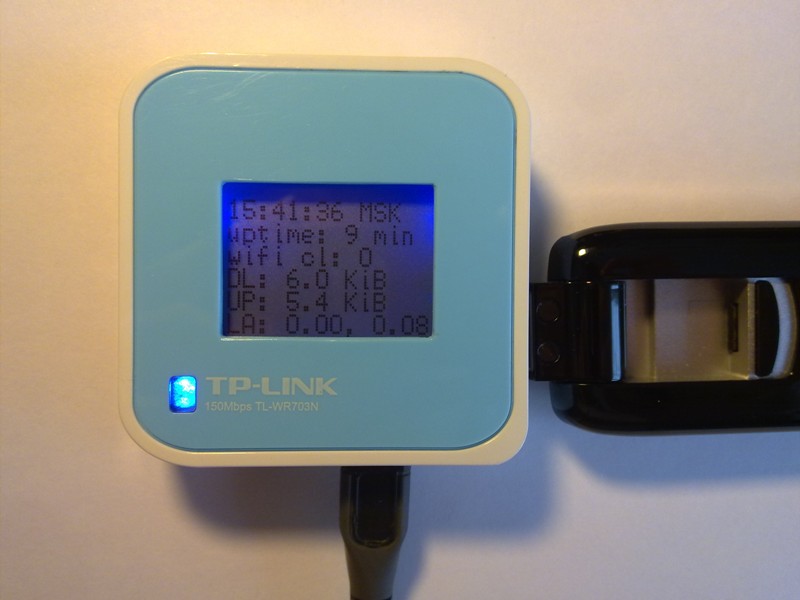
Make the script executable and add to autoload in System> Startup> Local Startup , reboot the router and get the result shown in the first photo)
Archive with firmware, PCB file and script - rghost.ru/45733310
(Caution! The source code of the firmware can cause panic attacks, fear and various pains.)
We disassemble the router with the most suitable tool for this - an old credit card, remove the card.
')
Next to the ethernet connector there is a free area, here we place the connector to which we will display the UART from the TP_IN and TP_OUT, +5 and +3.3 volts for the display, and the ground.
According to the scheme of the router is easy to find where to power.
And the display itself, on Ebay, is searched for on the Nokia 5110 LCD Module.
But even such a small display won't fit in just like that. Part of the board along with two of the four LED backlights will have to be cut.
Try on in the case ...
... and we cut out the window for the display in the lid, and at the same time we check its performance
We will connect the display to the ATmega48p controller, and it will already read the characters from the UART router. The schematic diagram does not see the point of view because of its extreme simplicity. The port and pins to which the display is connected can be viewed in the lcd_nokia3310pin.h file from the archive at the end of the article. The library itself is taken from here.
Printed circuit board.
We are flashing the controller ...
... and solder the board on the reverse side of the display.
We connect with the router. Connector pins are bent - otherwise the display will not fit.
Everyone is here. You can collect.
The display is pressed against the usb-connector on the board with a cover, not very much, but it is enough that it is fixed.
The display with the controller is understood by only three commands:
! s00Test ^ - display “Test” on the first line, starting with the first character;
! c - clear the display;
! b - turn on / off the backlight.
The router is loaded for quite a long time, and until the first line arrives on the UART, the fake text progress bar is filled in on the display.
The firmware of the router is, of course, OpenWRT , although I had to use a slightly modified build , in which I managed to get a Huawei E3276 modem. Add a new UMTS / GPRS / EV-DO connection (“MTS” in my case)
And in the convenient directory we will create a script that will send the current time, uptime, the number of clients connected via Wi-Fi, traffic statistics of the connection created by us and load average to the serial port (/ dev / ATH0). To set the port speed (9600 baud), you will need to install the stty package, because At the standard speed of 115200, the controller did not want to receive any data.
script text
#!/bin/sh port="/dev/ttyATH0" speed="9600" stty -F /dev/ttyATH0 raw speed $speed -crtscts cs8 -parenb -cstopb lcdwrite() { echo "!s0${1}$2^" > $port } while [ : ] do s=`date | tail -c 18 | head -c 12` lcdwrite 0 "$s" sleep 1 s=`uptime` s=`expr "$s" : '.*up.\(.*\), l'` lcdwrite 1 "uptime: $s" sleep 1 s=`iw dev wlan0 station dump | grep Station | wc -l` lcdwrite 2 "wifi cl: $s" sleep 1 s=`ifconfig 3g-mts` s=`expr "$s" : '.*(\(.*\)).'` lcdwrite 3 "DL: $s" sleep 1 s=`ifconfig 3g-mts` s=`expr "$s" : '.*(\(.*\))'` lcdwrite 4 "UP: $s" sleep 1 s=`uptime | tail -c 17 | head -c 10` lcdwrite 5 "LA: $s" sleep 1 done Make the script executable and add to autoload in System> Startup> Local Startup , reboot the router and get the result shown in the first photo)
Archive with firmware, PCB file and script - rghost.ru/45733310
(Caution! The source code of the firmware can cause panic attacks, fear and various pains.)
Source: https://habr.com/ru/post/178661/
All Articles