Heavy FPV-quadcopter - development, assembly and first flight
I have been doing quadrocopters as a hobby for almost half a year. I hung a camera (GoPro HD Hero 2) and a video transmitter on my last device, and flew it through the video glasses - the coolest feeling, I want to tell you. But the technique was not perfect. The old X525 frame with aluminum beams was not stable enough for a weight of 1.8kg, the shaker shook in the air, and it all looked quite collective. Therefore, it was decided to build a new quad, on his own designed frame, taking into account all the needs. And the needs were as follows:
- Space for all equipment. The new frame should have enough space for the camera (without propellers in the picture), the transmitter, OSD, a large battery, plus control electronics (flight controller board and GPS).
- Stability. The frame should be as rigid as possible, but at the same time provide vibration isolation of the camera from the motors.
- Appearance. I wanted to make the copter such that it was pleasant to look at it, and not typical for beginners a bundle of wires and screeds on a standard cross-shaped frame.
- (Secondary) Weight. The X525 base copter weighed 1.8kg with a camera and a battery, I wanted to slightly reduce this figure, and at the same time raise the flight time on one battery.
Thinking over my head and deciding how it would look, I installed LibreCAD and got to work.
Development
The inspiration for the overall shape of the copter was the frame of the Spidex v2 . I liked the location of the components in one level - the camera in front, then the center shifted forward, and the battery suspended from behind. This scheme allows you to position the camera so that the propellers do not fall into its field of view. They also came up with a good way of vibration isolation - the camera and the battery are suspended from two horizontal pipes, which, in turn, are mounted on the center with the help of rubber insulators. Battery weight helps reduce vibrations transmitted to the camera. Well, it looks like a copter, in my opinion, very well.
')
However, Spidex did not fit my needs completely. First, it used aluminum tubes, from which I had already suffered - they bend, even without accidents, just from a constant load. Secondly, I use the GoPro Hero HD2 camera, borrowed indefinitely from my roommate - I am not ready to mount it on the rotor without a protective case, but Spidex does not provide for this.
In short, from Spidex, I decided to use only the general layout. I decided to assemble the frame myself using fiberglass plates and carbon fiber pipes with clamps. A familiar house has a milling machine on which you can cut out plates of the required shape. To create this very form, I sat down at LibreCAD, and this is what I did:
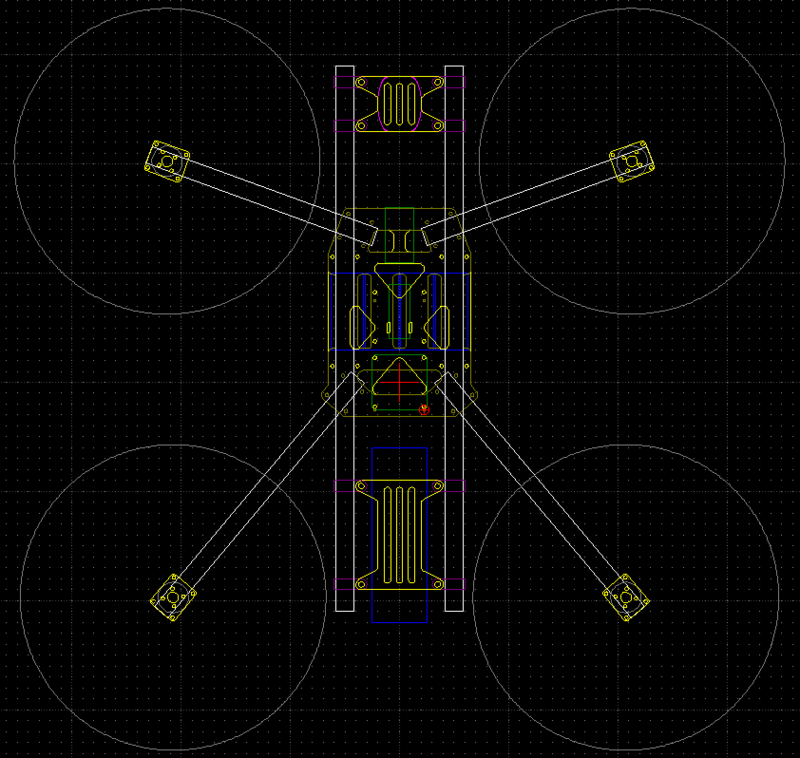
General view of the copter from above
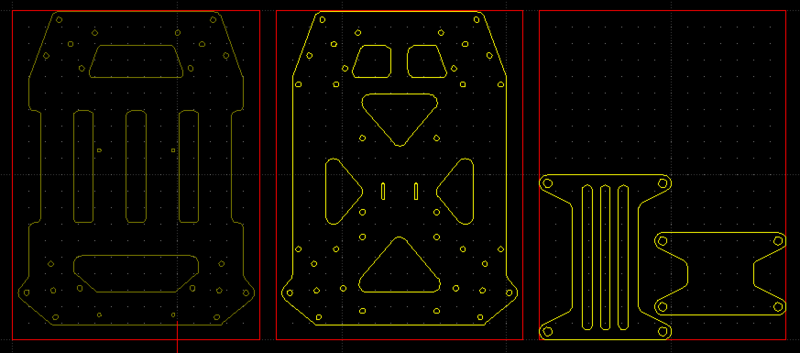
Center plates and camera and battery holders
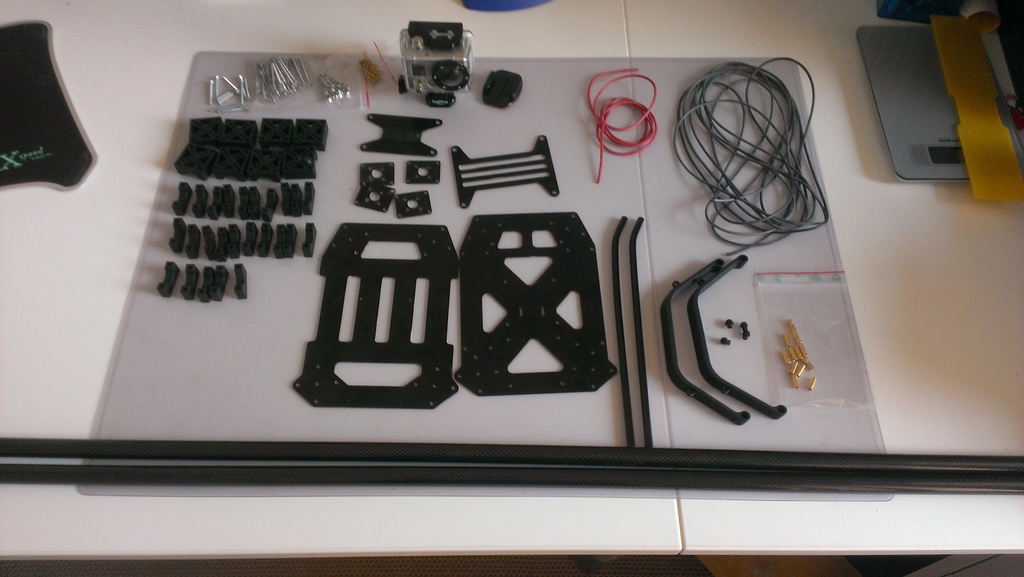
Satisfied with this result, I handed over the drawings to a friend, and ordered all the necessary details in local (German) online stores. In particular, carbon tubes were purchased (16x14mm, meter length, three pieces - two will be needed for the frame, well, in reserve), clamps for them together with suitable screws / nuts (from the Flyduino FCP HL set), wires for laying through tubes to motors, vibration isolators (silent blocks under M3), and a bunch of small things.
I decided to use all the electronics from the previous copter. Two quads are useless; everything works fine - why buy new parts? The list of the same electronics and other parts migrated from the previous model:
- Motors: 4x NTM 28-30 750kv
- Motor controllers: 4x HobbyKing Blue Series 30A, with SimonK firmware
- Propellers: 4x Graupner E-Prop 11x5
- Management Board: Crius MultiWii SE v0.1, with MultiWii 2.2
- Batteries: Turnigy Nanotech 4S 4500mAh 25-35C
- Camera: GoPro HD Hero2
- Video Transmitter: ImmersionRC 5.8G 25mW
- Antenna: Clowerleaf 5.8G, DIY from a craftsman on a local forum
- OSD: MinimOSD with KV Team OSD firmware for MultiWii 2.2
- GPS: Drotek I2C GPS
- Radio: Graupner HoTT GR-16, under my transmitter (MX-16)
Assembly
A few days later all the details were in place, and you could proceed to assembly.
Copter assembly in 23 pictures
Details laid out on the table, the assembly begins. The order did not last long ...
To begin with, we saw the tubes under the desired length - 22 cm and 28 cm, all four are sawn from one meter tube. A file for metal with fine teeth goes very well.

We try on the clamps to the lower center.
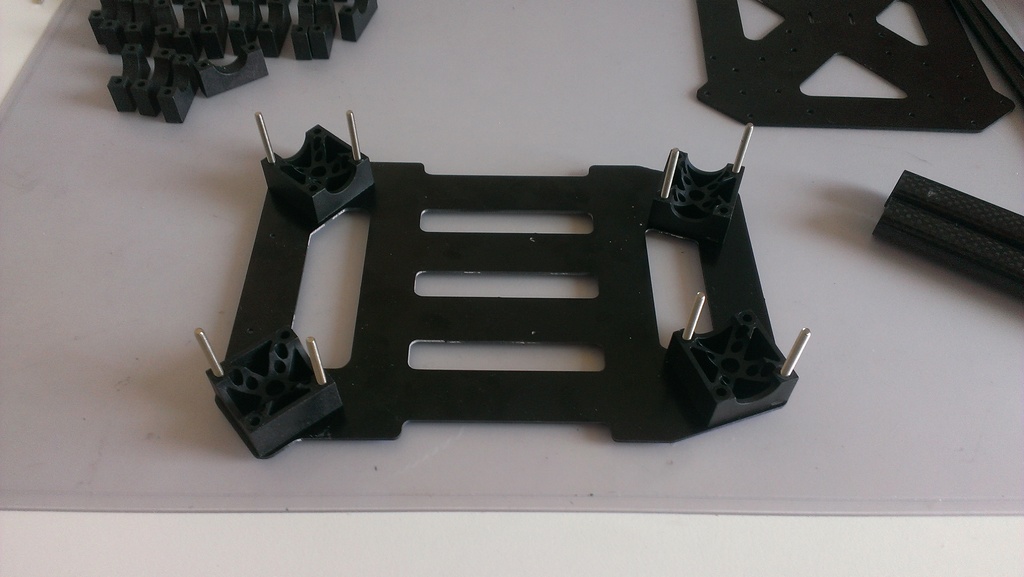
The center is assembled to check whether everything fits in as it should. It seems yes.
Screw all the other parts of the frame. Looks like it is almost done? As if not so.

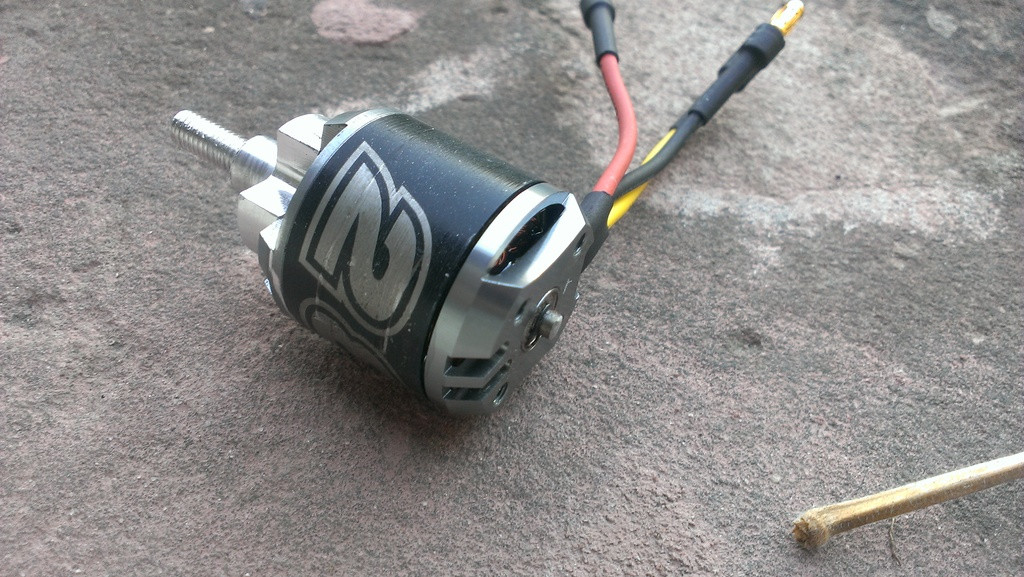
The axes of the motors need to be cut - they protrude from the back side, and prevent the installation of tubes on top. Glue the motor with adhesive tape in order to prevent metal filings from getting inside ...
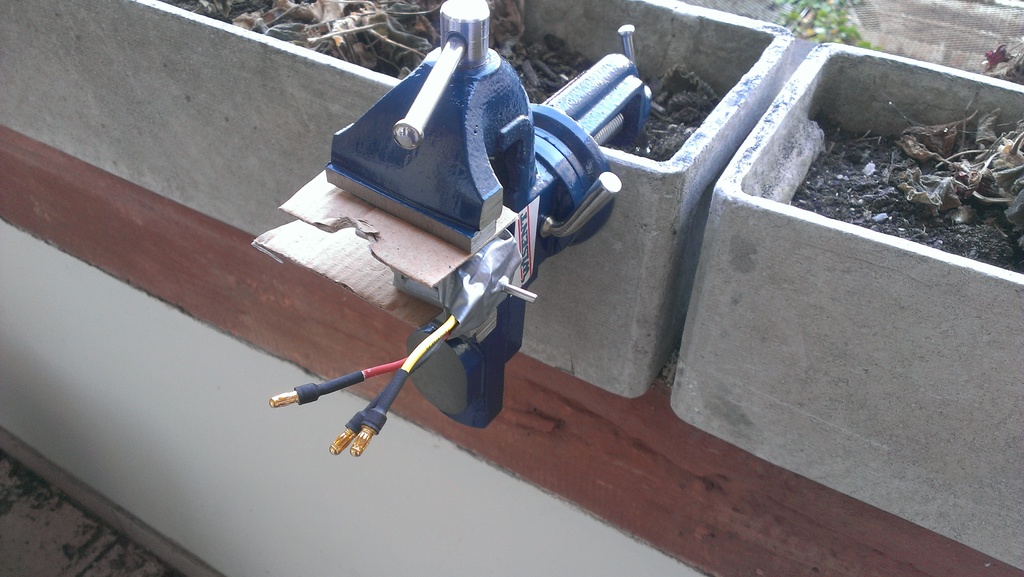
... and his Dremel, Dremel. Dremel cuts a 3mm axle like butter knife. The main safety glasses do not forget.
Remove heat shrink from motor controllers to solder new wires.
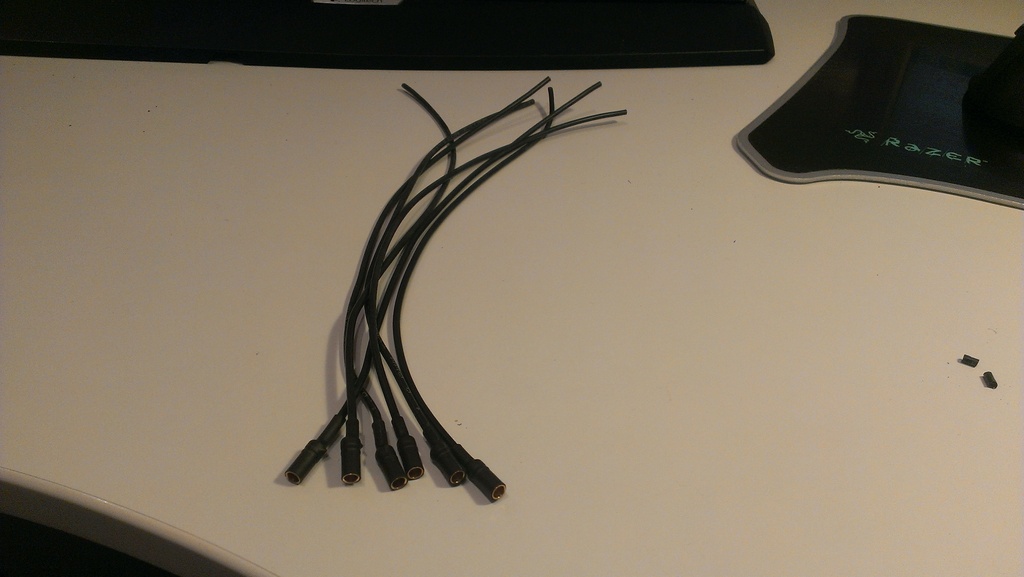
Wires are cut to the desired length. Solder the connectors for the motors. Three phases to the motor, it is necessary to solder the dofig - and this is only a quad.
Place the controllers on the bottom frame.
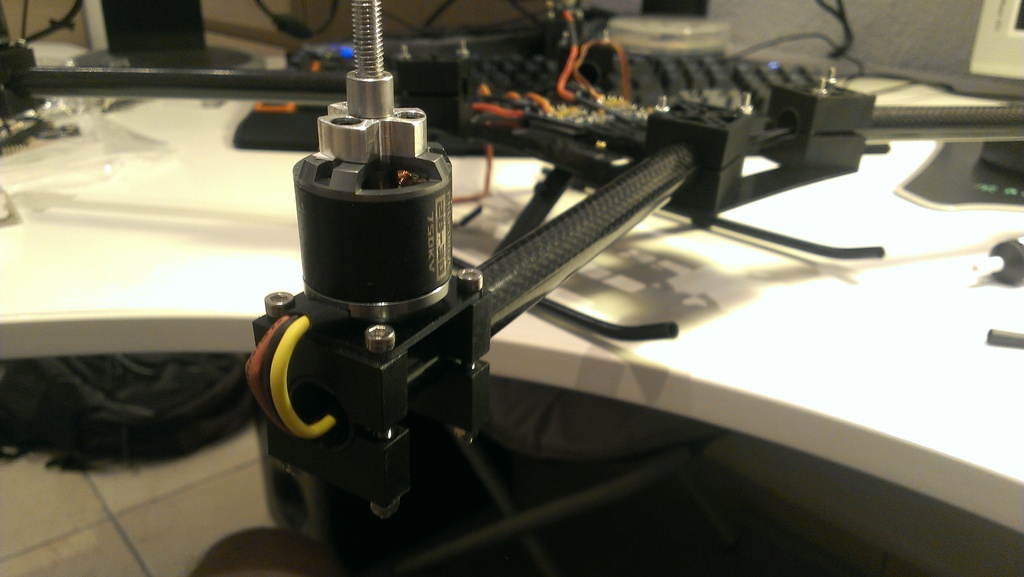
We fasten the motor and run the cable through the tube. Everything is going as planned!
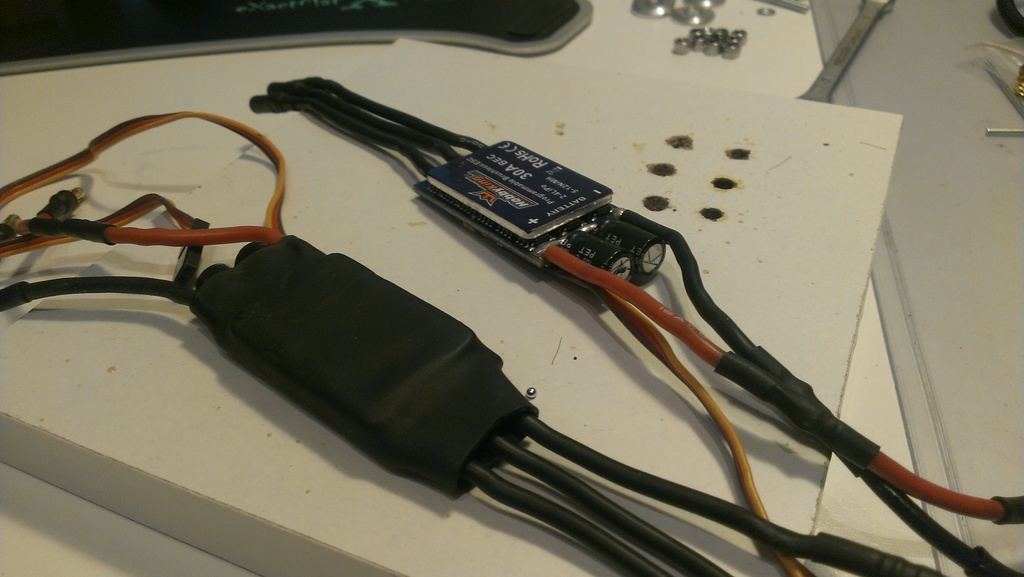
We isolate the controllers with new heat shrink when all cables are in place.
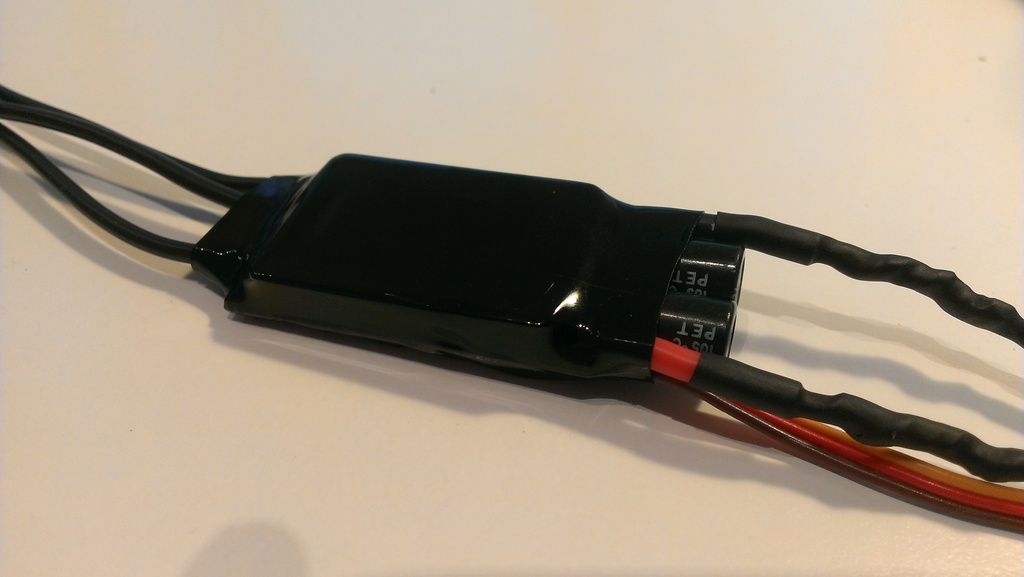
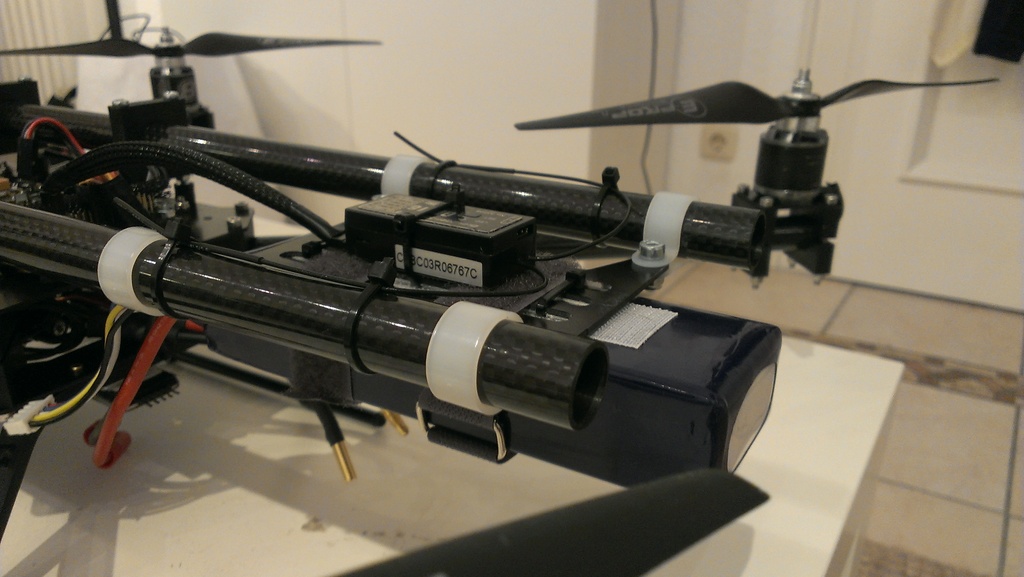
Install the motor controllers in their final position. Wires too much, but quite clean.
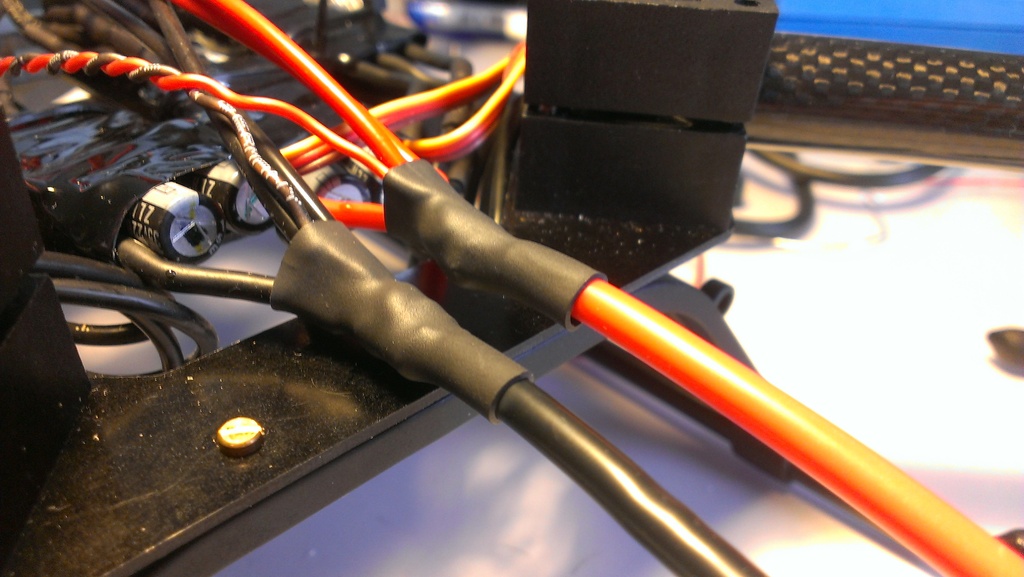
Battery cabling using the RCExplorer method. First we collect the wires from the controllers with a bunch ...
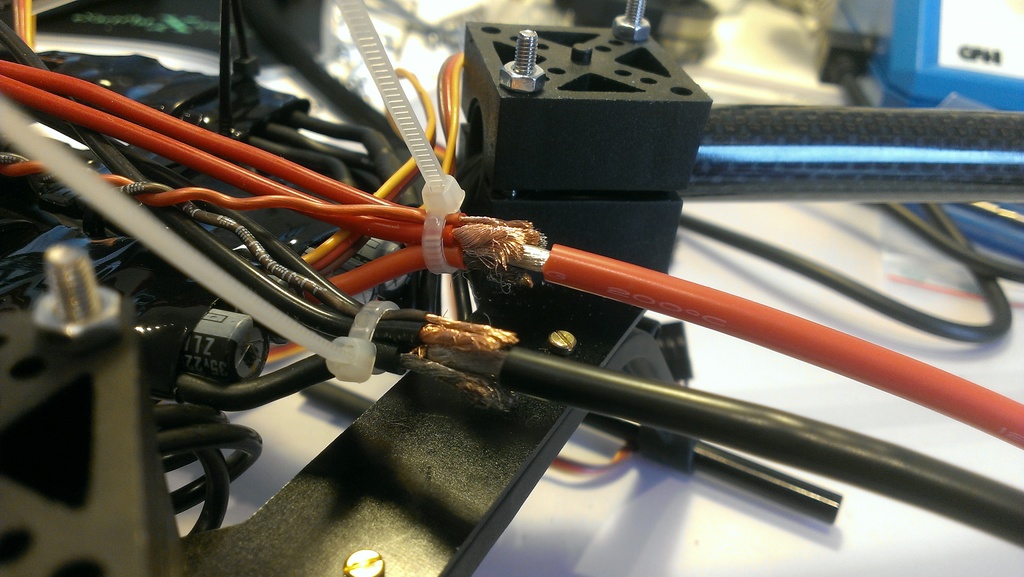
... we are fine with fine copper wire ...
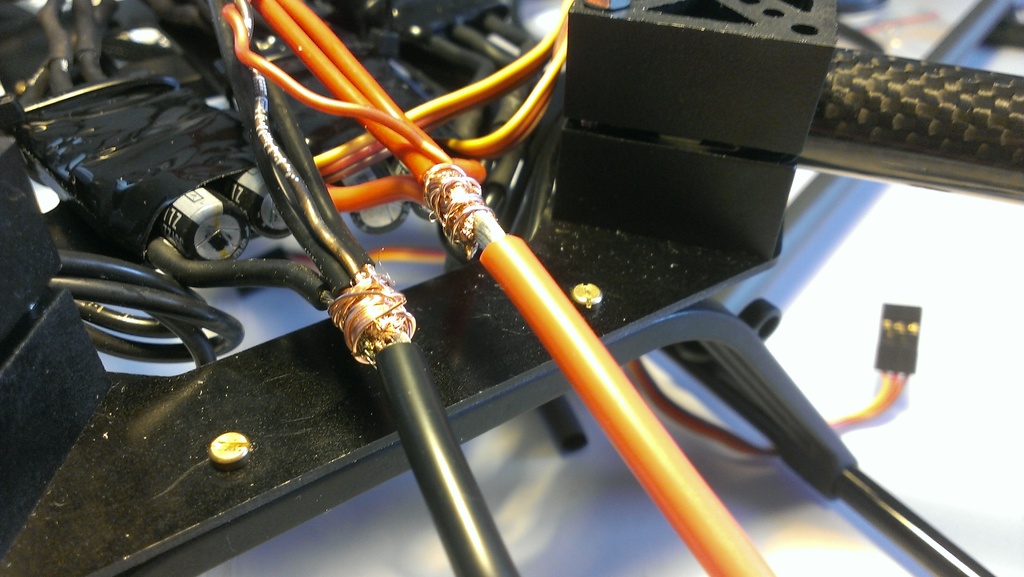
... we solder, and we isolate by shrinking. The connection is mechanically strong and well conductive.
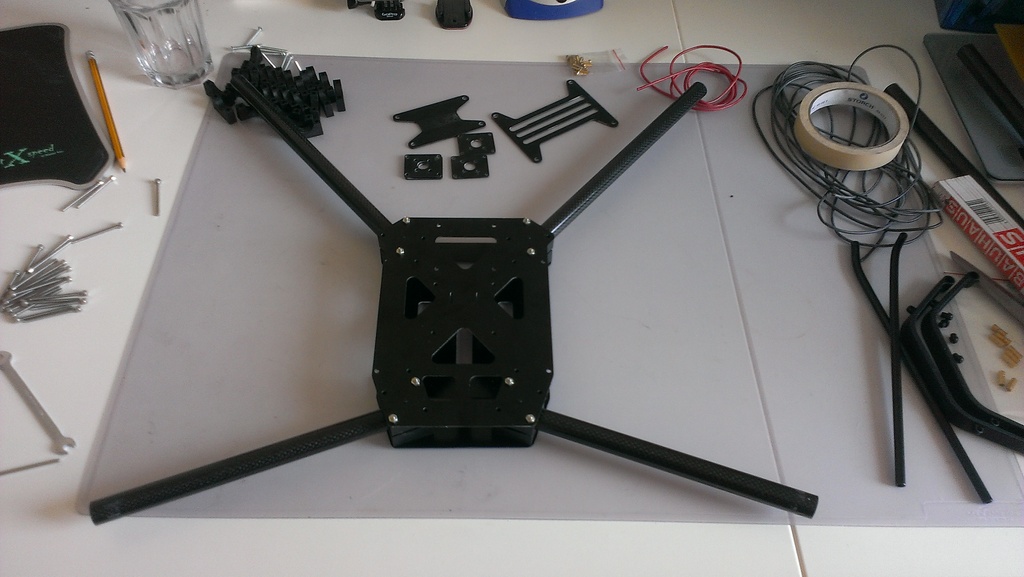
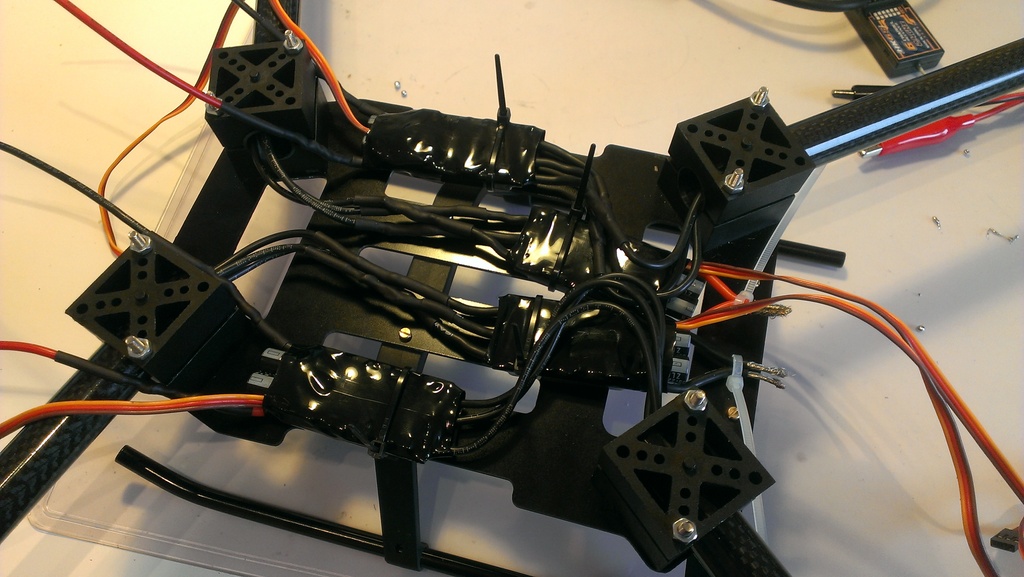
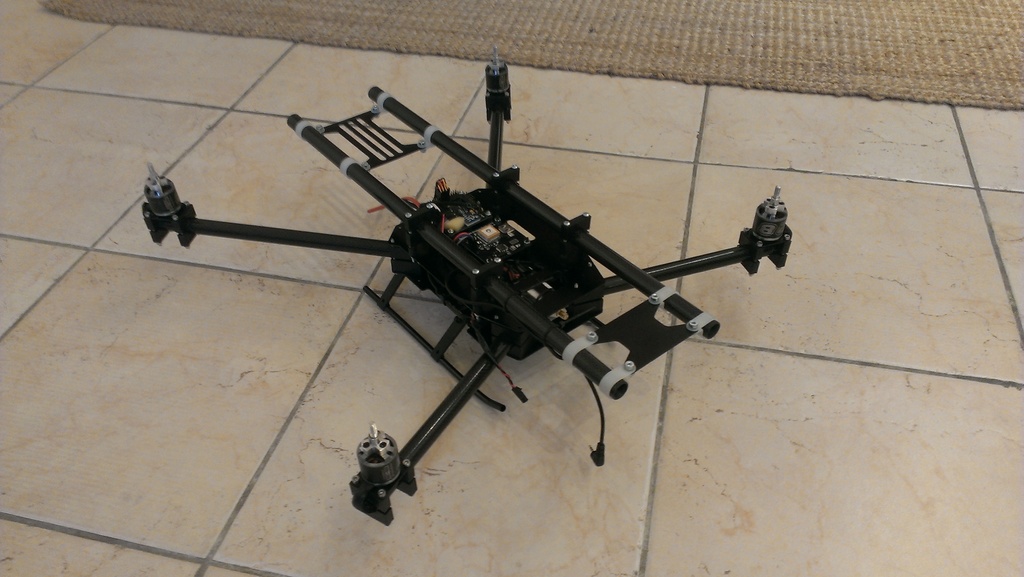
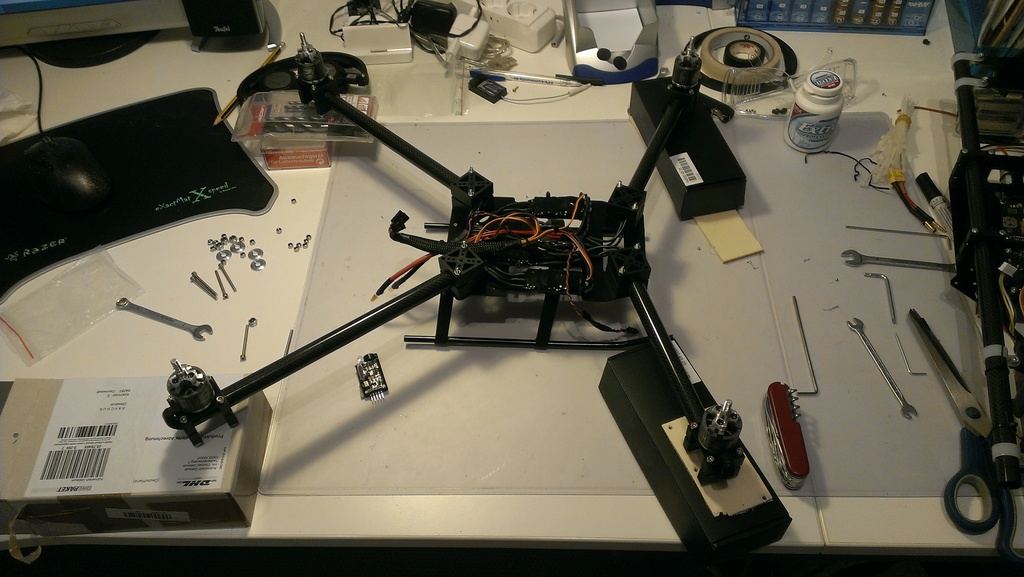
Try on the final assembly: everything is the same! Upper semi-frame is not yet screwed, just lies on top.
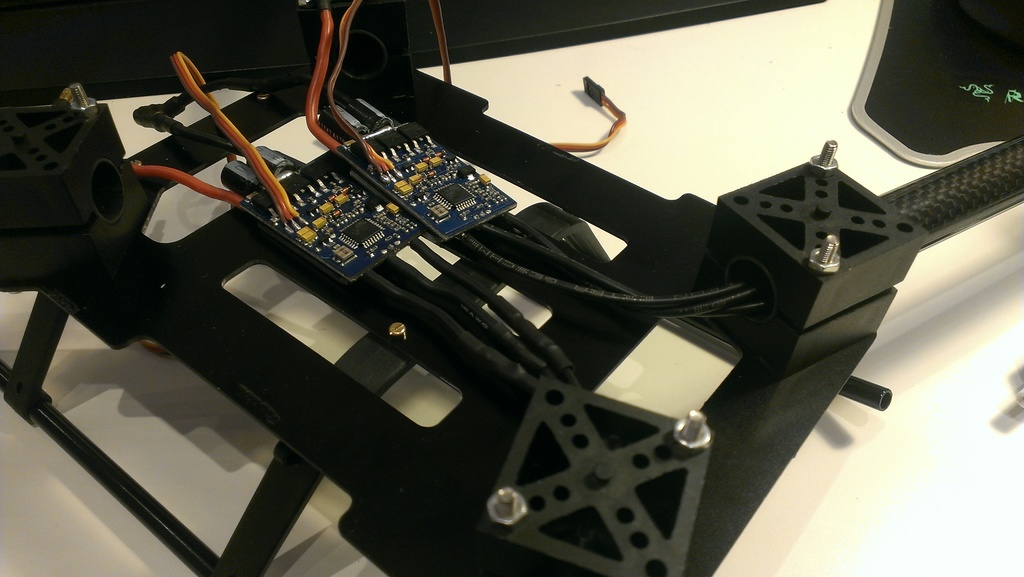
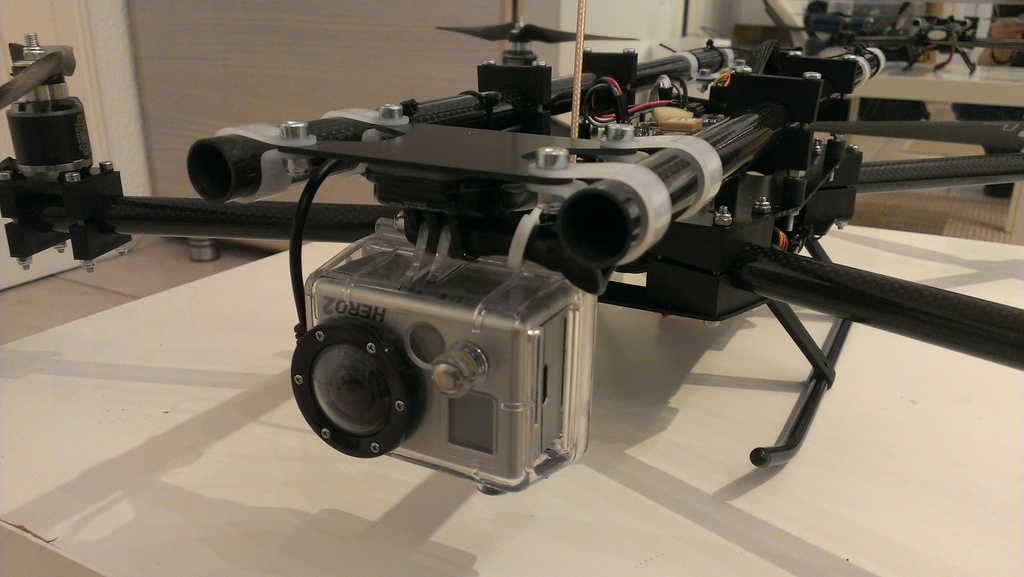
Upper semi-frame with control electronics in the center (controller and GPS) and vibration-proof tubes with a camera and battery.
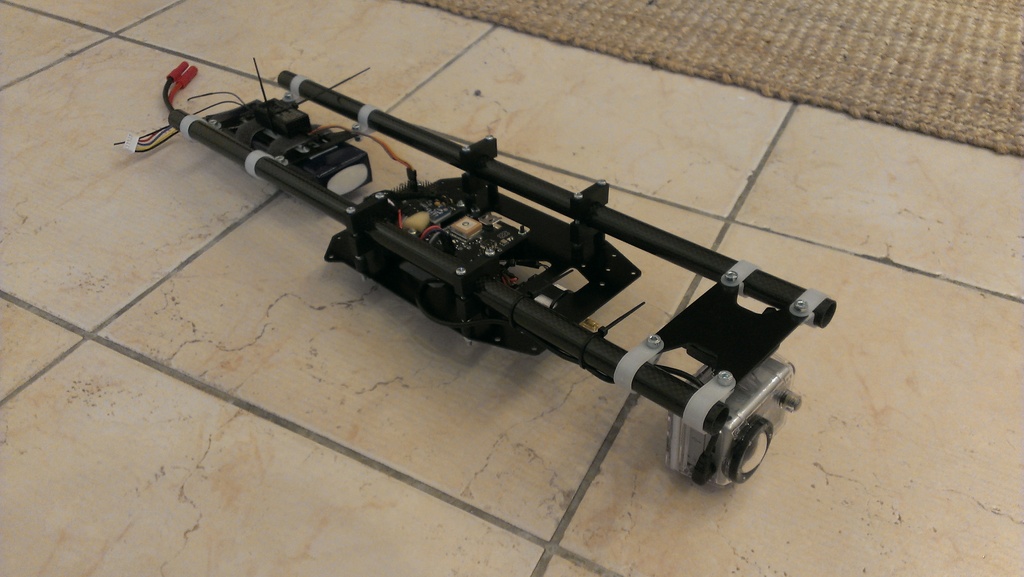
Video equipment on the lower side of the upper center: the video cable from the camera goes to MinimOSD, there is superimposed on it information from the flight controller, and then to the video transmitter.
Bottom semi-frame ready to install the top. The motors are raised so that the clips in the center do not break up when the temporary nuts are unscrewed.
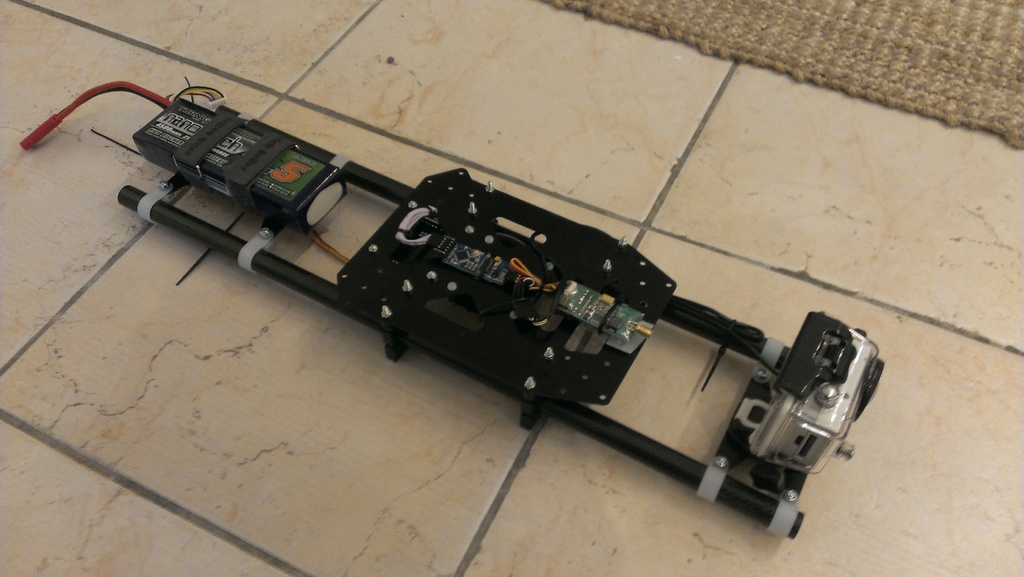
Install and fasten the upper half frame. Tighten the nuts, connect all the wires ...
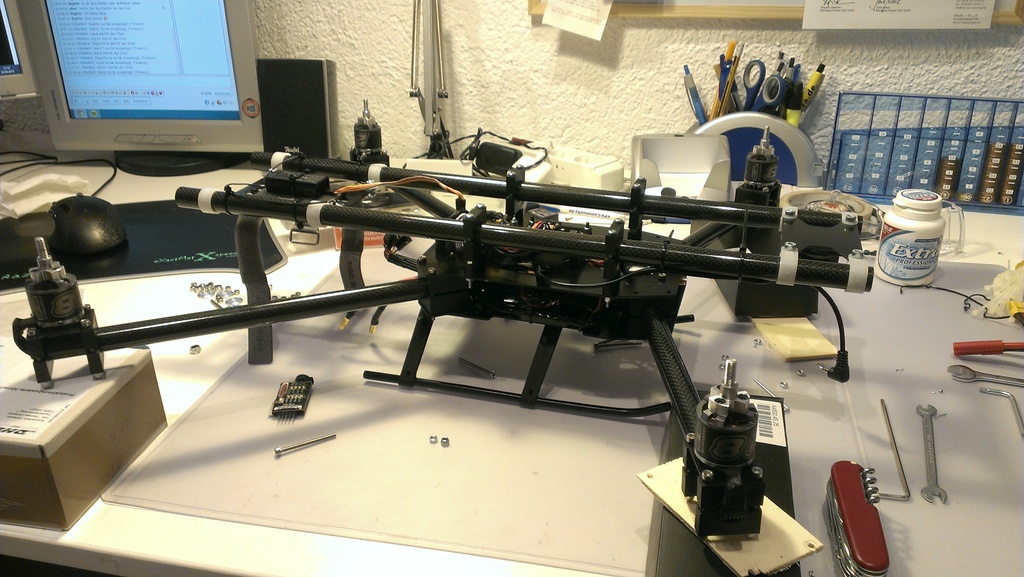
... done!
To begin with, we saw the tubes under the desired length - 22 cm and 28 cm, all four are sawn from one meter tube. A file for metal with fine teeth goes very well.
We try on the clamps to the lower center.
The center is assembled to check whether everything fits in as it should. It seems yes.
Screw all the other parts of the frame. Looks like it is almost done? As if not so.
The axes of the motors need to be cut - they protrude from the back side, and prevent the installation of tubes on top. Glue the motor with adhesive tape in order to prevent metal filings from getting inside ...
... and his Dremel, Dremel. Dremel cuts a 3mm axle like butter knife. The main safety glasses do not forget.
Remove heat shrink from motor controllers to solder new wires.
Wires are cut to the desired length. Solder the connectors for the motors. Three phases to the motor, it is necessary to solder the dofig - and this is only a quad.
Place the controllers on the bottom frame.
We fasten the motor and run the cable through the tube. Everything is going as planned!
We isolate the controllers with new heat shrink when all cables are in place.
Install the motor controllers in their final position. Wires too much, but quite clean.
Battery cabling using the RCExplorer method. First we collect the wires from the controllers with a bunch ...
... we are fine with fine copper wire ...
... we solder, and we isolate by shrinking. The connection is mechanically strong and well conductive.
Try on the final assembly: everything is the same! Upper semi-frame is not yet screwed, just lies on top.
Upper semi-frame with control electronics in the center (controller and GPS) and vibration-proof tubes with a camera and battery.
Video equipment on the lower side of the upper center: the video cable from the camera goes to MinimOSD, there is superimposed on it information from the flight controller, and then to the video transmitter.
Bottom semi-frame ready to install the top. The motors are raised so that the clips in the center do not break up when the temporary nuts are unscrewed.
Install and fasten the upper half frame. Tighten the nuts, connect all the wires ...
... done!
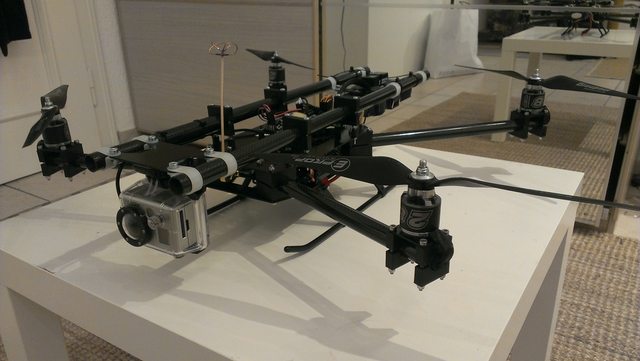
The result of the assembly:
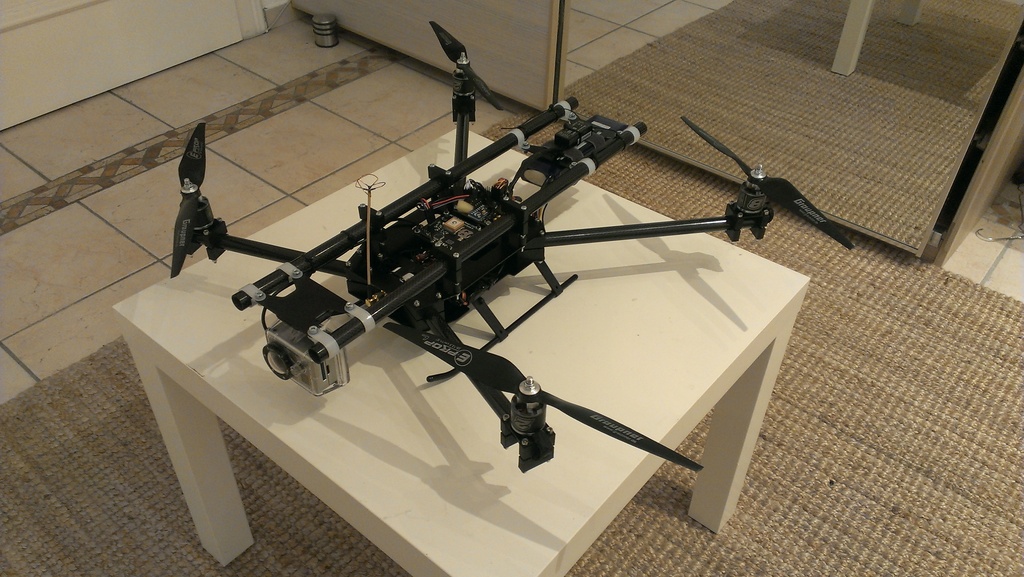
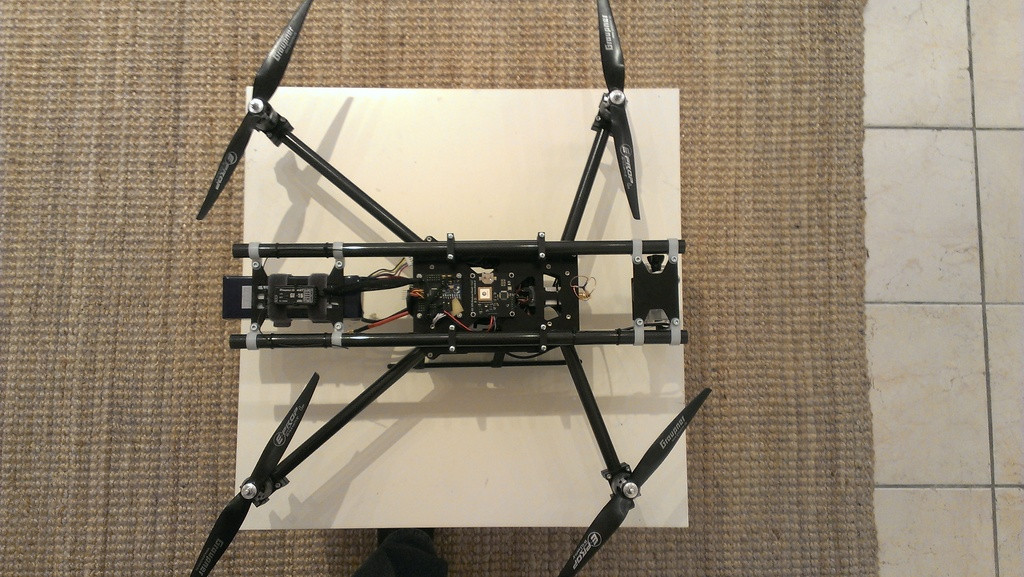

Here is a copter turned out. The only thing I am not happy about is the weight. It was not possible to alleviate the construction, due to the clamps for the tubes and the huge number of screws with nuts, the total weight rose to 1950 grams. However, this is still quite within the power of the drive - my doubts were completely dispelled during the first flight.
First flight
Sensations from the first flight: fantastic! The copter stands in the air as if dug, perfectly controlled both visually and through FPV. Flight time on one charge is 14 minutes, and the power reserve is more than enough for a comfortable flight and maneuver. I’m still digging slightly with the controller settings - GPS doesn’t work well (practically does not hold position, return-to-home doesn’t work), and the PID parameters need to be adjusted (decrease P on the roll axis to get rid of the light transverse vibrations visible in the video) .
In general, the project was a success. Kopter I will actively use for flights and filming in the coming weeks.
Any questions, comments, etc. welcome.
Source: https://habr.com/ru/post/178509/
All Articles