Bread crumbs (breadcrumbs) in asp.net MVC3
In this post, we will look at the process of creating the navigation menu and bread crumbs in the asp.net MVC3 project. First, we will create an empty project, then add a sitemap provider, several controllers and views, and eventually force the provider to bring out the breadcrumbs.
Let's start with an empty MVC3 project. Launch Visual Studio. Create a new Asp.Net MVC3 Web application. I will call it SitemapDemo:
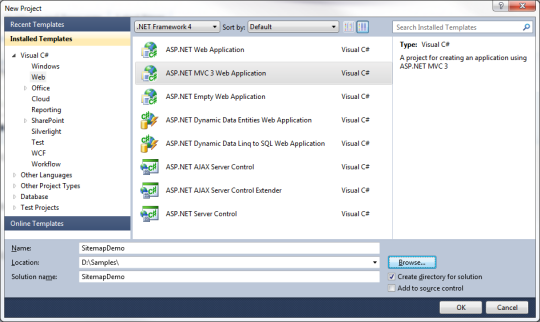
For the demonstration, I chose an empty template with the Razor visualization engine.
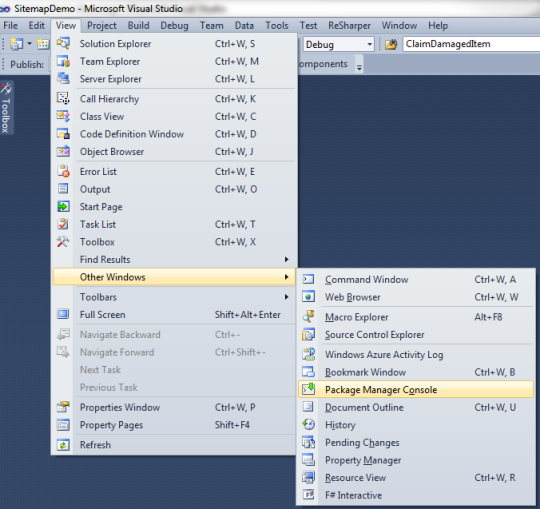
Now, before doing anything, let's go back and put the NuGet package. Select View> Other Windows and then select “ Package Manager Console ”:
')
To add the Asp.net MVC sitemap provider to the current project, enter the following command in the Package Manager Console and press enter:
This command will download the necessary files (dlls, cshtml files) and add them to your MVC project. The operation may take several minutes, depending on your connection. If successful, the Package Manager Console will display something like this:
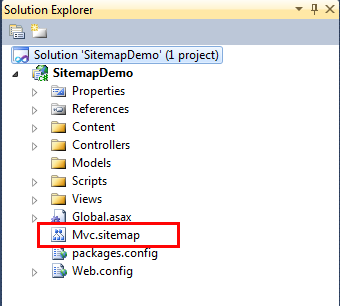
Now let's see what NuGet package manager actually added to our project:
Since as a visualization engine we use Razor, we can delete asax files that have been added to the SitemapDemo> Views> Shared> DisplayTemplates folder . Here is what our project now looks like:

Now everything is ready. Now let's add some controllers and views before we start playing with SiteMapProvider.
In some cases, the MVC Sitemap provider will die quietly if we try to get it to work with methods of controllers that do not exist or non-existent views. Therefore, we first create controllers and views.
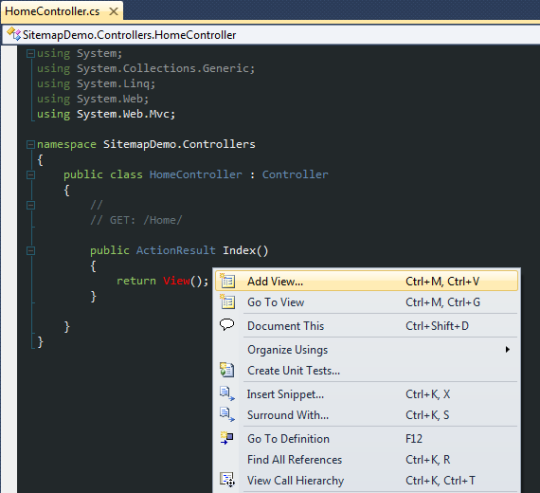
All sites have a homepage, so first let's create it. Right click on the Controllers folder and create the “HomeController” controller:

Now your controller is created and opened, right click on the Index action and select “ Add View ... ”
In the add view dialog, simply click " Add ". Nothing needs to be changed. Now let's change the text in the created page. Add a title like “Index - this is the home page”.
Now, by the same principle, let's add another controller. Let's call it NewsController. Add another sports method to it:
Now let's add views for each NewsController controller method. Let's do it in the same way that we added views for the home page - right click on each method in the controller. Again, we simply leave the settings for the “Add View” dialog box by default and just click “Add” for both views.
Let's add another controller - AboutController. Once created, leave it unchanged and add a new Index view. Also edit the title on the page
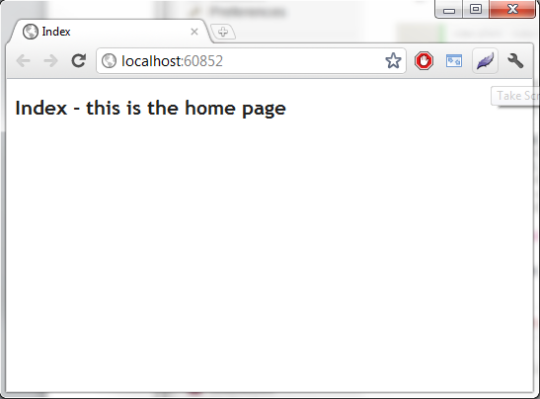
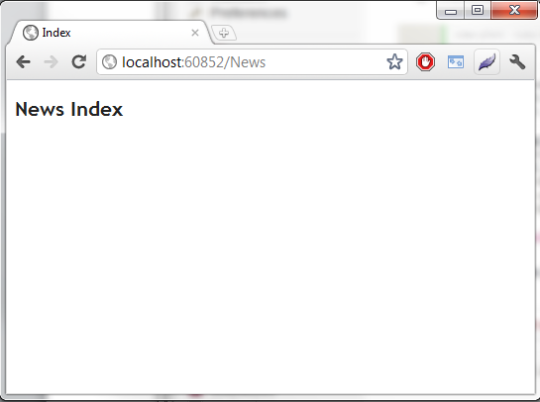
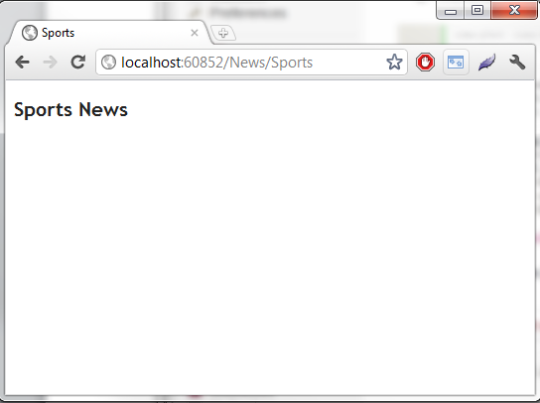
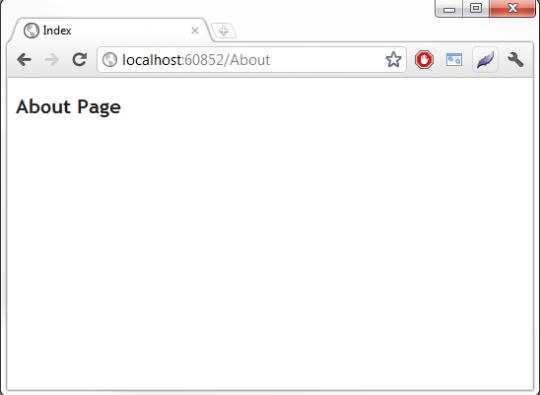
Now there are 4 pages in our project. It is worth testing them before we begin to implement the Site Map Provider. Below are screenshots of the resulting pages:
Great, now we have a small site with a simple structure. Imagine the structure of the site in the chart:
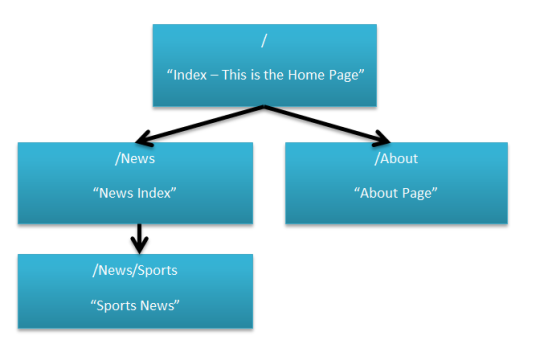
Visualizing the site layout will help us correctly describe the structure of the Mvc.sitemap file. Our Index page is a wrapper around the whole site, because is the home page and the first page when entering the site.
Now let's go to the sitemap configuration. Let's start by editing the Mvc.sitemap file, which is in the root of our project. The file contains the xml nodes needed to represent the combinations of your controllers and methods.
Edit Mvc.Sitemap as follows:
And so we formed the structure of our site in the file MVC.Sitemap. A common mistake here is to forget to wrap the entire site with an xml node representing the homepage that the visitor sees at the very beginning.
Now that we have several controllers and methods and the structure of the site is properly described in Mvc.Sitemap, let's add navigation to the pages.
Open _Layout.cshtml located in the Views / Shared folder. Change the page body code as follows:
So we call the MvcSiteMap library and say to display the navigation menu on all pages. The parameters of the method call are as follows:
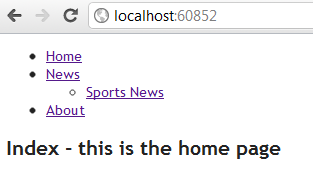
If we launch our application, we should see the navigation menu on each page:
We managed to bring a simple navigation menu to the pages of our site. If you want to change the layout styles, simply change the code in Views / Shared / DisplayTemplates / MenuHelperModel.cshtml . Let's make a small change - change the list item markers from circles to squares:
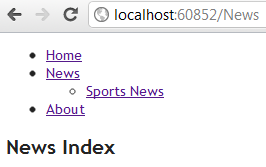
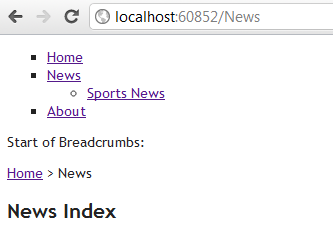
You can refresh the page without having to rebuild the project. The start page of News should look like this:
We can add bread crumbs just as easily. Open our _Layout.cshtml and write the following code:
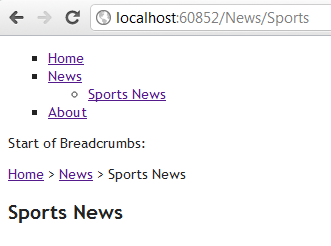
Now there are convenient bread crumbs on all pages:
Similarly, if we want to customize the appearance of bread crumbs, we need to edit the Views / Shared / DisplayTemplates / SiteMapPathHelperModel.cshtml file .
Any real site at some point will use a dynamic or parameterized URL. Adding a dynamic URL to an MVC Sitemap is quite simple if you know how. Let's start by adding a new method to NewsController:
Now add the view. Edit Article.cshtml as follows:
Open the page in the browser localhost: xxxx / News / Article / 1234:
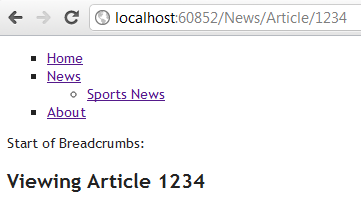
Note that the new page is not marked in the sitemap and therefore the bread crumbs are empty.
In order to insert into the page in the navigation menu, you first need to decide where it will be. I want her to be inside the News section. Edit Mvc.Sitemap and add the Key attribute to the “News” node.
Now add attributes to the News controller's Article method:
Build the project and open it in the browser localhost: xxxx / News / Article / 1234:
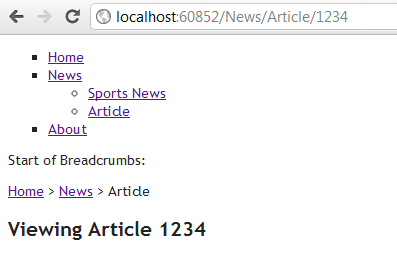
Now we have breadcrumbs and navigation menu on a new page, despite the dynamic URL!
Download the solution here .
Translation of the article: edspencer.me.uk/2011/09/20/mvc-sitemap-provider-tutorial-2-breadcrumbs
INSTALLATION
Let's start with an empty MVC3 project. Launch Visual Studio. Create a new Asp.Net MVC3 Web application. I will call it SitemapDemo:
For the demonstration, I chose an empty template with the Razor visualization engine.
Now, before doing anything, let's go back and put the NuGet package. Select View> Other Windows and then select “ Package Manager Console ”:
')
To add the Asp.net MVC sitemap provider to the current project, enter the following command in the Package Manager Console and press enter:
PM> Install-Package MvcSiteMapProviderThis command will download the necessary files (dlls, cshtml files) and add them to your MVC project. The operation may take several minutes, depending on your connection. If successful, the Package Manager Console will display something like this:
PM> Install-Package MvcSiteMapProvider
Successfully installed 'MvcSiteMapProvider 3.1.0.0'.
Successfully added 'MvcSiteMapProvider 3.1.0.0' to SitemapDemo.

PM>
Now let's see what NuGet package manager actually added to our project:
- SitemapDemo> References> MvcSiteMapProvider - Link to MvcSiteMapProvider.dll
- SitemapDemo> Mvc.sitemap - This is your MVC3 website in XML nodes
- SitemapDemo> Views> Shared> DisplayTemplates> MenuHelperModel.cshtml
- SitemapDemo> Views> Shared> DisplayTemplates> SiteMapHelperModel.cshtml
- SitemapDemo> Views> Shared> DisplayTemplates> SiteMapNodeModel.cshtml
- SitemapDemo> Views> Shared> DisplayTemplates> SiteMapNodeModelList.cshtml
- SitemapDemo> Views> Shared> DisplayTemplates> SiteMapPathHelperModel.cshtml
- SitemapDemo> Views> Shared> DisplayTemplates> SiteMapTitleHelperModel.cshtml
Since as a visualization engine we use Razor, we can delete asax files that have been added to the SitemapDemo> Views> Shared> DisplayTemplates folder . Here is what our project now looks like:
Now everything is ready. Now let's add some controllers and views before we start playing with SiteMapProvider.
IMPORTANT
In some cases, the MVC Sitemap provider will die quietly if we try to get it to work with methods of controllers that do not exist or non-existent views. Therefore, we first create controllers and views.
All sites have a homepage, so first let's create it. Right click on the Controllers folder and create the “HomeController” controller:
Now your controller is created and opened, right click on the Index action and select “ Add View ... ”
In the add view dialog, simply click " Add ". Nothing needs to be changed. Now let's change the text in the created page. Add a title like “Index - this is the home page”.
Now, by the same principle, let's add another controller. Let's call it NewsController. Add another sports method to it:
using System; using System.Collections.Generic; using System.Linq; using System.Web; using System.Web.Mvc; namespace SitemapDemo.Controllers { public class NewsController : Controller { // // GET: /News/ public ActionResult Index() { return View(); } // // GET: /News/Sports/ public ActionResult Sports() { return View(); } } } Now let's add views for each NewsController controller method. Let's do it in the same way that we added views for the home page - right click on each method in the controller. Again, we simply leave the settings for the “Add View” dialog box by default and just click “Add” for both views.
Let's add another controller - AboutController. Once created, leave it unchanged and add a new Index view. Also edit the title on the page
Now there are 4 pages in our project. It is worth testing them before we begin to implement the Site Map Provider. Below are screenshots of the resulting pages:
Screenshots
localhost: xxxx
localhost: xxxx / News
localhost: xxxx / News / Sports
localhost: xxxx / About
localhost: xxxx / News
localhost: xxxx / News / Sports
localhost: xxxx / About
Great, now we have a small site with a simple structure. Imagine the structure of the site in the chart:
Visualizing the site layout will help us correctly describe the structure of the Mvc.sitemap file. Our Index page is a wrapper around the whole site, because is the home page and the first page when entering the site.
Now let's go to the sitemap configuration. Let's start by editing the Mvc.sitemap file, which is in the root of our project. The file contains the xml nodes needed to represent the combinations of your controllers and methods.
Edit Mvc.Sitemap as follows:
<?xml version="1.0" encoding="utf-8" ?> <mvcSiteMap xmlns="http://mvcsitemap.codeplex.com/schemas/MvcSiteMap-File-3.0" enableLocalization="true"> <mvcSiteMapNode title="Home" controller="Home" action="Index"> <mvcSiteMapNode title="News" controller="News" action="Index"> <mvcSiteMapNode title="Sports News" controller="News" action="Sports"/> </mvcSiteMapNode> <mvcSiteMapNode title="About" controller="About" action="Index"/> </mvcSiteMapNode> </mvcSiteMap> And so we formed the structure of our site in the file MVC.Sitemap. A common mistake here is to forget to wrap the entire site with an xml node representing the homepage that the visitor sees at the very beginning.
ADDING A NAVIGATION
Now that we have several controllers and methods and the structure of the site is properly described in Mvc.Sitemap, let's add navigation to the pages.
Open _Layout.cshtml located in the Views / Shared folder. Change the page body code as follows:
<body> @Html.MvcSiteMap().Menu(false, true, true) @RenderBody() </body> So we call the MvcSiteMap library and say to display the navigation menu on all pages. The parameters of the method call are as follows:
- We do not want to start from the current node.
- We want to show nodes in child levels
- We want to show the root node. If set to false, the “Home” node will not be shown.
If we launch our application, we should see the navigation menu on each page:
EDITING NAVIGATION REPRESENTATIONS
We managed to bring a simple navigation menu to the pages of our site. If you want to change the layout styles, simply change the code in Views / Shared / DisplayTemplates / MenuHelperModel.cshtml . Let's make a small change - change the list item markers from circles to squares:
<ul> @foreach (var node in Model.Nodes) { <li style="list-style-type:square;">@Html.DisplayFor(m => node) @if (node.Children.Any()) { @Html.DisplayFor(m => node.Children) } </li> } </ul> You can refresh the page without having to rebuild the project. The start page of News should look like this:
BREAD CROPS
We can add bread crumbs just as easily. Open our _Layout.cshtml and write the following code:
<body> @Html.MvcSiteMap().Menu(false, true, true) <p>Start of Breadcrumbs:</p> @Html.MvcSiteMap().SiteMapPath() @RenderBody() </body> Now there are convenient bread crumbs on all pages:
Similarly, if we want to customize the appearance of bread crumbs, we need to edit the Views / Shared / DisplayTemplates / SiteMapPathHelperModel.cshtml file .
DYNAMIC URL / PARAMETRED URL
Any real site at some point will use a dynamic or parameterized URL. Adding a dynamic URL to an MVC Sitemap is quite simple if you know how. Let's start by adding a new method to NewsController:
//GET: News/Article/x public ActionResult Article(int id) { ViewBag.id = id; return View(); } Now add the view. Edit Article.cshtml as follows:
@{ ViewBag.Title = "Article"; } <h2>Viewing Article @ViewBag.id</h2> Open the page in the browser localhost: xxxx / News / Article / 1234:
Note that the new page is not marked in the sitemap and therefore the bread crumbs are empty.
In order to insert into the page in the navigation menu, you first need to decide where it will be. I want her to be inside the News section. Edit Mvc.Sitemap and add the Key attribute to the “News” node.
<mvcSiteMapNode title="News" controller="News" action="Index" key="News"> Now add attributes to the News controller's Article method:
//GET: News/Article/x [MvcSiteMapNode(Title = "Article", ParentKey = "News")] public ActionResult Article(int id) { ViewBag.id = id; return View(); } Build the project and open it in the browser localhost: xxxx / News / Article / 1234:
Now we have breadcrumbs and navigation menu on a new page, despite the dynamic URL!
DOWNLOAD SOLUTION
Download the solution here .
Translation of the article: edspencer.me.uk/2011/09/20/mvc-sitemap-provider-tutorial-2-breadcrumbs
Source: https://habr.com/ru/post/178087/
All Articles