Easy way to manage remote devices
 What I wanted:
- when the task is completed in jenkins, display a notification on the computer and, as an addition, display it on a physical display connected to the arduino;
- an interface that can be opened on a phone or tablet for controlling a music player on a computer and a video player on a raspberry pi;
- an interface accessible from outside the local network for outputting values from sensors installed on the arduino.
What happened:
- client running on the device, with a python method declaration;
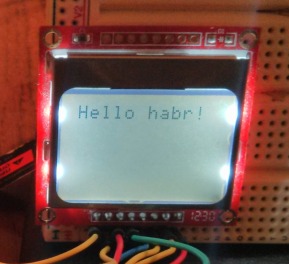
- RESTful api to run "methods" (the picture on the right is displayed through it);
- "Control panels" with a web-interface;
- service to control devices, methods and panels.
Links
Service - rdevic.es
Server source code - rdevices-server
Client source code - rdevices-client
')
What's inside
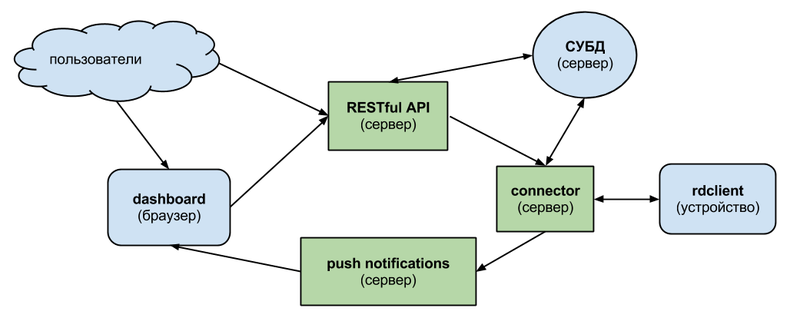
rdclient - runs on the user's device, declares methods, executes them on request from the server, and sends the result back. Written in python. Initially, to communicate with the server, I wanted to use ØMQ, but to install it, the user would need to assemble a module. Therefore, ordinary sockets are used.
connector - the daemon receives requests from the API, sends them to the client device, gets the result, writes it to the database and sends the notification daemon. Written in python and tornado. Redis is used to communicate with the API and the notification service.
RESTfull API - receives requests directly from users or through “control panels” and transfers them to the connector. Written in python, django and tastypie.
push notifications - the daemon receives notifications about the completion of the execution of methods from the connector and sends them to the control panel. Made to reduce the number of requests to the API. Written in python, tornado and sockjs.
dashboard - a web-interface for managing devices is created by the user and stored on the server. For markup, use html, for scripts, JavaScript, CoffeeScript or IcedCoffeeScript.
How to create a device
To create it, you need to install pip and git, if you don’t have them.
And install rdclient:
pip install -e git://github.com/nvbn/rdevices-client.git#egg=rdclient 
Now you need to create a device through the site and copy it
uuid .To declare a device, you need to create a python file, for example,
device.py , inherit from the Device class, decorate methods with method(result, [arg1], [arg2], ..) and specify uuid in Meta .Annotation of the parameters and the result of the method is required, but is used only for informative purposes.
An example of a simple device:
from rdclient import Device, method class MyDevice(Device): class Meta: uuid = 'DEVICE_UUID' @method('None') def print_123(self): print 123 @method('int', a='int', b='int') def sum_a_and_b(self, a, b): return a + b Now you can run the client:
rdclient device.py After that, a brief documentation for its device will appear on the device page.
For some applications, there are already ready mixins:

API usage
The first step is to create a key to access the API .
All requests must be in json or xml and this must be explicitly indicated in the header, for example:
Accept: application/json Content-type: application/json To call the method you need to send a POST request to
rdevic.es/api/v1/device_method_call?username=USERNAME&api_key=API_KEY rdevic.es/api/v1/device_method_call?username=USERNAME&api_key=API_KEY with the body containing the object (in json or xml): { method: METHOD_NAME, device: DEVICE_UUID, request: { arg1: 'arg1Value', arg2: 'arg2Value' } } In response will come:
{ method_id: METHOD_ID, request: { arg1: 'arg1Value', arg2: 'arg2Value' }, response: {}, state: 0, text_state: 'started', id: CALL_ID, resource_uri: '/api/v1/device_method_call/CALL_ID/', } An updated version can be obtained by making a GET request at
resource_uri?username=USERNAME&api_key=API_KEY . The result of the method call is in the response field. The execution status of the method in state . Possible values: STATE_CREATED = 0 STATE_FINISHED = 1 STATE_ERROR = 2 The request can be done with
curl : curl "http://rdevic.es/api/v1/device_method_call/?username=nvbn&api_key=45932208bfb91d5ba8c9ab82137026c76ece69a8" -H "Accept: application/json" -H "Content-type: application/json" -X POST -d "{\"method\":\"arduino_write\",\"device\":\"bcc97caa-a09b-11e2-a15d-009c02975edf\",\"request\":{\"data\": \"clear\nwrite:Hello habr\!\n\"}}" The result of its implementation is shown not the first picture.
Dashboard creation
First you need to create it on the site and open the code editing.
Scripts can be written in JavaScript (
type="javascript" ), CoffeeScript ( type="coffeescript" ) and IcedCoffeeScript ( type="iced-coffeescript" ).They can use the dashboard api, it provides:
dashboard.ready(callback)- initialization of the dashboard;dashboard.getDevice(deviceId, callback)- get device in callback;device.method(args, [callback])- call the method and get the result in the callback.argsis an object containing an:.
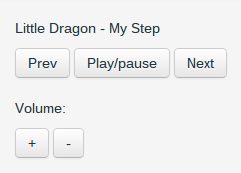
As an example of the panel - the remote for rhythmbox (
rdclient.mixins.RhythmboxMixin ): <script type='text/javascript'> dashboard.ready(function(){ dashboard.getDevice(DEVICE_ID, function(device){ $('#prev').click(function(){ device.rhythmbox_previous({}); }); $('#next').click(function(){ device.rhythmbox_next({}); }); $('#play-pause').click(function(){ device.rhythmbox_play_pause({}); }); }); }); </script> <button class='btn' id='prev'>Prev</button> <button class='btn' id='play-pause'>Play/pause</button> <button class='btn' id='next'>Next</button> To avoid the ladder you can use IcedCoffeeScript. With him, the part with the script will look like this:
<script type='text/iced-coffeescript'> await dashboard.ready await dashboard.getDevice DEVICE_ID, defer device $('#prev').click => device.rhythmbox_previous {} $('#next').click => device.rhythmbox_next {} $('#play-pause').click => device.rhythmbox_play_pause {} </script> Future plans
Now only basic features are implemented in the project. More planned:
- event'y on the side of the device;
- git repositories with custom “panels”;
- api keys with limited access to devices and method.
PS all keys and uuid in the article are non-existent.
Source: https://habr.com/ru/post/177755/
All Articles