Deploying django applications on OpenShift hosting from Red Hat
The advantages of cloud hosting nowadays are not explained, and Red Hat also offers us to try out all the goodies for free (naturally with some limitations).
You do not pay for hosting and get?
Well, if the required language was not found, you can create a Do-It-Yourself application and configure it as you please.
We will consider the deployment of Django applications.
I found plenty of manuals on the Internet, but the pitfalls made me tinker. I will describe below.
')
So after registering at openshift.com, it is better to install rhc - a tool for managing the resources allocated for us. Why is it better? Yes, you can just configure everything from a web browser, but through the console it is much easier and faster, especially in linux.
You can install rhc in ubuntu like this:
Now login via the console:
Is done. We are online.
Create a python application:
habr is of course the name of the application.
The utility reports that our application has been created and is available at: http://habrlamazavr.rhcloud.com/
, as well as the git address of our application (copy it to kudanibut).
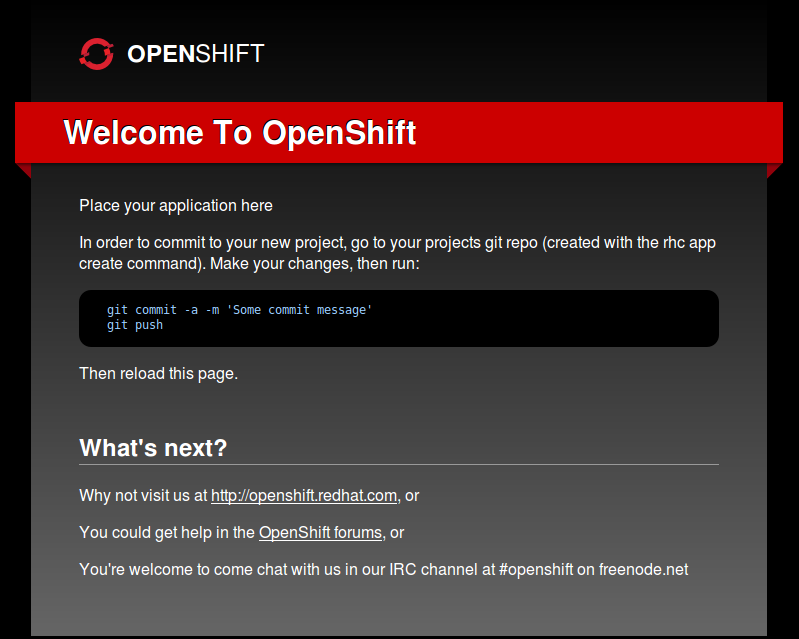
We see this page:
Now go to install django. Go to the wsgi directory and create a django application:
Edit the application file in the wsgi directory:
Uncomment the line to install django
in the setup.py file at the root of the openshift application.
Now you need all this to upload to the server.
Entering the wsgi directory, add the application folder to git:
In the course of execution, django was installed on the server (in my case, 1.5.1, i.e., the latest version for today).
At the end we see the django start page:

But some application without a database.
Add the database mysql, phpmyadmin and configure the django project to work with it.
Add the mysql cartridge to the habr application:
Keep the database username and password from the rhc output:
Add phpmyadmin:
The password and the login name of phpmyadmin will be displayed again, although this is a duplicate of the password and the name of the database.
What is important here is only a link to enter the admin. habr-lamazavr.rhcloud.com/phpmyadmin
Phpmyadmin I add in order to import the finished database to the server. Running syncdb there is not very convenient.
We configure django to work with the database in the settings.py file of our django application.
Naturally, you need to import the os module at the beginning of the file.
Commit the changes and fill:
After the end go to the page of our application. It's ok. So the database is connected, otherwise we see 501 error. Then we look at the logs with the command:
We will also create a django application inside our project:
Add a line:
in INSTALLED_APPS in the settiongs.py file of the django project.
Make a view with css and media files, respectively.
Create a templates folder in the habr / habr directory (next to the settings.py file) and the index.html file in it:
View in the views.py:
Specify url in urls.py:
Now we specify the directory with the templates for our project in the settings.py file:
Add to git the folder with the template and the django application that we created:
I do not cite examples with paths, below is an archive with an example.
Commit and fill
Go see our page.
Well, now only goodies with media files.
First add static admin files. We collect them:
We get the admin folder, which we put in the static directory in the wsgi directory.
Create a .htaccess file in the wsgi directory:
And just like that! application is needed, not an error.
We create the media / css / folder in it the style.css file and add the color of our greeting to it.
Do not forget to add the one created in git:
Go to the page. The text has changed color.
As promised project .
You do not pay for hosting and get?
- 1 Gb of disk space
- ability to create 3 applications
- support for php 5.3, Ruby 1.9, Node.js 0.6, Perl 5.10, python 2.6 (3.3), Zend Server 5.6 and this is not a complete list.
Well, if the required language was not found, you can create a Do-It-Yourself application and configure it as you please.
We will consider the deployment of Django applications.
I found plenty of manuals on the Internet, but the pitfalls made me tinker. I will describe below.
')
So after registering at openshift.com, it is better to install rhc - a tool for managing the resources allocated for us. Why is it better? Yes, you can just configure everything from a web browser, but through the console it is much easier and faster, especially in linux.
You can install rhc in ubuntu like this:
$ sudo yum install rubygems git $ sudo gem install rhc Now login via the console:
$ rhc setup Is done. We are online.
Create a python application:
$ rhc app create habr python-2.6 habr is of course the name of the application.
The utility reports that our application has been created and is available at: http://habrlamazavr.rhcloud.com/
, as well as the git address of our application (copy it to kudanibut).
We see this page:
Now go to install django. Go to the wsgi directory and create a django application:
$ cd habr/wsgi/ $ django-admin startproject habr Edit the application file in the wsgi directory:
#!/usr/bin/env python # some original codes we need import os virtenv = os.environ['APPDIR'] + '/virtenv/' os.environ['PYTHON_EGG_CACHE'] = os.path.join(virtenv, 'lib/python2.6/site-packages') virtualenv = os.path.join(virtenv, 'bin/activate_this.py') try: execfile(virtualenv, dict(__file__=virtualenv)) except: pass # new codes we adding for Django import sys import django.core.handlers.wsgi os.environ['DJANGO_SETTINGS_MODULE'] = os.environ['OPENSHIFT_APP_NAME']+'.settings' sys.path.append(os.path.join(os.environ['OPENSHIFT_REPO_DIR'], 'wsgi', os.environ['OPENSHIFT_APP_NAME'])) application = django.core.handlers.wsgi.WSGIHandler() Uncomment the line to install django
install_requires=['Django>=1.3'], in the setup.py file at the root of the openshift application.
Now you need all this to upload to the server.
Entering the wsgi directory, add the application folder to git:
$ git add habr $ git commit -a -m "Initialization" $ git push In the course of execution, django was installed on the server (in my case, 1.5.1, i.e., the latest version for today).
At the end we see the django start page:
But some application without a database.
Add the database mysql, phpmyadmin and configure the django project to work with it.
Add the mysql cartridge to the habr application:
$ rhc cartridge add mysql-5.1 -a habr Keep the database username and password from the rhc output:
Added mysql-5.1 to application habr MySQL 5.1 database added. Please make note of these credentials: Root User: Root Password: Database Name: habr Connection URL: mysql://$OPENSHIFT_MYSQL_DB_HOST:$OPENSHIFT_MYSQL_DB_PORT/ You can manage your new MySQL database by also embedding phpmyadmin-3.4. The phpmyadmin username and password will be the same as the MySQL credentials above. Add phpmyadmin:
$ rhc cartridge add phpmyadmin-3.4 -a habr The password and the login name of phpmyadmin will be displayed again, although this is a duplicate of the password and the name of the database.
What is important here is only a link to enter the admin. habr-lamazavr.rhcloud.com/phpmyadmin
Phpmyadmin I add in order to import the finished database to the server. Running syncdb there is not very convenient.
We configure django to work with the database in the settings.py file of our django application.
'ENGINE': 'django.db.backends.mysql', # Add 'postgresql_psycopg2', 'mysql', 'sqlite3' or 'oracle'. 'NAME': os.environ['OPENSHIFT_APP_NAME'], # Or path to database file if using sqlite3. 'USER': os.environ['OPENSHIFT_MYSQL_DB_USERNAME'], # Not used with sqlite3. 'PASSWORD': os.environ['OPENSHIFT_MYSQL_DB_PASSWORD'], # Not used with sqlite3. 'HOST': os.environ['OPENSHIFT_MYSQL_DB_HOST'], # Set to empty string for localhost. Not used with sqlite3. 'PORT': os.environ['OPENSHIFT_MYSQL_DB_PORT'], # Set to empty string for default. Not used with sqlite3. Naturally, you need to import the os module at the beginning of the file.
Commit the changes and fill:
$ git commit -a -m "db init" $ git push After the end go to the page of our application. It's ok. So the database is connected, otherwise we see 501 error. Then we look at the logs with the command:
$ rhc tail habr We will also create a django application inside our project:
$ django-admin startapp habrapp Add a line:
'habrapp', in INSTALLED_APPS in the settiongs.py file of the django project.
Make a view with css and media files, respectively.
Create a templates folder in the habr / habr directory (next to the settings.py file) and the index.html file in it:
<!DOCTYPE html> <html lang="ru"> <head> <meta charset="utf-8"> <meta http-equiv="Content-Type" content="text/html; charset=utf-8" /> <link rel="stylesheet" href="/media/css/style.css" type="text/css" /> <title>{{title}}</title> </head> <body> <h3>{{text}}</h3> </body> </html> View in the views.py:
from django.shortcuts import render_to_response def index(request): c = { 'title': 'Habratitle', 'text': 'Hello habrahabr from OpenShift!',} return render_to_response('index.html',c) Specify url in urls.py:
(r'^$','habrapp.views.index'), Now we specify the directory with the templates for our project in the settings.py file:
TEMPLATE_DIRS = ( os.path.join(os.path.dirname(__file__),'templates').replace('\\','/'), ) Add to git the folder with the template and the django application that we created:
$ git add templates/ $ git add habrapp/ I do not cite examples with paths, below is an archive with an example.
Commit and fill
$ git commit -a -m 'views add' $ git push Go see our page.
Well, now only goodies with media files.
First add static admin files. We collect them:
$ python manage.py collectstatic We get the admin folder, which we put in the static directory in the wsgi directory.
Create a .htaccess file in the wsgi directory:
RewriteEngine On
RewriteRule ^application/media/(.+)$ /static/media/$1 [L]
And just like that! application is needed, not an error.
We create the media / css / folder in it the style.css file and add the color of our greeting to it.
h3 { color: #6DA3BD; } Do not forget to add the one created in git:
$ git add . $ git add . $ git add .htaccess $ git commit -a -m 'media files' $ git push Go to the page. The text has changed color.
As promised project .
Source: https://habr.com/ru/post/177243/
All Articles