MySQL On air. Monitor SQL queries
Understanding how this or that CMS works has to use various tools that facilitate work.
The most interesting topic is working with databases (oi | s). Naturally, to study queries and query results, you need to use something universal. Something that will work stably with both the well-known engine and the self-written system.
Suppose you have a content management system and you need to see how new users are added or password changes are changed.
Most of the tools allowing to monitor work with the database are paid [ one , two ]. I wanted something easier and more convenient, so I chose mysql-proxy. Although the utility capabilities are much wider than I need, I will describe only the main. It works on both Windows and Unix systems.
You can download it here: dev.mysql.com/downloads/mysql-proxy
The first thing you need to decide on the choice of distribution. At the moment, the latest version is “MySQL Proxy 0.8.3 alpha”, I have Windows 7 as the OS, so all the tests will be on it.
')
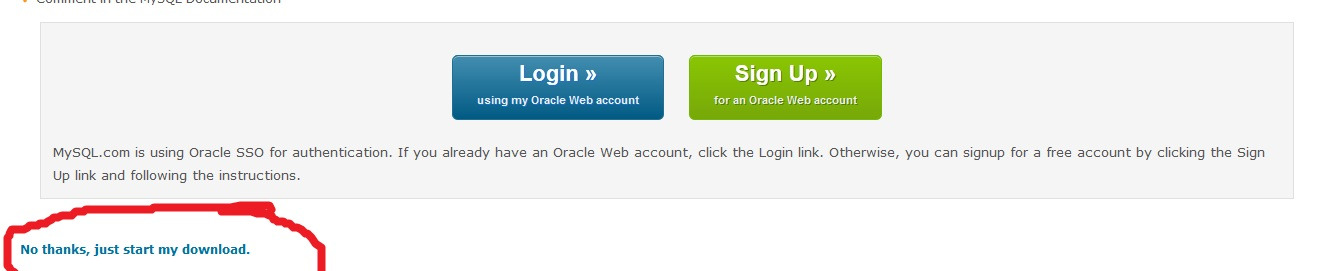
After clicking on the “Download” button, you will be asked to log in or register, but there is a link for downloading from the bottom without unnecessary actions. (There are ready-made packages in the repositories of Ubuntu and Debian, so: sudo apt-get install mysql-proxy)
I want to note that at a size of 7.9 MB, the distribution kit includes Lua with support for the main modules.
After downloading the archive, you need to unpack it into a directory convenient for you, take for example C: \ mysql-proxy
To run the application you need to decide on the parameters.
In this context, much depends on what you have installed. As LAMP I use Winginx, you can read about this bundle here: winginx.ru
By default, MySQL runs on port 3306, we will not touch it.
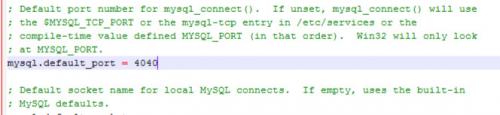
We need to change the port to connect php to the database. For this you need to fix php.ini
Find the string "mysql.default_port" and set the port (4040 by default). For more versatile work, change “mysqli.default_port” to 4040
The preparatory part is passed, let's get down to business.
Option 1. Monitoring requests.
For simple monitoring, you must use the Lua script. As I already said, Lua is bundled, so nothing new needs to be installed.
Create a simple script view.lua in the directory C: \ mysql-proxy \ with the contents:
function read_query(packet) if string.byte(packet) == proxy.COM_QUERY then print(string.sub(packet, 2)) end end Now you can check the result.
For convenience, create in the directory C: \ mysql-proxy file view.bat with the contents:
C:\mysql-proxy\bin\mysql-proxy.exe --proxy-lua-script=C:\mysql-proxy\view.lua --log-file="C:\mysql-proxy\mysql-proxy-log.txt" --proxy-backend-addresses=localhost:3306 --proxy-backend-addresses - MySQL server address to which we will proxy the request.
Having launched the web server and having executed any queries to the database, you can see the following:
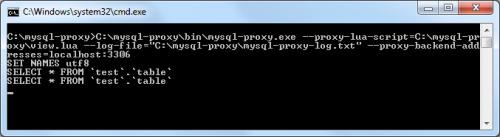
Requests are displayed, good.
Option 2. Monitoring requests and writing to a file.
To record requests to the file, we will use the regular capabilities of Lua.
Create a file view-write.lua in the directory C: \ mysql-proxy \ with the contents:
function read_query(packet) if string.byte(packet) == proxy.COM_QUERY then local file = io.open("C:\\mysql-proxy\\sql-log.txt", "a") file:write(string.sub(packet, 2) .. "\n") file:close() print(string.sub(packet, 2)) end end and bat file - "view-write.bat"
C:\mysql-proxy\bin\mysql-proxy.exe --proxy-lua-script="C:\mysql-proxy\view-write.lua" --log-file="C:\mysql-proxy\mysql-proxy-log.txt" --proxy-backend-addresses=localhost:3306 The result after the execution of queries (at the address “C: \ mysql-proxy \ sql-log.txt”)

In addition to displaying the queries themselves, we may need to display the results of these queries.
Option 3. Requests and results
Using the same scheme, create the script “view-result.lua”:
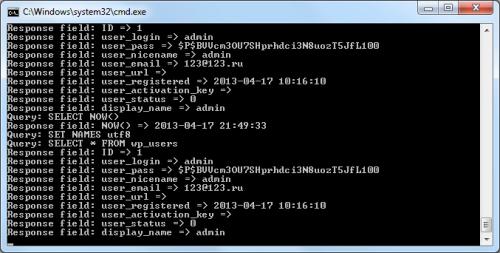
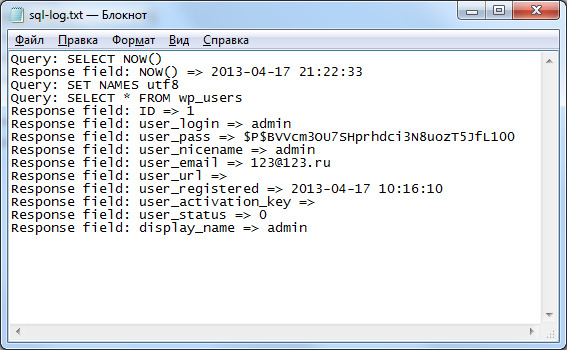
function read_query( packet ) if packet:byte() == proxy.COM_QUERY then print("Query: " .. string.sub(packet, 2)) local file = io.open("C:\\mysql-proxy\\sql-log.txt", "a") file:write("Query: " .. string.sub(packet, 2) .. "\n") file:close() proxy.queries:append(2, string.char(proxy.COM_QUERY) .. string.sub(packet, 2), {resultset_is_needed = true} ) proxy.queries:append(1, packet, {resultset_is_needed = true}) return proxy.PROXY_SEND_QUERY end end function read_query_result(inj) if inj.id == 1 then for row in inj.resultset.rows do local i = 1 local fields = {} while row[i] do if row[i] == row then break end local file = io.open("C:\\mysql-proxy\\sql-log.txt", "a") file:write("Response field: " .. inj.resultset.fields[i].name .. " => " .. row[i] .. "\n") file:close() print("Response field: " .. inj.resultset.fields[i].name .. " => " .. row[i]) i = i + 1 end end return proxy.PROXY_IGNORE_RESULT end end And view-result.bat
C:\mysql-proxy\bin\mysql-proxy.exe --proxy-lua-script="C:\mysql-proxy\view-result.lua" --log-file="C:\mysql-proxy\mysql-proxy-log.txt" --proxy-backend-addresses=localhost:3306 As a result, we get full logging of requests and responses in a readable form.
Source: https://habr.com/ru/post/177057/
All Articles