Creating a custom component from scratch. Part 1
Introduction
Greetings, colleagues!
Quite often, when developing multimedia Android applications (hereinafter simply “applications”), we are faced with the task of creating our own components that are not provided for in the system. It can be all kinds of knobs-switches, spectrum visualizers, etc. Some of them can be obtained by simply replacing the graphic resource, turning the canvas by 90 degrees, etc. But sometimes, you still have to do something different. zero.
In this article, I'm going to talk about creating a component - a simple piano keyboard, using inheritance from the View class and implementing all the internals “independently.” Why in quotes - see further.
In a series of articles I will try to highlight issues such as:
')
- component rendering
- adding scrolling using standard scrollbars
- interaction, using key selectors
- Preserving component state when rotating screen
- adding backlight in overscroll
- passing parameters to XML
- pinch zoom
The first article will be about the first three points.
If you are interested in these topics, welcome under cat.
Prehistory
Once upon a time, when I wrote my musical application, which I mentioned in previous articles, I was faced with the need to wash down the piano. Since this was my very first android application, and even then the android was not at all the same as it is now, in the first version I did more than one perversion to make a less working component. I kept a giant Bitmap in my memory, made up of 4 pictures with an octave, for scrolling I had a separate stream that cyclically reduced the scrolling speed at a given interval and fell asleep until the next task was received. Interactivity was zero.
Now, after some time, I am writing a project, in many respects similar to my first, but on a completely different level of quality and functionality, and again I need a piano. Here I will tell about it.
Component development
View or SurfaceView?
Rule of thumb, which I brought for myself, is to try to use the View whenever possible, and avoid SurfaceView, unless you need to have a component that constantly draws some changing state with more or less complex graphics (game, video). In all other cases, View is your choice. You also need to consider that using SurfaceView, we are depriving ourselves of the possibility in the future to animate this component inside your layout.
First stage
So, let's start, the first thing we will do is create a new class, the heir of android.view.View. Let's call it PianoView.
public class PianoView extends View { public PianoView(Context context, AttributeSet attrs) { super(context, attrs); } @Override protected void onDraw(Canvas canvas) { super.onDraw(canvas); } } As we see, we have a constructor in which the context and a set of attributes are passed to us. In the onDraw method, we will draw our component. This method is called every time it becomes necessary to redraw the view, for example, for each frame of the animation.
Keyboard drawing Graphic resources.
To draw the keys, I will use the standard Android tools: selector, nine-patch drawable.
For the white keys, I have prepared the following 9-patch images. I decided to make the selected state using the standard for Holo blue backlight.


For blacks:


And for each of them created a selector:
<?xml version="1.0" encoding="utf-8"?> <selector xmlns:android="http://schemas.android.com/apk/res/android"> <item android:drawable="@drawable/white_key_pressed" android:state_pressed="true"></item> <item android:drawable="@drawable/white_key"></item> </selector> All that is now left is to get these Drawables in the code with
context.getResourses.getDrawable();Keyboard drawing Code
So, to keep the component code clean, I brought all the keyboard drawing and storing the necessary information to the Keyboard class. In our
onDraw I'll just call its method: protected void onDraw(Canvas canvas) { if (measurementChanged) { measurementChanged = false; keyboard.initializeInstrument(getMeasuredHeight(), getContext()); instrumentWidth = keyboard.getWidth(); } keyboard.draw(canvas); } I will not tell you in great detail how the piano is drawn simply because it takes too much space with boring text and code. Anyone who wants to see the details can take my code and see. Here I will explain only the principle.
The first stage is initialization. Initialization includes the calculation of the array of keys.
Key[] keysArray; This is our model. Each item is a key. The key knows its coordinates (in the component's coordinate system) and dimensions, whether it is black or white, and whether it is currently pressed or not.
class Key { float startX; float endX; float startY; float endY; int midiCode; boolean black; boolean pressed = false; void setBounds(float startX, float endX, float startY, float endY) { this.startX = startX; this.startY = startY; this.endX = endX; this.endY = endY; } boolean containsPoint(float x, float y) { return startX <= x && endX > x && startY <= y && endY > y; } } This process occurs every time the physical size of our component changes, our keyboard initializes (the measurementChanged flag is responsible for this, which we simply set to true in the onMeasure method). Thus, we will not calculate the key positions each time we draw.
Initialization code
public void initializeInstrument(float measuredHeight, Context context) { whiteKeyWidth = Math.round(measuredHeight / WHITE_KEY_ASPECT_RATIO); octaveWidth = whiteKeyWidth * 7; int blackHalfWidth = octaveWidth / 20; blackKeyHeight = Math.round(measuredHeight / BLACK_KEY_HEIGHT_PERCENT); keysArray = new Key[KEYS_IN_OCTAVE * OCTAVES]; int whiteIndex = 0; int blackIndex = 0; for (int i = 0; i < KEYS_IN_OCTAVE; i++) { Key key = new Key(); if (isWhite(i)) { key.black = false; key.setBounds(whiteKeyWidth * whiteIndex, whiteKeyWidth * whiteIndex + whiteKeyWidth, 0, measuredHeight); whiteIndex++; } else { key.black = true; int indexDisplacement = i == 1 || i == 3 ? 1 : 2; key.setBounds(whiteKeyWidth * (blackIndex + indexDisplacement) - blackHalfWidth, whiteKeyWidth * (blackIndex + indexDisplacement) + blackHalfWidth, 0, blackKeyHeight); blackIndex++; } key.midiCode = START_MIDI_CODE + i; keysArray[i] = key; } for (int i = KEYS_IN_OCTAVE; i < KEYS_IN_OCTAVE * OCTAVES; i++) { Key firstOctaveKey = keysArray[i % KEYS_IN_OCTAVE]; Key key = firstOctaveKey.clone(); key.startX += (i / KEYS_IN_OCTAVE) * octaveWidth; key.endX += (i / KEYS_IN_OCTAVE) * octaveWidth; key.midiCode = START_MIDI_CODE + i; keysArray[i] = key; } } Here we calculate the width of the keys based on the height of the component and build an array of keys. First the first octave is built, then it is cloned and shifted along the X axis the necessary number of times to obtain the remaining octaves. Also, each key will have a corresponding MIDI code for each sound. Midi codes are numbered. Our first key code will be START_MIDI_CODE. The code of any key is calculated by adding the start code and the key index in the array.
Next - drawing keys. In a loop across the array of keys, we draw as follows:
private void drawSingleKey(Canvas canvas, Key key, int firstVisibleKey, int lastVisibleKey) { Drawable drawable = key.black ? blackKeyDrawable : whiteKeyDrawable; drawable.setState(new int[] { key.pressed ? android.R.attr.state_pressed : -android.R.attr.state_pressed }); drawable.setBounds((int) key.startX, (int) key.startY, (int) key.endX, (int) key.endY); drawable.draw(canvas); } The drawing takes place in 2 stages, because first we need to draw white keys, then black keys so that no overlaps occur. We could have avoided this if the 9-patches for the keys were made not rectangular, with cutouts. Moreover, it could help us remove unnecessary pixel redraws, but for the purposes of this article, let's keep everything as primitive as possible.
Done, our tool is successfully drawn:
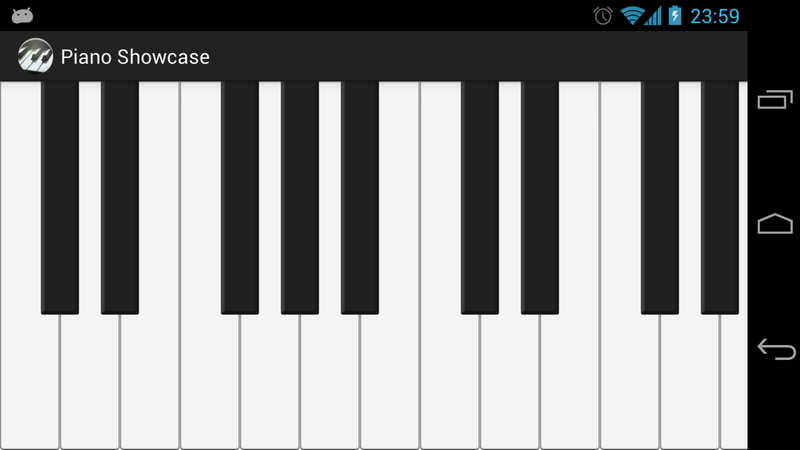
Not bad. Of course, when you click on the keys now nothing happens. Let's fix it.
Key interaction
For user-click interactions, the onTouchEvent method is usually overridden and it defines what the user did — touched a finger, performed a gesture, double-tapped, long-tailed, and so on. Fortunately, in most cases, you and I are spared from such troubles.
We will use the GestureDetector class, kindly provided by the platform from its early days.
Let's add a
private GestureDetector gestureDetector; field to our tool private GestureDetector gestureDetector; and initialize it private void init() { if (!isInEditMode()) { gestureDetector = new GestureDetector(getContext(), gestureListener); } } In the constructor, we pass the listener to the gestureListener, this is the place where we get callbacks from the detector when we detect any gestures.
private OnGestureListener gestureListener = new GestureDetector.SimpleOnGestureListener() { public boolean onDown(MotionEvent e) { if (keyboard.touchItem(e.getX(), e.getY())) { invalidate(); } return true; } public boolean onScroll(MotionEvent e1, MotionEvent e2, float distanceX, float distanceY) { resetTouchFeedback(); return true; } public boolean onSingleTapUp(MotionEvent e) { resetTouchFeedback(); return super.onSingleTapUp(e); } }; So, the algorithm of work is simple, in the onDown method we pass the coordinates of the keystroke to our keyboard, where we perform the search for the key pressed (the touchItem method calculates its index by the coordinates of the key without having to scan the entire array). If a key is found, it is marked as pressed, and we call invalidate, which leads to a redraw.
In the remaining methods, we reset the key (when scrolling, finger up, etc.). This is done by analogy, for example, with a ListView, when we start scrolling a sheet, the selection is cleared.
The next step is to connect the detector to our component. This is done very simply:
public boolean onTouchEvent(MotionEvent event) { int action = event.getAction(); if (action == MotionEvent.ACTION_CANCEL) { resetTouchFeedback(); } return super.onTouchEvent(event) || gestureDetector.onTouchEvent(event); } Please note that we also check if the
ACTION_CANCEL action is ACTION_CANCEL , and in this case, we also reset the selection, since the GestureDetector does not react to it, and if it suddenly happened, we risk staying with the selected key forever.Checking:
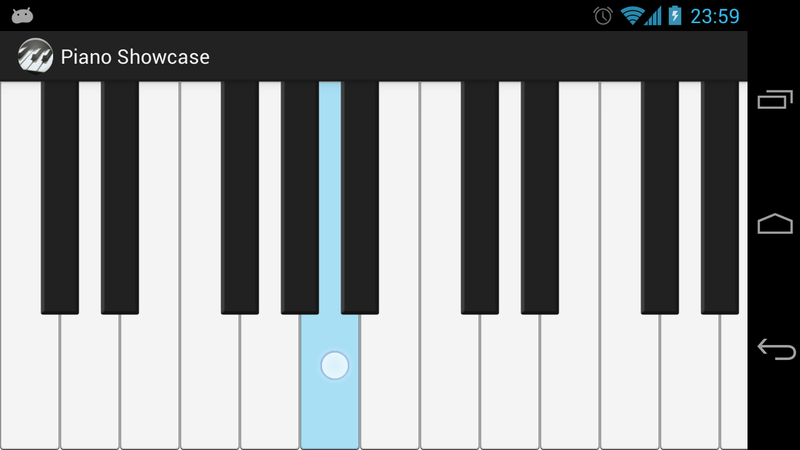
Hooray, now it looks a little more alive. But we still see only a part of the keyboard ... Do not worry, let's fasten the scrolling.
Adding Scrolling to a Component
So, we will consider first of all how we will shift our contents. The easiest way is to not move anything, but to draw in the same way, but to move the canvas itself. The Canvas class allows you to perform affine transformations on yourself.
Let's add a simple field
private int xOffset; in our class.
Now we extend our onDraw method with the following construction:
protected void onDraw(Canvas canvas) { if (measurementChanged) { measurementChanged = false; keyboard.initializeInstrument(getMeasuredHeight(), getContext()); instrumentWidth = keyboard.getWidth(); } canvas.save(); canvas.translate(-xOffset, 0); keyboard.updateBounds(xOffset, canvasWidth + xOffset); keyboard.draw(canvas); canvas.restore(); } Let's take a look at what we did:
- canvas.save () - remembers the current state of the canvas. Creates a kind of control point
- canvas.translate () - shifts the canvas by a specified distance
- canvas.restore () - restore the original state of the canvas.
We also added an updateBounds method to our Keyboard class. It allows you to transfer the left and right visible border, so that we do not draw the keys that go beyond the screen. Optimization such.
Now that we have added support for scrolling at the drawing stage, we will add it to the user interaction - GestureDetector. Modify onScroll:
public boolean onScroll(MotionEvent e1, MotionEvent e2, float distanceX, float distanceY) { resetTouchFeedback(); xOffset += distanceX; if (xOffset < 0) { xOffset = 0; } if (xOffset > instrumentWidth - getMeasuredWidth()) { xOffset = instrumentWidth - getMeasuredWidth(); } invalidate(); return true; } Done, now, when we move our finger on our keyboard, it will scroll nicely, without going beyond the border of the keyboard. But this is not enough for us. We want to be able to pull a finger and start the keyboard to dangle in inertia - to make fling.
Fortunately, we do not have to calculate the speed of the finger and the distance traveled by it on the screen. All this for us makes our beloved GestureDetector. We just need to override the onFling method. It will help us know that the user has completed fling, as well as its initial characteristics. But in order to track the scrolling state, interpolate between the initial and of course the points, we need another component - Scroller, or rather, its brother - OverScroller (we want to add glow effects in the future). Scroller is a very useful component for any kind of scrolling in Android, is used in countless internal components, and implements the standard scrolling behavior.
Add our scroller:
private OverScroller scroller; and initialize it in the component constructor.
Next, modify the GestureDetector as follows:
private OnGestureListener gestureListener = new GestureDetector.SimpleOnGestureListener() { public boolean onDown(MotionEvent e) { scroller.forceFinished(true); if (keyboard.touchItem(e.getX() / scaleX + xOffset, e.getY())) { invalidate(); } return true; } public boolean onFling(MotionEvent e1, MotionEvent e2, float velocityX, float velocityY) { scroller.fling(xOffset, 0, (int) -velocityX, 0, 0, instrumentWidth - getMeasuredWidth(), 0, 0); return true; } // ... }; As can be seen from the code, we start the scroller with the initial offset and speed, we indicate to it the minimum and maximum scrolling.
The next step is onDraw
protected void onDraw(Canvas canvas) { if (scroller.computeScrollOffset()) { xOffset = scroller.getCurrX(); } if (measurementChanged) { measurementChanged = false; keyboard.initializeInstrument(getMeasuredHeight(), getContext()); instrumentWidth = keyboard.getWidth(); } canvas.save(); canvas.scale(scaleX, 1.0f); canvas.translate(xOffset , 0); keyboard.updateBounds(xOffset , canvasWidth + xOffset ); keyboard.draw(canvas); canvas.restore(); if (!scroller.isFinished()) { ViewCompat.postInvalidateOnAnimation(this); } } What has changed here? For each frame of the animation, we call scroller.computeScrollOffset (), this method returns true if the scroller is animated, then we get the current value of the variable xOffset.
Because the animation involves a series of redraws - at the end of the method, we check whether the scroller has finished animating, and, if not, assign the next frame of the animation. Thus, until the scroller finishes its work, or is not stopped by force, the onDraw method will be called as often as possible and draw your component.
Now our component is nicely scrolling and supports fling. But something is missing, right? Not enough standard scrollbars below. No problem.
Adding standard scrollbars
Adding standard scrollbars is like a spell, there are no special secrets here, just a sequence of actions.
First, you need to tell our component that it supports all standard scrolling attributes. To do this, in our values directory create an file attrs.xml, in which to add the following definition:
<declare-styleable name="View"> <attr name="android:fadeScrollbars" /> <attr name="android:scrollbarAlwaysDrawHorizontalTrack" /> <attr name="android:scrollbarAlwaysDrawVerticalTrack" /> <attr name="android:scrollbarDefaultDelayBeforeFade" /> <attr name="android:scrollbarFadeDuration" /> <attr name="android:scrollbarSize" /> <attr name="android:scrollbarStyle" /> <attr name="android:scrollbarThumbHorizontal" /> <attr name="android:scrollbarThumbVertical" /> <attr name="android:scrollbarTrackHorizontal" /> <attr name="android:scrollbarTrackVertical" /> <attr name="android:scrollbars" /> </declare-styleable> Now, add to the constructor:
setVerticalScrollBarEnabled(false); setHorizontalScrollBarEnabled(true); TypedArray a = context.obtainStyledAttributes(R.styleable.View); initializeScrollbars(a); a.recycle(); The next step is to override the three simplest methods in which we will manage the size and position of the scrollbars:
protected int computeHorizontalScrollExtent() { return canvasWidth; } @Override protected int computeHorizontalScrollOffset() { return xOffset; } @Override protected int computeHorizontalScrollRange() { return instrumentWidth; } The code speaks for itself - in the first method we specify the width of our component, in the second, the current scrolling offset, in the third the size of the entire keyboard (which goes beyond the screen). Now these scrollbars are left to “wake up” when needed. The base View class provides a special awakenScrollBars () method for this. Add the following lines:
if (!awakenScrollBars()) { invalidate(); } to the onScroll and onFling methods of our GestureDetectorListener.
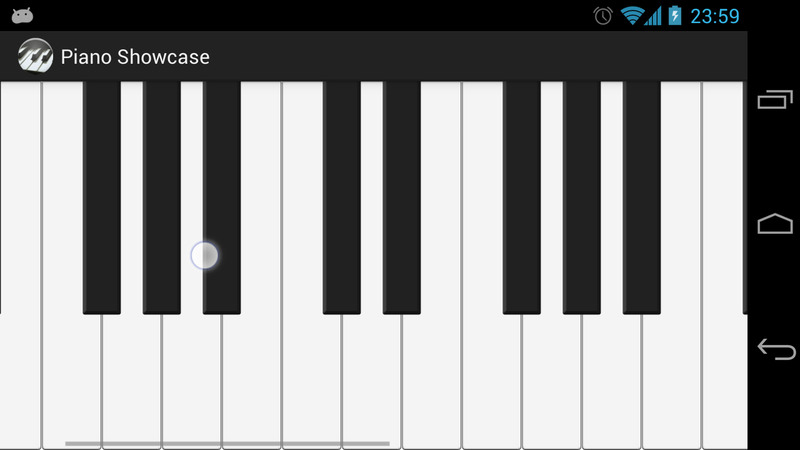
The result - standard scrollbars delight our eyes.
Conclusion
So, in this part we considered the creation of a component, drawing with the help of Drawables, various states of drawables, visual feedback when interacting, scrolling, fling-gesture, creating scrollbars.
The article was quite long, so I decided to split it into several parts.
In the next part I will tell about:
- Preserving component state when rotating screen
- adding backlight in overscroll
- XML parameter passing
- pinch zoom
I also have plans for the third part, where I will talk about optimization, about the difference between using ready-made bitmaps and drawing on the canvas (drawCircle, drawText, etc), about getting rid of redrawing, etc. I will write the third article only if the first two readers will like it and there will be interest in appearing third
The sources of the finished project for this series of articles are on my github at: goo.gl/VDeuw . I just want to note that these are clippings from the project under development, and if you find some code that doesn’t seem to be needed, I probably didn’t notice it and forgot to cut it.
Source: https://habr.com/ru/post/176643/
All Articles