ASP.NET MVC Lesson 7. Bootstrap, jQuery, Ajax
The purpose of the lesson : To determine the rules for working with html, js and css files. Bootstrap and extra css. Js-files structure Using jQuery, highlights, learning selectors, events, etc. addClass, removeClass, attr, data, dynamic dom-object creation, ajax.
Finally, we proceed to a more detailed study of the client side, which is already less connected with asp.net mvc, but is still important for web development.
Twitter Bootstrap is a css framework. Those. a set of tools for creating blocks, buttons, tags, forms and navigation. Our application will be based on this framework.
')
Read more here:
http://twitter.github.com/bootstrap/
Install the bootstrap:
Remove Jquery.UI:
Add the bootstap to the BundleConfig and remove the jquery.UI from there (App_Start / BundleConfig.cs):
It is important to remember about the order of priority for setting styles:
The main work in the task of styles is with the help of tags, classes (pseudo-classes), and attributes. Using
To set the styles, we will use the css-file Site.css. Since the bootstrap styles are already set for the basic forms, delete this block and leave the file (/Content/Site.css):
These are css styles that are used to display errors in the
Now let's define the rules by which we will create our style:
Connect the styles and js files to the main layout file (/Areas/Default/Views/Shared/_Layout.cshtml):
What's going on here:
At the beginning of the file, it is announced that it will be included in the Layout:
The specified layout will display the data using
It is seen that the body drove under the navigation bar. In our file we override the body (/Content/Site.css):
Much better.
Since we used the classes for the bootstap form earlier, then registering with us now looks like this:

Let's correct the choice of the date of birth, add the classes in the Html. DropDownList () (/Areas/Default/Views/User/Register.cshtml):
Since it is likely that we will use this construction somewhere else by choosing a date (although not a fact), this is more general than particular (which refers specifically to registration) (/Content/Site.css):
Checking:

Uiii!
Go to the description of js files. We use jquery as the main framework for working with the client part of the code. One of our custom js file (let's call it /Scripts/common.js) will always be called. The functions that will be present on any page will be added to it. The remaining js-files will be called as an option.
In order not to be confused, we will create 2 “admin” and “default” folders in / Scripts.
All files will have unique names that will be written in SmallCase format, and will relate to a particular page (mostly). For example: user-register.js is the file that will be included in the User / Register.cshtml page:
This section is displayed in the place where it is described in _Layout.cshtml (/Areas/Default/Views/Shared/_Layout.cshtml):
In /App_Start/BundleConfig.cs meanwhile add a description:
All user js classes, with the exception of plugins, will have the following structure:
Consider more:
As resource files grow over time, and on the other hand, mobile Internet is being developed for mobile devices, in which the amount of transmitted data plays an important role, minifying the receipt of a page comes down to the following things:
Reducing the number of requests for images, especially small ones. This is done in two ways:
?
Of course, when downloading content icons or images, this method is not applicable.
For css and js, file minification is applied, i.e. spaces and delimiters are removed and shorter local variables are used. The file is either initially prepared as minified for the jquery library or minified on the server.
To enable minification, change the compilation directive in the Web.config file:
Or directly include in /App_Start/BundleConfig.cs:
Check:

Up to 527 KB optimization

After optimizing 251 KB
Those. more than 2 times. In fact, this value can be both less and more, depending on what resources we ship. If there is caching, then the page with further work loads only a small part of the new files.
Install jQuery
Initially, jquery is already installed, but if the framework has been updated, and this is done often, then it is obvious that you need to update it:
Install-Package jQuery
Next, we previously removed JQueryUI ( http://jqueryui.com/ ), since we are going to use the datepicker function, modal, to use from what bootstrap offers. But in JQueryUI there is an interaction functional we need, i.e. Draggable, Droppable, Resizable, Selectable and Sortable. Set them selectively:
For ease of debugging, Firefox has a Firebug extension, and Chrome has a built-in Developer Tool. I will look at the Developer Tool example. Called by key presses -
Let's explore it:
JQuery is a tool that helps us develop client code for different browsers. It is also a simple and logical library.
At the heart of everything is the selector. The selector allows you to select multiple elements located in the DOM (document object model) and perform actions on them, such as: assign an event handler, change the location, change attributes, delete selected elements, add text or html to selected elements, create an object.
The basic rule is written as:
If the selection area is not set, it is searched for the entire document: $ (document). This is the root node of the entire DOM.
If the selection area is set, then it is searched only in the border of this node.
The selector rule is set according to the principles of assigning css properties:
To check whether an element is found or not, you can use the length property:
To move up the tree of elements from the selected one, you can use the functions .closest (), .parent () or .parents ():
To handle events, we assign events to selector elements. For example:
What are the events:
It must be remembered that events do not apply to newly created elements, although they fall under the choice of a selector that was previously performed. But if we, at the second time, initialize, then on elements where event handling has already been assigned, this event will be executed twice.
To set the global processing constant, use the following construction:
To work with the attributes of the element are mainly used functions:
To work with elements, consider the following functions:
Consider the main and main function (in 99% of cases I managed only with it).
There are other options, but it is worth resorting to them in some cases.
Consider more options:
A lot of theory, it is time to move on to practice. Create a second login form, which will contribute to a quick login. When clicking on “Login”, we are not going to the Login page, instead of it pops up a pop-up offering to enter a login right now. If you enter an error, the form gives a warning. We leave the usual form at / Login, we will need it.
Popup forms can be used frequently, so we will consider this a standard procedure - call Popup at such and such. Since the popup is always one, we will create a container for it in _Layout.cshtml (/Areas/Default/Views/Shared/_Layout.cshtml):
Add functionality to common.js (/Scripts/common.js):
where .modal () is a function from bootstrap.js.
Since the Login is on every page, we add the following functionality in common.js too:
Add a handler to the controller (/Areas/Default/Controller/LoginController.cs):
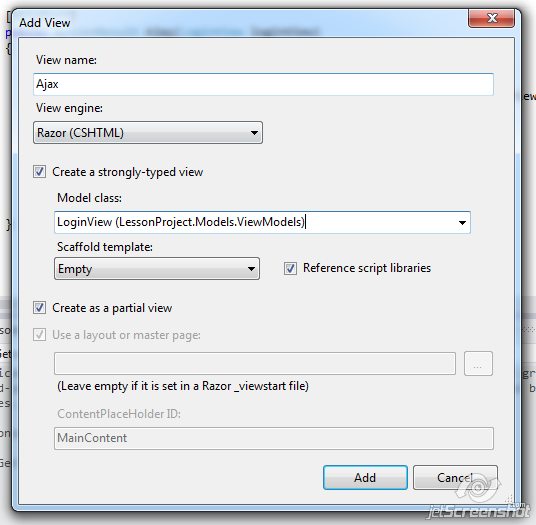
It is completely analogous to Index, only another View will be called - “Ajax”, create it (/Areas/Default/Views/Login/Ajax.cshtml):
Pay attention to the LoginForm form id and LoginButton button id.
Let's change the call in UserLogin.cshtml (/Areas/Default/Views/Home/UserLogin.cshtml):
In common.js, we add LoginButton processing, when we call, we set the event handler to $ (“# LoginButton”). Click (...) (/Scripts/common.js):
Note the recursive call
To do this, do the trick. In / Areas / Default / Views / Shared / add _Ok.cshtml, the essence of which is to reload the page:
With a successful login, we load this View. When added to a DOM tree in a string
the script will start and reload the page, without waiting for the rest of the calls. Change the controller (/Areas/Default/Controllers/LoginController.cs):
Check, works!
We considered the basic principles of layout and the client part, but this is only a small fraction of what you can know about the layout, styles and programming in the client part.
We learned how to use the debugger in Chrome and create an ajax request. Consider this question further in the future.
Useful links:
http://jquery.com
http://habrahabr.ru/post/161895/
http://habrahabr.ru/post/154687/
http://twitter.github.com/bootstrap/
http://habrahabr.ru / post / 160177 /
All sources are located at https://bitbucket.org/chernikov/lessons
Finally, we proceed to a more detailed study of the client side, which is already less connected with asp.net mvc, but is still important for web development.
Twitter Bootstrap and css
Twitter Bootstrap is a css framework. Those. a set of tools for creating blocks, buttons, tags, forms and navigation. Our application will be based on this framework.
')
Read more here:
http://twitter.github.com/bootstrap/
Install the bootstrap:
Install-Package Twitter.Bootstrap Remove Jquery.UI:
Uninstall-Package Jquery.UI.Combined Add the bootstap to the BundleConfig and remove the jquery.UI from there (App_Start / BundleConfig.cs):
public class BundleConfig { public static void RegisterBundles(BundleCollection bundles) { bundles.Add(new ScriptBundle("~/bundles/jquery").Include( "~/Scripts/jquery-1.*")); bundles.Add(new ScriptBundle("~/bundles/modernizr").Include( "~/Scripts/modernizr-*")); bundles.Add(new ScriptBundle("~/bundles/bootstrap").Include( "~/Scripts/bootstrap*")); bundles.Add(new StyleBundle("~/Content/css") .Include("~/Content/site.css") /* */ .Include("~/Content/bootstrap*")); } } It is important to remember about the order of priority for setting styles:
- Browser's inline styles have the lowest priority.
- Custom browser style
- Inherited styles from parent elements
- The following css-styles are specified in external files, here the rule is more important (other things being equal) if the file containing the rule is after the file containing the previous one. The same rule applies to the mutual arrangement of the rules within the document.
- Further, the cost of using selectors:
- Tags have the lowest priority:
h1, div, p - Classes and pseudo-classes. Selector:
.item { }, :hover { } - Attributes [attr = "value"]. Example:
[type=”checkbox”] {} - ID is the highest priority.
#main { }type#main { }
- Tags have the lowest priority:
- An even higher priority is to set the style right in the style tag:
<div style=”width : 203px”></div> - And the highest priority is the style with the accompanying word! Important.
The main work in the task of styles is with the help of tags, classes (pseudo-classes), and attributes. Using
!important not recommended, nor is it necessary to set styles in the style attribute and use the ID attribute.To set the styles, we will use the css-file Site.css. Since the bootstrap styles are already set for the basic forms, delete this block and leave the file (/Content/Site.css):
/* Styles for validation helpers -----------------------------------------------------------*/ .field-validation-error { color: #f00; } .field-validation-valid { display: none; } .input-validation-error { border: 1px solid #f00; background-color: #fee; } .validation-summary-errors { font-weight: bold; color: #f00; } .validation-summary-valid { display: none; } These are css styles that are used to display errors in the
Html.ValidationMessage() , Html.ValidationSummary() methods.Now let's define the rules by which we will create our style:
- It is forbidden to use the selector through id, type
#Main. This is due to the fact that although browsers process all the elements containing this attribute, the ID attribute in the DOM rules must be unique throughout the page. - Classes for formatting use the SmallCaps type: some-class-name, all in small letters, using “-” to separate. Actually, the way it is used in the CSS itself.
- Classes intended only for management (used exclusively in js code) for separation use the type lowerCamelCase: someClassName. Actually, as well as conventions on writing code in js or jquery.
- The id attributes are specified by the UpperCamelCase type:
id=”SomeButton”. - Do not use generic classes such as
.list, .item, .button, .text, .user, .image, .container, .wrapperat the top level. - Do not complicate words. Do not use a construction like:
.main-container-left-part-wrapper-list. - Set popular styles if necessary, do it in the general description of the type:
.error {color : red }, .left { float : left }. - Use cascade description from general to specific:
.list { } .list .item { } <li> .list > .item { } - and for multiple class tags:
.item.odd { }
for<div class="item odd"></div> - use the following document structure
/* - - - - - h1, h2, h3 ... - a - p */ /* : - .error - .field-validation-error . - .show-me { border : 1px solid red; } - .hidden {display : none; } - .relative { position : relative; } */ /* - .popup-window - .popup-window .close - .popup-window .wrapper - .popup-window .header - .error-message - .info-message */ /* - header - .logo - .user-login - nav.main-menu - .main-content - footer */ /* */ /* */ /* */ /* … */
The structure of the html-page.
Connect the styles and js files to the main layout file (/Areas/Default/Views/Shared/_Layout.cshtml):
<!DOCTYPE html> <html> <head> <meta charset="utf-8" /> <meta name="viewport" content="width=device-width" /> <title>@ViewBag.Title</title> @Styles.Render("~/Content/css") @RenderSection("styles", required: false) @Scripts.Render("~/bundles/modernizr") </head> <body> <div class="navbar navbar-fixed-top"> <div class="navbar-inner"> <div class="container"> <ul class="nav nav-pills pull-right"> @Html.Action("UserLogin", "Home") </ul> </div> </div> </div> @RenderBody() @Scripts.Render("~/bundles/jquery") @Scripts.Render("~/bundles/bootstrap") @RenderSection("scripts", required: false) </body> </html> What's going on here:
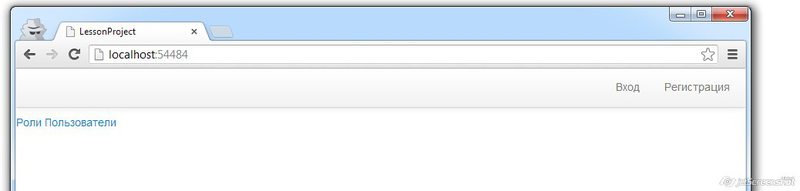
- We receive the request and upon request we determine the route / Default / Home / Index.
- This controller / method has a standard View - /Home/Index.cshtml
At the beginning of the file, it is announced that it will be included in the Layout:
@{ ViewBag.Title = "LessonProject"; Layout = "~/Areas/Default/Views/Shared/_Layout.cshtml"; } The specified layout will display the data using
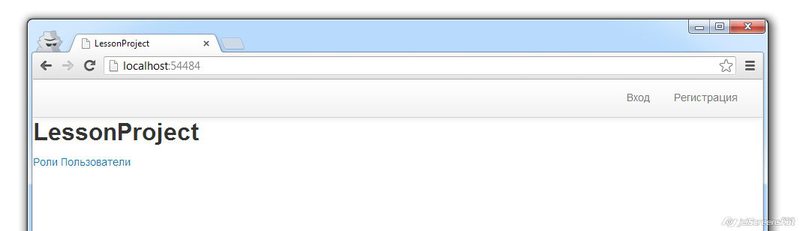
@RenderBody() . Run:It is seen that the body drove under the navigation bar. In our file we override the body (/Content/Site.css):
body { padding-top : 40px !important; } Much better.
Since we used the classes for the bootstap form earlier, then registering with us now looks like this:
Let's correct the choice of the date of birth, add the classes in the Html. DropDownList () (/Areas/Default/Views/User/Register.cshtml):
… <div class="controls"> @Html.DropDownList("BirthdateDay", Model.BirthdateDaySelectList, new { @class = "select-day" }) @Html.DropDownList("BirthdateMonth", Model.BirthdateMonthSelectList, new { @class = "select-month" }) @Html.DropDownList("BirthdateYear", Model.BirthdateYearSelectList, new { @class = "select-year" }) </div> Since it is likely that we will use this construction somewhere else by choosing a date (although not a fact), this is more general than particular (which refers specifically to registration) (/Content/Site.css):
.select-day { width : 50px; } .select-month { width : 90px; } .select-year { width : 70px; } Checking:
Uiii!
Js file structure
Go to the description of js files. We use jquery as the main framework for working with the client part of the code. One of our custom js file (let's call it /Scripts/common.js) will always be called. The functions that will be present on any page will be added to it. The remaining js-files will be called as an option.
In order not to be confused, we will create 2 “admin” and “default” folders in / Scripts.
All files will have unique names that will be written in SmallCase format, and will relate to a particular page (mostly). For example: user-register.js is the file that will be included in the User / Register.cshtml page:
@section scripts { @Scripts.Render("/Scripts/default/user-register.js") } This section is displayed in the place where it is described in _Layout.cshtml (/Areas/Default/Views/Shared/_Layout.cshtml):
… @Scripts.Render("~/bundles/bootstrap") @Scripts.Render("~/bundles/common") @RenderSection("scripts", required: false) </body> In /App_Start/BundleConfig.cs meanwhile add a description:
bundles.Add(new ScriptBundle("~/bundles/common").Include( "~/Scripts/common.js")); All user js classes, with the exception of plugins, will have the following structure:
function FunctionName() { _this = this; this.init = function () { /* */ $("button").click(function () { var id = $(this).attr("id"); _this.saySomething(id); }); } /* */ this.saySomething = function (id) { alert("-! : " + id); } /* */ function saySomething (id) { alert("-! !: " + id); } } var functionName = null; $().ready(function () { functionName = new FunctionName(); functionName.init(); }); Consider more:
function FunctionNamehas a name in the UpperCamelCase style by the name of the file in which it is located (CommonandUserRegisterin the common.js and user-register.js files, respectively)_this = this;Saving the link to this function so that it can be used inside delegate functionsthis.init()is the external (public) function where the processing will be initialized.var functionName = null- create a global variable. Possible to use from other files.$().ready()is called after the DOM structure is formed. JQuery function.functionName = new FunctionName();- create a class object.functionName.init();- initialize it.
Minification of resource files
As resource files grow over time, and on the other hand, mobile Internet is being developed for mobile devices, in which the amount of transmitted data plays an important role, minifying the receipt of a page comes down to the following things:
- Reducing the number of requests to resource files
- Reducing resource files.
Reducing the number of requests for images, especially small ones. This is done in two ways:
?
- Using sprite. A large canvas adds a lot of design elements at once. After that, the offset and the width / height of a part of this canvas are specified in the css.
For example drawing: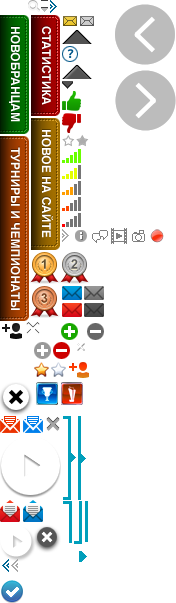
And its use in html:<div class="label label-new sprite"></div>
And css:.sprite { background: url("/Media/images/sprite.png"); overflow: hidden; text-indent: -9999px; } .box .label { position: absolute; width: 29px; right: -29px; top: 35px; } .box .label-new { background-position: 0 -15px; height: 119px; } - 2. Use for very small images (icons) ads directly in css using coding it in base64.
To do this, the image is transferred to base64, for example at http://webcodertools.com/imagetobase64converter
Then add to css by type:background-image: url(data:image/png;base64,iVBORw0KGgoAAAANSUhEUgAAAAEAAAAWCAYAAAABxvaqAAAAGXRFWHRTb2Z0d2FyZQBBZG9iZSBJbWFnZVJlYWR5ccllPAAAAyJpVFh0WE1MOmNvbS5hZG9iZS54bXAAAAAAADw/eHBhY2tldCBiZWdpbj0i77u/IiBpZD0iVzVNME1wQ2VoaUh6cmVTek5UY3prYzlkIj8+/PlBqi0kAAAAwSURBVHjaYmBgYGBnghFccIIbRPCiEvwggg8LixfOBbN44AaACU4gZvgJIv4DBBgARTIDD2TeBRAAAAAASUVORK5CYII=);
Of course, when downloading content icons or images, this method is not applicable.
For css and js, file minification is applied, i.e. spaces and delimiters are removed and shorter local variables are used. The file is either initially prepared as minified for the jquery library or minified on the server.
To enable minification, change the compilation directive in the Web.config file:
<compilation debug="false" targetFramework="4.5" /> Or directly include in /App_Start/BundleConfig.cs:
BundleTable.EnableOptimizations = true; Check:
Up to 527 KB optimization
After optimizing 251 KB
Those. more than 2 times. In fact, this value can be both less and more, depending on what resources we ship. If there is caching, then the page with further work loads only a small part of the new files.
Install jQuery
Initially, jquery is already installed, but if the framework has been updated, and this is done often, then it is obvious that you need to update it:
Install-Package jQuery
Next, we previously removed JQueryUI ( http://jqueryui.com/ ), since we are going to use the datepicker function, modal, to use from what bootstrap offers. But in JQueryUI there is an interaction functional we need, i.e. Draggable, Droppable, Resizable, Selectable and Sortable. Set them selectively:
- Since jQuery <1.6 is required for Install-Package JQuery.UI.Interactions, we will install it manually.
- Choose a custom download from jqueryui.com/download
- We select only Core and Interactions
- we swing
- Transferring css-files to / Content / css
- We transfer js-files to / Scripts (jquery-1.9.1-min.js is not necessary to transfer)
- We connect in BundleConfig
bundles.Add(new ScriptBundle("~/bundles/jqueryui") .Include("~/Scripts/jquery-ui-1.*")); bundles.Add(new StyleBundle("~/Content/css/jqueryui") .Include("~/Content/jquery-ui-1*")); - If necessary, we announce on the pages.
- Done!
Firebug (Firefox) and Developer Tool (Chrome)
For ease of debugging, Firefox has a Firebug extension, and Chrome has a built-in Developer Tool. I will look at the Developer Tool example. Called by key presses -
Shift-Ctrl-I .Let's explore it:
- Elements Tab.

Here, on the left, we can see the DOM tree of elements. On the right side are styles. Styles, like elements, can be edited on the go, and the changes will immediately be displayed in the browser in the editable page. Very handy when you need to fix the location of objects by several pixels. - Resources Tab

In the left part are all the resources that have been downloaded, and in the right you can view them. - Network tab
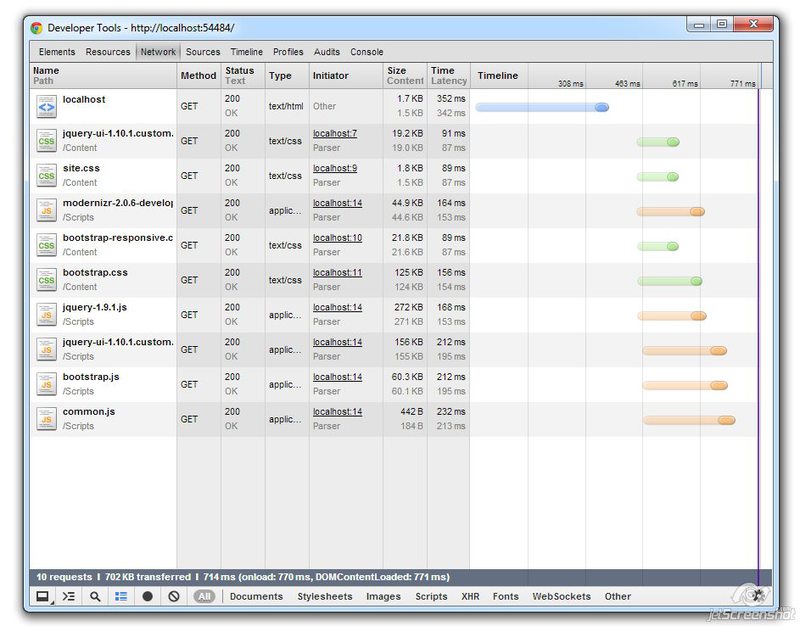
Shows requests and timing of these requests. Indicates different colors document, css, js files, images. Shows file sizes.
When clicking on a request, you can take a closer look at the HTTP request, for example: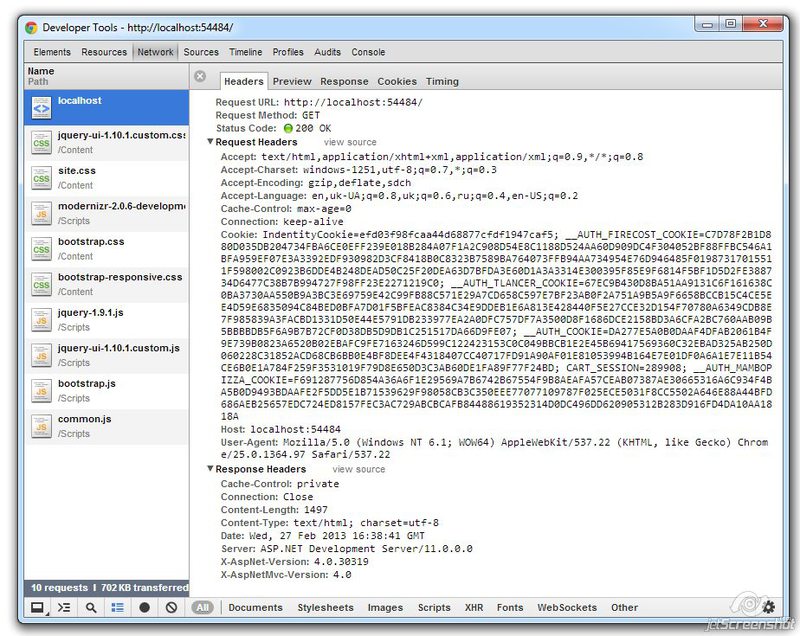
- Sources tab
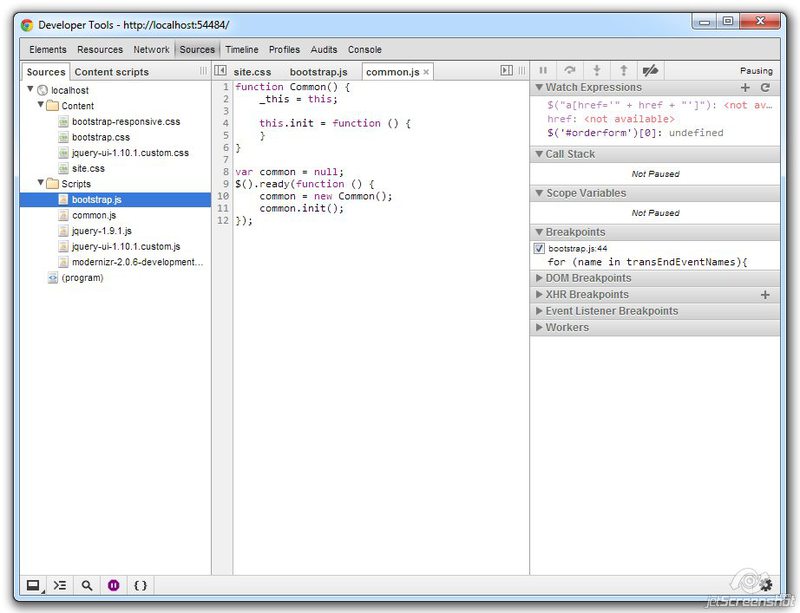
One of the main tabs. Here you can view js-files, set breakpoints, and debug applications. F9, F10, F11 hotkeys as in VisualStudio for debugging. - Timeline tab
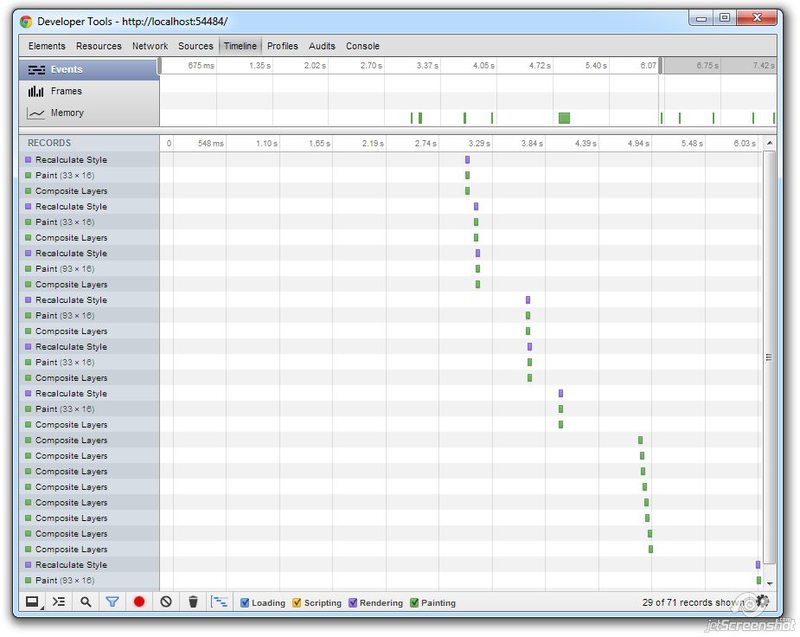
Shows what's happening in the browser. I never used it. - Profiles tab
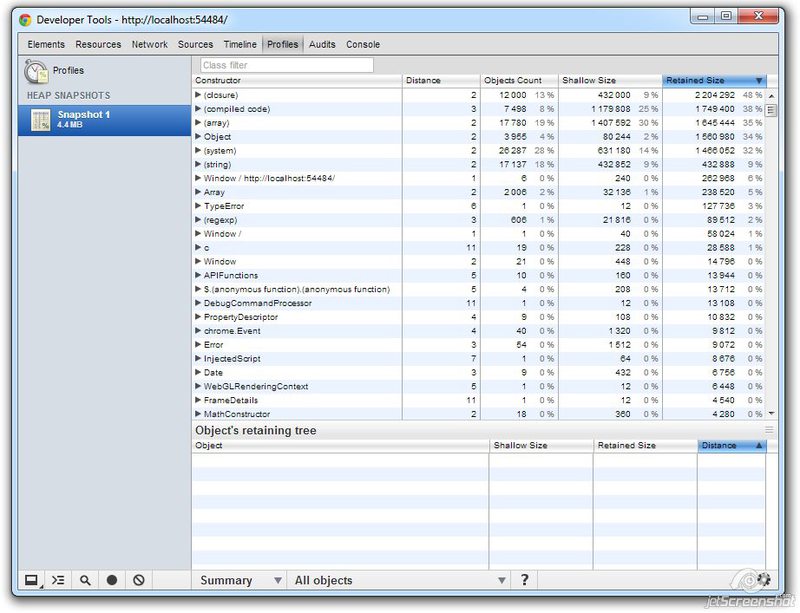
For profiling, i.e. finding non-trivial errors. Also, never used. - Audits tab
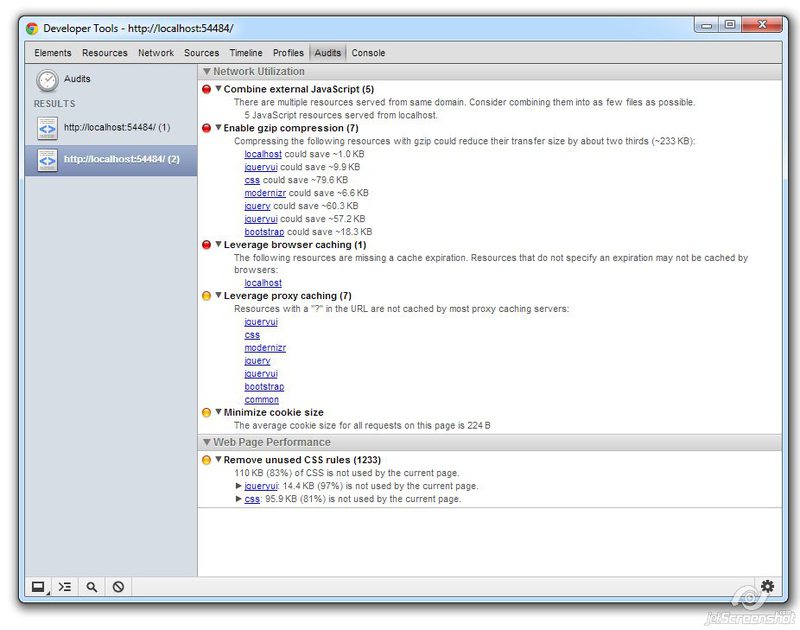
On this tab, you can check the page for optimization. Those. The browser recommends doing some actions that will lead to a decrease in the code transmitted from the server, compression, removal of unnecessary css lines. - Console tab

At the same time, both the command line and the logging output window. To output the log, you need to call the console.log (“message”) command.
Use this command carefully in IE, because when the console is not open, it gives an error.
Selectors and bypass
JQuery is a tool that helps us develop client code for different browsers. It is also a simple and logical library.
At the heart of everything is the selector. The selector allows you to select multiple elements located in the DOM (document object model) and perform actions on them, such as: assign an event handler, change the location, change attributes, delete selected elements, add text or html to selected elements, create an object.
The basic rule is written as:
$([“ ”][, ])If the selection area is not set, it is searched for the entire document: $ (document). This is the root node of the entire DOM.
If the selection area is set, then it is searched only in the border of this node.
The selector rule is set according to the principles of assigning css properties:
$(“div”)- select all div elements$(“.class”)- select all items with existing class$(“.class .class1”)- select all items with the existing class1 class contained in the class$(“.class.class1”)- select all items with existing class class1 and class$(“#Id1”)- the choice of the element (one) with id = Id1$(“[type='password']”)- select element with attribute type = 'password'$(“div”, $(“#MainPopup”))- selection of all div elements contained in the element with id = MainPopup$(“input[type='checkbox']:checked”)- selection of input elements of the type checkbox, which are$(“input[type='checkbox']:checked”).
To check whether an element is found or not, you can use the length property:
if($("#Id1").length == 0) { alert(" ") } To move up the tree of elements from the selected one, you can use the functions .closest (), .parent () or .parents ():
parent()- returns the immediate parent (and only him)parents(selector)- returns the set of all parents (if no selector is specified up to body and html)closest(selector)- returns the closest element that corresponds to the selector, and the element itself can be the same.
Developments
To handle events, we assign events to selector elements. For example:
$(".button").click(function () { alert("Button clicked"); }); What are the events:
- Browser Events
- .error () - a script execution error occurred in the browser
- .resize () - changed the size of the container to which this event was assigned.
- .scroll () - the content inside the container “scrolled” (here you need to understand automatic scrolling, that is, if an element has an overflow style assigned to it: scroll and the contents have scrolled).
- Document Downloads
- .load () - loaded item. For example, if you change (assign) src tag img.
- .ready () is called when the DOM document is finished loading. We use it constantly when initializing classes.
- .uload () is called when the user wants to close the page.
- Form events
- .blur () - when the focus field is lost
- .change () - when you change the selection of a drop-down list or a list of multiple choice
- .focus () - when acquiring focus from an input field
- .select () - when selecting text or part of text in the input field
- .submit () - when confirming the input form
- Keyboard events
- .focusin () - when acquiring the focus (analog focus)
- .focusout () - when the focus is lost (analog blur)
- .keydown () - when a key is pressed at the moment while the key is pressed
- .keypress () - when you press and release the key
- .keyup () - when the key is released
- Mouse events
- .click () - when you click the left mouse button on the element
- .dblclick () - with a double click of the mouse
- .hover () - on mouse over
- .mousedown (), .mouseup (), .mouseenter (), .mouseleave (), .mousemove (), .mouseout (), .mouseover () - all these events respond to the appropriate actions of the mouse relative to the elements.
It must be remembered that events do not apply to newly created elements, although they fall under the choice of a selector that was previously performed. But if we, at the second time, initialize, then on elements where event handling has already been assigned, this event will be executed twice.
To set the global processing constant, use the following construction:
$(document).on("click", ".button", function () { alert("Button clicked"); }); Attributes and Values
To work with the attributes of the element are mainly used functions:
- .val (value) - set the value attribute value; for the select \ option construction, selects an element
- .val () - get the value attribute value, or the value if this is an input field
- .attr (“attr”) - get the value of the attr attribute
- .attr (“attr”, “value”) - set the value of the attribute attr
- .data (“id”) - get the value of the data-id attribute
- .data (“id”, “20”) - set the value 20 to the data-id attribute
- .css (“width”, “120px”) - set the width style value: 120px
- .css (“width”) - get the value of width
- .addClass () /. removeClass () /. toggleClass () - add / remove / switch class in selector elements
Main manipulations
To work with elements, consider the following functions:
- .show () \. hide () - show \ hide
- .html (htmltext) - set html text in innerHtml elements
- .text (text) - set the text of the elements
- .empty () - clear selector elements
- .remove () - remove selector items
- .append () - add html-text or selector elements after all its leaves
- .prepend () - add html-text or selector elements in front of all its leaves
- .after () /. before () - insert html-text or elements after the element / before the element
- .appendTo () /. prependTo () - add the selected element to the end / beginning of the leaves of the specified element
Ajax
Consider the main and main function (in 99% of cases I managed only with it).
$.ajax({ type: "GET", url: "/ajaxUrl", data: { id: id }, beforeSend: function () { /* - */ }, success: function (data) { /* */ }, error: function () { /* */ } }); There are other options, but it is worth resorting to them in some cases.
Consider more options:
- type. GET or POST request.
- url. If you do not specify it, or it will be the default, the ajax request will be sent to the current page.
- data. In json or get format, a similar string, such as "id = 1 & value = 2". You can use form serialization:
data: $("form").serialize()
It should be remembered that when transmitting a set of identical values of checkboxes, you need to set thetraditional : true
beforeSend. Event generated immediately before form submission.
success. An event that indicates that everything is good and data contains the result of the execution
error. The event that occurs if the response from the server was different from 200 OK.
Ajax-login form.
A lot of theory, it is time to move on to practice. Create a second login form, which will contribute to a quick login. When clicking on “Login”, we are not going to the Login page, instead of it pops up a pop-up offering to enter a login right now. If you enter an error, the form gives a warning. We leave the usual form at / Login, we will need it.
Popup forms can be used frequently, so we will consider this a standard procedure - call Popup at such and such. Since the popup is always one, we will create a container for it in _Layout.cshtml (/Areas/Default/Views/Shared/_Layout.cshtml):
<div id="PopupWrapper"></div> Add functionality to common.js (/Scripts/common.js):
this.showPopup = function (url, callback) { $.ajax({ type: "GET", url: url, success: function (data) { $(".modal-backdrop").remove(); var popupWrapper = $("#PopupWrapper"); popupWrapper.empty(); popupWrapper.html(data); var popup = $(".modal", popupWrapper); $(".modal", popupWrapper).modal(); callback(popup); } }); } where .modal () is a function from bootstrap.js.
Since the Login is on every page, we add the following functionality in common.js too:
this.init = function () { $("#LoginPopup").click(function () { _this.showPopup("/Login/Ajax", function (modal) { }); }); } Add a handler to the controller (/Areas/Default/Controller/LoginController.cs):
[HttpGet] public ActionResult Ajax() { return View(new LoginView()); } [HttpPost] public ActionResult Ajax(LoginView loginView) { if (ModelState.IsValid) { var user = Auth.Login(loginView.Email, loginView.Password, loginView.IsPersistent); if (user != null) { return RedirectToAction("Index", "Home"); } ModelState["Password"].Errors.Add(" "); } return View(loginView); } It is completely analogous to Index, only another View will be called - “Ajax”, create it (/Areas/Default/Views/Login/Ajax.cshtml):
@model LessonProject.Models.ViewModels.LoginView <div class="modal hide fade" tabindex="-1" role="dialog" aria-hidden="true"> <div class="modal-header"> <button type="button" class="close" data-dismiss="modal" aria-hidden="true">×</button> <h3 id="myModalLabel">Login</h3> </div> <div class="modal-body"> @using (Html.BeginForm("Ajax", "Login", FormMethod.Post, new { @class = "form-horizontal", id = "LoginForm" })) { <fieldset> <legend></legend> <div class="control-group"> <label class="control-label" for="Email"> Email</label> <div class="controls"> @Html.TextBox("Email", Model.Email, new { @class = "input-xlarge" }) <p class="help-block"> Email</p> @Html.ValidationMessage("Email") </div> </div> <div class="control-group"> <label class="control-label" for="Password"> </label> <div class="controls"> @Html.Password("Password", Model.Password, new { @class = "input-xlarge" }) @Html.ValidationMessage("Password") </div> </div> </fieldset> } </div> <div class="modal-footer"> <button class="btn" data-dismiss="modal" aria-hidden="true">Close</button> <button class="btn btn-primary" id="LoginButton">Login</button> </div> </div> Pay attention to the LoginForm form id and LoginButton button id.
Let's change the call in UserLogin.cshtml (/Areas/Default/Views/Home/UserLogin.cshtml):
<li><span class="btn btn-link" id="LoginPopup"></span></li> In common.js, we add LoginButton processing, when we call, we set the event handler to $ (“# LoginButton”). Click (...) (/Scripts/common.js):
this.init = function () { $("#LoginPopup").click(function () { _this.showPopup("/Login/Ajax", initLoginPopup); }); } … function initLoginPopup(modal) { $("#LoginButton").click(function () { $.ajax({ type: "POST", url: "/Login/Ajax", data : $("#LoginForm").serialize(), success: function (data) { showModalData(data); initLoginPopup(modal); } }); }); } function showModalData(data, callback) { $(".modal-backdrop").remove(); var popupWrapper = $("#PopupWrapper"); popupWrapper.empty(); popupWrapper.html(data); var popup = $(".modal", popupWrapper); $(".modal", popupWrapper).modal(); if (callback != undefined) { callback(popup); } } Note the recursive call
initLoginPopup. And here is the dilemma. Since with a successful entrance we don’t need a new page to be loaded into PopupWrapper (or a page with an error), but only for the page to refresh.To do this, do the trick. In / Areas / Default / Views / Shared / add _Ok.cshtml, the essence of which is to reload the page:
<script> window.location.reload(); </script> With a successful login, we load this View. When added to a DOM tree in a string
popupWrapper.html(data); the script will start and reload the page, without waiting for the rest of the calls. Change the controller (/Areas/Default/Controllers/LoginController.cs):
var user = Auth.Login(loginView.Email, loginView.Password, loginView.IsPersistent); if (user != null) { return View("_Ok"); } Check, works!
Total
We considered the basic principles of layout and the client part, but this is only a small fraction of what you can know about the layout, styles and programming in the client part.
We learned how to use the debugger in Chrome and create an ajax request. Consider this question further in the future.
Useful links:
http://jquery.com
http://habrahabr.ru/post/161895/
http://habrahabr.ru/post/154687/
http://twitter.github.com/bootstrap/
http://habrahabr.ru / post / 160177 /
All sources are located at https://bitbucket.org/chernikov/lessons
Source: https://habr.com/ru/post/176053/
All Articles