ASP.NET MVC Lesson 1. Start
The purpose of the lesson: To study the Global.asax and web application launch behavior, processing the web request. Learning Nuget and Connecting Logging.
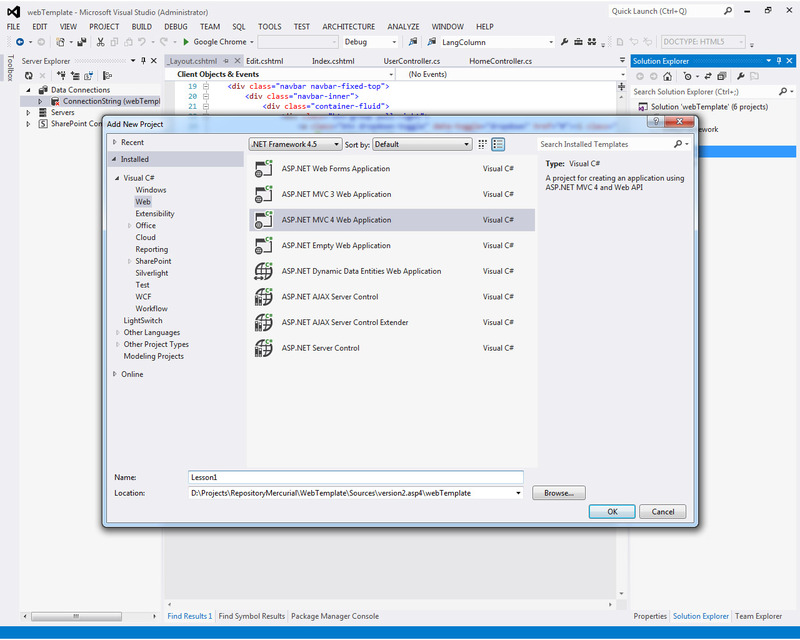
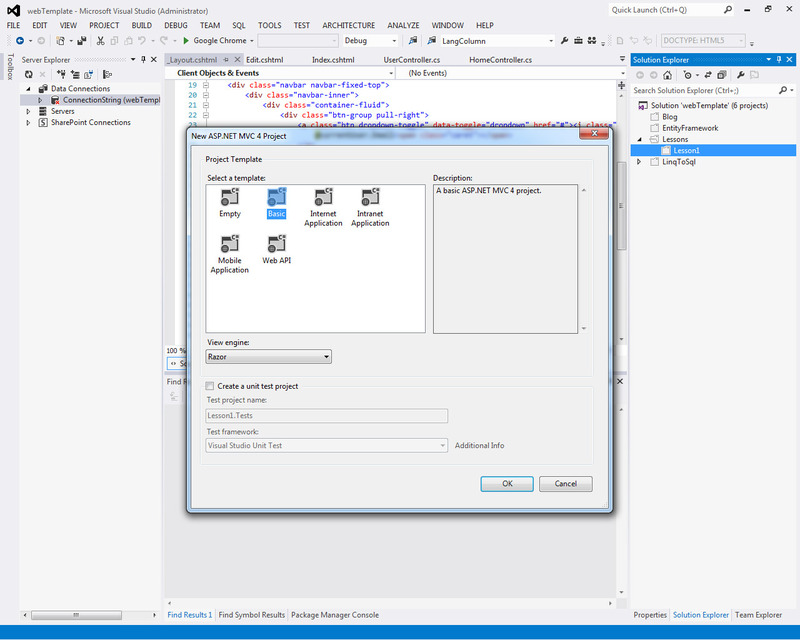
Create an ASP.NET MVC 4 Web Application "Lesson1" application (Figure 1.):
')
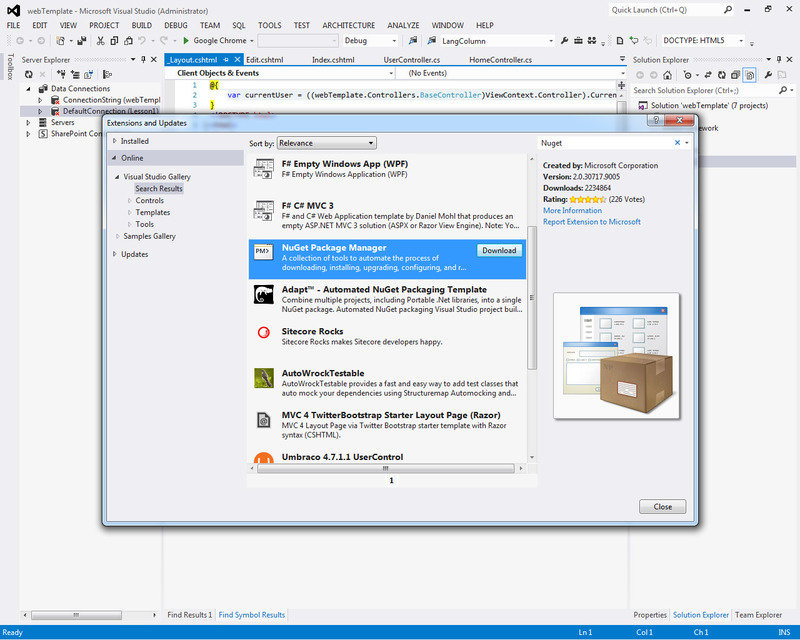
We will not launch the application, but install it immediately (if you haven’t already done so) the NuGet extension:
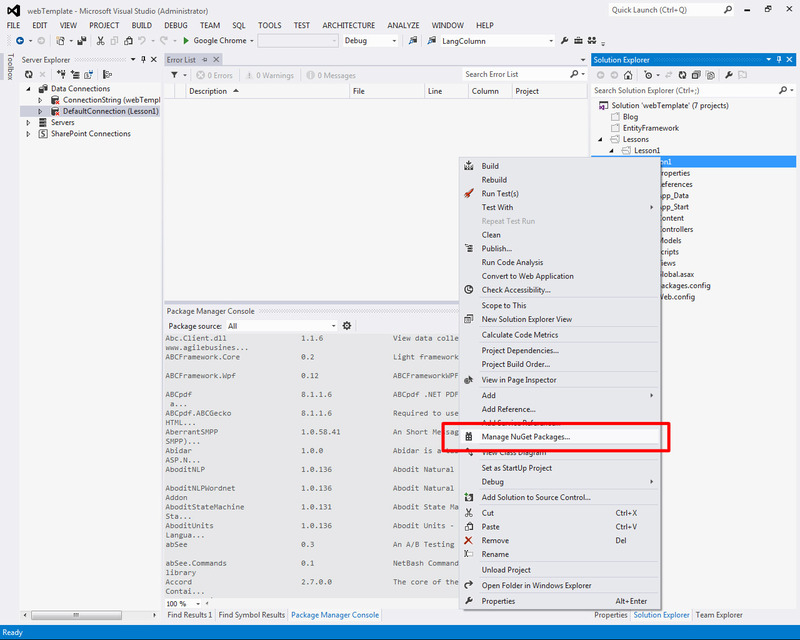
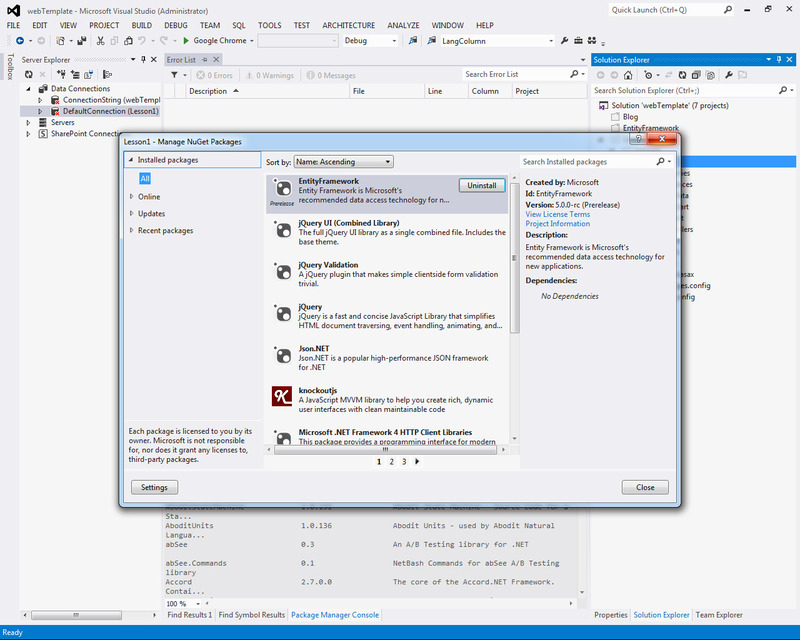
NuGet Package Manager is an extension for Visual Studio that allows you to add modules to existing projects that greatly simplify the work. When creating the “Basic” asp.net mvc4 application, many modules were initially added to the application itself. We can find their list by clicking on Manage NuGet Packages ... in the context menu of the project:
About them in order:
Now that we’ve roughly figured out what our application consists of, let's run it.
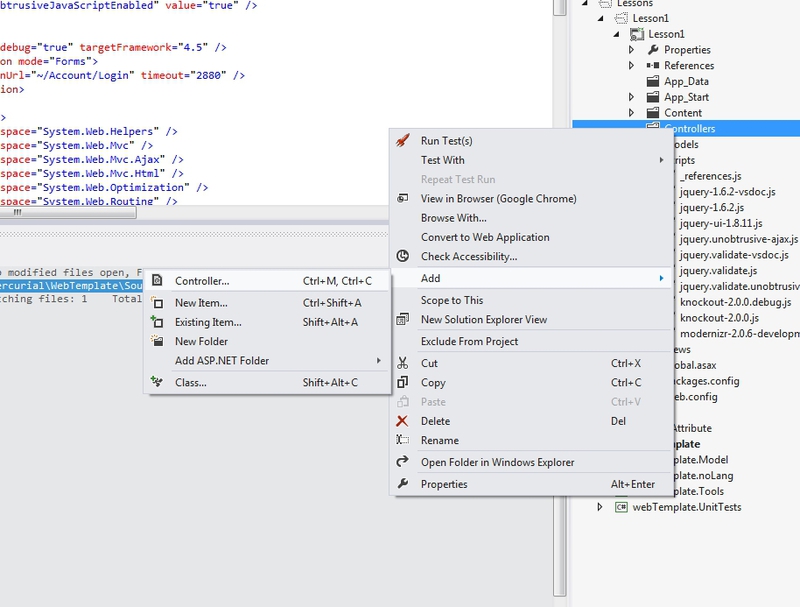
To do this, you need to create a HomeController:

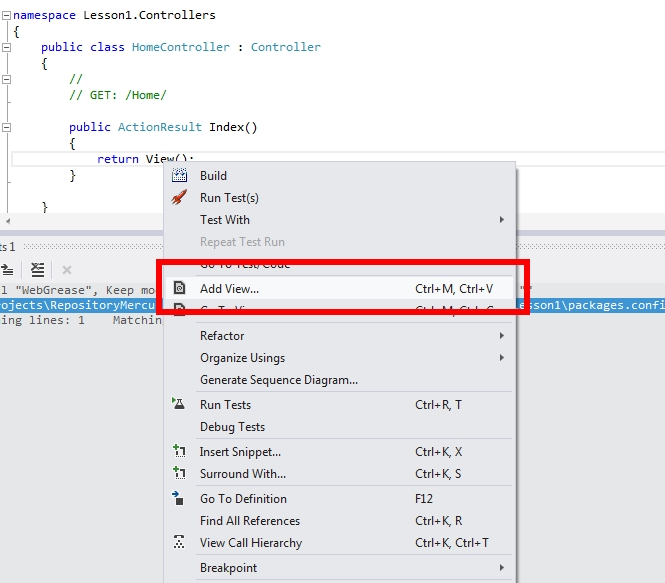
For the Index method (action), add a View and select ~ Views / Shared / _Layout.cshtml as the layout (of the master page type):

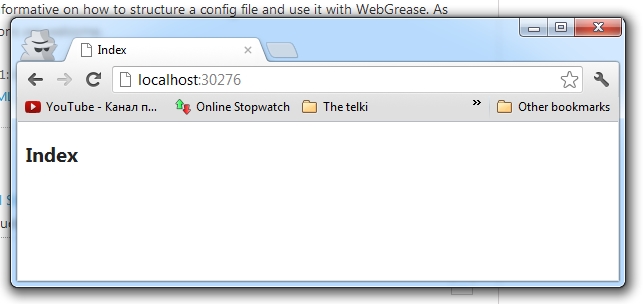
Actually, we can run.
All we will see is:
Why it was necessary to call the controller Home and how it works, we will study in more detail in the following lessons.
And now let's pay attention to the Global.asax file:
The MvcApplication class inherits HttpApplication and contains instructions for initializing the application. There are a few more events to which you can add code. Consider them:
Good. Now, to see firsthand that this is exactly what is happening, we will add logging and do this by adding the NLog module to NuGet.
NuGet has a console for executing commands to install / remove / search for modules, and other things, such as scaffolding .
To display all installed modules we write:
To get all modules available for installation:
For all available modules called NLog
Or
To install the NLog module, you must first select a project (if there are more than one in the solution) and enter the command:

Files are copied to the project, links to assemblies are added, and web.config can be updated.
To remove a module from a project, it is necessary that it is not associated with other modules. Delete this:
After installation, we use the documentation on NLog ( https://github.com/nlog/nlog/wiki/Tutorial ) and add to Web.config:
We will fix it later. Add to the code (Global.asax.cs):
and
Run and complete the application (Stop). Open the file C: //file.txt. We will see what happened.
Registration is performed in Application_Start:
Details on Filter initialization, Bundle and Route are located in the App_Start folder.
WebActivator is a module that allows you to run the code until the very first start of App_Start. This may be necessary in order to, for example, create a test database before launching.
Install:
Add a class to the App_Start folder:
In the log file, we see that the Application PreStart line is executed before the Application Start:
Create four files separately for trace (tracing), debug (debugging), info (information), error (errors). Determine the place of recording: / Contents / logs / [current date] We will rewrite the configuration:
For NLog there is also a cool Log2Console program that allows you to get logs right in the program window.

Run the program and configure the receiver:
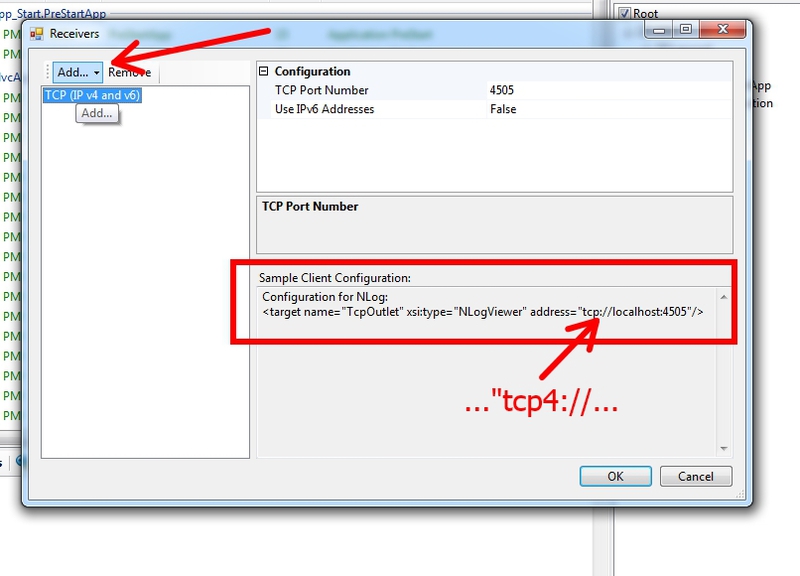
In Web.config we write:
I pay attention that you need to write address = "tcp4: // ..." , and not address = "tcp: // ..."
All sources are located at https://bitbucket.org/chernikov/lessons
Start
Create an ASP.NET MVC 4 Web Application "Lesson1" application (Figure 1.):
')
We will not launch the application, but install it immediately (if you haven’t already done so) the NuGet extension:
NuGet Package Manager is an extension for Visual Studio that allows you to add modules to existing projects that greatly simplify the work. When creating the “Basic” asp.net mvc4 application, many modules were initially added to the application itself. We can find their list by clicking on Manage NuGet Packages ... in the context menu of the project:
About them in order:
- Entity Framework - provides work with the database
- jQuery (+ jQuery UI, jQuery Validation) is a popular javascript framework (we’ll talk about it later).
- Json.NET - classes for working with json-data format.
- knockoutjs - javascript library for working with Model View ViewModel architecture. ( http://knockoutjs.com/ )
- Microsoft.Net Framework 4 Http Client Libraries is a program interface for working with HttpContext.
- Microsoft ASP.NET MVC 4 - in fact, the classes of the MVC design pattern (what is the subject of study)
- Microsoft ASP.NET Razor 2 - view-engine. There are also ASPX and Spark - we will also talk about them later
- Microsoft ASP.NET Universal Providers Core Libraries (Microsoft ASP.NET Universal Providers for LocalDB) - provides tools to support all SQL Server 2005 (and later) and for SQL Azure.
- Microsoft ASP.NET Web API (Microsoft ASP.NET Web API Client Libraries, Microsoft ASP.NET Web API Core Libraries, Microsoft ASP.NET Web API Web Host) - for creating REST applications, working with XML, JSON, and so on
- Microsoft ASP.NET Web Optimization Framework - optimizes data transfer, for example, minimizes js code
- Microsoft ASP.NET WebPages 2 - a set of classes for working in View
- Microsoft jQuery Unobtrusive Ajax (Microsoft jQuery Unobtrusive Validation) - jQuery library to support ajax / validation
- Microsoft.Web.Infrastructure - allows you to dynamically register HTTP-modules at runtime
- Modernizr - js-library that allows you to use html5 and css3 in older browsers
- WebGrease - allows minifying html, css, js.
Now that we’ve roughly figured out what our application consists of, let's run it.
To do this, you need to create a HomeController:
For the Index method (action), add a View and select ~ Views / Shared / _Layout.cshtml as the layout (of the master page type):
Actually, we can run.
All we will see is:
Why it was necessary to call the controller Home and how it works, we will study in more detail in the following lessons.
Global.asax
And now let's pay attention to the Global.asax file:
public class MvcApplication : System.Web.HttpApplication { protected void Application_Start() { AreaRegistration.RegisterAllAreas(); FilterConfig.RegisterGlobalFilters(GlobalFilters.Filters); RouteConfig.RegisterRoutes(RouteTable.Routes); BundleConfig.RegisterBundles(BundleTable.Bundles); } } The MvcApplication class inherits HttpApplication and contains instructions for initializing the application. There are a few more events to which you can add code. Consider them:
- public void Init () - the application is initialized or on the first call. It is called for all instances of the HttpApplication object.
- public void Dispose () - called immediately before the destruction of the HttpApplication object. This is an ideal place to clean up previously used resources.
- Application_Error - Occurs when an unhandled exception occurs in an application.
- Application_Start - occurs when the first HttpApplication instance is created. This allows you to create objects available to all instances of the HttpApplication class.
- Application_End - occurs when all previously created instances of the HttpApplication class are destroyed. This event occurs only once during the entire lifetime of the application.
- Application_BeginRequest - occurs when the application receives a request. The first time this event occurs for a page request when a user enters a URL.
- Application_EndRequest - The last event that occurs for a request to the application.
- Application_PreRequestHandlerExecute - occurs before ASP.NET starts the page handler or web service.
- Application_PostRequestHandlerExecute - occurs when ASP.NET finishes processing.
- Applcation_PreSendRequestHeaders - occurs before ASP.NET sends HTTP headers to the client (browser).
- Application_PreSendContent - occurs before ASP.NET sends HTTP content to the client (browser).
- Application_AcquireRequestState — Occurs when ASP.NET receives the current state (session state) associated with the current request.
- Application_ReleaseRequestState - occurs when ASP.NET completes the execution of all events. As a result, all modules retain their current state.
- Application_ResolveRequestCache - occurs when ASP.NET executes an authorization request. This allows caching modules to process the request and serve from the cache, bypassing the execution handler.
- Application_UpdateRequestCache - occurs when ASP.NET completes the execution of the handler so that caching modules can save the result for use in subsequent responses.
- Application_AuthenticateRequest - occurs when the identification module identifies the current user as valid. Currently, user credentials are already verified.
- Application_AuthorizeRequest - occurs when the authorization module confirms that the user can have access to resources.
- Session_Start - occurs when a new user visits the site.
- Session_End - it comes when the user's session time expires, or he leaves the site.
Good. Now, to see firsthand that this is exactly what is happening, we will add logging and do this by adding the NLog module to NuGet.
Package manager console
NuGet has a console for executing commands to install / remove / search for modules, and other things, such as scaffolding .
To display all installed modules we write:
Get-Package To get all modules available for installation:
Get-Package –ListAvailable For all available modules called NLog
Get-Package -ListAvailable -Filter NLog Or
Get-Package -ListAvailable | where {$_.Id -match "NLog"} ( ) To install the NLog module, you must first select a project (if there are more than one in the solution) and enter the command:
Install-Package NLog Files are copied to the project, links to assemblies are added, and web.config can be updated.
To remove a module from a project, it is necessary that it is not associated with other modules. Delete this:
Uninstall-Package NLog Nlog
After installation, we use the documentation on NLog ( https://github.com/nlog/nlog/wiki/Tutorial ) and add to Web.config:
<configSections> <section name="nlog" type="NLog.Config.ConfigSectionHandler, NLog" /> <nlog xmlns="http://www.nlog-project.org/schemas/NLog.xsd" xmlns:xsi="http://www.w3.org/2001/XMLSchema-instance"> <targets> <target name="logfile" xsi:type="File" fileName="C://file.txt" /> </targets> <rules> <logger name="*" minlevel="Info" writeTo="logfile" /> </rules> </nlog> We will fix it later. Add to the code (Global.asax.cs):
public class MvcApplication : NinjectHttpApplication { private static NLog.Logger logger = NLog.LogManager.GetCurrentClassLogger(); and
protected void Application_Start() { logger.Info("Application Start"); AreaRegistration.RegisterAllAreas(); FilterConfig.RegisterGlobalFilters(GlobalFilters.Filters); RouteConfig.RegisterRoutes(RouteTable.Routes); BundleConfig.RegisterBundles(BundleTable.Bundles); } public void Init() { logger.Info("Application Init"); } public void Dispose() { logger.Info("Application Dispose"); } protected void Application_Error() { logger.Info("Application Error"); } protected void Application_End() { logger.Info("Application End"); } Run and complete the application (Stop). Open the file C: //file.txt. We will see what happened.
2012-09-18 19:18:11.5668|INFO|Lesson1.MvcApplication|Application Start 2012-09-18 19:18:13.7319|INFO|Lesson1.MvcApplication|Application Init 2012-09-18 19:18:14.2709|INFO|Lesson1.MvcApplication|Application Init 2012-09-18 19:18:14.2769|INFO|Lesson1.MvcApplication|Application BeginRequest 2012-09-18 19:18:14.3579|INFO|Lesson1.MvcApplication|Application AuthenticateRequest 2012-09-18 19:18:14.3579|INFO|Lesson1.MvcApplication|Application AuthorizeRequest 2012-09-18 19:18:14.3579|INFO|Lesson1.MvcApplication|Application ResolveRequestCache 2012-09-18 19:18:14.3989|INFO|Lesson1.MvcApplication|Session Start 2012-09-18 19:18:14.3989|INFO|Lesson1.MvcApplication|Application AcquireRequestState 2012-09-18 19:18:14.3989|INFO|Lesson1.MvcApplication|Application PreRequestHandlerExecute 2012-09-18 19:18:15.9580|INFO|Lesson1.MvcApplication|Application PreRequestHandlerExecute 2012-09-18 19:18:15.9580|INFO|Lesson1.MvcApplication|Application ReleaseRequestState 2012-09-18 19:18:15.9580|INFO|Lesson1.MvcApplication|Application UpdateRequestCache 2012-09-18 19:18:15.9580|INFO|Lesson1.MvcApplication|Application EndRequest 2012-09-18 19:18:15.9580|INFO|Lesson1.MvcApplication|Application PreSendRequestHeaders 2012-09-18 19:18:35.6061|INFO|Lesson1.MvcApplication|Session End 2012-09-18 19:18:38.0833|INFO|Lesson1.MvcApplication|Application Dispose 2012-09-18 19:18:38.0833|INFO|Lesson1.MvcApplication|Application End 2012-09-18 19:18:39.1383|INFO|Lesson1.MvcApplication|Application Dispose Registration is performed in Application_Start:
- Area,
- Filter (filters)
- Bundle (kits),
- Route (routes).
Details on Filter initialization, Bundle and Route are located in the App_Start folder.
WebActivator
WebActivator is a module that allows you to run the code until the very first start of App_Start. This may be necessary in order to, for example, create a test database before launching.
Install:
Install-Package WebActivatorEx Add a class to the App_Start folder:
[assembly: WebActivator.PreApplicationStartMethod(typeof(PreStartApp), "Start")] namespace Lesson1.App_Start { public static class PreStartApp { private static NLog.Logger logger = NLog.LogManager.GetCurrentClassLogger(); /// <summary> /// /// </summary> public static void Start() { logger.Info("Application PreStart"); } } } In the log file, we see that the Application PreStart line is executed before the Application Start:
2012-09-19 10:29:01.3950|INFO|Lesson1.App_Start.PreStartApp|Application PreStart 2012-09-19 10:29:01.6290|INFO|Lesson1.MvcApplication|Application Start Create four files separately for trace (tracing), debug (debugging), info (information), error (errors). Determine the place of recording: / Contents / logs / [current date] We will rewrite the configuration:
<nlog autoReload="true" xmlns="http://www.nlog-project.org/schemas/NLog.xsd" xmlns:xsi="http://www.w3.org/2001/XMLSchema-instance"> <variable name="logDirectory" value="${basedir}/Content/logs/${shortdate}" /> <targets> <target name="fileLogTrace" xsi:type="File" fileName="${logDirectory}/trace.txt" /> <target name="fileLogDebug" xsi:type="File" fileName="${logDirectory}/debug.txt" /> <target name="fileLogInfo" xsi:type="File" fileName="${logDirectory}/info.txt" /> <target name="fileLogErrors" xsi:type="File" fileName="${logDirectory}/errors.txt" /> </targets> <rules> <logger name="*" level="Trace" writeTo="fileLogTrace" /> <logger name="*" level="Debug" writeTo="fileLogDebug" /> <logger name="*" level="Info" writeTo="fileLogInfo" /> <logger name="*" minlevel="Warn" writeTo="fileLogErrors" /> </rules> </nlog> Log2Console
For NLog there is also a cool Log2Console program that allows you to get logs right in the program window.
Run the program and configure the receiver:
In Web.config we write:
<target name="TcpOutlet" xsi:type="NLogViewer" address="tcp4://localhost:4505"/> I pay attention that you need to write address = "tcp4: // ..." , and not address = "tcp: // ..."
All sources are located at https://bitbucket.org/chernikov/lessons
Source: https://habr.com/ru/post/176001/
All Articles