Launch .NET MicroFramework on STM32F4Discovery (translation)
A few months ago, STMicroelectronics distributed the STM32F4 Discovery debug card for free. I became one of those lucky enough to get it for free. Last semester, I used a fee for my project (realtime and embedded OS) using Keil. I also have a Netduino debug board, which is my favorite among my debug boards because I can use Visual Studio and C #. I know about the limitations of managed code related to the cost of resources on the CLR, but my program is not a real-time program. In the last week, I accidentally stumbled upon the site netmf4stm32.codeplex.com and was pleasantly surprised that .NET MicroFramework was ported to STM32F4 debugging boards. So why not try? At the same time I described the whole process, diluting the text with screenshots. The source of this work was the post netmf4stm32.codeplex.com/discussions/400293 . Thanks to LouisCPro and members at netmf4stm32.codeplex.com/team/view . All this took me no more than 2 hours (including the installation of Visual C # Express 2010). Let's start ...
We will need the following
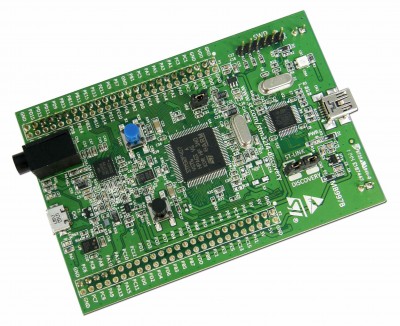
- STM32F4 Discovery debug card
- Micro USB and Mini USB cables (both needed)
- STM32 ST-LINK Utility (to fill the bootloader on the debug board, it is necessary for the driver) www.st.com/internet/com/SOFTWARE_RESOURCES/TOOL/DEVICE_PROGRAMMER/stm32_st-link_utility.zip
- Download stm32f4discovery.zip and STM32_WinUSB_drivers_ (for_evaluation_purposes_only) .zip at this link netmf4stm32.codeplex.com
- Visual C # Express or Visual Studio 2010 (version 2012 not yet supported) www.microsoft.com/visualstudio/eng/downloads#d-2010-express
- .NET MicroFramework SDK (in our case version 4.2) netmf.codeplex.com/releases/view/91594
- One LED (we will blink LEDs)
After you have installed everything (please install everything), connect the miniUSB cable.

Connect MiniUSB cable to STM32F4
(I had another firmware installed, so everything started up easily)
As soon as you plug in the card, the search for drivers begins. If you have already installed the STLink utility, the drivers will be installed automatically. If you missed it, please install it. Run STLink (by default STM32 ST-LINK Utility.exe is located in the folder C: \ Program Files (x86) \ STMicroelectronics \ STM32 ST-LINK Utility \ ST-LINK Utility \)

STLink is connected to the board
After connecting to the utility, clear the STM32F4 (do not worry, you will not get a brick) by following the screenshots below (in turn, run Erase Chip and Erase Sectors ...)
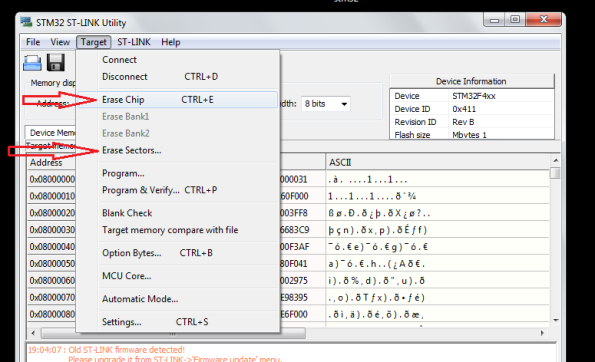
Cleaning menu
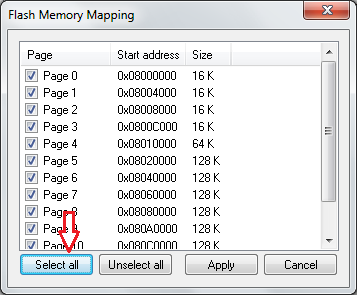
Sector Clearing
Now the chip is cleared. Remember point 4 at the beginning, where are the links to two zip archives? Unpack them in a convenient place (we will use them). In stm32f4discovery.zip you will see 3 files: Tinybooter.hex, ER_Flash.hex and ER_Config.hex. Using the ST Link utility, load Tinybooter.hex into the chip (follow the instructions in the screenshot below)
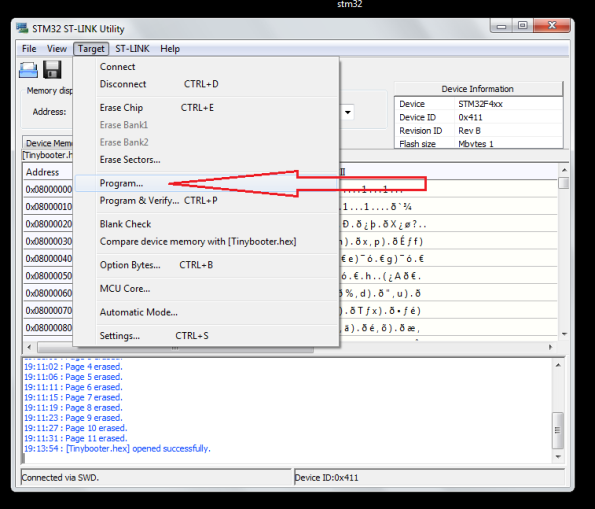
Program Section
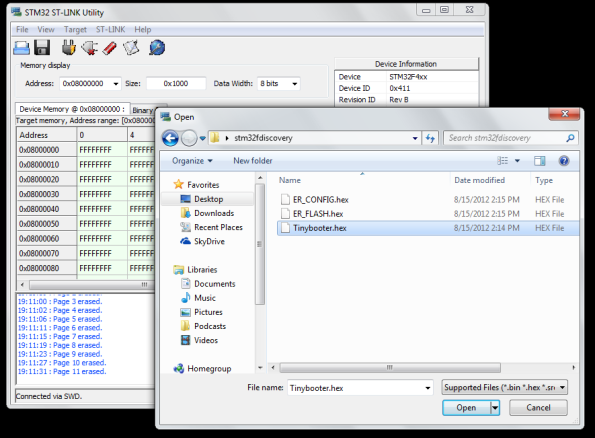
Tinibooter.hex
Then press the reset button on the board (or pull out and insert the usb cable). Once you have downloaded Tinibooter.hex, the miniUSB cable will only act as a power source for our project. After rebooting your board, plug in the Micro USB cable (another cable). I used a cable to charge my smartphone.

Micro and Mini USB cables are connected
As soon as you plug in the Micro USB cable, the system will start searching for drivers and will not find them. Install a driver that is in another file named “STM32_WinUSB_drivers_ (for evaluation purposes only) .zip”. Use the screenshots below if you don’t know how to do this.
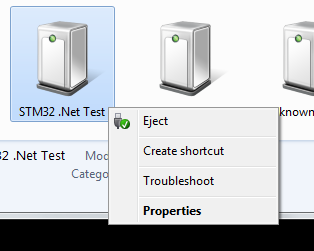
Go to Devices and Printers from the Start menu, and then
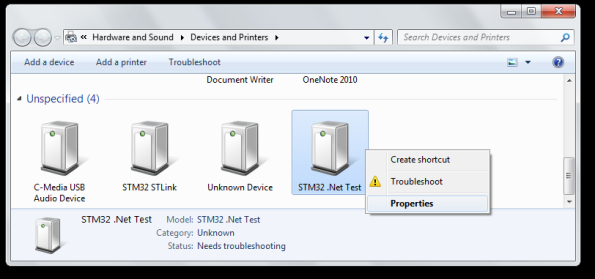
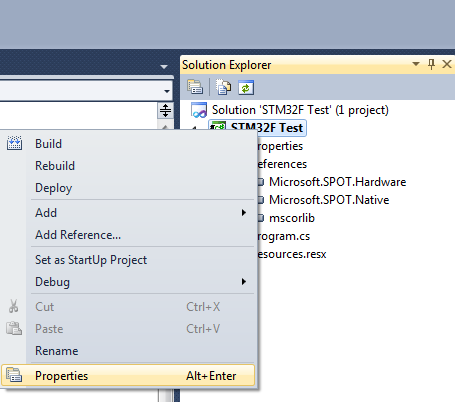
Right-click on the shortcut STM32.Net Test
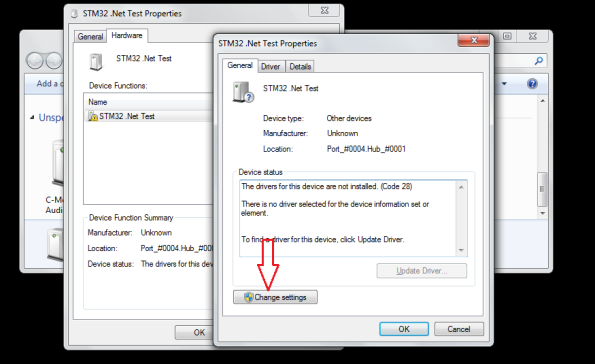
Properties -> Change Settings

Search for a new driver
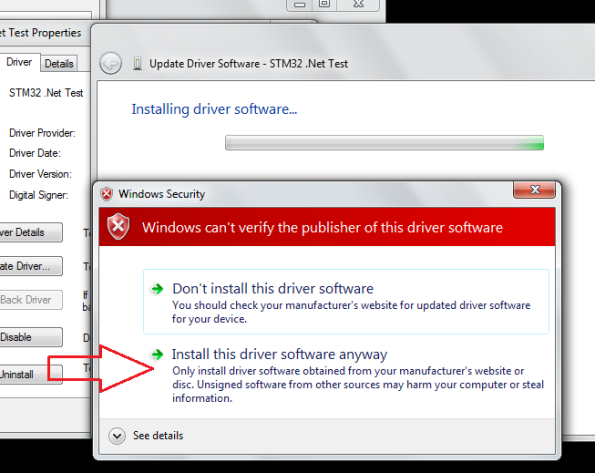
Ignore the warning (as usual)))
There are no mistakes now!
Now MFDeploy should be able to detect the board. MFDeploy is MicroFramework Deployer. With this program we will install the CLR, on which our .net code will run. Ok, run MFDeploy.exe (you will find it in the folder C: \ Program Files (x86) \ Microsoft .NET Micro Framework \ v4.2 \ Tools \), which you should have after installing the SDK. To make sure that MFDeploy sees the board, do as shown below.

MFDeploy ping
If you see the answer, then everything is done correctly. Download 2 other .hex files (ER_Config.hex and ER_Flash.hex) unpacked from stm32f4discovery.zip to the board using MFDeploy as shown below
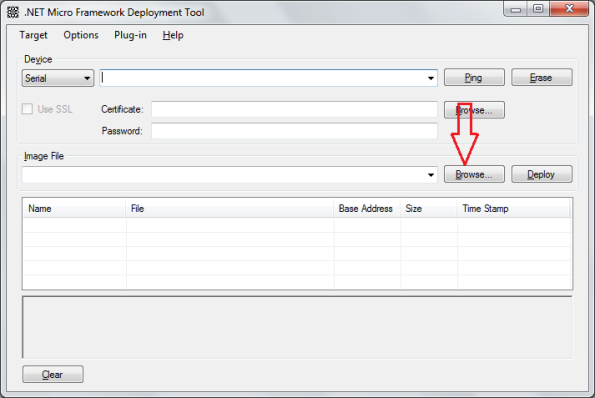
Click Browse to download the hex files.
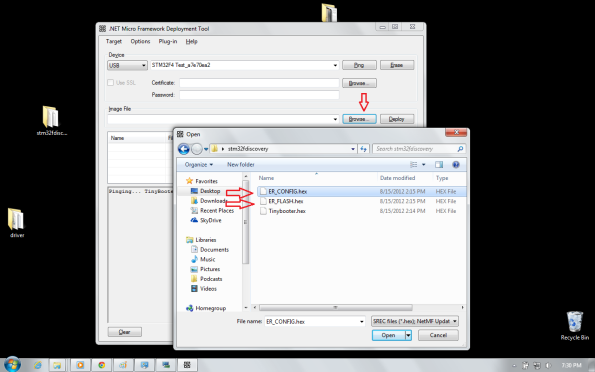
Install them in any order.
Reboot the card.
Congratulations! You now have a board with .NET Microframework!
Now we need to test our board. Open Visual C # Express / Visual Studio. I am sure you have already installed the Microframework SDK. Select project type
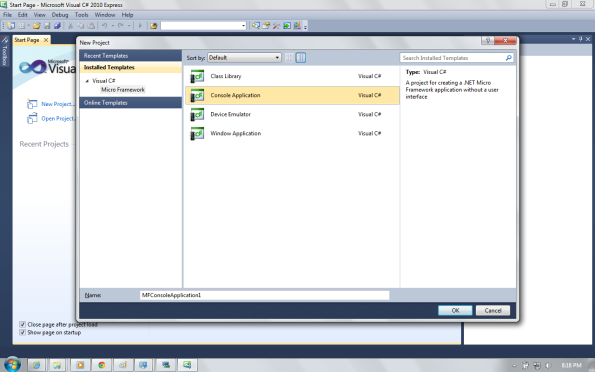
MicroFramework Project
Now we need to change the properties so that Visual Express / Studio loads the project into our board. Set as shown below.
Settings
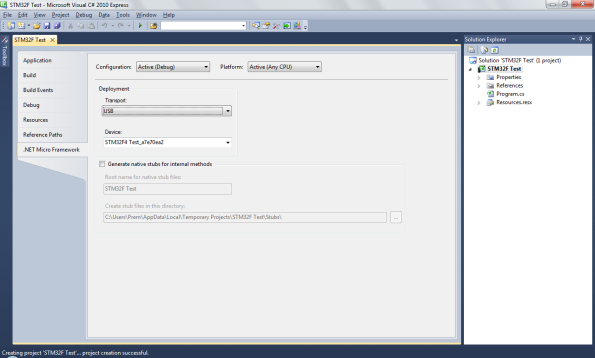
Using USB
Now we need to add a class so that we can blink the LEDs.

Add a class
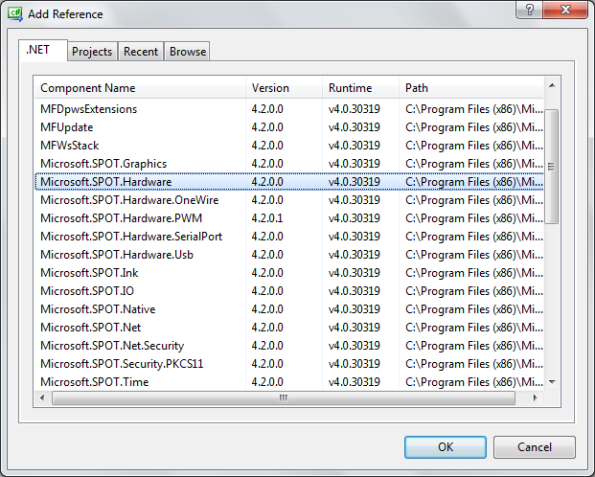
Microsoft.SPOT.Hardware
My test code
using System; using System.Threading; using Microsoft.SPOT; using Microsoft.SPOT.Hardware; namespace STM32F_Test { public class Program { public static void Main() { OutputPort led = new OutputPort(Cpu.Pin.GPIO_Pin1, false); //PA1 on discovery board while (true) { led.Write(true); Thread.Sleep(500); led.Write(false); Thread.Sleep(500); } } } } You can find out the card pin map in this file “C: \ MicroFrameworkPK_v4_2 \ DeviceCode \ Targets \ Native \ STM32 \ ManagedCode \ Hardware \ CPU.cs” which you will find if you installed the porting kit (not included in the list above).
Original article: singularengineer.wordpress.com/category/electronics
')
Source: https://habr.com/ru/post/175989/
All Articles