Ruby on Rails Application Development in Visual Studio
Today we will talk about how to develop and debug applications on all the already long-loved Ruby on Rails framework. For all of me personally, from the first day I’ve become familiar with Rails, it’s usual to use the following link:
- Ubuntu
- Rvm
- Gedit + terminal (as development environment)
But today I would like to talk about the development on rails just underWindows Windows in the best objectively in my opinion development environment for today MS Visual Studio. Who cares please under the cat.
I am sure that many connoisseurs of rails will begin tovomit negative reaction after thinking about the development under Windows. Nevertheless, I consider this post to be. Immediately make a reservation, I am not a supporter of Windows or X. Developed for many years in C #, I’ve been writing on Rails for a couple of years. So let's get started.
')
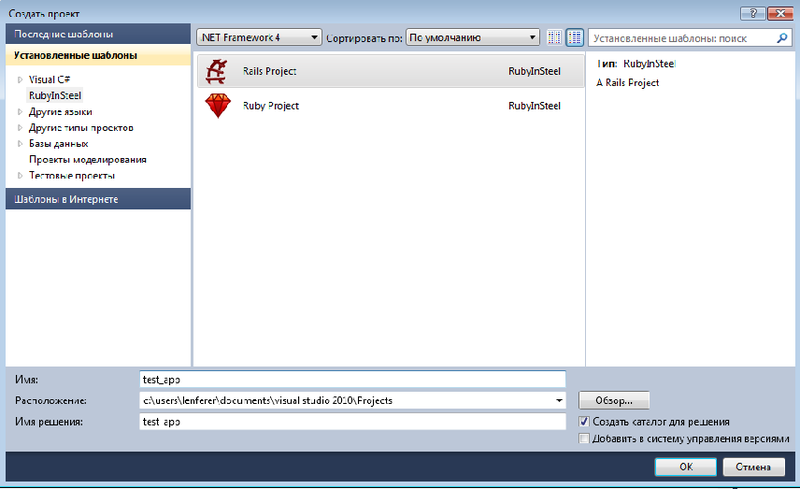
So, after we finally wait for the installation to finish, we will try to create the first project: File -> New-> Project
After an hour of waiting in the hope that everything will work, I received a gift in the form of the following error:

I think it is almost normal, to expect that everything will start under Windows from the first time was probably naive. The error actually tells us that we do not have rails, although it was assumed that “ruby in steel” would do everything for us. So:
They waited for a new error:
Go to http://rubyinstaller.org/downloads andbeat your head against the wall and swing DevKit. After downloading, unpack the archive into the folder C: \ DevKit, start the ruby console and execute the following commands
Now we can safely install the rails. After successful installation, again we are trying to create a project:
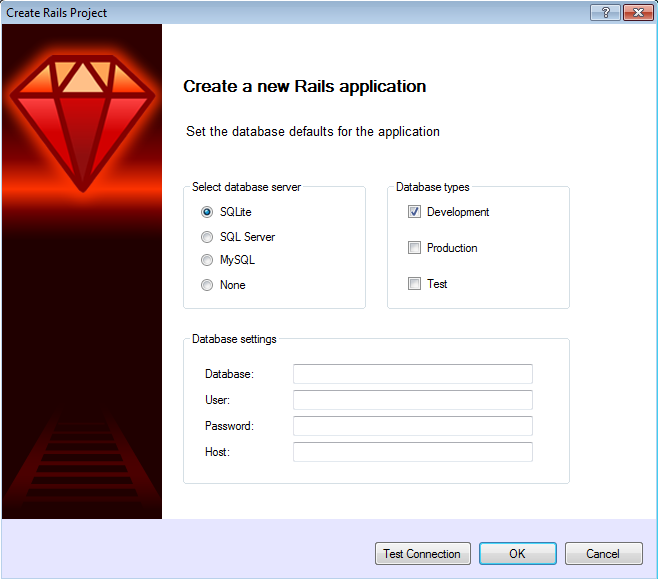
Here we select the DBMS at our discretion, after installing DevKit, there should not be any special problems regardless of the selected DBMS. I preferred to choose SQLite since the Windows virtual machine is clean and only Visual Studio is installed. So choose the name of the future base of our application and click next.

Our application is ready, a wonderful panel appeared in the upper left part of the window where you can add commands.

All the delights of development in Visual Studio in C # are now available for rails, and using the magic of Rails is now even more convenient.
More detailed and meaningful development capabilities on rails in Visual Studio in the video below.
Pros steel in ruby
Cons steel in ruby
Thank you for your attention to all who read it, if it was useful for someone, it means that time was wasted.
- Ubuntu
- Rvm
- Gedit + terminal (as development environment)
But today I would like to talk about the development on rails just under
I am sure that many connoisseurs of rails will begin to
Installation
- The first thing we need to do is download and install Visual Studio, 2010 or 2012, I personally prefer the tenth. I have already installed it on a virtual machine, so we will not stop at this step.
- Then follow the link and download "ruby in steel" . Once downloaded and launched, a wonderful window will come out in which you need to select all three checkboxes and
enjoy the installation process.
wait for the installer to download about 200 MB from the Internet, then install the whole thing. The process as it turned out not fast, especially nervous in this segment can go to drink coffee and smoke.
')
First project
So, after we finally wait for the installation to finish, we will try to create the first project: File -> New-> Project
After an hour of waiting in the hope that everything will work, I received a gift in the form of the following error:
I think it is almost normal, to expect that everything will start under Windows from the first time was probably naive. The error actually tells us that we do not have rails, although it was assumed that “ruby in steel” would do everything for us. So:
- Go to the command line
- Go to the directory C: \ Ruby192 \ bin
- We type the gem list command, we see that only two gems are installed and none of them are rails
- We type gem install rails and wait for about half an hour
from the sea.
They waited for a new error:
ERROR: Error installing rails:
The 'json' native gem requires installed build tools.

Please update your PATH to include build tools or download the DevKit
from 'http://rubyinstaller.org/downloads' and follow the instructions
at 'http://github.com/oneclick/rubyinstaller/wiki/Development-Kit'
Go to http://rubyinstaller.org/downloads and
- ruby dk.rb init
- ruby dk.rb review
- ruby dk.rb install
Now we can safely install the rails. After successful installation, again we are trying to create a project:
Here we select the DBMS at our discretion, after installing DevKit, there should not be any special problems regardless of the selected DBMS. I preferred to choose SQLite since the Windows virtual machine is clean and only Visual Studio is installed. So choose the name of the future base of our application and click next.
Our application is ready, a wonderful panel appeared in the upper left part of the window where you can add commands.
All the delights of development in Visual Studio in C # are now available for rails, and using the magic of Rails is now even more convenient.
More detailed and meaningful development capabilities on rails in Visual Studio in the video below.
Total
Pros steel in ruby
- Comfortable IDE
- Full step by step debugging
- Easy transition from other languages supported by Visual Studio
- 60 days free trial
Cons steel in ruby
- Inevitable shamanism during installation
- Price $ 249
Thank you for your attention to all who read it, if it was useful for someone, it means that time was wasted.
Source: https://habr.com/ru/post/174103/
All Articles