Configuring Kerberos authentication using smart cards
 In the continuation of a long-standing topic about the use of two-factor authentication in the GNU / Linux OS, let me tell you about the scheme of work and setting up authentication using Kerberos. In this article, we will look at how to configure MIT Kerberos to authenticate users with certificates and key pairs located on a USB token. Also, the materials described in the article can be used to configure authentication in a Windows domain.
 Brief introduction
To begin with, we will conduct a small educational program in Kerberos terminology and consider the available implementations of this protocol in the operating system based on GNU / Linux. I’ll just make a reservation that I couldn’t find an unambiguous translation of the terms used in Kerberos, so in order to avoid confusion, I will duplicate the basic terms in English.So, let's begin. To quote Wikipedia,
Kerberos is a network authentication protocol that allows data to be transmitted over unsecured networks for secure authentication. Focused primarily on the client-server model and provides mutual authentication - both users through the server confirm the identity of each other.It is worth noting that Kerberos is primarily a protocol, and not a specific authentication system. Its implementations are used in various operating systems, including Windows, as a method of authenticating users in a domain. There are several open source implementations of the Kerberos protocol, such as the original MIT Kerberos and Heimdal. This zoo has arisen due to US restrictions on the export of cryptographic information security tools; today this situation around MIT Kerberos has already subsided. In the article we will look at the configuration process for MIT Kerberos V5.
Kerberos Terminology
- Ticket (ticket) - temporary data issued to the client for authentication on the server on which the necessary service is located.
- A client is a kind of entity on the network (user, host, or service) that can receive a ticket from Kerberos.
- A key distribution center (key distribution center, KDC) is a service that issues Kerberos tickets.
- Domain (realm) is a network used by Kerberos, consisting of KDC servers and multiple clients. The realm name is case-sensitive, usually written in uppercase and the same as the domain name.
- Principal is a unique name for the client for which Kerberos authentication is allowed. It is written as root [/ instance] @REALM.
Kerberos Settings Files
On server:
- /etc/krb5kdc/kdc.conf - KDC Settings
On the client and server:
- /etc/kbr5.conf - authentication server settings (description of realms, domain names and other settings)
Setting up the working environment
First you need to deploy the environment in which the authentication will be performed. The easiest way to do this is by taking two virtual machines on the same subnet. Just install Ubuntu on one virtual machine (this will be our server), and then clone it and get a client. When writing this article, I used a fresh Ubuntu 12.10 (x86) and VMWare virtual machine. To make it easier for virtual machines to see each other over the network, it is worth switching network cards to Bridged mode.Important! Make sure that the time on the client and the server is synchronized, it is necessary for the correct operation of Kerberos.
')
Network configuration
Kerberos clients look for their servers by domain names, so you need to configure DNS and make sure that server names are resolved successfully. In our example, it suffices to put the server's domain name in / etc / hosts, which I did. The network diagram is shown below.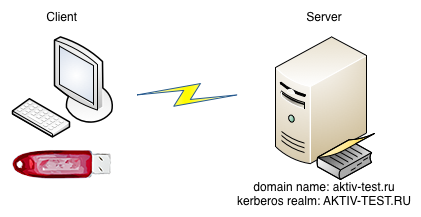
Installing the necessary packages
On the server we need:
- krb5-kdc - KDC service
- krb5-admin-server - Kerberos administration server (it controls user accounts)
- krb5-pkinit - Kerberos extension for certificate authentication
The following packages should be delivered to the client:
- krb5-user - a basic set of utilities for client authentication work
- krb5-config - Kerberos Settings Files
- krb5-pkinit
- libpam-krb5 - PAM module for using Kerberos authentication
- pcscd, opensc, libengine-pkcs11-openssl - packages needed to work with tokens
When installing packages, we will be asked for the default settings, we will use the following:
- Default realm: AKTIV-TEST.RU
- Server names (admin server and KDC): aktiv-test.ru (it is also registered in / etc / hosts on the client)
- User: testuser@AKTIV-TEST.RU
Kerberos Setup
Basic settings
After installing the packages on the server, you need to initialize the realm command$ sudo krb5_newrealm And on the client, update the configuration files:
$ sudo dpkg-reconfigure krb5-config Also on the client and server, add the following lines to /etc/krb5.conf:
[domain_realm] .aktiv-test.ru = AKTIV-TEST.RU aktiv-test.ru = AKTIV-TEST.RU Now we will create a new user on the server with the name testuser
$ sudo kadmin.local # username = testuser # password = test # kadmin.local:$ addprinc testuser # ... kadmin.local:$ quit On the client, you can now check whether we configured the network and Kerberos correctly:
$ kinit testuser@AKTIV-TEST.RU # $ klist # ticket, $ kdestroy Configuring public key authentication
To use the pkinit module, we will have to use openssl as a mini-TC to create key pairs and certificates of the client and the server.On server:
Let's create a key pair and certificate of our “TC”. Here we generate the CA key and create a self-signed certificate using openssl. In the real world, the key naturally must be securely protected from falling into the wrong hands. $ openssl genrsa -out cakey.pem 2048 # ... $ openssl req -key cakey.pem -new -x509 -out cacert.pem # ... Let's create a key pair for the KDC, an application for a certificate and write it out for ourselves.
Here we will need the special OpenSSL extension file ( pkinit_extensions ), which will contain additional certificate fields used in Kerberos. In particular, we will specify:
- Extended Key Usage (EKU) - an identifier (OID) that tells how you plan to use the certificate
- otherName - the field specifying our principal for which the certificate is issued
$ openssl genrsa -out kdckey.pem 2048 # $ openssl req -new -out kdc.req -key kdckey.pem # $ REALM=AKTIV-TEST.RU; export REALM $ CLIENT=aktiv-test.ru; export CLIENT # pkinit_extensions . $ openssl x509 -req -in kdc.req -CAkey cakey.pem -CA cacert.pem -out kdc.pem -extfile pkinit_extensions -extensions kdc_cert –CAcreateserial After that, transfer the following files to / var / lib / krb5kdc /:
- kdc.pem
- kdckey.pem
- cacert.pem
On the server, edit the Kerberos settings (/etc/krb5kdc/kdc.conf file) to use the keys and certificates of the server and CA:
[kdcdefaults] kdc_tcp_ports = 88 pkinit_identity = FILE:/var/lib/krb5kdc/kdc.pem,/var/lib/krb5kdc/kdckey.pem pkinit_anchors = FILE:/var/lib/krb5kdc/cacert.pem [realms] AKTIV-TEST.RU = { database_name = /var/lib/krb5kdc/principal admin_keytab = FILE:/etc/krb5kdc/kadm5.keytab acl_file = /etc/krb5kdc/kadm5.acl key_stash_file = /etc/krb5kdc/stash max_life = 10h 0m 0s max_renewable_life = 7d 0h 0m 0s master_key_type = des3-hmac-sha1 supported_enctypes = aes256-cts:normal arcfour-hmac:normal des3-hmac-sha1:normal des-cbc-crc:normal des:normal des:v4 des:norealm des:onlyrealm des:afs3 default_principal_flags = +preauth } Next on the server, you must enable pre-authentication for our user.
$ kadmin.local kadmin.local$: modprinc +requires_preauth testuser Further actions will be performed on the client.
Format the token $ pkcs15-init --erase-card -p rutoken_ecp $ pkcs15-init --create-pkcs15 --so-pin "87654321" --so-puk "" $ pkcs15-init --store-pin --label "User PIN" --auth-id 02 --pin "12345678" --puk "" --so-pin "87654321" –finalize Let's generate a key pair of RSA 2048 bits on the token and create a certificate application. It is important to note that the paths to the libraries engine_pkcs11.so and opensc-pkcs11.so on your system may differ, so you should first check their location.
# ID , $ pkcs15-init -G rsa/2048 --auth-id 02 --id 42 --label "testuser's key" --public-key-label "testuser's public key" # ... $ openssl # multiarch- opensc-pkcs11.so engine_pkcs11.so OpenSSL> engine dynamic -pre SO_PATH:/usr/lib/openssl/engines/engine_pkcs11.so -pre ID:pkcs11 -pre LIST_ADD:1 -pre LOAD -pre MODULE_PATH:opensc-pkcs11.so (dynamic) Dynamic engine loading support [Success]: SO_PATH:/usr/lib/openssl/engines/engine_pkcs11.so [Success]: ID:pkcs11 [Success]: LIST_ADD:1 [Success]: LOAD [Success]: MODULE_PATH:opensc-pkcs11.so Loaded: (pkcs11) pkcs11 engine OpenSSL> req -engine pkcs11 -new -key 1:42 -keyform engine -out client.req -subj "/C=RU/ST=Moscow/L=Moscow/O=Aktiv/OU=dev/CN=testuser/emailAddress=testuser@mail.com" engine "pkcs11" set. PKCS#11 token PIN: OpenSSL> quit After this, we will receive the client.req application file, which must be placed on the server and the user certificate issued based on the CA data:
$ REALM=AKTIV-TEST.RU; export REALM $ CLIENT=testuser; export CLIENT $ openssl x509 -CAkey cakey.pem -CA cacert.pem -req -in client.req -extensions client_cert -extfile pkinit_extensions -out client.pem Then it is worth restarting the server and KDC:
$ /etc/init.d/krb5-admin-server restart $ /etc/init.d/krb5-kdc restart At the output of openssl, we get a file with client.pem client certificate. It needs to be transferred to the client machine, put in / etc / krb5 / and written to the token:
$ pkcs15-init --store-certificate client.pem --auth-id 02 --id 42 --format pem And finally, we will need to make a setting in the Kerberos configuration file that will indicate what data to use for authentication (in our case, this is the CA certificate and the path to the PKCS # 11 module). The MIT Kerberos documentation contains various parameters that allow you to customize the selection of authentication data on the token, but in our case, we simply specify the PKCS # 11 module, since this is sufficient in this situation.
[libdefaults] default_realm = AKTIV-TEST.RU # pkinit_anchors = FILE:/etc/krb5/cacert.pem # PKCS#11 pkinit_identities = PKCS11:/usr/lib/opensc-pkcs11.so Check if we can get the ticket on the client using the data from the token:
$ kinit testuser # PIN- $ klist Configuring PAM Authentication Using Kerberos
Earlier, when setting up the client machine, we installed the libpam-krb5 package. It will help us to perform authentication in Kerberos when logging into the system, as well as in applications using system authentication (for example, login, lightdm, etc.). To connect the PAM module, just run the command $ sudo pam-auth-update and select the required authentication modules in the dialog. For more fine-tuning, you can look at the /etc/pam.d/common-auth file and edit it at will. I described the structure of the file in a previous article .
Conclusion
The use of the Kerberos protocol for centralized authentication in conjunction with the centralized creation of the storage and distribution of accounts (for example, through a directory based on OpenLDAP) allows you to create a "UNIX domain", consisting entirely of machines running free software. Such a solution can be used in the corporate sector, and smart card authentication will be a pleasant bonus for both administrators and users of the company's network.useful links
Source: https://habr.com/ru/post/170829/
All Articles