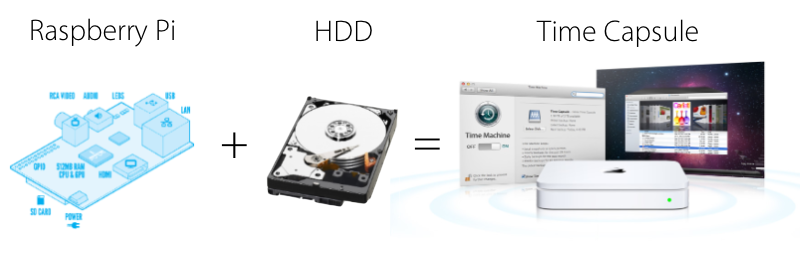
Raspberry Pi as a Time Capsule for Mac OS
I found out about the Raspberry Pi single-board computer a little more than six months ago and I immediately wanted to use it as a home media server. But waiting for your order for 4 months and browsing the Internet suggested that you use Raspberry Pi as your MacBook Pro backup storage, i.e., configure RPi (Raspberry Pi) so that Mac OS X can be used over local Wi-Fi network backed up automatically.
This article is an attempt to create step-by-step instructions on how to configure RPi for use as a Time Capsule.
During the setup process, you will need to go through the following steps:
- Connect and configure external USB drives
- installation support for HFS + file system
- configure automatic mounting of hard drives when RPi is enabled / restarted
- installing and configuring Avahi and Netatalk daemons
- Mac OS X setup
')
Connect and configure external USB drives
A disk formatted with the HFS + file system must be connected to an external power source (or via an active USB hub), then connected to the RaspberryPi. I used the connection via an active USB hub, because when I connected a WD My Passport 1TB portable drive without additional power, RPi rebooted and incorrectly mounted the drive.
After installing the operating system on the RPi and setting up the local network, we connect via SSH and define our disk with the command sudo blkid :
pi@raspbmc:~$ sudo blkid /dev/zram0: UUID="5d50a251-be5b-45be-af7a-51e1ef903041" TYPE="ext2" /dev/mmcblk0p1: UUID="FC65-D8D3" TYPE="vfat" /dev/mmcblk0p2: UUID="05ccd8fa-099d-4d6e-9ea3-dc8f77dd0127" TYPE="ext4" /dev/sda1: LABEL="EFI" UUID="70D6-1701" TYPE="vfat" /dev/sda2: UUID="43c5813f-7bce-374e-b111-b1b7e74464c7" LABEL="timeR" TYPE="hfsplus" In my case, timeR with the hfsplus file system is called sda2 . The unique identifier UUID can be remembered, it will come in handy later.
Install HFS + file system support:
pi@raspbmc:~$ sudo apt-get install hfsplus hfsutils hfsprogs Create a disk mount point (folder):
pi@raspbmc:~$ sudo mkdir /media/timemachine and mount our sda2 disk in read / write mode:
pi@raspbmc:~$ sudo mount -o force /dev/sda2 /media/timemachine Checking:
pi@raspbmc:~$ mount /dev/mmcblk0p2 on / type ext4 (rw,noatime) proc on /proc type proc (rw) devpts on /dev/pts type devpts (rw,noexec,nosuid,relatime,gid=5,mode=620) /dev/mmcblk0p1 on /boot type vfat (rw,noatime) /dev/sda1 on /media/EFI type vfat (rw,nosuid,nodev,sync,noatime,uid=0,gid=0,shortname=mixed,dmask=0077,utf8=1,showexec,uhelper=udisks) /dev/sda2 on /media/timemachine type hfsplus (rw,force) excellent, sda2 was mounted in rw mode - read / write.
To automatically mount the disk, you need to make changes to the / etc / fstab file :
pi@raspbmc:~$ sudo nano /etc/fstab At the very end we add:
UUID="43c5813f-7bce-374e-b111-b1b7e74464c7" /media/timemachine hfsplus rw,force,exec,auto,users 0 0 I specify the UUID so that you can connect the drive to any USB RPi port.
To make sure that the mount is correct, restart RPi:
pi@raspbmc:~$ sudo reboot With the help of the command, I check that the hard disk is connected in rw mode:
pi@raspbmc:~$ mount If, for any reason, the disk is not connected in read / write mode ( rw ), then the disk must be checked:
pi@raspbmc:~$ sudo fsck.hfsplus -f /dev/sda2 Install and configure Avahi and Netatalk Daemons
Install additional packages required for Avahi and Netatalk to work:
pi@raspbmc:~$ sudo apt-get install avahi-daemon libavahi-client-dev libdb5.3-dev db-util db5.3-util libgcrypt11 libgcrypt11-dev We upload the latest version of Netatalk to RPi in any way convenient for you from netatalk.sourceforge.net :
I downloaded from the site on the MacBook, unpacked the archive and copied the folder to RPi:
MacBook-Pro:~ other$ scp -r /Users/other/Downloads/netatalk-3.0.2 pi@192.168.1.99:~/ To build Netatalk, you need to install additional, cohesive packages, without which the compilation may fail with the error:
pi@raspbmc:~$ sudo apt-get install make gcc binutils Go to the folder on the RPi source code Netatalk and execute the following commands:
pi@raspbmc:~/netatalk-3.0.2 ./configure --with-init-style=debian --with-zeroconf pi@raspbmc:~/netatalk-3.0.2 make pi@raspbmc:~/netatalk-3.0.2 sudo make install Configure Netatalk by editing the /usr/local/etc/afp.conf file:
pi@raspbmc ~ $ sudo nano /usr/local/etc/afp.conf You can replace the contents of afp.conf with the following setting:
; ; Netatalk 3.x configuration file ; [Global] ; Global server settings uam list = uams_guest.so, uams_dhx.so, uams_dhx2.so ;[Homes] basedir regex = /home ; [My AFP Volume] ; path = /path/to/volume [Time Machine Raspberry] path = /media/timemachine time machine = yes After editing, restart the demons:
pi@raspbmc ~ $ sudo /etc/init.d/netatalk start pi@raspbmc ~ $ sudo /etc/init.d/avahi-daemon start And we add them to autoload:
pi@raspbmc ~ $ cd /etc/init.d/ pi@raspbmc ~ $ sudo update-rc.d netatalk defaults On this work with the Raspberry Pi is over.
Mac OS X Setup
Now it is necessary to configure your Mac OS X operating system a little; for this, enter the following command in the Terminal:
MacBook-Pro:~ other$ Defaults write com.apple.systempreferences TMShowUnsupportedNetworkVolumes 1 That's all! A new device should appear in the sidebar of Finder, I have it called raspbmc:

Go to the system settings of Mac OS X, and connect the disk for backup. Additionally, you will need to enter your RPi username and password. After a while, Mac OS X starts to create a backup:

After creating a backup, the performance was checked by running Time Machine:

The five-day period of operation of the Time Capsule from RPi showed a good side. Mac automatically finds the backup drive and works with it.
For all the time, one problem was discovered when electricity was cut off in the apartment. After switching on, the disk to the RPi was mounted in read-only mode, as a result of which TimeMachine refused to save backups.
The problem was solved by manually checking the disk with the command:
pi@raspbmc:~$ sudo fsck.hfsplus -f /dev/sda2 where / dev / sda2 is the backup disk.
The entire system assembly looks like this:

One disc is used for Time Machine backups, the second one is used to store video and music that RPi plays on TV.
Source: https://habr.com/ru/post/169159/
All Articles