How to start flying on your own, without risking your life
 I recently read a post here. How to start flying, even on something, on your own. Inspiring. Sure. But it seems to me that there are many more risks to life in this business than the author describes. This is my personal opinion, and perhaps it is not supported by anything. In the comments to the post about it said quite a few words and I will not dwell on this.
In this post I want to share with you an equally inspiring process of creating an aircraft based on the theme "Do it yourself."
Not so long ago, about half a year ago, I wanted to “make something up”, I really wanted to. Most likely idleness so affects. Any arduino robots are no longer inspired. I wanted something even more complicated, but more mm ... exciting what-if. And at that time I stumbled upon a radio-controlled model community forum in which people made airplanes with their own hands. At first I was surprised: “Wow, people make planes themselves, and then they also fly!”. In this forum (by the way, I’ll give all-all-all links at the end of the topic) I spent 3-4 hours looking at topics about how pieces of plywood or ceiling tiles with plastic bottles turn into attack aircraft of the Second World War and then perform figures of higher flying in the air ... This is inspired! But it still seemed to me that all this was difficult, it was not for me, nothing like that would work for me and so on. But it all continued to inspire. Then I remembered which way I ended up on this forum, what I was looking for and what I wanted. Half a second to think it over took a blank sheet of paper and began to make a plan for building one of the simplest models. And then it started ...
Plan. What you need to immediately decide
Electronics
Selection of materials
Construction (there are a lot of photos)
Flying
Finance
Useful materials
')
I immediately want to decide on some number of details:
- I'm new to this business
- my approaches / decisions / advice do not claim to be the only true
- I'm not a discoverer
- I did not invent a bicycle
- I just share my experience in this matter
Plan. What you need to immediately decide
So let's go. The first and the last, which is important at the initial stage when building the aircraft, is to determine its size and weight. Everything depends on it: the choice of materials, electronics, technology, just ALL. At this stage, I seriously missed. With the material, the choice was made immediately - the ceiling tile (yes, the one that many have stuck on the ceiling in the corridors and in the kitchen). This is the easiest to use material after paper airplanes. Next, I figured the size of the aircraft, looked at what weight, on average, the resulting aircraft of this size. And, based on these data (mainly data on average weight), I immediately ordered electronics from China.
Airplanes are of different types: gliders, trenenry, acrobats, impeller, 3D. Everyone knows how to fly, but each of them has its own purpose. It is intuitively clear from the name of these groups. I, of course, did the coach. This type of aircraft is the softest in control and flies at lower speeds. This is in theory. And in fact, it all depends on how you make it!
Then, while driving through the construction markets, choosing ceiling tiles, I finally decided on the dimensions. I didn’t want to make a small (half a meter) plane, I immediately wanted something really tangible. Therefore, my dimensions were approximately 950mm in length and 1150mm wingspan. In the photo to the topic I (my height is 1850mm), so that the plane was really noticeable size.
And the mistake was that I took the weight of the same aircraft (by the way, it was the famous Cessna 150 ) with approximately the same dimensions (span 1-1.2 meters). But I did not take into account that those planes were made by people who already knew a lot about it. And as a rule, their weight is 1.5–2 times less than that of newbies. The weight search accumulates not only because of the excess material used (for example, a layer of glue that is too thick can add up to 15% of weight), but also because of the choice of electronics. For example, I bought two batteries, more capacity and weight, respectively. I thought that I would fly them longer - a bummer, it is not. In general, for the calculated weight, I rolled out percent by 30%. I was going to build a model weighing about 650 grams, it turned out almost 900. For the aircraft, this is critical. Highly. Although, looking ahead, I will say that in the air he raised not only his weight, but also an adjustable wrench on board! This article is not a guide to making, but rather a tale about what steps need to be taken on the path of building an aircraft, and of a series of photographs of this process.
Electronics
This is one of the most difficult moments. I think the plane was easier to do than choose electronics. There are so many options that there is not enough free time to review, re-read and compare everything. I consulted a lot with activists from the RC Design community and RC Aviation. Basically there my final electronics set prompted me. And of course in which I,
- Radio control equipment
- Brushless motor
- Speed control
- Battery (x2)
- Charger
- Propeller (x6 different)
- Servo drives
Pictures are for informational purposes only, I bought some other details ...
Everything, except the equipment, I ordered from China. The equipment I wanted to wait there for a long time before ordering, so I found it in Moscow. Though for 150% of the Chinese price. Reached all, as usual, for a month. The box is terribly crumpled, but the insides are safe and sound.
At first, I wanted to describe some subtleties in the selection of electronics (having experienced this in my own experience), but I thought that it was not worth while to overload the topic with this. I will give all the links where you can find all the detailed information about this. There are even calculators ( the easiest of them ).
The main thing to know when using this electronics is:
- NEVER and under no circumstances (!) Start up an electromotor with a propeller that is not properly fixed! Unsecured - it means being on the table, in your hands (no matter how hard you pinch it - it will break free!, Checked on yourself, but fortunately, it flew off to the side and stopped with a blow against the wall)! Even after installing it on a plane, if you can easily move it with your hands, it will break out!
- Never charge batteries unattended. Especially if the charger is cheap for them
- Do not recharge the batteries and do not discharge them below a certain threshold - otherwise you will have to throw out
- In storage mode, all electronics must be de-energized. De-energized - means disconnected from the battery, and not just turned off
Selection of materials
For me, the choice of material was very simple. Ceiling tile and point. Not only beginner model aircrafts build aircraft from it, but also those who already know it. I have already said that it is very easy to work with this material. He is light. It is very easy to repair the plane from it, which is very important for beginners (if it became really bad for him - you can cut out the injured piece and put a new one on this place).
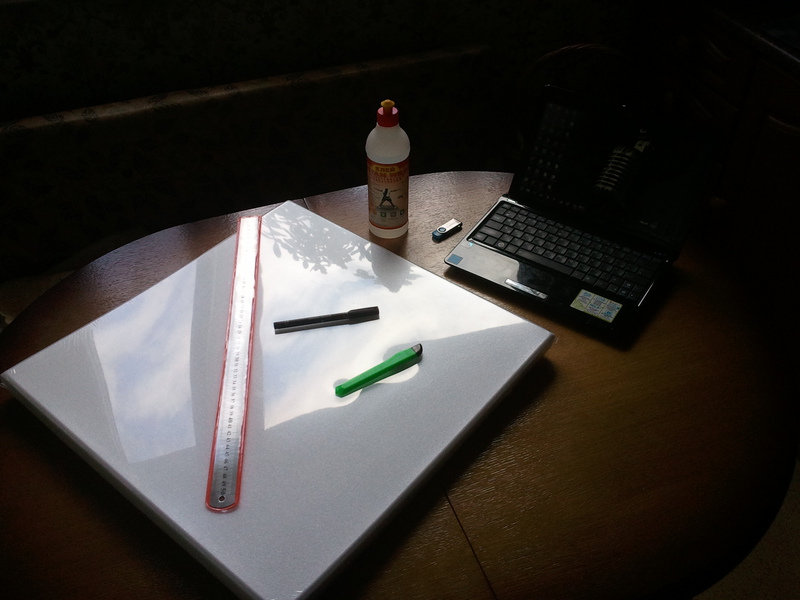
I went to the nearest hardware store and bought there:
- Wrapping a simple (without texture) ceiling tile 500x500mm
- Packing flat, but not simple (understand further) tiles 200x1000mm
- TITAN glue
It all cost about 300-350 rubles.
There are no tricks in the purchase of ceiling tiles, in principle, no, choose a flat (without relief) tile 4-5 mm thick and carry it to the cashier. But with the choice of glue experienced pilots that only do not advise. There is a whole lot of parameters that you need to choose. Up to the fact that in different parts of the gluing of the nodes of the aircraft using different glue. I didn’t bother much and decided to take something average - TITAN. It is inexpensive, well washed off from the hands and did not fall off from any of the glued parts. About the choice of glue can read here .
About the materials should also be noted from what else make a good model. From plastic bottles. Tetris technology. Also, cutting special aviation plywood (or balsa) on CNC machines.
Construction (there are a lot of photos)
So let's go. All we still need is a knife, a ruler and ... and that’s it.
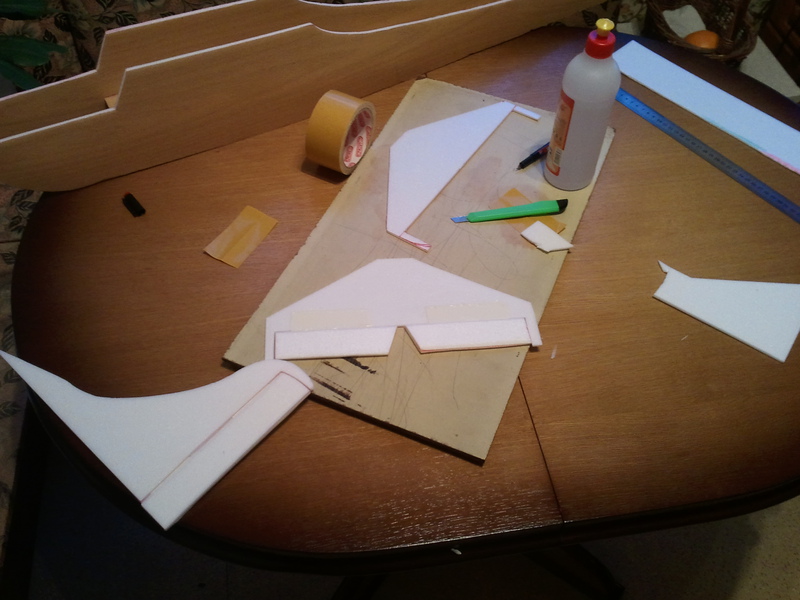
I have already said that I did not invent the bicycle and tried to make the plane according to the drawings I found on one of the sites (they are in the links at the end of the topic). But some details of the drawing were not clear to me, and after cutting the wing, I decided to move away from them and do it “by eye”.
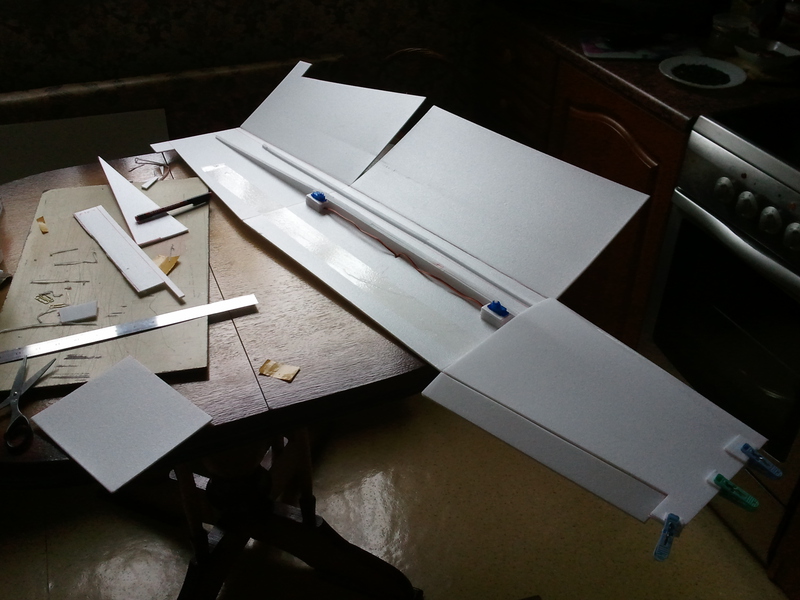
I decided to start with the wing. As I said, it will consist of 3 parts. Cut to size from drawing. The wing is NOT flat, like a real aircraft, it has a convex shape (or something like this). Spars are glued to the inside of the wing, which serve (should serve ...) with ribs of the wing and do not allow it to "fold."


Then 3 parts are glued together by the same spars. Looking ahead, I will say that these spars will not hold the wing by themselves. But in the final, the entire plane is covered with scotch tape, which gives 80% of the rigidity of the whole structure. But the tape separately, too, will not be able to keep the wing from the "folding". Therefore, both methods are used. But spars should be more powerful for this size. Often carbon fiber tubes with a diameter of 3-5 mm are placed in the wing - and rightly so!

As you have already noticed, the wing will be closed from above by bending the sheet of ceiling tile. To do this, on the outside of the fold we glue a strip of adhesive tape (along all lengths), and on the inside we “patch” the groove along the fold line. I used a regular CD for this, it is usually advised to use a blunted flat-head screwdriver (I think this is much more difficult). Then you need to place the servo drives that will control the aileron. And you can glue the wing.

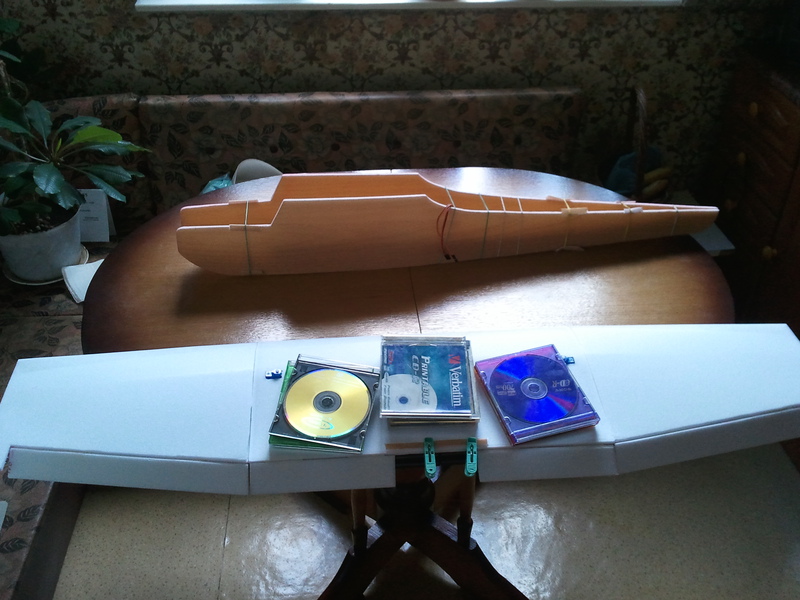
As you noticed, I already managed to paste in the ailerons (there is a link to the dictionary of basic terms at the end of the topic), but unfortunately I did not take any photos. But about this process, I will tell you when we will manufacture the tail. And now let's get to the body of the aircraft itself. We take the tile, the one that is 200x1000mm, draw a contour. We pretend. Redraw. Cut out. This is not true! But I did just that. Because to follow the size at that time I was already very tired. Moreover, I could not withstand the exact dimensions due to various circumstances. Although, maybe he would fly even better if I did everything according to the drawings. So my story is not a perfect case! We continue. All parts of the aircraft will be glued together from two layers of tile. Therefore, we will need 4 copies:

The surface of the ceiling used for the fuselage, had a texture "under the tree." I glued them to the "white" sides. In general, when gluing two layers of ceilings, it is advised to sand both surfaces (even if they are ordinary). This will help the glue to absorb better. Cut out the frame part of the fuselage, in which we have 2 servo machines to control the elevators and heading. We glue them.


In the central part of the wing cut holes for the servo machines and glue the wing completely.
In order for the glue to clutch finally, it will take about a day (as written by experienced modellers). I kept the parts with discs / rubber bands and everything that came to hand for about an hour or two. As already said, nothing fell off. Intermediate result:
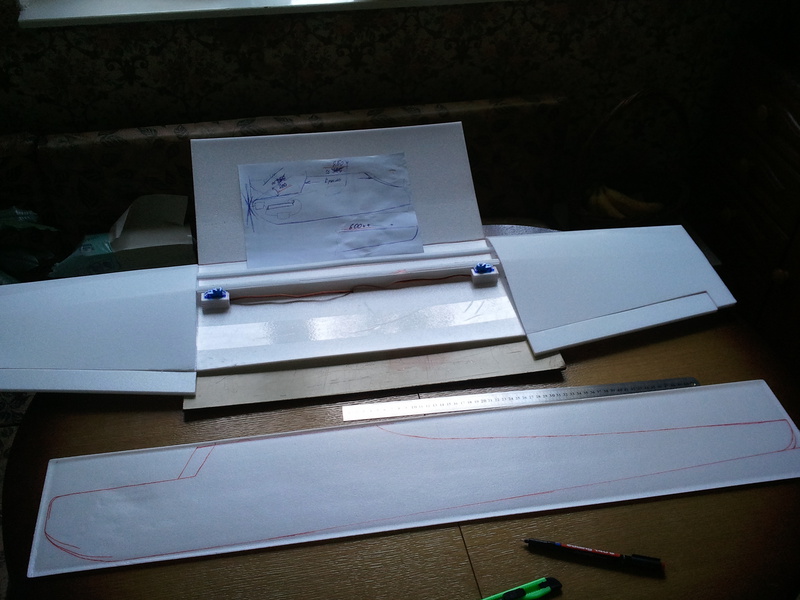
The photo shows that the wing turned crooked ... I do not know what to say. While I was making the wing - I followed the drawings with the greatest possible precision. The central part was formed at a right angle, and the side - at an angle. Maybe this is the case ... In the future it will all be fine. We turn to the tail.

Here you can see how the elevators are glued in (similar to the rudder and ailerons (see above)). In a nutshell: draw and cut out all the pieces in 2 copies. Then the parts that will be glued to each other end-to-end (in fact, I would advise you to make a 1-2mm gap there), you need to fix it. Namely, cut the right angles along the part at 45 degrees. If you look closely, it can be seen in the last photo, at the very scotch.
About scotch. It is double-sided, it is glued in both the tail (wing) and the steering wheel itself. They are double-layer, remember yes? So glue a piece of tape on the first layer of the steering wheel, smear the rest of the area with glue and apply a second layer of the steering wheel. The resulting detail is applied to the first layer of the tail, glue a piece of adhesive tape that protrudes from the steering wheel and ... well, you understand. And if you do not understand, look at the photo above again. I stopped this brain-killing story at the same moment. Glue the tail.
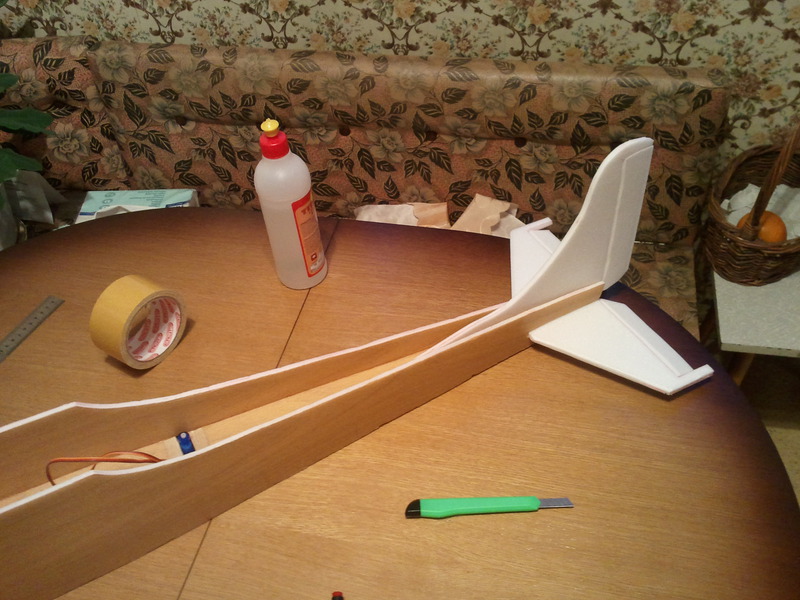
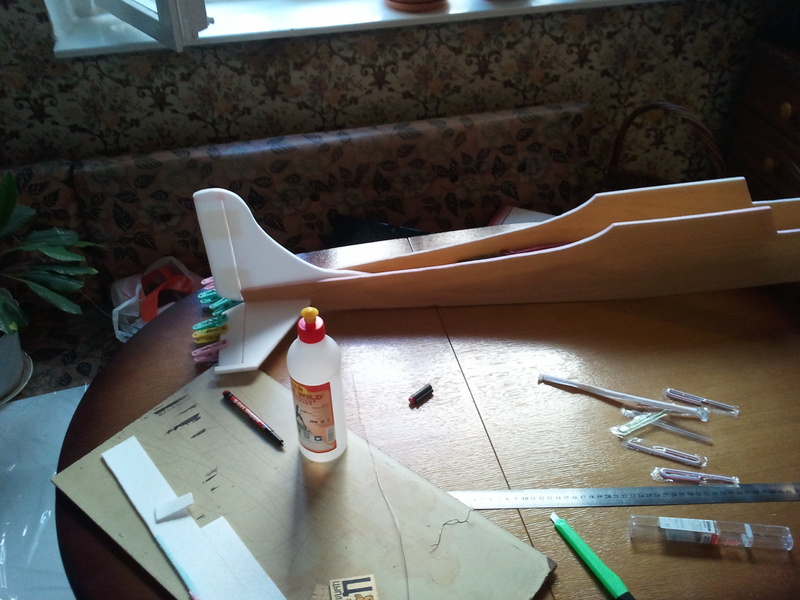
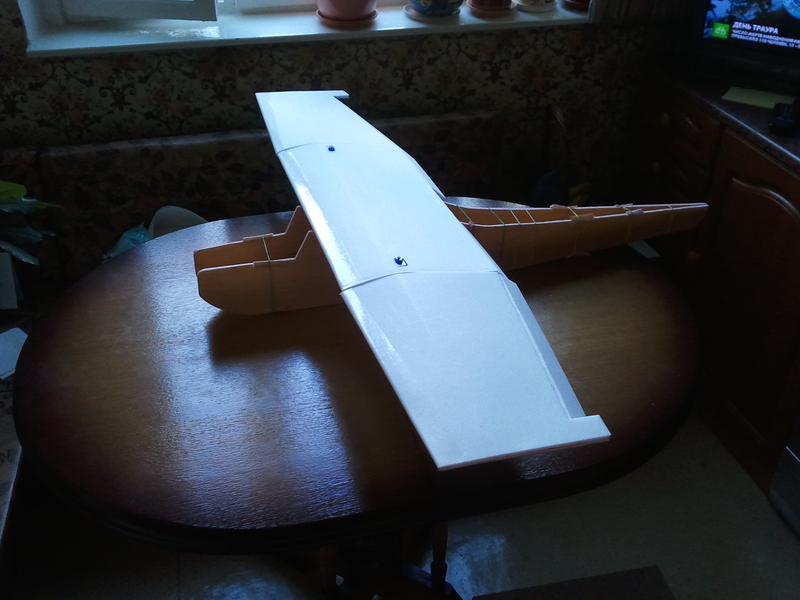
You can see that the airplane is already beginning to take the final look.
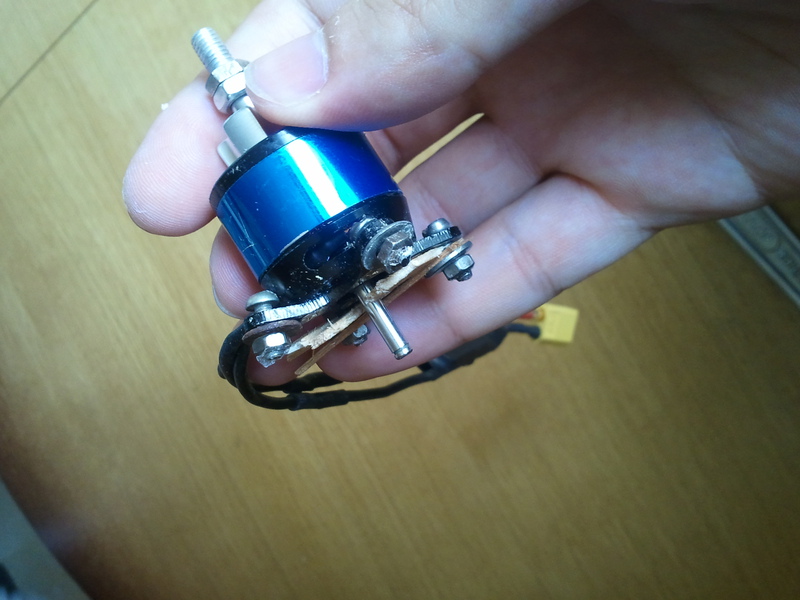
Next, electronics. Wow ... There is a lot to be said about this, but I'm afraid then the article will have to be divided into parts. And, given my status, it is unlikely to succeed. And the purpose of this topic is not to write detailed instructions for creating an airplane (although I can do this in the future) - this will require 3-5 standard topics for the habr.
Briefly say so. The power of the entire aircraft comes from the battery (thanks to KO), in turn, the engine regulator is connected to it. Further, all aircraft electronics receive power from the controller. The regulator is used to smoothly increase / decrease the engine speed. The motor is connected to the regulator by soldering 3 wires. They, that on the engine, that on the regulator, absolutely identical. If after soldering the engine turns in the wrong direction, then you need to solder any two (swap). This is a standard procedure and the only correct one - do not be surprised. The receiver is also powered by the regulator (which will communicate with the control panel). All servo drives will be powered through the receiver circuit. You just need to connect them (servas) to the receiver. This is a super abbreviated knowledge. More information can be found on the links at the end of the article or ask in the comments.
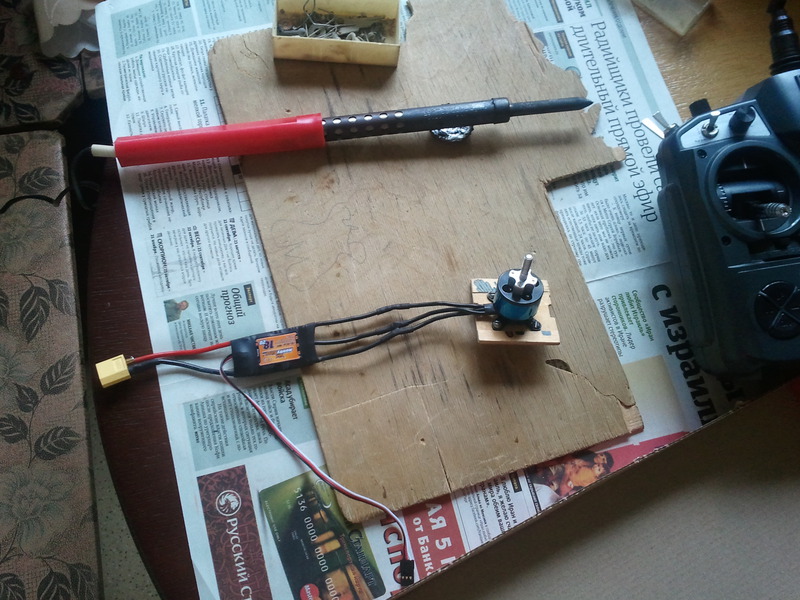
In the photo the regulator and engine. 2 thick wires with a large yellow connector go to the battery, 3 thin to the transmitter. Unfortunately, I lost the photos (I did this plane in the summer of 2012), in which I made traction from the servo of the cars to the hogs. They were glued to the elevators, directions, and ailerons. Hogs are pieces of plastic or something like that (thin and strong enough) that are glued to the handlebars. They look like this:

Photo Yury Yuri Community RC Aviation
You can see how they are connected to the servos in the photos below, towards the end.
Next you need to make a motorcycle. Already from the name you can understand the purpose, but I will explain. Usually this term in the construction of aircraft is called the site to which the engine will be mounted. But at the very beginning, when I was just about to start building the plane, I watched a lot of videos with flights. There were both steep flights, and first flights, and carrots (as the crash of airplanes is called when control is lost over them and they, like carrots, fly their noses to meet the ground ...). So, 99% of the first flights end in a carrot, 90% of the second flights end in a carrot, 80% ... well, you understand. So, I knew that the poor nose of my plane would have to withstand at least a dozen strikes against the ground at speeds from 5 to 35 km / h. On those videos that I watched, half of the carrots ended in a broken nose. Well, nothing, you can stick a new one! But no, this is not for me!
Usually aircraft builders glue the engine like this

Only instead of carbon fiber - a ceiling in 2-3 layers. Well, after the carrot you know where all this stuff is. I did not think much time about how to withdraw the concentration of energy when falling from the most fragile places - then the nose. There were very brilliant thoughts, but there was no time to make a frame from rulers or plywood, so I decided this:
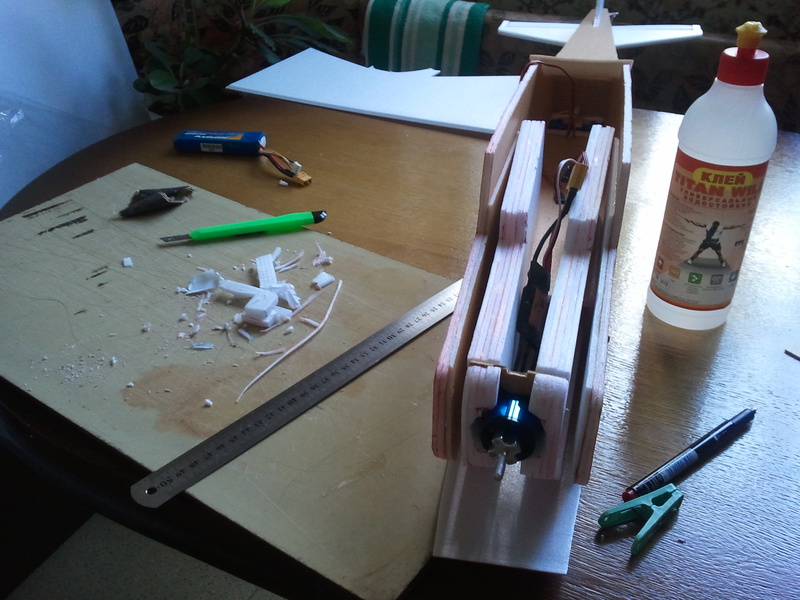
After that, at the top of this “security frame” I cut out a place for the battery:

Due to the fact that the center of gravity had to be on the line of the leading edge of the wing (or 2-5 cm further), the battery needed to be located as close as possible to the nose of the aircraft. This frame served as a safety cushion for the heaviest parts of the aircraft - the engine and batteries. The frame rested on the frame of the aircraft and a stick from a Chinese restaurant passed through it, which was used for wing trimming:
Thus, the energy from the impact of the batteries and the motor on the ground was borne by this frame, and the attachment points of the frame without problems kept the energy of the impact from the rest of the body (which weighs less than the nose).
By the way, this photo clearly shows the device of the wires (pieces of wire) from the servo machines to the aileron hogs. There is nothing tricky there.
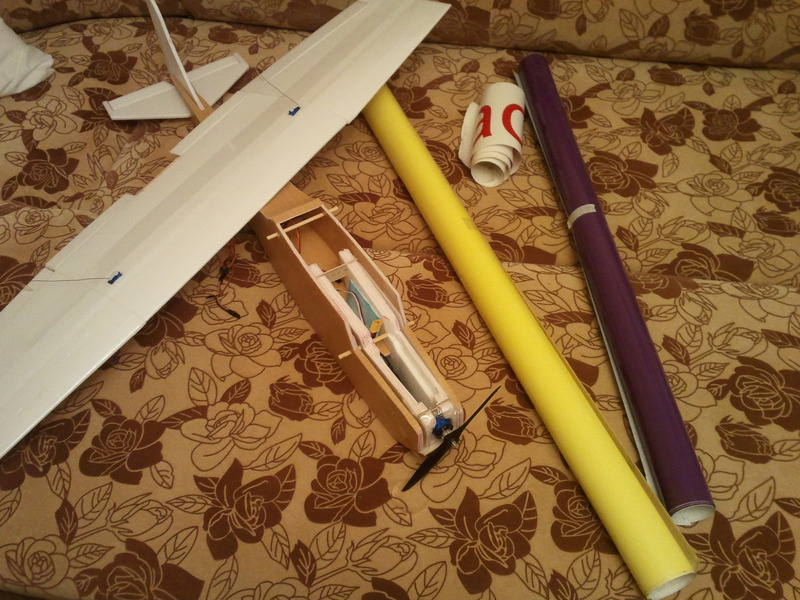
The photo is still present film . Yes, I will paste over it with a film, but not with an adhesive tape, as I wrote earlier. Because of this, he again gained weight. But nothing can be done about it ... I didn’t remove the pasting process. There is nothing interesting, it turned out crooked and bad.
And now more interesting. Photos of the finished aircraft:

The yellow pieces on top of the wing glue up the most terrible places of purple pasting ... But now this is not the point. The photo still shows the entire starter kit. Key, pliers, receiver, remote control, 2 batteries, a propeller, a knife and a lot of rubber bands.
Flying
There is already a slight tremor in the knees. I did it for two weeks (or a little more), giving him an average of 2 hours a day. A friend helped me run it. I gave a brief briefing on the launch, how to throw and so on. To say that after the launch I was overwhelmed with various kinds of emotions - to say nothing. I have not felt this for a long time. It was joy / chagrin / laughter / sadness / laughter / disappointment and everything in a fraction of seconds and all over the edge, in general we are watching the launch!
Inspection after landing
For those who did not understand what happened, but probably did not understand 99%, as soon as my friend let him out of his hands, he almost on the spot twisted a dead loop with a diameter of 3-4 meters at full speed (full throttle) and stuck almost in the place from which he was allowed to - a friend barely managed to run away ... Confusion.
Inspection showed that almost everything is intact. Torn only a little fuselage right under the wing in a place where the antenna goes from the receiver. Without hesitation, after conducting a test for the work of all controls, we are conducting a second launch - the result is the same. Well, of course, now I threw the gas as soon as I realized that I could not pull it out and returned to the ground with a softer fit on the grass. The third launch was exactly the same. After some thought, I thought that I still had the wrong centering (the center of gravity was not in the right place). He began to think what to hang to the nose to align it. Empirically, we came to a single solution that helped move the center of gravity to the desired point:
Hard, I know. I also knew that the plane already had a good advantage. But not to go home after all three aerobatics? It’s just that I don’t have a place to let me near the house, so I traveled out of the city for about 20 minutes one way.
On landing, he left the same way against my will. But what to do with such a load, he should not fly at all.
Results of the first day:

As you noticed, the blows to the ground were really not weak!
As it turned out, the reason for this behavior was not only bad alignment. But the wrongly glued stabilizer (the horizontal part of the tail), the wrong angle of attack of the wing (just it pulled the model continuously up) and the center of gravity. In general, I corrected everything that could be easily corrected (center of gravity and angle of attack of the wing), and went to the next tests:
Attentive ones might have noticed that at the end of the video, the wing of the plane broke, but that's another story ... It’s just as noticeable how difficult it is for this plane to deal with the oncoming air masses, how difficult it is to climb up and it's all because of the overweight. So remember, if you start to build your plane
Finance

Plus, about 350 rubles for the ceiling and glue, 500 rubles for the film, 3000 rubles for the control panel.
Total first plane I went in 7500 rubles.
Please note the following. Charging and remote control (the main items of consumption) can be used not only for this model, but not only in aviation in general. Given that charging weighs about a kilogram, and the delivery of such a parcel costs about 500-600 rubles, then we can say that the plane itself cost me about 3000 rubles!
For the money you can buy a finished aircraft in the same stores. But with a cheap remote control (no further than 100 meters) and with poor charging or without it at all. And in general, I wanted to do more CAM than to fly!
Useful materials
Resources on this topic is really not count. But here are some of the most useful (at least for me):
- RC design
- RC-Aviation
- Basic Terms Dictionary
- HobbyKing and his Russian comrade (clone)
- Search service for components for copters and not only from pokryshkin habrauser
And one more piece of positive at last, thanks to my girlfriend!
A photo

PS I hope I did not tire you, and you will treat this article and its purpose with understanding (see at the very beginning),
Thanks for attention!
upd: I took out all the pictures from under the spoilers, of course, at the request of the readers.
Source: https://habr.com/ru/post/168219/
All Articles