HP LaserJet 1100. Solving issues with a MiniCentronics connector and connecting to Windows 7
Introduction
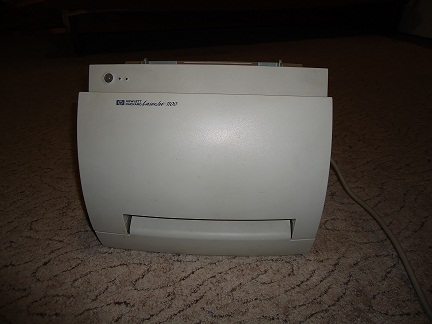
I think that every habrayuzer has a printer at home. So I also had a printer at home before the wedding, but after, when I moved, I lost this good. For a while coping, but the inconvenience was strong. For a long time I could not decide on the type of device: whether jet with a CISS or lazer. I will not go into details of the agony of choice, I will only say that I faced a budget deficit. But this already influenced the fact that I chose a used laser printer from the class HP LaserJet 1100, i.e. unkillable device without chips and with spare parts available (used after all). In the end, it was him who bought it. And then I ran into problems:
1. The printer does not use a standard LPT cable (Centronics - DB-25), which can be bought at any store, but a special one: MiniCentronics
2. According to the information on the official website, the drivers for Windows7 are already built into the system. However, automatic installation over the network does not work.
')
If you are faced with the same problems, then you are under the cat (the photos were taken after unsoldering to a mediocre soap box and in poor light).
So what I had:
1. HP LJ 1100 printer;
2. Centronics cable - DB-25;
3. An old computer that works as a torrent player and others with Windows 2003 on board (only it is equipped with an LPT port).
What I needed:
1. A working printer that can be printed from any computer on the network (Windows 7 64 bit and Windows XP 32 bit)
Connecting the printer to the working machine
The first thing I did was google a couple of instructions on how to redesign the cable (printer).
Main material
Additional material
It was possible to solder the cable directly, and it was possible to build a separate connector on the printer. My choice fell on the
Why so brutal?
I plan to update the router and take it with a print server. Those. I will not need a LPT, but a USB. For these purposes, I will buy an LPT-USB adapter and here I’ll do it “nicely” with the USB connector in the printer case.
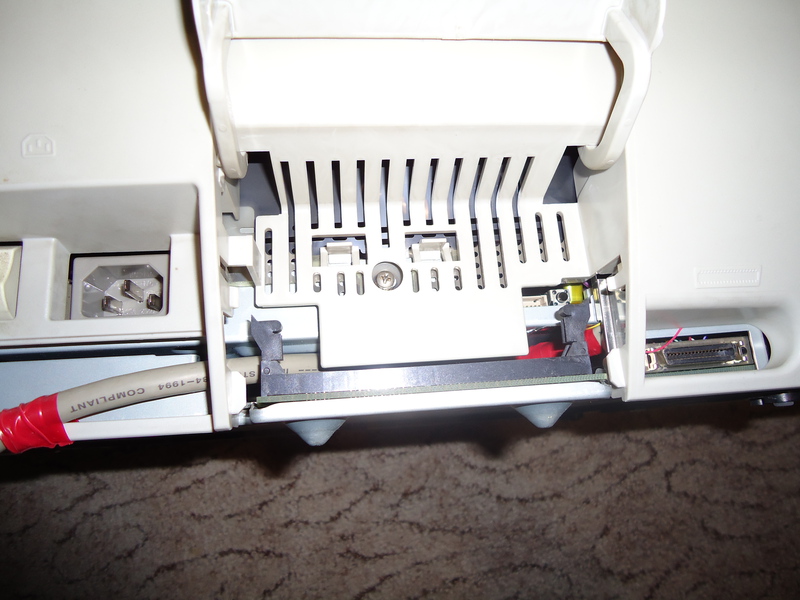
Getting to the inside is easy: turn the printer upside down and unscrew the three bolts.
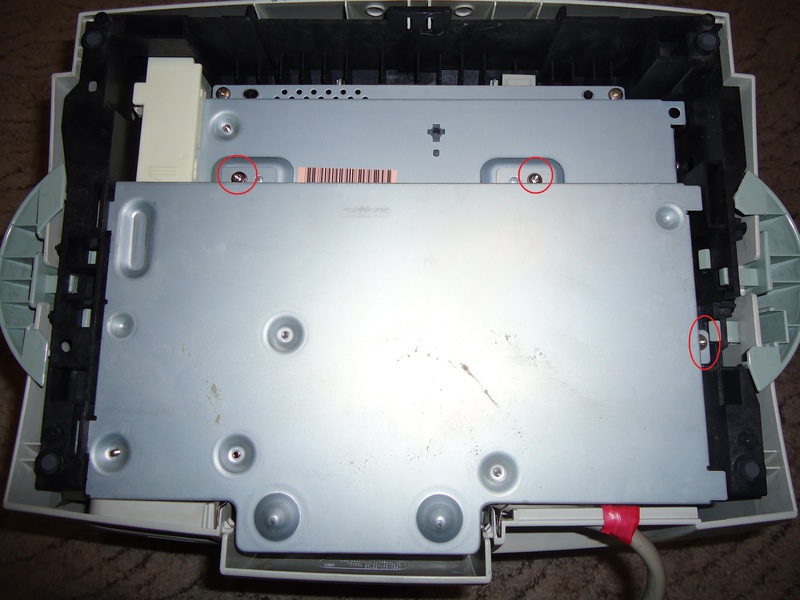
After that, raise the cover on the right side. The board is located on it and is connected to the other parts by three loops. One of the loops (the thinnest) is inserted into the port with a latch, and the rest are simply removed:
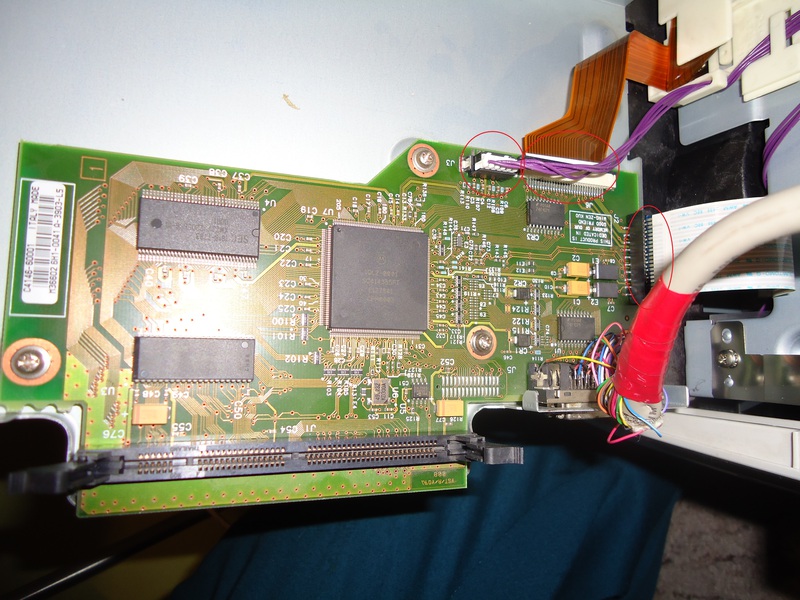
Turning off the trains and starting the "operation". In my case, I “bit off” the Centronics connector that I did not need (it was not separable) and, using the hint on the above links, I created my connection table with the tester.
| Wire color | Centronics | LPT | MiniCentronics |
|---|---|---|---|
| brown | one | one | 15 |
| Red | 2 | 2 | 6 |
| Orange | 3 | 3 | 7 |
| yellow | four | four | eight |
| green | five | five | 9 |
| blue | 6 | 6 | ten |
| Violet | 7 | 7 | eleven |
| white | eight | eight | 12 |
| pink | 9 | 9 | 13 |
| brown white | ten | ten | 3 |
| Orange-white | eleven | eleven | one |
| Green and white | 12 | 12 | five |
| purple-white | 13 | 13 | 2 |
| red with brown stripe | 14 | 14 | 17 |
| blue brown | 32 | 15 | four |
| orange brown | 31 | sixteen | 14 |
| blue black | 36 | 17 | sixteen |
| brown-black | nineteen | 18 | 33 |
| orange black / rose black | 20/21 | nineteen | 24/25 |
| yellow black | 22/23 | 20 | 26/27 |
| green-black / purple-black | 24/25 | 21 | 28/29 |
| White black | 26/27 | 22 | 30/31 |
| yellow white / purple brown | 29/34 | 23 | 19/22 |
| red white / blue white / gray white | 15/17/28 | 24 | 20/21/23 |
| green brown / rose black / pink brown / yellow brown | 30/33/35 | 25 | 32/34/35 |
Attention! Wire color may vary!
Numbers 18-25 on the DB-25 (19-35 on the MiniCentronics) - weight. As you can see in the photo above, the 25th threw it on the ground, while everyone else just insulated (you can cut it off). The 18th pin on the MiniCentronics is not used. I used flux for soldering, the brand of which is not possible to identify. All wires are soldered to the top row of legs, which means more preserved nerves.
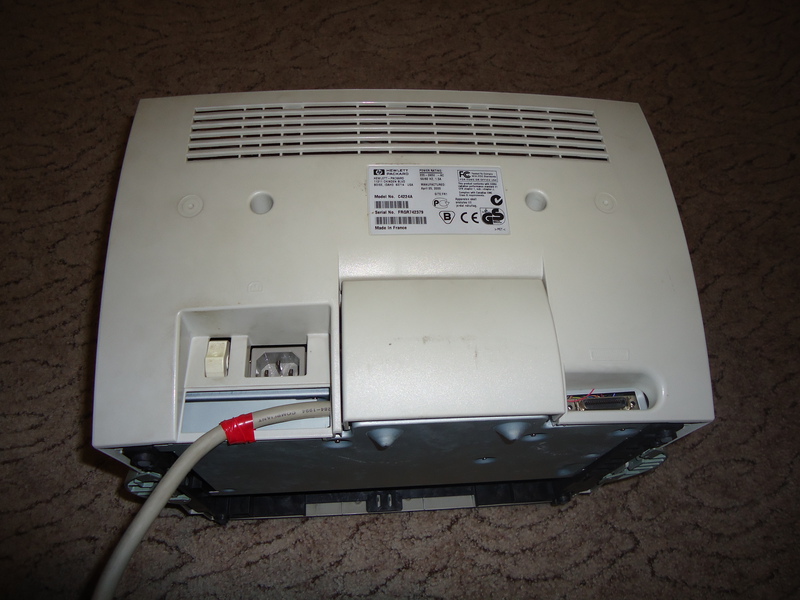
After everything turned out we collect the printer back. I brought the cable through the stub, the purpose of which I do not understand. Then I insert the USB port in this place:
And now near
We connect the printer to the computer and proceed to the second stage.
Connecting the printer to Windows 7 via the network:
How to connect the printer to Windows 2003 - no one should have problems. Just download the driver on the official website and off you go. Then we share it (I will not explain it either) and transfer to the computer with Windows 7. We launch the installation of the printer. I had a network printer without any problems:
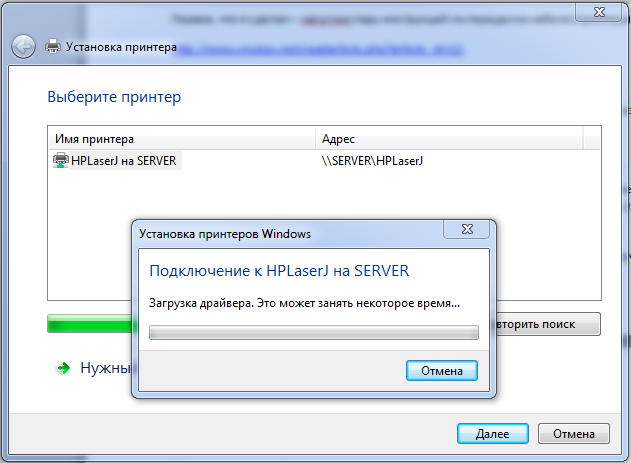
But after a while:
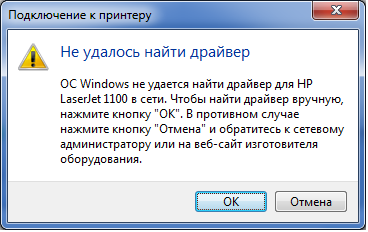
It is necessary to explicitly specify the printer from the list, but because I am trying to set it up as a network, there is no such possibility. Okay, let's go the other way - we choose the installation of a local printer, rather than a network printer:

And immediately select the item “Create a new port” with the type “Local Port”:
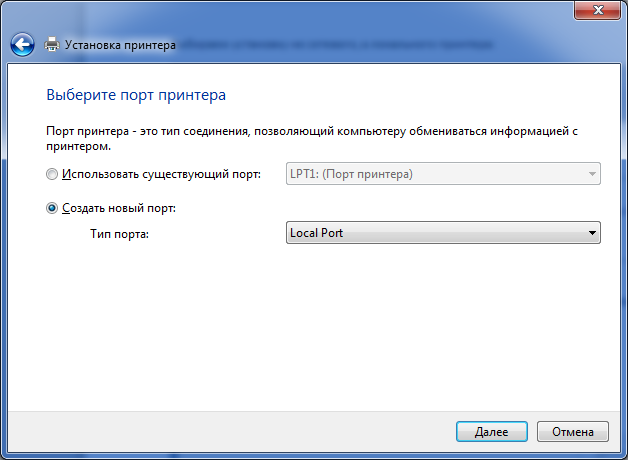
Click "Next" and in the window that appears, enter the address of our printer on the network:

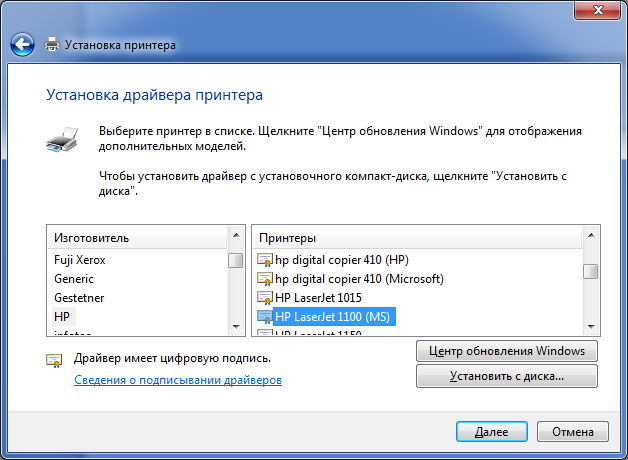
Well, here choose from the list Our HP LaseJet 1100 (MS):
Well, then we answer the questions of installing this printer "by default" and providing general access.
If, all of a sudden, the printer is not listed, then use the “Windows Update Center”. I did not use this myself, but this is mentioned on the HP website.
After these manipulations, the printer will begin to work and prove the purchase is justified.
Source: https://habr.com/ru/post/167345/
All Articles