We get acquainted with Fabric.js. Part 2
This is the second part of a series of articles on the open Javascript canvas library Fabric.js.
In the first part of this series, we familiarized with the most basic aspects of the canvas of the library Fabric.js . We learned how Fabric can be useful, examined its object model and object hierarchy; saw that there are both simple shapes (rectangle, triangle, circle), and complex (SVG). Learned to perform simple operations on these objects.
Well, we figured out the basics, let's get down to more interesting things!
')
Any self-respecting canvas library nowadays includes tools for working with animation. Fabric is no exception. After all, we have a powerful object model and flexible graphical capabilities. It would be a sin not to be able to set it in motion.
You probably remember how to change the attribute of an object. Simply call the
You can animate an object on the same principle and with the same ease. Each object in Fabric has an
The first argument is an attribute that we want to change. The second argument is the final value of this attribute. For example, if the rectangle is at an angle of -15 °, and we specify "45", then the angle will gradually change from -15 ° to 45 °. But the last argument is an optional object for more detailed settings (duration, calls, easing, etc.)
By the same principle, to rotate an object 5 degrees counterclockwise:
You probably noticed that we are constantly pointing out the "onChange" call. Isn't the 3rd argument optional? Yes exactly. The fact is that just this
Well, why doesn't
Returning to the options for animation, what exactly can we change?
All these options are less obvious, except probably easing. Let's take a closer look.
By default,
Notice that we use
That's basically all you need to know about animation. Now you can easily do interesting things - change the angle of the object to make it rotating; animate left / top to move it; animate width / height to increase / decrease; animate the opacity to appear / fade; etc.
In the first part of this series, we learned how to work with images in Fabric. As you probably remember, the
Working with images is fun, but with image filters is even more fun!
Fabric already has several filters, and also allows you to easily define your own. Some of the filters from the Fabric are probably familiar to you - removing a white background, translating to black and white, negative or brightness. And some are less popular - gradient transparency, sepia, noise.
So how do you apply a filter to an image? Each
Well, for example, make a picture in black and white:

This is how you can make sepia:

With the “filters” attribute you can do everything the same as with a regular array — remove the filter (using

Notice that we passed the
Well, we figured out the filters; time to create your own!
The pattern for creating filters will be pretty simple. We need to create a "class", and write the

Without going deep into the details of the code, it is worth noting that the most important thing happens in the loop, where we change the green (data [i + 1]) and blue (data [i + 2]) components of each pixel to 0, in effect removing them. The red component remains untouched, which makes the whole image red. As you can see, the
Regardless of what you prefer to work with - hex, RGB, or RGBA color formats - Fabric simplifies tedious operations and transfers from one format to another. Let's look at several ways to define color in Fabric:
Translation format is very simple.
By the way, you can do more than just a translation. You can "overlay" the colors one on another, or make them a black and white version.
An even more expressive way to work with colors is using gradients. Gradients allow you to seamlessly blend one color with another, opening up the possibility of quite amazing effects.
Fabric supports them using the
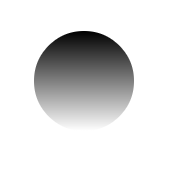
In this example, we create a circle at point 100,100, with a radius of 50px. Then we expose him to the gradient going across the entire height of the object, from black to white.
As you can see, the method gets a configuration object in itself, in which there can be 2nd pairs of coordinates (x1, y1 and x2, y2), and the “colorStops” object. The coordinates indicate where the gradient starts and where it ends. colorStops indicate what colors it consists of. You can define as many colors as you like; the main thing is that their positions are in the range from 0 to 1 (for example, 0, 0.1, 0.3, 0.5, 0.75, 1). 0 represents the beginning of the gradient, 1 - its end.
Here is an example of a red and blue gradient going from left to right:
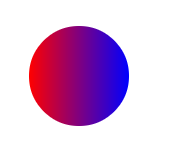
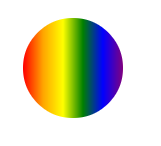
But the 5-step gradient-rainbow, with flowers occupying 20% of the entire length:
Can you think of something interesting?
What if you need to display not only pictures and vector shapes on canvas, but also text? Fabric can do it too! Meet
Before talking about the text, it is worth noting why we generally provide support for working with text. After all, canvas has built-in fillText and strokeText methods.
First, in order to be able to work with the text as with objects. Embedded canvas methods - as usual - allow you to display text at a very low level. But by creating an object of the type
The second reason is to have richer functionality than what canvas gives us. Some things that are in Fabric but not in native methods:
Well, let's look at the omnipresent "hello world"?
That's all! To display the text, you just need to add an object of type
In addition to the usual attributes, text objects of course have their own, related to the text. Briefly, about these attributes:
Default is Times New Roman. Allows you to change the font family for text.
Controls text size. Notice that, unlike other objects in Fabric, we cannot resize text with width / height. Instead, fontSize is used, and of course scaleX / scaleY.
Allows you to make the text fatter or thinner. Just like in CSS, you can use either words (“normal”, “bold”) or number values (100, 200, 400, 600, 800). It is important to understand that for a certain thickness you need to have the appropriate font. If there is no “bold” (bold) option in the font, for example, the bold text may not be displayed.
Allows you to add text strikethrough, overline, or underline. Again, this declaration works the same as in CSS. However, Fabric can even a little more, allowing you to use these decorations together (for example, underlining and strikethrough), simply listing them through the space.
Shadow for text. It consists of 4 components: color, horizontal indent, vertical indent, and blur size. This should all be familiar if you’ve previously worked with shadows in CSS. Changing these 4 options, you can achieve many interesting effects.
Text style There can be only one of two things: “normal” or “italic”. Again, it works the same as in CSS.
By combining stroke (the color of the outer stroke) and strokeWidth (the width of the outer stroke), you can achieve quite interesting effects. Here are a couple of examples:
Alignment is useful when working with multiline text. In a single-line text, the alignment is not visible, because the width of the text object itself is the same as the length of the line.
Possible values: "left", "center", "right", and "justify"
Another attribute most likely familiar from CSS is lineHeight (line height). Allows you to change the spacing between lines in multi-line text. Here is an example of text with lineHeight 3, and the second with lineHeight 1.
Finally, you can give the text a background using textBackgroundColor. Note that the background is filled only under the text itself, and not on the whole "box". To paint over the entire text object, you can use the “backgroundColor” attribute. You can also see that the background depends on the text alignment and lineHeight. If the lineHeight is very large, the background will be visible only under the text.
Events are an indispensable tool for creating complex applications. For ease of use, and more detailed settings, Fabric has an extensive event system; ranging from low-level mouse events to high-level object events.
Events allow us to “catch” different moments when something happens on the canvas. Want to know when the mouse was pressed? We follow the event "mouse: down". How about when the object was added to the canvas? For this there is an “object: added”. Well, what about redrawing the canvas? Use "after: render".
The event API is very simple, and is similar to what you are most likely used to in jQuery, Underscore.js, or other popular JS libraries. There is an
Let's look at an example:
We added a listener for the “mouse: down” event on the canvas object, and specified a handler that will record the coordinates where this event occurred. Thus, we can see exactly where the click on the canvas. The event handler receives an options object, with two parameters:
This example will output “an object was clicked!” If we click on an object. Also the type of this object will appear.
What other events are available in Fabric? At the mouse level, we have " mouse: down ", " mouse: move ", and " mouse: up ". In general, there is an " after: render ". There are events related to the selection of objects: " before: selection: cleared ", " selection: created ", " selection: cleared ". And of course, object events: " object: modified ", " object: selected ", " object: moving ", " object: scaling ", " object: rotating ", and " object: added ".
It is worth noting that events of the type “object: moving” (or “object: scaling”) occur constantly, while the object is moving or scaling, even if by one pixel. At the same time, events like “object: modified” or “selection: created” occur only at the end of the action (object change, creating a group of objects, etc.).
In the previous examples, we attached a listener to a canvas object (
For convenience, Fabric allows you to add listeners directly to Fabric objects!
In this example, listeners “join” straight to the rectangle and circle. Instead of "object: selected", we use the "selected" event. By the same principle, you can use the event “modified” (“object: modified” when “hanging” on the canvas), “rotating” (analogous to “object: rotating”), etc.
You can get acquainted with the events closer and right in real time in this demo .
At this the second part came to an end. So much for everything new, but that's not all! In the third part, we will consider the groups of objects, the serialization / deserialization of the canvas and the JSON format, the SVG parser, and the creation of subclasses.
In the first part of this series, we familiarized with the most basic aspects of the canvas of the library Fabric.js . We learned how Fabric can be useful, examined its object model and object hierarchy; saw that there are both simple shapes (rectangle, triangle, circle), and complex (SVG). Learned to perform simple operations on these objects.
Well, we figured out the basics, let's get down to more interesting things!
')
Animation
Any self-respecting canvas library nowadays includes tools for working with animation. Fabric is no exception. After all, we have a powerful object model and flexible graphical capabilities. It would be a sin not to be able to set it in motion.
You probably remember how to change the attribute of an object. Simply call the
set method, passing the appropriate value: rect.set('angle', 45); You can animate an object on the same principle and with the same ease. Each object in Fabric has an
animate method (inheriting from fabric.Object ) which ... animates this object. rect.animate('angle', 45, { onChange: canvas.renderAll.bind(canvas) }); The first argument is an attribute that we want to change. The second argument is the final value of this attribute. For example, if the rectangle is at an angle of -15 °, and we specify "45", then the angle will gradually change from -15 ° to 45 °. But the last argument is an optional object for more detailed settings (duration, calls, easing, etc.)
animate way has very useful functionality - support of relative values. For example, if you need to move an object 100px to the right, then it is very simple to do it: rect.animate('left', '+=100', { onChange: canvas.renderAll.bind(canvas) }); By the same principle, to rotate an object 5 degrees counterclockwise:
rect.animate('angle', '-=5', { onChange: canvas.renderAll.bind(canvas) }); You probably noticed that we are constantly pointing out the "onChange" call. Isn't the 3rd argument optional? Yes exactly. The fact is that just this
canvas.renderAll for each frame of the animation allows you to see the animation itself! The animate animate only changes the attribute value during a specified time, and according to a certain algorithm (easing). rect.animate('angle', 45) changes the value of the angle, while not redrawing the screen after each change. A redrawing of the screen is needed to see the animation.Well, why doesn't
animate redraw the screen automatically? Because of the performance. Indeed, on the canvas can be hundreds or even thousands of objects. It would be pretty awful if each of the objects redraw the screen as it changes. In this case, it is better to use, for example, requestAnimationFrame to permanently draw the canvas without calling renderAll for each object. However, in most cases, you will most likely use canvas.renderAll as an “onChange” call.Returning to the options for animation, what exactly can we change?
- from : Allows you to change the initial value of the attribute for the animation (if you do not want to use the current one).
- duration : The duration of the animation. The default is 500 (ms).
- onComplete : The function to call at the end of the animation.
- easing : The easing function.
All these options are less obvious, except probably easing. Let's take a closer look.
By default,
animate uses a linear function to soften the animation. If this option is not suitable, Fabric has a large set of popular easing functions (available through the object fabric.util.ease ). For example, this is how you can move the object to the right, while springing at the end: rect.animate('left', 500, { onChange: canvas.renderAll.bind(canvas), duration: 1000, easing: fabric.util.ease.easeOutBounce }); Notice that we use
fabric.util.ease.easeOutBounce as a softening option. There are other popular functions - easeInCubic , easeOutCubic , easeInElastic , easeOutElastic , easeInBounce , easeOutExpo , etc.That's basically all you need to know about animation. Now you can easily do interesting things - change the angle of the object to make it rotating; animate left / top to move it; animate width / height to increase / decrease; animate the opacity to appear / fade; etc.
Image Filters
In the first part of this series, we learned how to work with images in Fabric. As you probably remember, the
fabric.Image constructor is used for this, passing the <img> element to it. There is also a method fabric.Image.fromURL , with which you can create an object directly from the URL string. And of course, these fabric.Image objects can be thrown onto the canvas where they will appear like everything else.Working with images is fun, but with image filters is even more fun!
Fabric already has several filters, and also allows you to easily define your own. Some of the filters from the Fabric are probably familiar to you - removing a white background, translating to black and white, negative or brightness. And some are less popular - gradient transparency, sepia, noise.
So how do you apply a filter to an image? Each
fabric.Image object has a “filters” attribute, which is simply an array of filters. Each element in this array is either one of the existing ones in Fabric or its own filter.Well, for example, make a picture in black and white:
fabric.Image.fromURL('pug.jpg', function(img) { // img.filters.push(new fabric.Image.filters.Grayscale()); // img.applyFilters(canvas.renderAll.bind(canvas)); // canvas.add(img); }); This is how you can make sepia:
fabric.Image.fromURL('pug.jpg', function(img) { img.filters.push(new fabric.Image.filters.Sepia()); img.applyFilters(canvas.renderAll.bind(canvas)); canvas.add(img); }); With the “filters” attribute you can do everything the same as with a regular array — remove the filter (using
pop , splice , or shift ), add a filter (using push , splice , unshift ), or even combine several filters. When applyFilters is applyFilters , all the filters in the array are applied to the image in turn. For example, let's create a picture with increased brightness and with a sepia effect: fabric.Image.fromURL('pug.jpg', function(img) { img.filters.push( new fabric.Image.filters.Sepia(), new fabric.Image.filters.Brightness({ brightness: 100 })); img.applyFilters(canvas.renderAll.bind(canvas)); canvas.add(img); }); Notice that we passed the
{ brightness: 100 } object to the Brightness filter. This is because some filters do not need anything extra, and some (for example, grayscale, invert, sepia) need to specify certain parameters. For the brightness filter, this is actually the brightness value itself (0-255). In the noise filter, this is the noise value (0-1000). And the “remove white” filter has a threshold (threshold) and a distance (distance).Well, we figured out the filters; time to create your own!
The pattern for creating filters will be pretty simple. We need to create a "class", and write the
applyTo method. Optionally, we can give the filter a toJSON method (support for JSON serialization), and / or initialize (if the filter has additional parameters). fabric.Image.filters.Redify = fabric.util.createClass({ type: 'Redify', applyTo: function(canvasEl) { var context = canvasEl.getContext('2d'), imageData = context.getImageData(0, 0, canvasEl.width, canvasEl.height), data = imageData.data; for (var i = 0, len = data.length; i < len; i += 4) { data[i + 1] = 0; data[i + 2] = 0; } context.putImageData(imageData, 0, 0); } }); fabric.Image.filters.Redify.fromObject = function(object) { return new fabric.Image.filters.Redify(object); }; Without going deep into the details of the code, it is worth noting that the most important thing happens in the loop, where we change the green (data [i + 1]) and blue (data [i + 2]) components of each pixel to 0, in effect removing them. The red component remains untouched, which makes the whole image red. As you can see, the
applyTo method gets the canvas element, which is an image. Having such a canvas, we can go through all the pixels of the image ( getImageData().data ) by changing them as we like.Colors
Regardless of what you prefer to work with - hex, RGB, or RGBA color formats - Fabric simplifies tedious operations and transfers from one format to another. Let's look at several ways to define color in Fabric:
new fabric.Color('#f55'); new fabric.Color('#123123'); new fabric.Color('356735'); new fabric.Color('rgb(100,0,100)'); new fabric.Color('rgba(10, 20, 30, 0.5)'); Translation format is very simple.
toHex() converts a color to hex. toRgb() - in RGB, and toRgba() - in RGB with alpha channel (transparency). new fabric.Color('#f55').toRgb(); // "rgb(255,85,85)" new fabric.Color('rgb(100,100,100)').toHex(); // "646464" new fabric.Color('fff').toHex(); // "FFFFFF" By the way, you can do more than just a translation. You can "overlay" the colors one on another, or make them a black and white version.
var redish = new fabric.Color('#f55'); var greenish = new fabric.Color('#5f5'); redish.overlayWith(greenish).toHex(); // "AAAA55" redish.toGrayscale().toHex(); // "A1A1A1" Gradients
An even more expressive way to work with colors is using gradients. Gradients allow you to seamlessly blend one color with another, opening up the possibility of quite amazing effects.
Fabric supports them using the
setGradient method, which is present on all objects. setGradient('fill', ...) is almost like setting the object's “fill” value, only a gradient is used instead of color. var circle = new fabric.Circle({ left: 100, top: 100, radius: 50 }); circle.setGradient('fill', { x1: 0, y1: 0, x2: 0, y2: circle.height, colorStops: { 0: '#000', 1: '#fff' } }); In this example, we create a circle at point 100,100, with a radius of 50px. Then we expose him to the gradient going across the entire height of the object, from black to white.
As you can see, the method gets a configuration object in itself, in which there can be 2nd pairs of coordinates (x1, y1 and x2, y2), and the “colorStops” object. The coordinates indicate where the gradient starts and where it ends. colorStops indicate what colors it consists of. You can define as many colors as you like; the main thing is that their positions are in the range from 0 to 1 (for example, 0, 0.1, 0.3, 0.5, 0.75, 1). 0 represents the beginning of the gradient, 1 - its end.
Here is an example of a red and blue gradient going from left to right:
circle.setGradient('fill', { x1: 0, y1: circle.height / 2, x2: circle.width, y2: circle.height / 2, colorStops: { 0: "red", 1: "blue" } }); But the 5-step gradient-rainbow, with flowers occupying 20% of the entire length:
circle.setGradient('fill', { x1: 0, y1: circle.height / 2, x2: circle.width, y2: circle.height / 2, colorStops: { 0: "red", 0.2: "orange", 0.4: "yellow", 0.6: "green", 0.8: "blue", 1: "purple" } }); Can you think of something interesting?
Text
What if you need to display not only pictures and vector shapes on canvas, but also text? Fabric can do it too! Meet
fabric.Text .Before talking about the text, it is worth noting why we generally provide support for working with text. After all, canvas has built-in fillText and strokeText methods.
First, in order to be able to work with the text as with objects. Embedded canvas methods - as usual - allow you to display text at a very low level. But by creating an object of the type
fabric.Text , we can work with it as with any other object on the canvas - move it, scale it, change attributes, etc.The second reason is to have richer functionality than what canvas gives us. Some things that are in Fabric but not in native methods:
- Multiline Native methods allow you to write only one line, ignoring line transitions.
- Text alignment . Left, center, right. Useful when working with multi-line text.
- Background text . The background is displayed only under the text itself, depending on the alignment.
- Text decoration . Underline, overline, underline.
- Line height Useful when working with multi-line text.
Well, let's look at the omnipresent "hello world"?
var text = new fabric.Text('hello world', { left: 100, top: 100 }); canvas.add(text); That's all! To display the text, you just need to add an object of type
fabric.Text to the canvas, indicating the desired position. The first parameter is required - it is the actual text string itself. The second argument is the optional configuration, as usual; you can specify left, top, fill, opacity, etc.In addition to the usual attributes, text objects of course have their own, related to the text. Briefly, about these attributes:
fontFamily
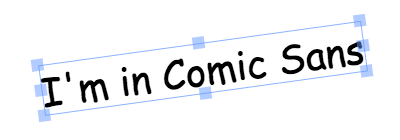
Default is Times New Roman. Allows you to change the font family for text.
var comicSansText = new fabric.Text("I'm in Comic Sans", { fontFamily: 'Comic Sans' }); fontSize
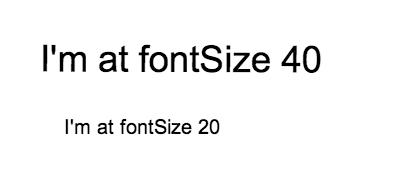
Controls text size. Notice that, unlike other objects in Fabric, we cannot resize text with width / height. Instead, fontSize is used, and of course scaleX / scaleY.
var text40 = new fabric.Text("I'm at fontSize 40", { fontSize: 40 }); var text20 = new fabric.Text("I'm at fontSize 20", { fontSize: 20 }); fontWeight
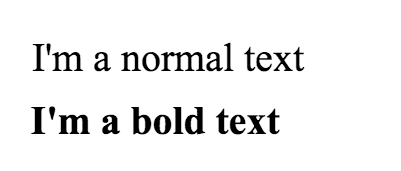
Allows you to make the text fatter or thinner. Just like in CSS, you can use either words (“normal”, “bold”) or number values (100, 200, 400, 600, 800). It is important to understand that for a certain thickness you need to have the appropriate font. If there is no “bold” (bold) option in the font, for example, the bold text may not be displayed.
var normalText = new fabric.Text("I'm a normal text", { fontWeight: 'normal' }); var boldText = new fabric.Text("I'm a bold text", { fontWeight: 'bold' }); textDecoration
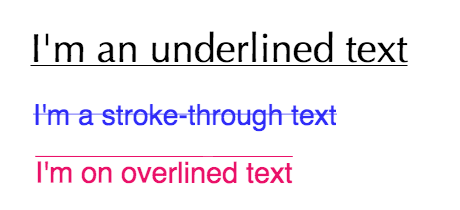
Allows you to add text strikethrough, overline, or underline. Again, this declaration works the same as in CSS. However, Fabric can even a little more, allowing you to use these decorations together (for example, underlining and strikethrough), simply listing them through the space.
var underlineText = new fabric.Text("I'm an underlined text", { textDecoration: 'underline' }); var strokeThroughText = new fabric.Text("I'm a stroke-through text", { textDecoration: 'line-through' }); var overlineText = new fabric.Text("I'm an overline text", { textDecoration: 'overline' }); shadow
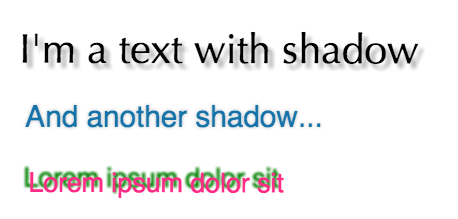
Shadow for text. It consists of 4 components: color, horizontal indent, vertical indent, and blur size. This should all be familiar if you’ve previously worked with shadows in CSS. Changing these 4 options, you can achieve many interesting effects.
var shadowText1 = new fabric.Text("I'm a text with shadow", { shadow: 'rgba(0,0,0,0.3) 5px 5px 5px' }); var shadowText2 = new fabric.Text("And another shadow", { shadow: 'rgba(0,0,0,0.2) 0 0 5px' }); var shadowText3 = new fabric.Text("Lorem ipsum dolor sit", { shadow: 'green -5px -5px 3px' }); fontStyle
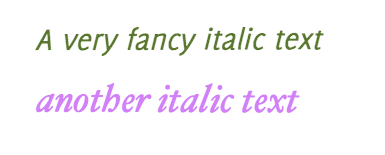
Text style There can be only one of two things: “normal” or “italic”. Again, it works the same as in CSS.
var italicText = new fabric.Text("A very fancy italic text", { fontStyle: 'italic', fontFamily: 'Delicious' }); var anotherItalicText = new fabric.Text("another italic text", { fontStyle: 'italic', fontFamily: 'Hoefler Text' }); stroke and strokeWidth
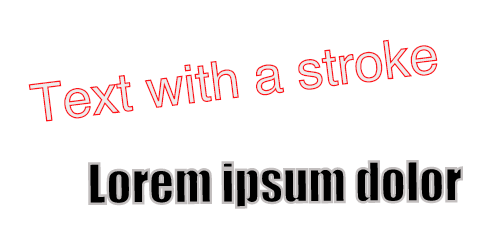
By combining stroke (the color of the outer stroke) and strokeWidth (the width of the outer stroke), you can achieve quite interesting effects. Here are a couple of examples:
var textWithStroke = new fabric.Text("Text with a stroke", { stroke: '#ff1318', strokeWidth: 1 }); var loremIpsumDolor = new fabric.Text("Lorem ipsum dolor", { fontFamily: 'Impact', stroke: '#c3bfbf', strokeWidth: 3 }); textAlign
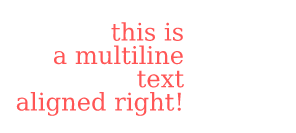
Alignment is useful when working with multiline text. In a single-line text, the alignment is not visible, because the width of the text object itself is the same as the length of the line.
Possible values: "left", "center", "right", and "justify"
var text = 'this is\na multiline\ntext\naligned right!'; var alignedRightText = new fabric.Text(text, { textAlign: 'right' }); lineHeight
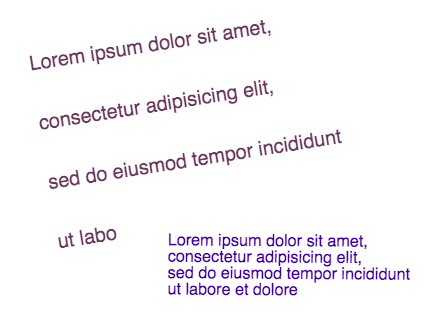
Another attribute most likely familiar from CSS is lineHeight (line height). Allows you to change the spacing between lines in multi-line text. Here is an example of text with lineHeight 3, and the second with lineHeight 1.
var lineHeight3 = new fabric.Text('Lorem ipsum ...', { lineHeight: 3 }); var lineHeight1 = new fabric.Text('Lorem ipsum ...', { lineHeight: 1 }); textBackgroundColor
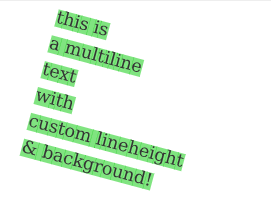
Finally, you can give the text a background using textBackgroundColor. Note that the background is filled only under the text itself, and not on the whole "box". To paint over the entire text object, you can use the “backgroundColor” attribute. You can also see that the background depends on the text alignment and lineHeight. If the lineHeight is very large, the background will be visible only under the text.
var text = 'this is\na multiline\ntext\nwith\ncustom lineheight\n&background'; var textWithBackground = new fabric.Text(text, { textBackgroundColor: 'rgb(0,200,0)' }); Developments
Events are an indispensable tool for creating complex applications. For ease of use, and more detailed settings, Fabric has an extensive event system; ranging from low-level mouse events to high-level object events.
Events allow us to “catch” different moments when something happens on the canvas. Want to know when the mouse was pressed? We follow the event "mouse: down". How about when the object was added to the canvas? For this there is an “object: added”. Well, what about redrawing the canvas? Use "after: render".
The event API is very simple, and is similar to what you are most likely used to in jQuery, Underscore.js, or other popular JS libraries. There is an
on method for initializing an event listener, and there is an off method for deleting it.Let's look at an example:
var canvas = new fabric.Canvas('...'); canvas.on('mouse:down', function(options) { console.log(options.e.clientX, options.e.clientY); }); We added a listener for the “mouse: down” event on the canvas object, and specified a handler that will record the coordinates where this event occurred. Thus, we can see exactly where the click on the canvas. The event handler receives an options object, with two parameters:
e - the original event, and the target - Fabric object on the canvas, if it is found. The first parameter is always present, but target only if the click occurred on the object. And of course, target passed only to the developers of those events where it makes sense. For example, for “mouse: down” but not for “after: render” (since this event does not “have” any objects, but simply indicates that the canvas was redrawn). canvas.on('mouse:down', function(options) { if (options.target) { console.log('an object was clicked! ', options.target.type); } }); This example will output “an object was clicked!” If we click on an object. Also the type of this object will appear.
What other events are available in Fabric? At the mouse level, we have " mouse: down ", " mouse: move ", and " mouse: up ". In general, there is an " after: render ". There are events related to the selection of objects: " before: selection: cleared ", " selection: created ", " selection: cleared ". And of course, object events: " object: modified ", " object: selected ", " object: moving ", " object: scaling ", " object: rotating ", and " object: added ".
It is worth noting that events of the type “object: moving” (or “object: scaling”) occur constantly, while the object is moving or scaling, even if by one pixel. At the same time, events like “object: modified” or “selection: created” occur only at the end of the action (object change, creating a group of objects, etc.).
In the previous examples, we attached a listener to a canvas object (
canvas.on('mouse:down', ...) ). As you probably guess, this means that events apply only to the canvas to which we attached them. If you have several canvases on a page, you can give them different listeners. Events on one canvas do not apply to other canvases.For convenience, Fabric allows you to add listeners directly to Fabric objects!
var rect = new fabric.Rect({ width: 100, height: 50, fill: 'green' }); rect.on('selected', function() { console.log('selected a rectangle'); }); var circle = new fabric.Circle({ radius: 75, fill: 'blue' }); circle.on('selected', function() { console.log('selected a circle'); }); In this example, listeners “join” straight to the rectangle and circle. Instead of "object: selected", we use the "selected" event. By the same principle, you can use the event “modified” (“object: modified” when “hanging” on the canvas), “rotating” (analogous to “object: rotating”), etc.
You can get acquainted with the events closer and right in real time in this demo .
At this the second part came to an end. So much for everything new, but that's not all! In the third part, we will consider the groups of objects, the serialization / deserialization of the canvas and the JSON format, the SVG parser, and the creation of subclasses.
Source: https://habr.com/ru/post/167119/
All Articles