[Translation] Introduction to CocosBuilder
Translation of the article Introduction to CocosBuilder .
The author of the original article, Ali Khafiji , a developer for iOS and Android.
CocosBuilder is a free tool that allows you to quickly and easily manage sprites, layouts and scenes when developing your game using Cocos2D.
')
CocosBuilder is ideal for quick planning of menus and other interface elements of game scenes, while you will not have problems with their layout in space.
During the training, you write the game Cat Jump. You will see how CocosBuilder will save you a lot of time and code.
Before CocosBuilder appeared, creating even the basic interface in a Cocos2D game was a headache for the developer. To add a menu or button to a game, you usually did something like this:
- Attempt to guess. “Mmm ... I think this button should be around 50 to 50.”
- Application launch. “Yeah, not really ...”
- Another attempt. “I think 60 to 50 will be better!”
- Check and everything is new. “Damn, it's still not that. Grrr! ”
CocosBuilder eliminates how all the mass iterations on setting up and testing the position of the sprite. CocosBuilder frees up time for you to focus on the logic of the game, rather than tearing your hair out, punching through your interface, which makes you a more productive developer - and that’s always good, isn't it?
This beginner's guide will show you how to use CocosBuilder to create simple interfaces. In CocosBuilder, you will learn how to create menus, buttons, particle systems, layers, and connect interfaces.
During the training, you will write a Cat Jump game, originally developed for the Cocos2D via Minigames seminar . Of course, this time there will be much less coding. You will see how CocosBuilder will save you a lot of time and code.
This guide assumes that you have a basic knowledge of Cocos2D. If you are new to Cocos2D, read Cocos2D first.
Cat Jump Game
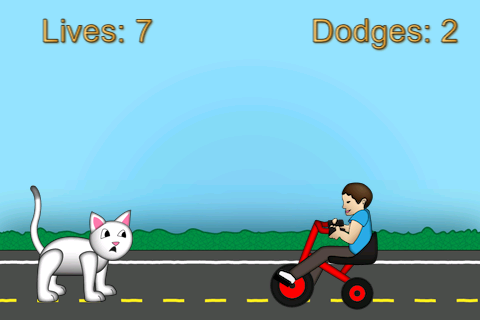
Cat Jump is a game about a cat that has a bad day. He just walks about his business, walks down the street when suddenly everything stumbles across it - cars, trucks, and even children on bicycles!
The screen shot of the game you saw at the beginning of this guide.
Your poor cat has a limited number of lives (of course 9), and your goal is to stay alive as long as possible while avoiding trouble.
To get started, download the CatJump version without CocosBuilder . Open it in Xcode, run it and play for a while - it's a lot of fun!
After you play, take a look at the code - you will see tons, set right in the code, the offsets and positions of the menu, text elements and sprites. It was very hard to write all this - you will learn about the way to make it better!
During training, you remake the Cat Jump game by completing the following tasks:
- Redo the main menu using CocosBuilder. Now the main menu is done by placing the menu items in hard-coded coordinates - you delete this code and redo the menu using CocosBuilder.
- Add screen options. You will add a new screen with three buttons for choosing the difficulty level: Easy, Medium and Hard. The choice of the complexity option will cause a selector in the program code.
- Add an About screen. You will also add a screen with a description of the program and a demonstration of a cool graphic effect. Using CocosBuilder, you do not write a single line of code to do it!
- Redo the main game screen using CocosBuilder. You remove the manual placement of the sprites and use CocosBuilder instead.
- Redo the end game screen using CocosBuilder. Again, no hard-coded offsets!
Finally, you will get helpful tips on how to find and fix common errors in CocosBuilder. You will learn about it now and save your time later.
Getting Started with CocosBuilder
If you have not done so already, download CocosBuilder . Make sure to download the latest version, which at the time of this writing is 2.1. Also download sample files.

Unpack CocosBuilder from the downloaded archive and copy it into the Programs folder.
Before you create a new project in CocosBuilder, you must create a directory for your project. This is the place where you will store all game resources / assets.
Note : You can also use resource references in your project, but using the directory structure with the resources stored there is more convenient, as this allows me to know exactly where all my files and helps to keep my resources organized.
Create a new folder on your desktop and name it CocosBuilderFiles . Then create two subfolders in this folder and name them Resources and Scenes .

The Resources folder will obviously contain all the resources for the game (sprites, fonts, etc.). If you want, you can copy all the resources from the Cat Jump project that you downloaded earlier, but to make it even easier, I created a ZIP file with everything you need. Download, unpack and copy its contents into the Resources folder.
Launch CocosBuilder and select the File \ New \ New Project menu item. Name the project CatJump and save it in the CocosBuilderFiles folder.
Now that you have created the project, you will see the resource folders and scenes in the project sidebar on the left side of CocosBuilder. Also note that CocosBuilder automatically created a new folder called ccbResources . In the same place you will see a new file with the name HelloCocosBuilder.ccb . Double click on the file to see its contents.
This is a very simple layer labeled “Hello CocosBuilder”:

Don't worry, your CatJump game will be a bit more complicated than that.
Look, mom, there's no code at all!
Let's start the remake of CatJump by creating the main menu of the game. This scene will have three buttons:
- Play - So the game starts!
- Options - Show the scene with the parameters where users can choose the level of difficulty of the game.
- About - Show the scene where there will be information about how to play the game.
And the first thing you need to do is delete the HelloCocosBuilder.ccb file, since this is just a template file created by CocosBuilder.
Note: You might think that it is simple enough to remove an unused scene file from the project, but I was not able to do it directly from CocosBuilder. I had to close CocosBuilder, remove HelloCocosBuilder.ccb from Finder, and then run the project in CocosBuilder again. If someone knows an easier way to do this, please post on the forum!
Then select the menu item File \ New \ New File. In the window that appears, make sure that CCLayer is selected in the Root object type field and tick the following permission types: iPhone Landscape and iPhone 5 Landscape .

Click the Create button, enter the file name MainMenuScene and save it in the Scenes folder.
The project panel should look something like this:

Well, you created your first scene! Now, how about adding multiple sprites?
Click on the CCSprite button on the toolbar. Hint: The button is circled in the image below.

So you add a new sprite to the scene.
Select the created sprite and set it as a frame for the file Title_catjump.png . To do this, use the right sidebar on which the properties of the selected item appear. In the CCSprite section of the Sprite frame field, in the drop-down menu, select the file Title_catjump.png in the Resources \ Normal folder.

Then, put the sprite in the center of the scene, simply dragging it to the center. Or, if you prefer to be precise, then you can set the Anchor Point property (in the CCNode section) to 0 for the X and Y values.
Please note that this will only work if your Position field is set to the value of the lower left corner. If you change the value of this field, then you must change the values of X and Y accordingly. Have fun - see what happens when you put different values.
Fine! You now have a background image. The next thing to do is add buttons for menu items.
Click the CCControlButton toolbar to create a new button on the screen.

A new button is created with a nice background image that you can find in the ccbResources folder created by CocosBuilder. Give this button a Play name using the CCControlButton section on the right sidebar, the Title field.

Adjust the position of the button. You can place it anywhere just by dragging it or set an absolute position using the properties on the right side panel.
Okay, we need more buttons! Repeat the above procedure to add two more. Name the second button Options, third - About. Your final layout should look like the one shown in the image below:

Hurray, the layout of the first scene is complete!
Connect layer to class
Before proceeding, you need to make some adjustments. If you create a scene using a layer created in CocosBuilder, and if this layer is a scene of a custom class, then you should say CocosBuilder the name of this class.
For example, if you initialize a scene using the MainMenuScene file and you want its layer to be the class you created, then you need to specify the name of this class in the Code Connections section.
Select the MainMenuScene.ccb file and select the CCLayer root node on the timeline.
In the Code Connections section, in the Custom class field, write the name of your MainMenuLayer class. Now, when you initialize this scene, CocosBuilder will look for a class named MainMenuLayer and use it to create an instance of the scene layer.

Next you need to publish the CocosBuilder interface file. To do this, simply select the menu item File \ Publish. This will create a new file named MainMenuScene.ccbi in the Scenes directory.
Stop messing with CocosBuilder - now is the time to try it all out in Xcode!
Time to write code!
First, make sure you have the latest version of Cocos2D 2.X installed (2.1-beta4 at the time of writing this tutorial).
Then launch Xcode and create a new project with the iOS \ cocos2d v2.x \ cocos2d template. Enter CatJump in the Product Name field, fill in the Company Identifier field as usual, and select iPhone in the Device Family field:

Complete the project creation and save it somewhere on your disk.
Then, at the root of the project, create a new group Scenes, and drag the file MainMenuScene.ccb that you made before. Make sure that there is a tick next to the “Copy items to destination group's folder (if needed)” item and a tick box next to CatJump in the “Add to targets” section.
Now you need to add a CCBReader to your project. CCBReader comes with sample files that you downloaded earlier from CocosBuilder. Unzip the sample files (if you haven’t already done this) to a folder on your hard drive. Find the CCBReader folder in the Add to Your Project \ cocos2d-iphone folder.
Drag the entire CCBReader folder into your project. Make sure that the “Create groups for any added folders” option is selected and that the “Copy items into destination group's folder” option is checked. Do the same with the CCControlExtension folder.
Next, create a new group in your project and name it Layers . Create a new file with the template iOS \ cocos2d v2.x \ CCNode. Subclass it to CCLayer and name it MainMenuLayer.m .
Before writing code, open AppDelegate.m and add the following import statement (immediately after the #import statements in the file):
#import "CCBReader.h" Then find the application: didFinishLaunchingWithOptions: procedure, and in it the following line:
[director_ pushScene: [IntroLayer scene]]; Once you find it, replace it with this:
[director_ pushScene: [CCBReader sceneWithNodeGraphFromFile:@"MainMenuScene.ccbi"]]; And that's all you need to do in the code, in order to run scenes created with CocosBuilder! The CCBReader class will parse the MainMenuScene.ccbi file and create the scene itself!
But before you start the program, you need to take one last step. Remember that background image that you added to your scene and images of buttons from the ccbResources folder in your CocosBuilder project folder?
These images are not in the project, and we need them in order for the program to work normally. Otherwise, the application will cause an error. (Actually, you can check it right now by trying to start the program ...)
Take all the files from your CocosBuilder project's resources folder and drag them into your Xcode project's resources folder. Do the same with all files in the ccbResources folder. As before, make sure that there is a check mark next to the item “Copy items into destination group's folder”, that the option “Create groups for any added folders” is selected and that there is a check mark next to our CatJump project.

Now run the program. If you received an error message while compiling CCBReader.m, replace the line with the error with the following:
return [_bundle pathForResource:resource ofType:ext inDirectory:subpath]; Run the program, you will see the main menu with three buttons, as shown below:

Developments
Congratulations, you now have a working layout created in CocosBuilder, with just one line of code! :)
But how to get the event that the user clicked on one of these buttons?
CocosBuilder to cope with this task is very simple! It allows you to specify the name of the method to be called if the user clicks the button. You can also specify an event for which this method will be triggered (using a set of parameters).
Let's add this functionality to MainMenuScene. Open MainMenuScene.ccb in CocosBuilder and select the Play button. In the right pane, in the CCNode section, change the Tag property to 1.
Then, in the CCControl section, fill in the Selector text box with the name of the buttonPressed: method to be called. Also ensure that the Target field contains the Document root value.

Do the same for the other two buttons, but with different tags - for Options - the Tag field will be 2, for About - 3.
Amazing You linked button presses to the selector provided in CCLayer. Save the changes, publish MainMenuScene.ccb, and copy the published file into the Xcode project folder.
Note : You do not need to drag the file to the Xcode project as before, since the file already exists in the project. So either delete the file from the project and then drag it back into the project, or copy the new file from the CocosBuilderFiles folder to the folder with the files of your Xcode project using Finder.
Now open MainMenuLayer.m in Xcode and add the following import statements there:
#import "CCControlButton.h" #import "CCBReader.h" In addition, add the following #define operators with constants immediately below the #import operators. They describe the tags of the buttons that you put on the scene:
#define PLAY_BUTTON_TAG 1 #define OPTIONS_BUTTON_TAG 2 #define ABOUT_BUTTON_TAG 3 How about the buttonPressed: method? Add it to MainMenuLayer.m:
-(void)buttonPressed:(id)sender { CCControlButton *button = (CCControlButton*) sender; switch (button.tag) { case PLAY_BUTTON_TAG: [[CCDirector sharedDirector] replaceScene:[CCTransitionCrossFade transitionWithDuration:1.0 scene:[CCBReader sceneWithNodeGraphFromFile:@"GameScene.ccbi"]]]; break; case OPTIONS_BUTTON_TAG: [[CCDirector sharedDirector] replaceScene:[CCTransitionFlipAngular transitionWithDuration:1.0 scene:[CCBReader sceneWithNodeGraphFromFile:@"OptionsScene.ccbi"]]]; break; case ABOUT_BUTTON_TAG: [[CCDirector sharedDirector] replaceScene:[CCTransitionCrossFade transitionWithDuration:1.0 scene:[CCBReader sceneWithNodeGraphFromFile:@"AboutScene.ccbi"]]]; break; } } In this method, everything should be clear: here, pressing each button is processed separately. For example, when you click the About button, the scene is AboutScene.ccbi.
Run the game. You should now have a fully functional main menu.
Awesome, you just created your first scene, and you barely wrote any code.
Of course, you noticed that the code for buttonPressed: is associated with CCBI files that you haven’t done yet. Therefore, if you click on any of the buttons in the menu, the program will generate an error, since these scenes are not yet in place.
This is what you are going to do next - fill in the blanks!
There is nothing difficult!
As in the main menu, there will be three buttons in the difficulty selection scene, and creating this scene will be just as easy.
In the Options scene, pressing the buttons will allow the user to select Easy, Medium or Hard difficulty levels. There will also be a button to return to the main menu.
Open CocosBuilder and create a new scene by selecting the File \ New \ New File menu item (follow the same steps as creating MainMenuScene), name it OptionsScene and save it in the Scenes folder.
Add three buttons to the scene and give them the names Easy, Medium and Hard. Then tag them with values 1, 2 and 3, respectively.
To receive events when the user clicks on the buttons, you must specify the method that will be invoked. Just as you did with MainMenuScene, write for each of the buttons in the Selector field the difficultyButtonPressed value : and in the Target field, select the Document Root value.
Note : I wonder what this Document Root means? This means the root node in the “Default Timeline” timeline tree. Soon you will install a custom class - OptionsLayer to the root node (CCLayer). This means that the OptionsLayer class will act as the Document Root.
Your layout will look like this:

Now back to the main menu button. This time, instead of adding CCControlButton, you need to add the CCMenu menu item.
Click the CCMenu button on the toolbar.

This will create a CCMenu menu and add it to the OptionsScene layer. Now add the CCMenuItemImage menu item by clicking the CCMenuItemImage button on the toolbar.

Specify different sprites in the Normal and Selected fields, for each - btn-back-0.png and btn-back-1.png . These properties can be changed in the CCMenuItemImage section of the panel on the right.

Insert the “Back” button in the upper left corner of the scene and set the backButtonPressed: selector for it. Remember to select Document root in the Target field.
That's all! The scene should look like this:

Just as you did with MainMenuScene before, add a custom class for OptionsScene. Call it OptionsLayer .

As before, save the changes, publish the scene, and add the CCBI file to the Xcode project.
Go to Xcode, create a new class in the Layers group and name it OptionsLayer (make sure it is a subclass of the CCLayer class), just like you did before.
Then add the following import statements and definitions to the top of OptionsLayer.m:
#import "CCBReader.h" #import "CCControlButton.h" #define DIFFICULTY_EASY_BUTTON_TAG 1 #define DIFFICULTY_MEDIUM_BUTTON_TAG 2 #define DIFFICULTY_HARD_BUTTON_TAG 3 And also the following methods:
-(void)backButtonPressed:(id)sender { [[CCDirector sharedDirector] replaceScene:[CCTransitionFlipAngular transitionWithDuration:1.0 scene:[CCBReader sceneWithNodeGraphFromFile:@"MainMenuScene.ccbi"]]]; } -(void)difficultyButtonPressed:(id)sender { CCControlButton *button = (CCControlButton*) sender; NSString *difficultyLevel = @"Hard"; if (button.tag == DIFFICULTY_EASY_BUTTON_TAG) { difficultyLevel = @"Easy"; } else if(button.tag == DIFFICULTY_MEDIUM_BUTTON_TAG) { difficultyLevel = @"Medium"; } NSLog(@"Difficulty is set to %@", difficultyLevel); } All this should be familiar to you. The procedure backButtonPressed: returns the user back to the main scene menu.
The procedure difficultyButtonPressed: in its current form does not establish the level of complexity, but only writes to the log the fact of the user's choice. Feel free to choose a high level of complexity, nothing changes.
Start the game, now you have two fully functional scenes. You are already halfway to the full game interface!
It was the turn of ... fire!
About scenes are needed to provide users with additional information about your program - how to play or use the application, who made it, version number, and so on.
Your About scene will be special: it will be a burning hell! This is not only to look cool, but also to understand how to add a particle system (for example, a special effect) using CocosBuilder.
Switch to CocosBuilder, create a new file called AboutScene and save it in the Scenes directory.
Get started with your layout by clicking the CCParticleSystemQuad button on the toolbar.

So you create a fiery particle system. Select a particle system and change the Particle texture property to cat_leap_1.png . Play around with the CCParticleSystemQuad parameter until you are happy with the result. Then slide the particle system to the lower right corner of the screen, as shown below:

Now you need to add some text. Add CCLabelBMFont by clicking the following button on the toolbar:

In the font properties, select Arial.fnt (from the Resources folder). Then add two more text elements, one below the other, also specify the same font.
Break the text of the following content - Help the cat jump over all the obstacles trying to run him over - between the three text elements. There are no nuances here anymore.
Now, the About scene will look like this:

You are almost done with this scene! All that's left is the Back button.
Add the Back button to the upper left corner, as you did before. As a selector, write backButtonPressed:, in the Target field - Document root.
The final step is to add a custom class for this scene, as well as for the two previous scenes. The name of the custom class is AboutLayer , as shown below:

As before, save the changes, publish the scene, and add it to the Xcode project. Then go to Xcode and create a new Cocos2D class in the Layers group. Call it AboutLayer and make sure it is a subclass of the CCLayer class.
Open AboutLayer.m and add the following import statement:
#import "CCBReader.h" And also this method:
-(void)backButtonPressed:(id)sender { [[CCDirector sharedDirector] replaceScene:[CCTransitionFlipAngular transitionWithDuration:1.0 scene:[CCBReader sceneWithNodeGraphFromFile:@"MainMenuScene.ccbi"]]]; } The method will be called when the user presses the Back button (green arrow) and the method replaces the current scene with the MainMenu scene.
Run the game. Check: clicking the About button displays the AboutScene scene, and the Back button takes you back to the main menu. Not bad for a few minutes of your time, eh?
In Game!
Finally, it is time to put into play our star - a cat who will have a hard day! All you have to do is put all the sprites you need to play in the right places, and you will do this without tinkering with the code. So let's get started!
Go to CocosBuilder and create a new file. Name it GameScene and save it in the Scenes folder.
Then click the CCSprite button on the toolbar to create a new sprite. Set the frame of this sprite to bg.png and put it in the center of the screen. Your scene should look like the one below:

Now add the main character of the game - the cat! Add another sprite to the layer by clicking the CCSprite button again. In the Frame field of the sprite, select cat_stand_1.png and coordinates X: 75, Y: 75.
In addition, we add two CCLabelBMFonts elements. They will show the number of lives of the cat, and the number of jumps made.
Press the CCLabelBMFont button two times and in the resulting elements enter the text Lives: and Dodges:. With these elements, become the font Arial.fnt . Place the resulting text elements in the upper left and right corners of the screen, as shown below:

Fine! All is ready.
Or not everything? Sprites you posted, but you have no way to refer to them in the code. For example, how would you manipulate a cat in the logic of the game? Do not break your head - with CocosBuilder it's easy.
Let's start with our hero, a cat. Select the cat sprite and in the right pane, in the Code Connections section, you will see the drop-down menu below the Custom class fields.
In this menu (the value Don’t assign is now selected there) select the value Doc root var and in the adjacent text field write the variable name cat . So we linked the variable "cat" with a link to this sprite. The value "Doc root var" means that this variable will be present in the root document, in our case - the layer class.

Now repeat the same for text elements and associate them with the variables livesLabel and dodgesLabel .
Guess what will happen next? Just like the previous scenes, this scene requires communication with the layer class. Link this scene to the GameLayer class, as shown below:

Save the changes, publish the scene, and add the CCBI file to the project. Go to Xcode and create a new class in the Layers group, calling it GameLayer and making sure it is a subclass of CCLayer.
It is time to describe the game logic. But since this is a guide to working with CocosBuilder (and not on building the logic of the game), just replace GameLayer.m with this long block of code:
the contents of the GameLayer.m file
#import "GameLayer.h" #import "CCBReader.h" #import "SimpleAudioEngine.h" #define kVehicleTypeNone -1 #define kVehicleTypeRedCar 0 #define kVehicleTypeYellowCar 1 #define kVehicleTypeDog 2 #define kVehicleTypeKid 3 @interface GameLayer() { CCLabelBMFont *livesLabel; CCLabelBMFont *dodgesLabel; CCSprite *cat; CCNode *_vehicles; BOOL _invincible; BOOL _jumping; double _nextSpawn; int _lives; int _dodges; CCSpriteBatchNode *_catJumpBatchNode; CCAnimation *_catJumpAnimation; } @end @implementation GameLayer - (id) init { self = [super init]; if (self) { [[CCSpriteFrameCache sharedSpriteFrameCache] addSpriteFramesWithFile:@"CatJumpAtlas.plist"]; _catJumpBatchNode = [CCSpriteBatchNode batchNodeWithFile:@"CatJumpAtlas.png"]; [self addChild:_catJumpBatchNode z:1]; _catJumpAnimation = [CCAnimation animation]; [_catJumpAnimation addSpriteFrame:[[CCSpriteFrameCache sharedSpriteFrameCache] spriteFrameByName:@"cat_leap_1.png"]]; [_catJumpAnimation addSpriteFrame:[[CCSpriteFrameCache sharedSpriteFrameCache] spriteFrameByName:@"cat_leap_2.png"]]; [_catJumpAnimation setDelayPerUnit:0.625f]; [_catJumpAnimation retain]; // If you want to add this to the AnimationCache instead of retaining //[[CCAnimationCache sharedAnimationCache] addAnimation:catJumpAnimation name:@"catJumpAnim"]; // Dog Animation CCAnimation *dogAnimation = [CCAnimation animation]; [dogAnimation addSpriteFrame:[[CCSpriteFrameCache sharedSpriteFrameCache] spriteFrameByName:@"dog_1.png"]]; [dogAnimation addSpriteFrame:[[CCSpriteFrameCache sharedSpriteFrameCache] spriteFrameByName:@"dog_2.png"]]; [dogAnimation addSpriteFrame:[[CCSpriteFrameCache sharedSpriteFrameCache] spriteFrameByName:@"dog_3.png"]]; [dogAnimation addSpriteFrame:[[CCSpriteFrameCache sharedSpriteFrameCache] spriteFrameByName:@"dog_4.png"]]; [[CCAnimationCache sharedAnimationCache] addAnimation:dogAnimation name:@"dogAnimation"]; // Kid Animation CCAnimation *kidAnimation = [CCAnimation animation]; [kidAnimation addSpriteFrame:[[CCSpriteFrameCache sharedSpriteFrameCache] spriteFrameByName:@"kidontrike_1.png"]]; [kidAnimation addSpriteFrame:[[CCSpriteFrameCache sharedSpriteFrameCache] spriteFrameByName:@"kidontrike_2.png"]]; [kidAnimation addSpriteFrame:[[CCSpriteFrameCache sharedSpriteFrameCache] spriteFrameByName:@"kidontrike_3.png"]]; [kidAnimation addSpriteFrame:[[CCSpriteFrameCache sharedSpriteFrameCache] spriteFrameByName:@"kidontrike_4.png"]]; [[CCAnimationCache sharedAnimationCache] addAnimation:kidAnimation name:@"kidAnimation"]; self.isTouchEnabled = YES; [self scheduleUpdate]; _vehicles = [CCNode node]; [self addChild:_vehicles]; _lives = 9; _dodges = 0; double curTime = [[NSDate date] timeIntervalSince1970]; _nextSpawn = curTime + 4; } return self; } - (void) didLoadFromCCB { [self setLives:_lives]; [self setDodges:_dodges]; } - (void) setDodges:(int) noOfDodges { dodgesLabel.string = [NSString stringWithFormat:@"Dodges:%d", noOfDodges]; } - (void) setLives:(int) noOfLives { livesLabel.string = [NSString stringWithFormat:@"Lives:%d", noOfLives]; } - (void)carDone:(id)sender { CCSprite *vehicle = (CCSprite *)sender; [vehicle removeFromParentAndCleanup:YES]; _dodges++; [self setDodges:_dodges]; } - (void)doneInvincible { _invincible = FALSE; } - (void)update:(ccTime)dt { CGSize winSize = [CCDirector sharedDirector].winSize; CCSprite *vehicleSprite; // Spawn Vehicles (new) double curTime = [[NSDate date] timeIntervalSince1970]; if (curTime > _nextSpawn) { int randomVehicle = arc4random() % 4; if (randomVehicle == kVehicleTypeRedCar) { // Red Car vehicleSprite = [CCSprite spriteWithSpriteFrame:[[CCSpriteFrameCache sharedSpriteFrameCache] spriteFrameByName:@"car1_1.png"]]; [vehicleSprite setUserData:[NSNumber numberWithInt:kVehicleTypeRedCar]]; CCSprite *wheel1 = [CCSprite spriteWithSpriteFrame:[[CCSpriteFrameCache sharedSpriteFrameCache] spriteFrameByName:@"car1_tire.png"]]; CCSprite *wheel2 = [CCSprite spriteWithSpriteFrame:[[CCSpriteFrameCache sharedSpriteFrameCache] spriteFrameByName:@"car1_tire.png"]]; id tireRotateAction1 = [CCRotateBy actionWithDuration:1.0f angle:360.0f]; // Ray, these are backwards on purpose as a lab exercise. id tireRotateAction2 = [CCRotateBy actionWithDuration:1.0f angle:360.0f]; [wheel1 runAction:[CCRepeatForever actionWithAction:tireRotateAction1]]; [wheel2 runAction:[CCRepeatForever actionWithAction:tireRotateAction2]]; [vehicleSprite addChild:wheel1]; [vehicleSprite addChild:wheel2]; [wheel1 setPosition:ccp(65,18)]; [wheel2 setPosition:ccp(212,18)]; } else if (randomVehicle == kVehicleTypeYellowCar) { // Yellow Car (Same code as Red Car except for wheel placement, re-listed for clarity. Consilidate in your own games) vehicleSprite = [CCSprite spriteWithSpriteFrame:[[CCSpriteFrameCache sharedSpriteFrameCache] spriteFrameByName:@"car2_1.png"]]; [vehicleSprite setUserData:[NSNumber numberWithInt:kVehicleTypeYellowCar]]; CCSprite *wheel1 = [CCSprite spriteWithSpriteFrame:[[CCSpriteFrameCache sharedSpriteFrameCache] spriteFrameByName:@"car2_tire.png"]]; CCSprite *wheel2 = [CCSprite spriteWithSpriteFrame:[[CCSpriteFrameCache sharedSpriteFrameCache] spriteFrameByName:@"car2_tire.png"]]; id tireRotateAction1 = [CCRotateBy actionWithDuration:1.0f angle:-360.0f]; id tireRotateAction2 = [CCRotateBy actionWithDuration:1.0f angle:-360.0f]; [wheel1 runAction:[CCRepeatForever actionWithAction:tireRotateAction1]]; [wheel2 runAction:[CCRepeatForever actionWithAction:tireRotateAction2]]; [vehicleSprite addChild:wheel1]; [vehicleSprite addChild:wheel2]; [wheel1 setPosition:ccp(62,15)]; [wheel2 setPosition:ccp(195,15)]; } else if (randomVehicle == kVehicleTypeDog) { // Dog vehicleSprite = [CCSprite spriteWithSpriteFrame:[[CCSpriteFrameCache sharedSpriteFrameCache] spriteFrameByName:@"dog_1.png"]]; [vehicleSprite setUserData:[NSNumber numberWithInt:kVehicleTypeDog]]; // In your code, check that the animationByName did not return nil (due to memory warnings) CCAnimation *vehicleAnimation = [[CCAnimationCache sharedAnimationCache] animationByName:@"dogAnimation"]; vehicleAnimation.restoreOriginalFrame = NO; vehicleAnimation.delayPerUnit = 0.5f/ vehicleAnimation.frames.count; id animationAction = [CCAnimate actionWithAnimation:vehicleAnimation]; [vehicleSprite runAction:[CCRepeatForever actionWithAction:animationAction]]; } else { // Kid on Bike (Same code as Dog, re-listed for clarity. Consilidate in your own games) vehicleSprite = [CCSprite spriteWithSpriteFrame:[[CCSpriteFrameCache sharedSpriteFrameCache] spriteFrameByName:@"kidontrike_1.png"]]; [vehicleSprite setUserData:[NSNumber numberWithInt:kVehicleTypeKid]]; // In your code, check that the animationByName did not return nil (due to memory warnings) CCAnimation *vehicleAnimation = [[CCAnimationCache sharedAnimationCache] animationByName:@"kidAnimation"]; vehicleAnimation.restoreOriginalFrame = NO; vehicleAnimation.delayPerUnit = 0.5f/ vehicleAnimation.frames.count; id animationAction = [CCAnimate actionWithAnimation:vehicleAnimation]; [vehicleSprite runAction:[CCRepeatForever actionWithAction:animationAction]]; } // Common placement and movement code for all vehicles vehicleSprite.position = ccp(winSize.width + vehicleSprite.contentSize.width/2, 75); [_catJumpBatchNode addChild:vehicleSprite]; [vehicleSprite runAction:[CCSequence actions: [CCMoveBy actionWithDuration:1.25 position:ccp(-winSize.width-vehicleSprite.contentSize.width, 0)], [CCCallFuncN actionWithTarget:self selector:@selector(carDone:)], nil]]; float randomInterval = arc4random() % 3 + 1.5; _nextSpawn = curTime + randomInterval; } // Check for collisions if (!_invincible) { float insetAmtX = 10; float insetAmtY = 10; BOOL isCatColliding; CGRect catRect = CGRectInset(cat.boundingBox, insetAmtX, insetAmtY); CGRect vehicleRect; for (CCSprite *vehicle in _catJumpBatchNode.children) { if ([vehicle tag] == 1) { continue; // No need to check if the Cat collides with itself } isCatColliding = NO; NSNumber *vehicleTypeNumber = (NSNumber*)[vehicle userData]; int vehicleType = [vehicleTypeNumber intValue]; if (vehicleType == kVehicleTypeRedCar) { CGPoint boundingBoxOrigin = vehicle.boundingBox.origin; CGRect carHood = CGRectMake(boundingBoxOrigin.x+10,boundingBoxOrigin.y , 40,80); insetAmtX = 50; insetAmtY = 10; vehicleRect = CGRectInset(vehicle.boundingBox,insetAmtX,insetAmtY); if ((CGRectIntersectsRect(catRect,carHood)) || (CGRectIntersectsRect(catRect, vehicleRect))) { isCatColliding = YES; CCLOG(@"Collided with Red Car"); } } else if (vehicleType == kVehicleTypeYellowCar) { CGPoint boundingBoxOrigin = vehicle.boundingBox.origin; CGRect carHood = CGRectMake(boundingBoxOrigin.x+10,boundingBoxOrigin.y , 68,65); insetAmtX = 68; insetAmtY = 10; vehicleRect = CGRectInset(vehicle.boundingBox,insetAmtX,insetAmtY); if ((CGRectIntersectsRect(catRect,carHood)) || (CGRectIntersectsRect(catRect, vehicleRect))) { isCatColliding = YES; CCLOG(@"Collided with Yellow Car"); } } else { // Dog or Kid CGRect vehicleRect = CGRectInset(vehicle.boundingBox, insetAmtX, insetAmtY); if (CGRectIntersectsRect(catRect, vehicleRect)) { isCatColliding = YES; } } if (isCatColliding == YES) { // Play sound, take a hit, invincible, break out of the loop [[SimpleAudioEngine sharedEngine] playEffect:@"squish.wav"]; _invincible = TRUE; [cat runAction:[CCSequence actions: [CCBlink actionWithDuration:1.0 blinks:6], [CCCallFunc actionWithTarget:self selector:@selector(doneInvincible)], nil]]; _lives--; [self setLives:_lives]; if (_lives <= 0) { [[CCDirector sharedDirector] replaceScene:[CCTransitionJumpZoom transitionWithDuration:1.0 scene:[CCBReader sceneWithNodeGraphFromFile:@"GameOver.ccbi"]]]; } break; } } } } - (void)doneJump { _jumping = FALSE; } - (void)ccTouchesBegan:(NSSet *)touches withEvent:(UIEvent *)event { if (!_jumping) { _jumping = TRUE; [[SimpleAudioEngine sharedEngine] playEffect:@"meow.wav"]; CCLOG(@"Making the Cat Jump"); _catJumpAnimation.restoreOriginalFrame = YES; CCAnimate *jumpAnimation = [CCAnimate actionWithAnimation:_catJumpAnimation]; CCJumpBy *jumpAction = [CCJumpBy actionWithDuration:1.25 position:ccp(0,0) height:200 jumps:1]; CCCallFunc *doneJumpAction = [CCCallFunc actionWithTarget:self selector:@selector(doneJump)]; CCSequence *sequenceAction = [CCSequence actions:jumpAction,doneJumpAction, nil]; [cat runAction:[CCSpawn actions:jumpAnimation,sequenceAction, nil]]; } } @end Feel free to look at the code to get an idea of what is happening with the logic of the game, but do not worry about it too much - CocosBuilder is in the center of our attention.
Notice the variables at the top of the code, immediately after the #defines operator:
CCLabelBMFont *livesLabel; CCLabelBMFont *dodgesLabel; CCSprite *cat; These variables, I'm sure you remember them, correspond to the variables that you created in CocosBuilder. They are automatically initialized as a cat sprite, a text about the number of lives and the number of jumps.
Run the game. Now, if you click the Play button in the main menu, you can play the game.
Hooray!You have created a game scene. It was much easier than dodging children on tricycles.
End of the game
Do you think you did everything? Not really.
You may have noticed that when a cat loses all lives, the game gives an error. This is because the Game Over scene that the CCBReader is trying to load is missing. This may be because you have not done it yet.
This scene will have two buttons:
- Main Menu : Returns the user to the main menu.
- Replay : User plays the game again.
Switch to CocosBuilder and create a new file called GameOver . Add two CCControlButtons buttons with the names listed above. Make sure you don’t forget to tag 1 and 2. Also, do not forget to enter the value of buttonPressed: in the Selector field and the Document root value in the Target field .
Finally, set the class for the root layer to GameOverLayer , save the changes, and publish the file.

Switch back to Xcode and add the CCBI file to the project. Then create a new Cocos2D class in the Layers group and name it GameOverLayer , making sure that this class is a sub-class of the CCLayer class.
Add the following import statements to GameOverLayer.m:
#import "CCControlButton.h" #import "CCBReader.h" And also definition operators:
#define MAIN_MENU_BUTTON_TAG 1 #define PLAY_AGAIN_BUTTON_TAG 2 Add a method that handles button presses:
-(void)buttonPressed:(id)sender { CCControlButton *button = (CCControlButton*) sender; switch (button.tag) { case MAIN_MENU_BUTTON_TAG: [[CCDirector sharedDirector] replaceScene:[CCTransitionFlipY transitionWithDuration:1.0 scene:[CCBReader sceneWithNodeGraphFromFile:@"MainMenuScene.ccbi"]]]; break; case PLAY_AGAIN_BUTTON_TAG: [[CCDirector sharedDirector] replaceScene:[CCTransitionFadeUp transitionWithDuration:1.0 scene:[CCBReader sceneWithNodeGraphFromFile:@"GameScene.ccbi"]]]; break; } } Run the program. You now have a full featured game.
It was much easier than selecting the positions of the sprites in the game code?
CocosBuilder troubleshooting
CocosBuilder is a great tool for creating scenes quickly and efficiently. However, this tool is not very good at communicating when something is wrong with the stage. In order to save your time, I have compiled a checklist that I need to go through in case the scene does not work properly or you get unexpected errors.
- Make sure you save your changes to CocosBuilder before publishing the file. It is very important. CocosBuilder , , . — .
- CCBI- Xcode-, , Add to target , . , Add to targets, . CCBI. , , .
- Read messages in the debug console. If CocosBuilder cannot tell you what went wrong, the debug console may contain a message that will help you figure out what went wrong. If it says: “File not found: GameOver.ccbi”, then this means that the GameOver.ccbi file was either not added to the project, or is not part of the target assembly that you are compiling, or there is simply an error in the file name.
- Make sure you are not sealed. When you enter text such as the names of variables, user-defined classes, or the name of event selectors, it is very important not to be sealed. Try to use copying through the clipboard.
If you use these tips, you will save yourself time, and if the problem does occur, we hope you pounce on her like a frisky cat on a mouse.
What's next?
Here is the entire source code of the final project.
Now you are ready to use CocosBuilder to create your own games. I hope that this lesson will save you a lot of time to create new games!
Source: https://habr.com/ru/post/166709/
All Articles