Thermometer, joystick and laptop in the same cabinet, not counting arduino
How it all started
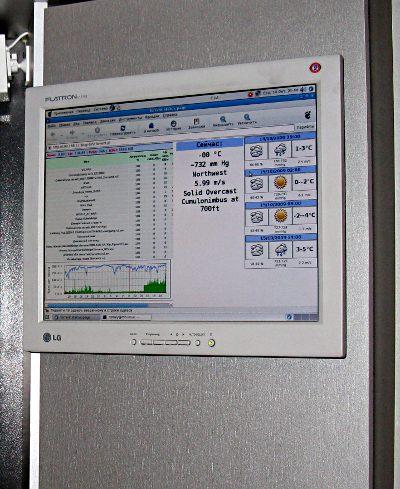
Once upon a time I stood in my closet in the hallway a home server under debian. He worked around the clock, supported the secondary DNS, did backups, swayed torrents, served as a media server, and so on and so forth (well, you know what a home server may be needed for). At the same time, I wanted to have a weather indicator on the street so that I could put on my pants before going out of the house of the necessary warmth. A thermometer outside the window did not suit this role - because of all the parasitic air currents near the walls of the high-rise building, it showed that it was horrible, and besides the temperature, it was interesting to know the wind and humidity besides the temperature. As a result, the server has a monitor on the outer surface of the cabinet. And the server itself has learned to take information about the current weather in the METAR format from the nearest airport (it is relatively close, and its weather report is very close to what is behind the door), and information about the forecast for the next day in XML from gismeteo.ru. All this through a web-section of the web-interface was shown automatically by the browser that started when the server was loaded. Then information about the channel load on the Internet, the current state of the torrents was added to the page (rTorrent has a corresponding software interface for this), the image of the video surveillance camera behind the door, something else ... It looked like this:
After some time, two shortcomings became apparent. First, in order to have a look, say, the temperature overboard had to turn on the monitor (keeping it constantly turned on badly - and the monitor degrades, and the light from it interferes at night). And the monitor does not turn on instantly, and these are a few (seemingly!) Seconds annoying. Secondly, the complete absence of control devices significantly limits the applicability of this economy. Strongly, for example, lacked the ability to control the surveillance camera (it is driven by the course and pitch). And then it was all over. The server after a series of upgrades and load growth began to overheat in the closet, and the household was tired of its noise. In the end, he was exiled outside the premises. And the need for a thermometer and everything else remained ...
Set the task
From the experience of the past operation it was possible to make the following:
- The presence of a device that shows all the useful information is not superfluous, and there is a sense in it.
- I would like to bring the most frequently requested “monitoring data” to an autonomous, constantly on indicator. But at the same time save the monitor to display less popular, but more complex in the visual plan of things.
- Requires control devices.
At the same time it is desirable to fulfill a number of related requirements: somehow, but to preserve aesthetics; do not spend extra money; don't make it too hard; make a more or less universal solution.
After thinking, I came to the following conclusions. First, it is necessary to have in the closet some kind of replacement for the server that lived there earlier. This device may have a minimum power, just to draw a full-fledged Linux with a browser. At the same time should not make noise and not much warm. A monitor and a control device are connected to this device. The presence of a full-fledged standard OS makes it possible not to reinvent the wheel and not limit your fantasies. Secondly, a character LCD display with a couple of lines will do the display of “operational” data. At night, of course, he would need a backlight. It is desirable that the display performance does not depend on the computer in the cabinet. Therefore, the presence of a separate controller is inevitable. It makes sense to put the main behind-the-scenes work on the exiled server (it is always on anyway, and with such a scenario, the capabilities of the “intra-cabinet” device can be almost arbitrarily small).
I had to think about the control device a little longer. The initial idea of mechanically adapting for use on a vertical surface full keyboard and mouse was rejected due to lack of aesthetics and the apparent redundancy of the entire keyboard. For all the scripts invented, a few keys and a mouse-like manipulator were enough. A variant of this idea - to buy a mini-keyboard with a built-in touchpad from the Chinese - was also rejected as requiring additional costs (albeit small), waiting time for delivery (this is usually a month with us) and generally unsportsmanlike.
Time to scrape the bottom of the barrel
On this day, God sent Alexander Yakovlevich:
- The already dusty Arduino clone from SeeedStudio (based on Atmega 328) and the Ethernet-shield (from long-standing versions, still without an SD slot) of the same origin are pretty dusty.
- The front panel of the ancient device production Tainet (it seems it was a control device for PM-modems, but I do not remember exactly). Inside was a two-line LCD display with built-in backlight, five buttons (normally open, common minus) and a line of green LEDs (the latter was not useful).
- An old laptop with a defective IDE controller and a heavily scratched screen (from the “can not be used and throw a bit” series), but with live USB, VGA and Ethernet (PS / 2, bluetooth, wifi it has never been born).
- Wires and other accessories in stock.
- The main surprise is the analog joystick, the existence of which I have already forgotten.
Admire the joystick
')
And now, holding five buttons and one joystick in my hands, I finally understood how to get rid of rats ... uh, well, in the sense that this is more than enough. Buttons can be used to control an autonomous controller, emulate several keyboard shortcuts (and even several of their sets, between which you can switch) and as mouse buttons. The mouse itself may well portray a joystick. In addition, the joystick has its own button (triggered by pressing along its vertical axis), i.e. there are already six buttons. Quite a lot.
Controller
Immediately warn you that the schemes and source will not. There is no sense in them, since the description of the principles and the mention of the used ready-made libraries is quite enough to confine something like “for themselves” without difficulties.
Arduino’s performance potential is not too great, and he cannot do everything at the same time. Therefore, right on the bank, the principle of switching blocks of its functionality was determined. In each cycle of the program only keystrokes are processed. For this, the Bounce library is used. It implemented chatter suppression and convenient registration of button press / release events.
The keystroke processing algorithm includes the function of turning on the backlight for a few seconds by pressing any button, incl. joystick buttons (each next press extends the backlight time). If during the backlight operation you press the “menu” button, the transition to the selection of the operating mode will occur. The selected mode is stored in a global variable, in accordance with the value of which one or another part of the rest of the program is executed. Each block has its own reaction to the keys and joystick.
At the moment, such blocks are autonomous (hereinafter we mean independent of the in-cabinet laptop, but server-dependent), a demonstration of the current weather, an autonomous demonstration of a brief weather forecast, an autonomous demonstration of channel utilization on the Internet, a surveillance camera control, mouse emulation. The last two functions are also technically autonomous, but with virtually no monitor turned on, there is no point in them.
The panel from the taynet perfectly fit under the monitor, arduino is fixed from the inside and covered with a plastic box. I wanted to make the design collapsible and easily upgradeable, so a piece of the breadboard was used, on which the controller seats are soldered (this clone has a number of standard hole pitch) and a connector for the front end cable. Immediately on the breadboard is placed a transistor switch to control the backlight. The mounting is made with soft wire. A controller is pulled over the top, and a shield is attached to it. It looks something like this:

Layout without controller
The controller has used up all the ports. Six pins for LCD maintenance, six for buttons (including joysticks), two for joysticks (of all, only they work in analog mode), one for controlling the backlight, the rest for connecting the shield.
Key transistor old school KT603 in a metal case. The choice of him is not determined by anything - just lying around in plain sight. Almost any npn will do.
Power is supplied from the USB charging via a double-cable (the second tail is connected to the laptop, more on that later).
The joystick was not very convenient for installation. Mount it is designed for installation in the PCB. Rummaging in the garbage, he managed to build a case for him from a bottle of some pills, a cork from a plastic bottle and a piece of aluminum corner. The corner is fixed on the Taynetov face, on the corner is a cork, and a modernized bottle is tightly put on the cork. The joystick is clamped between them and does not require any other attachment (it moves without noticeable friction - the plastic is rather slippery). Looks like that:

Not ideal, of course, but acceptable.
A bit bigger
A laptop
On a Debian laptop, as a dwm window manager. All this is loaded (HDD is not) all from the same server over the network. A monitor is connected to VGA and to USB, as mentioned above, arduino.
Blocks weather and downloads of the channel to the Internet
Here, without much fuss. The server still receives data from the airport, the gismeteo, and puts it in the form of html with a string formatted accordingly. For parsing METAR data, the pearl barley library Geo :: METAR is used. Arduino takes the http line (uses the regular Ethernet library), parses and displays on the LCD (uses the regular LiquidCrystal library). Channel load data is processed in the same way. Only the information is taken via SNMP from the router. Buttons are used only to switch between menu items and turn on the backlight.
Video Camera Control
The unnamed IP camera of Chinese origin has servo drives, generates mjpeg stream and is controlled via the built-in http-server. Its native interface is inconvenient for my purposes and is not used. But careful consideration of the source code of its pages allows you to determine the URL for video and control. Video stream picks up the server using Motion software. He does with him what is needed. The in-cabinet computer already uses the secondary stream (motion has a built-in http server for this and different settings — refresh rate, image size, label overlay, etc.) and shows it with ffplay. The controller controls the camera directly (making the necessary GET requests in accordance with keystrokes - up-down, left-right).
Mouse and keyboard emulation
Here the decision came not immediately. The easiest thing would be to emulate a PS / 2 device. But alas, there were no such interfaces, as already mentioned. The second idea - to gut and use the electronics of a USB mouse and keyboard - failed. None of the available devices had a label on the components, which allowed them to uniquely identify, find the datasheet and use. Only one thing remained - regular FTDI in arduino and virtual ttyUSBx in a laptop. Yes, you can write anything to the port, but then what? And preferably without programming, by regular means. I didn’t find it right away, but now I know about the existence of the wonderful xdotool tool. Taking commands from the terminal or from the standard stream, this thing moves the mouse, pressing the mouse buttons and keyboard (keyboard output can be sent to the desired window). Say to move the mouse, commands like
xdotool mousemove_relative x y xdotool click button where button is the button number (1 is left, 2 is middle, 3 is right). In my version, five buttons are used as follows: left and right - left and right click respectively, upper - double click, middle - imitates the left mouse button click on the first button, imitates the mouse button release on the second button (for selecting text for example). On the computer side, commands can be taken directly in xdotool. First, configure the serial port, so to speak: stty -F /dev/ttyUSB0 raw ispeed 9600 ospeed 9600 -ignpar cs8 -cstopb -echo then send a stream from it:
cat /dev/sttyUSB0 > xdotool - But this is not very flexible, since it limits the use of the ligament to only mouse and keyboard controls. It is better to use a special script that reads the stream, and then, depending on the content, sends it to the right place, incl. and in xdotool. Thus, you can adjust the execution of anything. Thus, in addition to mouse emulation, I have an on / off monitor implemented. Rather, the monitor itself does not move, but the on / off sleep mode is performed using the xset dpms command with parameters. It works like this: you press the button of the joystick - it wakes up, you press again - it falls asleep. Not very helpful, but fun.
The result was an easy-to-implement configuration that can be used in virtually any home monitoring, management, etc. scenarios.
Well, that's all. Thanks for attention.
Source: https://habr.com/ru/post/165951/
All Articles