Simulate the night vision of a person in a 3D game
Today we will deal with postprocessing images in DirectX.
As you know, in the dark human vision is provided by retinal wand cells, high light sensitivity of which is achieved due to loss of color sensitivity and visual acuity (although the rods in the retina are larger, they are distributed over a much larger area, so the total “resolution” is less).
All these effects can be seen most, looking up from the computer and going out at night on the street.
')
As a result, we get something like the following ( look at the whole screen! ):
Before: dull Polish shooter

After: IGF Finalist and E3 Laureate

The first thing you need to decide what effect we want to achieve. I broke all the processing into the following parts:
We will write under Unity3D Pro, in the form of a shader for post-processing.
Before proceeding directly to the shader, we will write a small script that runs the screen buffer through this shader:
Here we just set the shader parameters to the user-defined ones and re-render the screen buffer through our shader.
Now let's deal directly with the case.
Variable and constant declarations:
The vertex shader is standard and does not perform any unusual transformations. The most interesting begins in a pixel shader.
First, select the value of the current pixel, and in addition to it - the “blurred” value for the same pixel:
Obtaining a “blurred” value is performed by the function blur (), which samples a few pixels next to ours and averages their values:
The pixel darkness coefficient will be determined by the average brightness value for three channels. The coefficient is cut off by a given brightness limit value (LuminanceThreshold), i.e. all pixels brighter than this are considered “bright enough” to not process them.
The dependence of kLum on brightness will look like this:

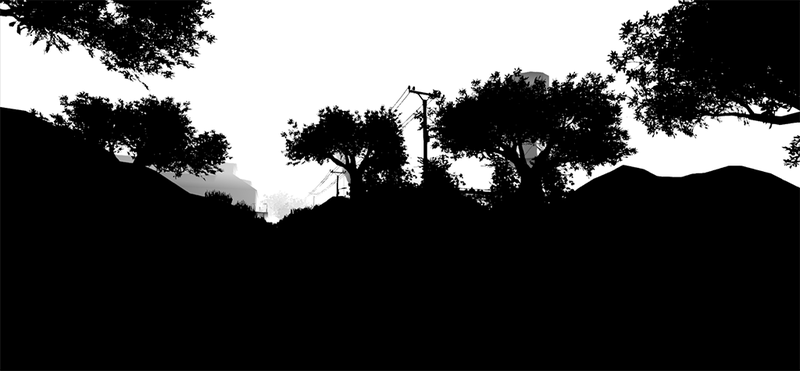
The kLum values for our scene look like this (white - 1, black - 0):

It is clearly seen here that bright areas (halo of lanterns and lighted grass) have a kLum equal to zero and our effect will not apply to them.
The distance from the screen surface to the pixel in meters can be obtained from the depth texture (depth texture, Z-buffer), which is clearly available for deferred rendering.
The kDepth coefficient will determine the degree of blurring of dark objects near, and kFarBlur - all others far away:
The plots of both coefficients from the distance look the same and differ only in scale:

KFarBlur values:

And now - magic! We calculate the total pixel blur ratio, based on the previous three:
Dark pixels will be blurred from a distance of several meters (DEPTH_BLUR_START), and distant objects will be irrespective of the light intensity.

The degree of color loss we will have is the degree of “unlit” (half kDesaturate = kLum).
It now remains to mix the normal, blurred and black and white pixel and calculate the final color:

However, if you look at the picture in dynamics, it is clear that something is missing. What? Noises!
Here we select a random variable from the _NoiseTex texture (filled with Gaussian noise from Photoshop), using the _Randomness vector provided by the script, which will change on each frame.
We mix the random value into our pixel:
As a bonus - a small video and the shader itself :
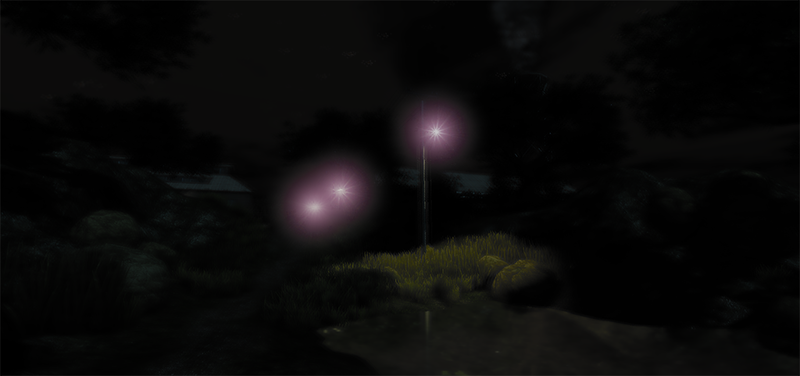
Update : correct, human lens flares:

As you know, in the dark human vision is provided by retinal wand cells, high light sensitivity of which is achieved due to loss of color sensitivity and visual acuity (although the rods in the retina are larger, they are distributed over a much larger area, so the total “resolution” is less).
All these effects can be seen most, looking up from the computer and going out at night on the street.
')
As a result, we get something like the following ( look at the whole screen! ):
Before: dull Polish shooter

After: IGF Finalist and E3 Laureate

Training
The first thing you need to decide what effect we want to achieve. I broke all the processing into the following parts:
- Loss of color in low-light areas
- Loss of clarity in the same place
- Slight noise (ibid)
- Loss of vision at long range in medium and low light
Implementation
We will write under Unity3D Pro, in the form of a shader for post-processing.
Before proceeding directly to the shader, we will write a small script that runs the screen buffer through this shader:
using UnityEngine; [ExecuteInEditMode] public class HumanEye : MonoBehaviour { public Shader Shader; public float LuminanceThreshold; public Texture Noise; public float NoiseAmount = 0.5f, NoiseScale = 2; private Camera mainCam; private Material material; private const int PASS_MAIN = 0; void Start () { mainCam = camera; mainCam.depthTextureMode |= DepthTextureMode.DepthNormals; material = new Material (Shader); } void OnRenderImage (RenderTexture source, RenderTexture destination) { material.SetFloat("_LuminanceThreshold", LuminanceThreshold); material.SetFloat ("_BlurDistance", 0.01f); material.SetFloat ("_CamDepth", mainCam.far); material.SetTexture ("_NoiseTex", Noise); material.SetFloat ("_Noise", NoiseAmount); material.SetFloat ("_NoiseScale", NoiseScale); material.SetVector("_Randomness", Random.insideUnitSphere); Graphics.Blit (source, destination, material, PASS_MAIN); } } Here we just set the shader parameters to the user-defined ones and re-render the screen buffer through our shader.
Now let's deal directly with the case.
Variable and constant declarations:
sampler2D _CameraDepthNormalsTexture; float4 _CameraDepthNormalsTexture_ST; sampler2D _MainTex; float4 _MainTex_ST; sampler2D _NoiseTex; float4 _NoiseTex_ST; float4 _Randomness; uniform float _BlurDistance, _LuminanceThreshold, _CamDepth, _Noise, _NoiseScale; #define DEPTH_BLUR_START 3 #define FAR_BLUR_START 40 #define FAR_BLUR_LENGTH 20 The vertex shader is standard and does not perform any unusual transformations. The most interesting begins in a pixel shader.
First, select the value of the current pixel, and in addition to it - the “blurred” value for the same pixel:
struct v2f { float4 pos : POSITION; float2 uv : TEXCOORD0; float2 uv_depth : TEXCOORD1; }; half4 main_frag (v2f i) : COLOR { half4 cColor = tex2D(_MainTex, i.uv); half4 cBlurred = blur(_MainTex, i.uv, _BlurDistance); Obtaining a “blurred” value is performed by the function blur (), which samples a few pixels next to ours and averages their values:
inline half4 blur (sampler2D tex, float2 uv, float dist) { #define BLUR_SAMPLE_COUNT 16 // float-! const float3 RAND_SAMPLES[16] = { float3(0.2196607,0.9032637,0.2254677), .... 14 .... float3(0.2448421,-0.1610962,0.1289366), }; half4 result = 0; for (int s = 0; s < BLUR_SAMPLE_COUNT; ++s) result += tex2D(tex, uv + RAND_SAMPLES[s].xy * dist); result /= BLUR_SAMPLE_COUNT; return result; } The pixel darkness coefficient will be determined by the average brightness value for three channels. The coefficient is cut off by a given brightness limit value (LuminanceThreshold), i.e. all pixels brighter than this are considered “bright enough” to not process them.
half kLum = (cColor.r + cColor.g + cColor.b) / 3; kLum = 1 - clamp(kLum / _LuminanceThreshold, 0, 1); The dependence of kLum on brightness will look like this:

The kLum values for our scene look like this (white - 1, black - 0):

It is clearly seen here that bright areas (halo of lanterns and lighted grass) have a kLum equal to zero and our effect will not apply to them.
The distance from the screen surface to the pixel in meters can be obtained from the depth texture (depth texture, Z-buffer), which is clearly available for deferred rendering.
float depth; float3 normal; DecodeDepthNormal(tex2D(_CameraDepthNormalsTexture, i.uv_depth), depth, normal); depth *= _CamDepth; // depth in meters The kDepth coefficient will determine the degree of blurring of dark objects near, and kFarBlur - all others far away:
#define DEPTH_BLUR_START 3 #define FAR_BLUR_START 40 #define FAR_BLUR_LENGTH 20 half kDepth = clamp(depth - DEPTH_BLUR_START, 0, 1); half kFarBlur = clamp((depth - FAR_BLUR_START) / FAR_BLUR_LENGTH, 0, 1); The plots of both coefficients from the distance look the same and differ only in scale:

KFarBlur values:

And now - magic! We calculate the total pixel blur ratio, based on the previous three:
half kBlur = clamp(kLum * kDepth + kFarBlur, 0, 1); Dark pixels will be blurred from a distance of several meters (DEPTH_BLUR_START), and distant objects will be irrespective of the light intensity.

The degree of color loss we will have is the degree of “unlit” (half kDesaturate = kLum).
It now remains to mix the normal, blurred and black and white pixel and calculate the final color:
half kDesaturate = kLum; half4 result = cColor; result = (1 - kBlur) * result + kBlur * cBlurred; half resultValue = result; result = (1 - kDesaturate) * result + kDesaturate * resultValue; return result; 
However, if you look at the picture in dynamics, it is clear that something is missing. What? Noises!
half noiseValue = tex2D(_NoiseTex, i.uv * _NoiseScale + _Randomness.xy); half kNoise = kLum * _Noise; Here we select a random variable from the _NoiseTex texture (filled with Gaussian noise from Photoshop), using the _Randomness vector provided by the script, which will change on each frame.
We mix the random value into our pixel:
result *= (1 - kNoise + noiseValue * kNoise); As a bonus - a small video and the shader itself :
Update : correct, human lens flares:

Source: https://habr.com/ru/post/165563/
All Articles