In search of the perfect css-framework. Requirements, implementation, maxmertkit

I love twitter bootstrap. Simple, logical in places, quite beautiful, suitable for rapid prototyping of web interfaces. But this was not enough. Taking twitter bootstrap into a large project, I had to completely disassemble it and rethink the css frameworks as combat units in web projects. As a result of the rethinking, requirements for any css-framework, convenient for both the coder and the frontent developer, were born.
Framework Requirements
- For framework classes it is necessary to use namespaces. This allows you to see which class belongs to the framework, and which one you wrote. Moreover, it eliminates the risk of redefining the class of the framework, because of which everything can break.
- All components of the framework, be it buttons or drop-down menus, must be independent widgets that, if removed, the framework will not be affected (I am silent about the possibility of compiling).
- For external modification of the framework, there should be a separate file with a theme, by changing which you get a completely different framework.
- Need to be able to change class names! And do it in the theme file.
- It is necessary to save the frontend-developer from having to remember a ton of classes for styling buttons, menus, pop-ups. Here, by stylization, I mean the application to them of various states and statuses, for example, error, loading, disabled, etc.
- When adding a modifier to the framework theme (I’ll talk about them later), for example, status, all connected widgets should be able to show this new status without editing the source code of this widget. For example, we add a new “deepspace” status to the theme file, which has a background color of # 000. After that, the elements of absolutely all widgets (tabs, buttons, pop-ups) become black when using the “deepspace” status.
- When a modifier is applied to the parent widget, all children widgets inherit this modifier. For example, if we have a group, within which there are buttons and text fields, and the task is to make the whole group large and set the class “disabled” to all elements within the group. To do this, add modifiers (classes, for example, big and disabled) not to the internal elements, but to the group.
- All standard icons are font. This solves a lot of problems.
- You must be able to quickly collect new widgets with the above requirements.
After reading the requirements that I myself wrote, I realized that I do not know such frameworks. So there is work to do.
')
Brief history of creation
Very briefly. I made three versions. The first was done in three days. Naturally, you cannot write this on pure css, so for the first version I chose LESS. Sugar was not sweet enough, and for the second version I chose SASS. It turned out to be much more flexible and allows you to do things that at LESS are difficult to implement, and sometimes simply impossible. I did the second version in about three weeks, but due to the fact that I just started to master the SASS, instead of a plowed field, I received a crater. Attempting to rewrite what is already there, only aggravated everything, so I started the third version, which you can see now. I can't give names, so I just added a kit to my nickname. Site - maxmert.com .
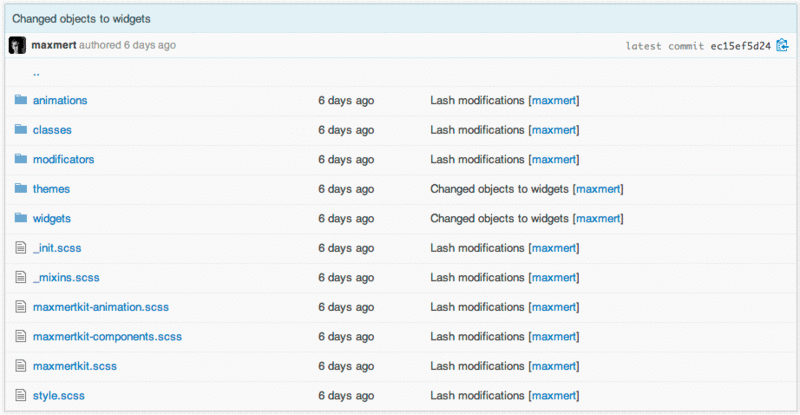
Maxmertkit File structure
All files in no case should not lie in one big heap. This, after all, is not only not beautiful, but also not practical.
Classes . The folder contains all base classes, from which all other widgets are inherited. At the moment it is one - object.
Modificators . Contains all possible modifiers applied to widgets. At the moment, this status, size and more.
Widgets . Inside all the widgets, from the button to the gallery.
Animations . CSS animations for widgets.
_init.scss . Initialization of typography and base classes.
_mixins.scss . Impurities.
maxmertkit * .scss . Files to compile. In fact, they simply plug in the necessary modules. If you don’t need anything, just comment out the import.
style.scss . Your styles.
Credo.
In this section, I will discuss the basic principles that were observed during the development of maxmertkit. All of them, one way or another, meet the requirements set at the beginning of the article.
Namespaces.
Neemspaces are vital for literacy writing of their classes in the framework. For what? I think often there is a desire to name a class for a badge badge , and for a table - a table . Only all the time you have to remember all the classes used in the framework. Not quite practical. There is no such lack in maxmertkit.
class = " - {Name of the widget} " - all the names of the widgets, for example -table , -tooltip , -badge , -modal , etc.
class = " - {StatusName} - " - the name of the status, for example, -error- , -warning- , -info- , -disabled- , -unstyled- , etc.
class = ” _ {SizeName} ” - the name of the size, for example, _tiny , _small , _big , _huge .
class = ” _ {Names of Other Modifiers} _ ” - for example, _loading_, _unclickable_, _active_, etc.
What is important, the same modifiers are used for any widget. For example, the _loading_ modifier can be placed either as a button or as a table or taboo. This allows you to not remember the long composite classes for each of the widgets.
Consider a common example. There is a button that removes any content. There are several conditions. Immediately after the page loads, we need to check whether this user can delete this content or not (for example, whether there is enough karma). And if the button cannot still show, but with the status disabled , if it can, with the status error (so that the button is red). While the task is set entirely for css. Step by step
- The page is loaded, we show the disabled button with the download status.

<a class="-btn -disabled- _loading_ -error-">Button</a> - Next, we check for the presence of karma. Suppose a user cannot delete content. Then just remove the _loading_ modifier.

<a class="-btn -disabled- -error-">Button</a> - If there is enough karma and the user can delete the content, delete the _loading_ modifier and -disabled- .

<a class="-btn -error-">Button</a> - If the user presses the button, add the _active_ modifier.

<a class="-btn -error- _active_">Button</a> - When the call to the server began, add the _loading_ modifier.

<a class="-btn -error- _active_ _loading_">Button</a>
I repeat that the demonstrated modifiers work for all widgets, not just the button. On the main page www.maxmert.com there is a small constructor that allows you to understand how they work for other widgets.
Inheritance of modifiers
When you apply a modifier to a parent widget, all children widgets inherit it. And if the child has a modifier of the same type, it overrides the parent. This is clearly seen in the example of the group.
This is a group without modifiers.

<div class="-group"> <a class="-btn">I like it</a> <a class="-btn"> <i class="-icon-thumbs-up"></i> </a> </div> Add a status -primary- .

<div class="-group -primary-"> <a class="-btn">I like it</a> <a class="-btn"> <i class="-icon-thumbs-up"></i> </a> </div> Add the status of the -dark- button inside the group.

<div class="-group -primary-"> <a class="-btn">I like it</a> <a class="-btn -dark-"> <i class="-icon-thumbs-up"></i> </a> </div> If you want more buttons, assign a size modifier to the group. All internal widgets (including icons) will inherit it.

<div class="-group -primary- _huge"> <a class="-btn">I like it</a> <a class="-btn -dark-"> <i class="-icon-thumbs-up"></i> </a> </div> Subtotals
So for now we have solved the following tasks (the numbering corresponds to the list at the beginning):
1. We use easily remembered neymspeysy.
2. Use widgets that are independent of each other and can be easily excluded from the assembly.
5. There is no need to remember many composite classes for different widgets, because the same modifiers apply to all widgets.
7. Modifiers are inherited by children widgets.
8. Font icons.
The remaining points are:
4. The ability to easily change the names of widgets and modifiers.
6. When modifying modifiers (colors, sizes, etc.), deleting or adding them, all changes should be applied to all widgets. That is, if we added any status modifier, then we can immediately apply it to any of the widgets without editing its code.
9. Easy assembly of new widgets with the above requirements.
Theme file
The theme file successfully solves problems 4 and 6. Let's see how. It is located in the themes folder. The name of this file can be any one starting with an underscore (the SASS requirement, files with such names are not compiled separately), just remember to import the necessary theme file into the project.
Variable names inside a theme file are formed as follows:
$ {objectParent} __ {thisObject} - {property} __ {compoundPart} - {property}
For example,
$ object__group
object is the parent (as I already said, so far it is alone);
group is an advertised widget.
$ object__group__appendix
appendix is an element inside the group widget (this can be header, content and anything else)
$ object__group__appendix-border-width
This is a declaration of the thickness of the text appendage boundary within the group.
$ object__dropdown__header-padding
Internal indent of dropdown dropdown header.
So, how are the names of the widgets declared? Very simple. When a widget is declared without its properties, the class name is always indicated. Thus, if you don’t like the class names, you can easily change them in the theme file:
$object__modal: -modal; $object__dropdown: -dropdown; $object__tooltip: -tooltip; $object__toolbar: -toolbar; $object__progressbar: -progress; $object__progressbar__bar: #{$object__progressbar}-bar; Let's look at the modifiers. To begin, analyze status modifiers.

For each of the modifiers, a separate column is allocated. The top line is the name. Removing a column with a modifier, for example, error , we get the expected result: the error modifier will disappear and none of the widgets will be changed by adding the appropriate class -error- .
In addition, you can change the name, for example, to error1 , and now just adding the class -error1 to the widget will change its status.
You can also add a column with your status and it will immediately work with all widgets.
Now about the size modifiers.

Here you can also change the name of the modifier in the column, change the size factor of the widget, delete or add your own size. All changes will also affect all widgets.
Widgets available in maxmertkit
The screenshots are not all that these widgets can do. In combination with various modifiers, they look completely different, there are dozens of options for one widget. Go to maxmert.com , see examples, look through the docks.
- Tables, -table

- Forms

- Icons -icon
- Social Icons -icon-social
- Grid- grid

- -Btn button

- Group -group

- Tabs -tabs

- Badges- badge

- Tags -labels

- Drop-down content

- Menu -menu

- The menu in the dropdown (I repent for the repetition, but I could not resist, I like it painfully; the menu in the dropdown looks a bit different)

- Tooltip -tooltip

- Progressbar -progress

- -Notify notifications , used with javascript plugins
- Windows -modal , used in conjunction with javascript-plugins
The full list can be seen inside the widgets folder.
Javascript
At the moment I have written 8 plugins.
- Popup For tooltip and dropdowns.
- Tabs.
- Button. To create buttons, checkboxes and radoibattons.
- Modal.
- Affix.
- Scrollspy
- Notify
- Carousel
It's hard to surprise anyone here. There is everything at the docks. There are only a few points that I wanted to talk about.
- In many plugins, you can write $ .ajax (or use $ .Deferred inside a callback) as a callback beforeOpen , beforeAction , afterOpen , etc. Until the data is received, the plugin will not take any further action (you can receive, for example, content for a dropdown). It is very convenient and allows you to focus on the processes that are going on, and not on how to implement them.
- In addition to javascript animation, implemented css animation. Looks, for my taste, amazing.
- All plugins track changes in parameters within themselves. That is, to change the theme, you just need to pass the {theme: 'dark'} plugin, it will do the rest. Say no to constant method calls.
- Many plugins have an “abyss” where every instance of the plugin is dropped. That is, from the instance of the plugin you have access to other instances of the same plugin. It is extremely convenient if, for example, you need to close all dropdowns when the current instance opens.
- There is something else I probably forgot about.
All plugins were written in pure javascript. But I started rewriting to coffeescript, because it is much easier to maintain and understand the source code with coffee. I'm for coffee with sugar.
Creating a new widget
The hardware went further, so if you are not going to make widgets for yourself or do not want to add maxmertkit to the repository, you can not read.
I warn you that you can still work on paragraph 9, because adding new widgets, in my opinion, can still be simplified. But at the moment I have only this option.
Let us consider the example of a button.
The new widget is placed in the widgets folder, the file name begins with an underscore (to prevent self-compilation). First, all styles that are not related to modifiers unique to this widget are written.
button, .#{$object__button}, input[type="button"] { @extend %__object; text-decoration: none; cursor: pointer; border-width: $object__button-border-width; border-style: solid; @include border-radius( $object__button-border-radius ); @include box-shadow( $object__button-shadow ); } @extend% __ object - inheritance from the class object, which was mentioned many times above. This makes it possible to apply modifiers well for this widget.
All variables, of course, are taken from the theme file.
Further, the most interesting. We need to specify that certain modifiers apply to the button widget. And when one of the modifiers is applied to the widget, it does not necessarily change everything from text color to shadow in it, it can change only a small part in it (for example, when adding the -error-modifier to the button, only the text color changes, and the background and everything else do not touch). In our case
$__inheritance: object; $__before-object: ''; $__object: 'button' 'input[type="button"]' '.#{$object__button}'; $__after-object: ''; @include set_modificator($mod__status, color-invert, border-color, gradient-vertical, text-shadow); $ __ inheritance : object - the class of the parent object (you can specify another one, but more on that later)
$ __ before-object and $ __ after-object - about them just below (but they must be specified, even empty).
$ __ object - here in quotes, spaces or tabs indicate the objects to which the modifiers will be applied directly (that is, to which the modifier classes will be hung)
@include_set_modificator ($ mod__status, color-invert, border-color, gradient-vertical, text-shadow) is a function that sets the modifier status $ mod__status (these are the columns from the theme file) for the widget, and Only inverted text color, border color, vertical gradient and text shadow.
Let's try to change the button when the user hovers over it:
$__inheritance: object; $__before-object: ''; $__object: append-list('button' 'input[type="button"]' '.#{$object__button}', '', ':hover'); $__after-object: ''; @include set_modificator($mod__status, gradient-vertical-darken); As you noticed, instead of the usual list, the append-list function is used here, which simply adds ': hover' to the end of each list item. We could not use it, but just write
'button:hover' 'input[type="button"]:hover' '.#{$object__button}:hover' In addition, the components of the modifiers that were used earlier are no longer indicated, only new components are indicated, or components that will override the old ones (in our case, in the pseudo -class button: hover the gradient-vertical-darken component will override the old gradient-vertical )
Same for : active
$__inheritance: object; $__before-object: ''; $__object: append-list('button' 'input[type="button"]' '.#{$object__button}', '', ':active'); $__after-object: ''; @include set_modificator($mod__status, gradient-vertical-darkener); If you are too lazy to write a list in $ __ object , you can write like this:
button, .#{$object__button}, input[type="button"] { $__inheritance: object; $__before-object: ''; $__object: this; $__after-object: ''; @include set_modificator($mod__status, color-invert, border-color, gradient-vertical, text-shadow); &:hover { $__inheritance: object; $__before-object: ''; $__object: this; $__after-object: ''; @include set_modificator($mod__status, gradient-vertical-darken); } &:active { $__inheritance: object; $__before-object: ''; $__object: this; $__after-object: ''; @include set_modificator($mod__status, gradient-vertical-darkener); } } You certainly noticed that block
$__inheritance: object; $__before-object: ''; $__object: this; $__after-object: ''; repeated many times. You can write it once before the button is announced.
The same without extra code:
$__inheritance: object; $__before-object: ''; $__object: this; $__after-object: ''; button, .#{$object__button}, input[type="button"] { @include set_modificator($mod__status, color-invert, border-color, gradient-vertical, text-shadow); &:hover { @include set_modificator($mod__status, gradient-vertical-darken); } &:active { @include set_modificator($mod__status, gradient-vertical-darkener); } } And what to do if the widget button is inside another widget? This is where $ __ before-object and $ __ after-object come in handy:
$__inheritance: object; $__before-object: ''; $__object: '.#{$object__group}'; $__after-object: 'button' 'input[type="button"]' '.#{$object__button}'; @include set_modificator($mod__status, color-invert, border-color, gradient-vertical, text-shadow); This means that the modifiers will now be applied to the group, since $ __ object is now a group, but everything that is in $ __ after-object will change in appearance. That is, as a result of the compilation, we get something like
-group.-error- > button { ... } -group.-error- > input[type="button"] { ... } -group.-error- > .-btn { ... } -group.-info- > button { ... } -group.-info- > input[type="button"] { ... } -group.-info- > .-btn { ... } … . If we use $ __ before-object ,
$__inheritance: object; $__before-object: '.#{$object__menu}'; $__object: '.#{$object__group}'; $__after-object: 'button' 'input[type="button"]' '.#{$object__button}'; @include set_modificator($mod__status, color-invert, border-color, gradient-vertical, text-shadow); then we get something like
.-menu > -group.-error- > button { ... } .-menu > -group.-error- > input[type="button"] { ... } .-menu > -group.-error- > .-btn { ... } .-menu > -group.-info- > button { ... } .-menu > -group.-info- > input[type="button"] { ... } .-menu > -group.-info- > .-btn { ... } … . The last question not addressed is: what to do if not all modifiers are applicable for this element (that is, we need to exclude some of them from the $ mod__status list)?
$__inheritance: $object__group-important; $__before-object: '.#{$object__group}'; $__object: 'button.#{$mod__loading}' 'input[type="button"].#{$mod__loading}' '.#{$object__button}.#{$mod__loading}'; $__after-object: ''; @include set_modificator(exclude-items($mod__status,$mod__status__disabled, default), loading); @include set_modificator ( exclude-items ($ mod__status, $ mod__status__disabled, default), loading) - excludes from the list of $ mod__status the statuses disabled and default . That is, when you set the loading modifier to a separate button within a group, it will not be used if the button has no status or if the status is disabled .
Only-items works similarly.
@include set_modificator ( only-items ($ mod__status, $ mod__status__disabled, default), loading-dark) - leaves only the specified statuses from the list of $ mod__status.
Components available for $ mod__status :
- color
- color-darken
- color-invert
- color-important
- color-invert-important
- text-shadow
- border-color
- border-color-darken
- border-color-darkener
- border-color-lighten
- border-color-lightener
- border-color-important
- background-color
- background-color-lighten
- background-color-lightener
- background-color-darken
- background-color-darkener
- gradient-vertical
- gradient-vertical-darken
- gradient-vertical-darkener
- gradient-vertical-three
- gradient-horizontal-three
- shadow
- outline
- loading
- loading-dark
This means that you can use any of these as follows.
set_modificator($mod__status, {}, {}, … ) Components available for $ mod__size :
- line-height
- line-height-small
- input-line-height
- font-size
- font-size-small
- padding
- padding-small
- padding-big
- padding-huge
- input-padding
Used so
set_modificator($mod__size, {}, {}, … ) Even if you specify the padding component, the size of the object will vary depending on the size modifier, but there are times when the padding should change, but it should be small or large and change slightly. That is why the components padding-small and padding-big appear.
As an afterword
Site - maxmert.com
Github - https://github.com/maxmert/maxmertkit
My English without practice has become completely Russian, so on the site you can meet mistakes, wrong turns or times. I beg you to help me and inform if you see such a bjaku. To do this, simply select a piece of text and click on the "Report an error" button in the left floating menu. Thanks in advance.
I tested maxmertkit for a long time, but still if you notice bugs in the layout, write the issue in github .
I thank readers and everyone who will use this framework. I hope to facilitate the hard work of frontend-developers.
Update:
- Download version 0.0.2. Major bugs fixed, thanks to everyone who participated. I continue to work in this direction :)
- Added adaptive layout. Now it is enough to apply the
_responsive_modifier to the block inside which it should be (for example, to the body).
Waiting for suggestions, for example, which widgets would you like? And, of course, information about errors found in github 'e.
Updated to version 1.0.3!
Source: https://habr.com/ru/post/165373/
All Articles