Parsing a simple cryptographic keygenme
Hi, Habrahabr.
Looking through various hubs on a December evening, I noticed that there were no articles about reversing anywhere long ago. A parse crackme / keygenme - and even more so. And suddenly it hit me: why not write your tutorial?
')
Those who are interested in parsing a simple cryptographic keygenme and what happened in the end, please under the cat.
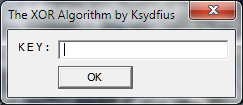
Today we will dissect the keygenme under the name “The XOR Algorithm” by Ksydfius. You can find this keygenme on crackmes.de or here .
Given:
-Text encrypted with the correct key.
- The same text, but not encrypted.
-Patching and brutofors are prohibited and meaningless.
In the end, we should get some kind of secret message.
Required toolkit: OllyDBG or any other debugger.
Let us proceed directly to the analysis. Open the keygenme in Ollie and stop at the entry point.

And now you need to look around a bit. We will familiarize with the imported functions - good, there are not so many of them in this file. Put breakpoints on the function of interest to us, which takes the entered text from the field - GetDlgItemTextA.

We press F9 and the main patient window appears in front of us. In the field "KEY" we drive in everything that pleases (I took the word hello) and click OK.

Next, the breakpoint will work on the function we need. Press Ctrl + F9 and stop at the exit from the function. Immediately after GetDlgItemTextA, which takes the key entered, the call to another function follows. Push F7 and get into it.

We continue to trace, until we reach the next section:
A few clicks of the F8 and keygenme leaves us. Well, let's look where jnz leads. First, he leads the exit command from the function (RETN), and then a comparison is made between the length of the key entered and the number 20h, which in our case are not equal. Then comes jnz, leading to the ExitProcess function, which ends the process of our keygenme.
Well, restart the keygenme and enter an arbitrary string of 32 characters, I took this one - 12345678901234567890123456789012. This time we successfully go through the comparison and enter a new function.

And here, almost the most important actions in the whole keygenme take place. In EDI, pre-prepared plain text is moved, and in ESI, the key entered is moved.

Then the value of EDX is added to ESI. Why this is done, I will tell a little below. Then one byte of the long string xor with a byte from the key. The value of the EDX is added to the xor value, and then all this is added to the value of the lower register BL.
After all these conversions, the function (CALL 00401000) is called, which moves the value of EBX, that is, the result of the previous procedure, in EAX, the EBX register is assigned the value 20h and EAX is divided by EBX. At the end of the function, EBX is reset.

Then the same thing happens with subsequent bytes of unencrypted text from EDI, until the text is encrypted. However, with the key all the more interesting. Remember, I promised to tell you why EDX is added to ESI? The fact is that the EDX register contains the remainder of the EAX and EBX divisions from function 00401000. This remainder is added to the ESI register, which contains the key entered. Therefore, the remainder is the byte number from the key we entered, which will be xor with the next byte from EDI.
An example is a picture showing the execution of the first and second cycle of this function:

During the first cycle EDX = 00000000, therefore the program used the first byte of the key. During the second cycle EDX = 00000006, it means the program used 7 (1 + 6) bytes of the key.
Okay, we go further. We put the breakpoint on the exit from the procedure (RETN) at 0x00401079 and press F9. We stop at the exit of the procedure with already encrypted text.
Next we see the following picture:

After exiting the main procedure, the EAX, EBX, ECX and EDX registers are cleared. In ESI, the string is encrypted using our invalid key, and the same string is encrypted in EDI, only encrypted with the correct key. Then, a byte from ESI is placed in the AL sub-register, and an EDI byte is respectively placed in the CL sub-register. Next, the bytes from CL and AL are compared, and if they are equal, then we are sent to the decryption procedure of the message (I will tell you in secret that the same thing happens in the main procedure, only the xor key and the encrypted message are generated). But since in our case, these subregisters are not equal, the process being debugged takes off.
Now let's figure out how the serial is generated. Pseudo Equation:
Correctly ciphered text byte = (Unencrypted text byte) xor ((key byte [previous mod 20h byte]) + (previous mod 32 key byte)).
Let's mark all this through variables for better readability and understanding:
Plaintext Byte = s
Key byte = x
Previous correctly encrypted byte mod 20h = y
New equation:
Correctly ciphered text byte = s xor (x [y] + y)
Since we are interested in x [y], let's express it through other variables:
x [y] = s xor (Correctly ciphered text byte - y)
For example, let's calculate the first byte pair:
x [1] = 57 xor (3 - 0) = 54h. We look at the table ASCII, it is a sign "T"
y = 3 mod 20 = 3
x [1 + 3] = 65 xor (50 - 3) = 28h. And this is a "(".
And so on, until all 32 elements of the line are filled.
Well, now you can write your keygen. I suggest to get acquainted with my decision (sorry for Delphi, but it was the fastest). You can download the executable file from here , and see the source here .
So, for the last time we open the long-suffering carcass of our guinea pig, copy the key from keygen, press the OK button, contemplate the MessageBox with congratulations, rejoice.

That's all. Thanks for reading, I hope it was quite fun and informative.
Looking through various hubs on a December evening, I noticed that there were no articles about reversing anywhere long ago. A parse crackme / keygenme - and even more so. And suddenly it hit me: why not write your tutorial?
')
Those who are interested in parsing a simple cryptographic keygenme and what happened in the end, please under the cat.
Today we will dissect the keygenme under the name “The XOR Algorithm” by Ksydfius. You can find this keygenme on crackmes.de or here .
Given:
-Text encrypted with the correct key.
- The same text, but not encrypted.
-Patching and brutofors are prohibited and meaningless.
In the end, we should get some kind of secret message.
Required toolkit: OllyDBG or any other debugger.
Let us proceed directly to the analysis. Open the keygenme in Ollie and stop at the entry point.
And now you need to look around a bit. We will familiarize with the imported functions - good, there are not so many of them in this file. Put breakpoints on the function of interest to us, which takes the entered text from the field - GetDlgItemTextA.
We press F9 and the main patient window appears in front of us. In the field "KEY" we drive in everything that pleases (I took the word hello) and click OK.
Next, the breakpoint will work on the function we need. Press Ctrl + F9 and stop at the exit from the function. Immediately after GetDlgItemTextA, which takes the key entered, the call to another function follows. Push F7 and get into it.
We continue to trace, until we reach the next section:
CMP EAX,20 ;20h=32d JNZ SHORT 00401075 ;RETN->ExitProcess A few clicks of the F8 and keygenme leaves us. Well, let's look where jnz leads. First, he leads the exit command from the function (RETN), and then a comparison is made between the length of the key entered and the number 20h, which in our case are not equal. Then comes jnz, leading to the ExitProcess function, which ends the process of our keygenme.
Well, restart the keygenme and enter an arbitrary string of 32 characters, I took this one - 12345678901234567890123456789012. This time we successfully go through the comparison and enter a new function.
And here, almost the most important actions in the whole keygenme take place. In EDI, pre-prepared plain text is moved, and in ESI, the key entered is moved.
Then the value of EDX is added to ESI. Why this is done, I will tell a little below. Then one byte of the long string xor with a byte from the key. The value of the EDX is added to the xor value, and then all this is added to the value of the lower register BL.
After all these conversions, the function (CALL 00401000) is called, which moves the value of EBX, that is, the result of the previous procedure, in EAX, the EBX register is assigned the value 20h and EAX is divided by EBX. At the end of the function, EBX is reset.
Then the same thing happens with subsequent bytes of unencrypted text from EDI, until the text is encrypted. However, with the key all the more interesting. Remember, I promised to tell you why EDX is added to ESI? The fact is that the EDX register contains the remainder of the EAX and EBX divisions from function 00401000. This remainder is added to the ESI register, which contains the key entered. Therefore, the remainder is the byte number from the key we entered, which will be xor with the next byte from EDI.
An example is a picture showing the execution of the first and second cycle of this function:
During the first cycle EDX = 00000000, therefore the program used the first byte of the key. During the second cycle EDX = 00000006, it means the program used 7 (1 + 6) bytes of the key.
Okay, we go further. We put the breakpoint on the exit from the procedure (RETN) at 0x00401079 and press F9. We stop at the exit of the procedure with already encrypted text.
Next we see the following picture:
After exiting the main procedure, the EAX, EBX, ECX and EDX registers are cleared. In ESI, the string is encrypted using our invalid key, and the same string is encrypted in EDI, only encrypted with the correct key. Then, a byte from ESI is placed in the AL sub-register, and an EDI byte is respectively placed in the CL sub-register. Next, the bytes from CL and AL are compared, and if they are equal, then we are sent to the decryption procedure of the message (I will tell you in secret that the same thing happens in the main procedure, only the xor key and the encrypted message are generated). But since in our case, these subregisters are not equal, the process being debugged takes off.
Now let's figure out how the serial is generated. Pseudo Equation:
Correctly ciphered text byte = (Unencrypted text byte) xor ((key byte [previous mod 20h byte]) + (previous mod 32 key byte)).
Let's mark all this through variables for better readability and understanding:
Plaintext Byte = s
Key byte = x
Previous correctly encrypted byte mod 20h = y
New equation:
Correctly ciphered text byte = s xor (x [y] + y)
Since we are interested in x [y], let's express it through other variables:
x [y] = s xor (Correctly ciphered text byte - y)
For example, let's calculate the first byte pair:
x [1] = 57 xor (3 - 0) = 54h. We look at the table ASCII, it is a sign "T"
y = 3 mod 20 = 3
x [1 + 3] = 65 xor (50 - 3) = 28h. And this is a "(".
And so on, until all 32 elements of the line are filled.
Well, now you can write your keygen. I suggest to get acquainted with my decision (sorry for Delphi, but it was the fastest). You can download the executable file from here , and see the source here .
So, for the last time we open the long-suffering carcass of our guinea pig, copy the key from keygen, press the OK button, contemplate the MessageBox with congratulations, rejoice.
That's all. Thanks for reading, I hope it was quite fun and informative.
Source: https://habr.com/ru/post/164303/
All Articles