Introduction to the development of WinRT applications in HTML / JavaScript. Styling applications
This article continues the series of materials ( first part ), devoted to the basics of developing WinRT applications on HTML / JS for Windows 8. We will consistently go from the starting almost empty template to the full-fledged application with the server part and live tiles.
Let me remind you that in the first article we learned how to add our own data sources and stopped on displaying this data in raw form on the pages of the application.
')
In this article we will look at the appearance of our application: add pictures, change the headers, styles, tiles, etc. All the work can be done in Visual Studio, although some things are more convenient and clearer to change in Expression Blend.
First of all, let's try to pull images out of posts if they are there, of course. To do this, open the js \ data.js file and go to the getItemsFromRSSFeed function, which parses individual posts.
Add the following code in front of the “var postItem = {” line :
Here we create a temporary element with post content and retrieve ( querySelector ) the first image from it to use it as a background image on tiles for posts. In case there are no images, we use an empty string, which we pass to the corresponding CSS rule.
Add the following lines to the post description object ( postItem ), without forgetting to add a comma with the line above:
It should look like this:
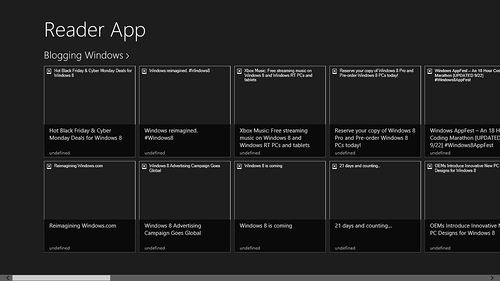
If you now run the project for debugging, you will see that visually nothing has changed.
Open the pages \ groupedItems \ groupedItems.html file . Inside this file, templates are used to describe page structure and data binding. Find the item template starting with the line:
Two lines below you will see the picture description:
If you are familiar with the basics of HTML, you probably already guessed why nothing has changed in the display: the format we used above is designed for use in CSS, rather than explicitly inserting an image link through img.
Delete this line to insert an image.
Move up one level and replace line.
to the following:
Here we use data binding capabilities ( data-win-bind attributes) with a template for projecting properties in data onto attributes in elements of html markup and DOM.
Try running the application for debugging:

It became better, but still not very. For example, as we expected, in some posts there are no images - and instead of them we got a lack of pictures or empty plugs. Let's put a colorful background for such posts. To do this, open the groupedItems.css file in the same folder.
Find the following line describing the display of a single element:
Add a background description at the end of this CSS rule:
Additionally, you can make several more manipulations of the background image, for example, center it, cancel repetitions and set the zoom mode:
Run the application:

Now let's move on to correcting the display of textual content.
Go back to the groupedItems.html file and item item template description ( itemtemplate ). At the end of the item you will find a description of the subheading ( item-subtitle ). In our case, there is no subtitle, but there is a date, so replace this line:
to the following:
If you try to start now, you will see that the date has moved somewhere and got on the headline.
To fix this, go back to the CSS file. Find a description of the subtitle:
Replace it with the appropriate date display description:
In this case, we also added right-justification and uppercase text display.
Now let's try to make the title of the record more and change its position on the tile.
For a start, it is necessary to bring it to a higher level Go to the groupedItems.html file and, within the element template, move the description of the header to a higher level, adding a wrapper. It should look like this:
Go back to the CSS file, it is necessary to display the change in the hierarchy and register the updated styles.
After the .groupeditemspage .groupeditemslist .item {...} rule add a new one:
Immediately after it, transfer the title description below ( .item-overlay should be replaced with .item-title-container ):
Try running a project:

To remove the background remaining from the original layout, go below to the code in the CSS file to the lines:
Replace the specified color with transparent .
Try increasing the text size of the date and changing the font to “Segoe UI Semibold” and the name of the application for another:

As a homework, try changing the appearance of the tiles so that they look like this (hint: gradients will help you):

Go inside the group and inside the separate blog. Similar actions to change the appearance must be done for all internal pages:


Put the application in Snapped mode (if you are working in Expression Blend, you can change the display mode on the Device tab). Here you also need to correct the styles according to the chosen style.

Snap-style styles are adjusted using Media Queries:
The finished project at the current stage can be downloaded here: http://aka.ms/win8jsreadertemplate_v1 .
In the next part, we will work on improving data management and adding support for multiple contracts.
Let me remind you that in the first article we learned how to add our own data sources and stopped on displaying this data in raw form on the pages of the application.
')
In this article we will look at the appearance of our application: add pictures, change the headers, styles, tiles, etc. All the work can be done in Visual Studio, although some things are more convenient and clearer to change in Expression Blend.
XAML / C #. If you are interested in developing using XAML and C #, I recommend to pay attention to a similar series of articles of my colleague - Stas Pavlov: We are dealing with the development of Windows 8 applications on XAML / #, implementing a simple RSS Reader .
Extract Images
First of all, let's try to pull images out of posts if they are there, of course. To do this, open the js \ data.js file and go to the getItemsFromRSSFeed function, which parses individual posts.
Add the following code in front of the “var postItem = {” line :
// var tempElement = document.createElement("div"); tempElement.innerHTML = postContent; var image = tempElement.querySelector("img"); var imglink = (image != null) ? "url('" + image.src + "')" : ""; Here we create a temporary element with post content and retrieve ( querySelector ) the first image from it to use it as a background image on tiles for posts. In case there are no images, we use an empty string, which we pass to the corresponding CSS rule.
Note : here we can also get into a situation where there is no explicit image in the post, but there is an invisible one used to count the number of views. This is exactly the situation for blogs used during the article, however, these pictures are transparent, so in our case it is not critical.
Add the following lines to the post description object ( postItem ), without forgetting to add a comma with the line above:
// backgroundImage: imglink It should look like this:
var postItem = { … link: post.querySelector("link").textContent, // backgroundImage: imglink }; If you now run the project for debugging, you will see that visually nothing has changed.
Open the pages \ groupedItems \ groupedItems.html file . Inside this file, templates are used to describe page structure and data binding. Find the item template starting with the line:
<div class="itemtemplate" data-win-control="WinJS.Binding.Template"> Two lines below you will see the picture description:
<img class="item-image" src="#" data-win-bind="src: backgroundImage; alt: title" /> If you are familiar with the basics of HTML, you probably already guessed why nothing has changed in the display: the format we used above is designed for use in CSS, rather than explicitly inserting an image link through img.
Note : one of the reasons why CSS is preferable in this case is the more flexible display settings and, in particular, the possibility of image manipulation, including the preservation of proportions.
Delete this line to insert an image.
Move up one level and replace line.
<div class="item"> to the following:
<div class="item" data-win-bind="style.backgroundImage: backgroundImage"> Here we use data binding capabilities ( data-win-bind attributes) with a template for projecting properties in data onto attributes in elements of html markup and DOM.
Try running the application for debugging:
It became better, but still not very. For example, as we expected, in some posts there are no images - and instead of them we got a lack of pictures or empty plugs. Let's put a colorful background for such posts. To do this, open the groupedItems.css file in the same folder.
Find the following line describing the display of a single element:
.groupeditemspage .groupeditemslist .item { Add a background description at the end of this CSS rule:
background-color: rgb(0, 204, 255); Additionally, you can make several more manipulations of the background image, for example, center it, cancel repetitions and set the zoom mode:
background-position: 50% 50%; background-repeat: no-repeat; background-size: cover; Run the application:
Now let's move on to correcting the display of textual content.
Update text styles
Go back to the groupedItems.html file and item item template description ( itemtemplate ). At the end of the item you will find a description of the subheading ( item-subtitle ). In our case, there is no subtitle, but there is a date, so replace this line:
<h6 class="item-subtitle win-type-ellipsis" data-win-bind="textContent: subtitle"></h6> to the following:
<h6 class="item-date win-type-ellipsis"> <span data-win-bind="textContent: day"></span> <span data-win-bind="textContent: month"></span> </h6> If you try to start now, you will see that the date has moved somewhere and got on the headline.
To fix this, go back to the CSS file. Find a description of the subtitle:
.groupeditemspage .groupeditemslist .item .item-overlay .item-subtitle { -ms-grid-row: 2; width: 220px; } Replace it with the appropriate date display description:
.groupeditemspage .groupeditemslist .item .item-overlay .item-date { -ms-grid-row: 2; width: 220px; text-transform: uppercase; text-align:right; } In this case, we also added right-justification and uppercase text display.
Note : Please note that the CSS 3 Grid Layout module is used for positioning elements. We will not dwell on the details of its use, but if you plan to create applications for the Windows Store on HTML / JS, we recommend that you study its features well.
Now let's try to make the title of the record more and change its position on the tile.
For a start, it is necessary to bring it to a higher level Go to the groupedItems.html file and, within the element template, move the description of the header to a higher level, adding a wrapper. It should look like this:
<div class="item" data-win-bind="style.backgroundImage: backgroundImage"> <!-- --> <div class="item-title-container"> <h4 class="item-title" data-win-bind="textContent: title"></h4> </div> <div class="item-overlay"> <h6 class="item-date win-type-ellipsis"> <span data-win-bind="textContent: day"></span> <span data-win-bind="textContent: month"></span> </h6> </div> </div> Go back to the CSS file, it is necessary to display the change in the hierarchy and register the updated styles.
After the .groupeditemspage .groupeditemslist .item {...} rule add a new one:
.groupeditemspage .groupeditemslist .item .item-title-container { -ms-grid-row: 1; margin: 10px; padding: 8px; opacity: 0.85; } Immediately after it, transfer the title description below ( .item-overlay should be replaced with .item-title-container ):
.groupeditemspage .groupeditemslist .item .item-title-container .item-title { overflow: hidden; width: 220px; display: inline; font-size: 1.6em; line-height: 1.5em; font-family: 'Segoe UI Light'; background: rgb(145, 0, 145); box-shadow: rgb(145, 0, 145) 0 0 0 8px; } Try running a project:
To remove the background remaining from the original layout, go below to the code in the CSS file to the lines:
.groupeditemspage .groupeditemslist .item .item-overlay { background: rgba(0,0,0,0.65); } Replace the specified color with transparent .
Try increasing the text size of the date and changing the font to “Segoe UI Semibold” and the name of the application for another:
As a homework, try changing the appearance of the tiles so that they look like this (hint: gradients will help you):
Go inside the group and inside the separate blog. Similar actions to change the appearance must be done for all internal pages:
Put the application in Snapped mode (if you are working in Expression Blend, you can change the display mode on the Device tab). Here you also need to correct the styles according to the chosen style.
Snap-style styles are adjusted using Media Queries:
@media screen and (-ms-view-state: snapped) { ... } Note: in this project we did not change the design theme (the default is dark). The theme is set in the CSS file connected from the WinJS library. You can easily find it in the title of each page:<link href="//Microsoft.WinJS.1.0/css/ui-dark.css" rel="stylesheet" />
Try changing dark to light to see the difference. Please note that not only the background color has changed, but also the color of text and other elements. In our case, this may lead to undesirable consequences, since some of the colors used are designed for a dark background color and a white color for the main text.
Project
The finished project at the current stage can be downloaded here: http://aka.ms/win8jsreadertemplate_v1 .
Further
In the next part, we will work on improving data management and adding support for multiple contracts.
Previous parts
Source: https://habr.com/ru/post/163813/
All Articles