Stellaris LaunchPad Short Review
Finally, the long-commissioned LaunchPad arrived, the first photos and a quick start - under the cut.

What kind of thing? Texas Instruments debug board with Cortex-M4F processor.
Specifications:
What's cool - the board has two absolutely identical LM4F120H5QR. One, with the already wired program, plays the role of a programmer and debugger, and the second is used for its intended purpose - the firmware is poured into it.
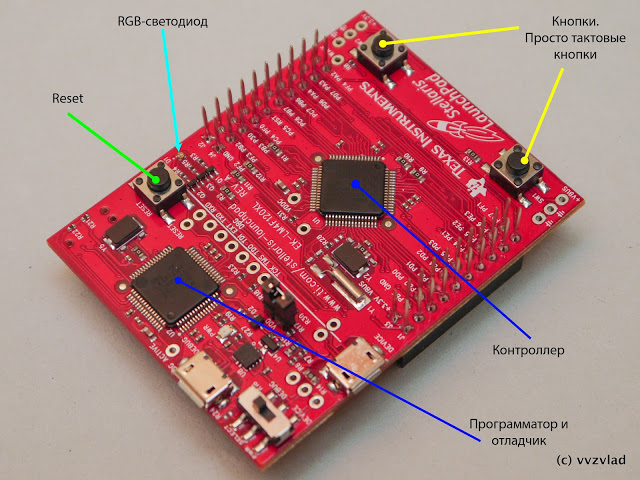
So what we have. two clock buttons connected to the pins and one button to reset the controller.
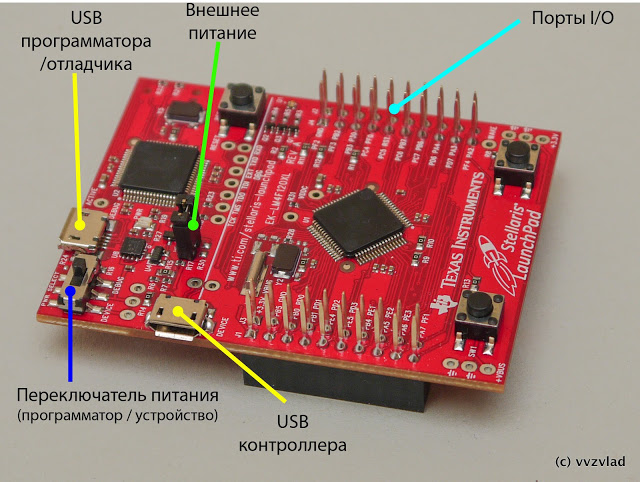
Many, many legs, two MicroUSB connectors connected to each of the two controllers (as I said, they are identical, and if you have a programmer, then you can also flash the first controller too). In the left corner of thering of the board is a switch that determines whether the board will be powered from the programmer connector, or from the device connector. This applies not only to the main controller, but also to the auxiliary controller (debugger). There is also a jumper that completely cuts off the power bus coming from the stabilizer from the main controller - this is necessary for those cases when the controller must work from its power source, the voltage on which may be different from the power supply.
Between the reset button and one of the output columns, a very small (but bright, contagious) three-color LED hid - probably 1x1mm in size.
Download the program.
Go here and find a package called EK-LM4F120XL-CCS. This is a Code Composer Studio and a toolkit for working with Stellaris.
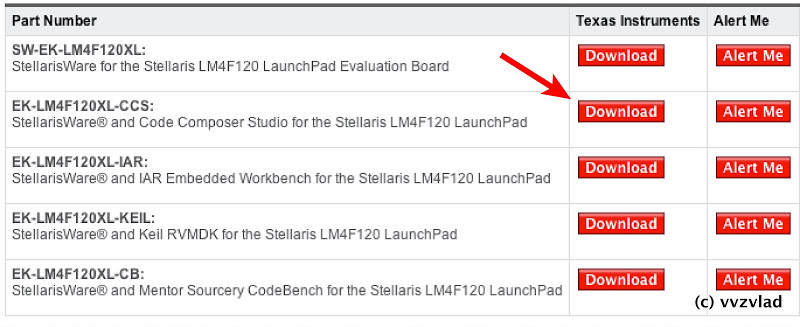
Click download. We agree with the agreement that we will not make a warhead out of this board, describe the device and scope (specifically this download is not checked, you can write anything. In some particularly secret information, a specially trained person will check the information entered).
Unpack From the Software \ CCS folder we set up a studio, connect the board, and install drivers from the Software \ ICDI folder.
Launch SW-EK-LM4F120XL-9453 from the Software \ StellarisWare folder. It will be unpacked by default to the root of the system drive, the StellarisWare folder.
Go to the studio:

Project - Import Exiting CSS Eclipse Project, then poke your nose into the folder obtained in the previous step.

Select All - Finish. After the end of copying, open the View - Project Explorer, in which we see examples of programs:
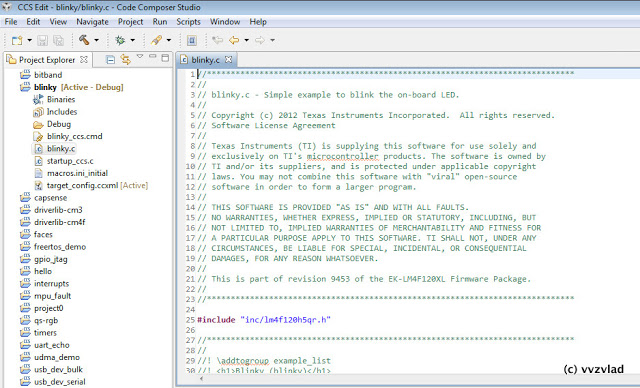
Right-click on any project you like, Debug As. The project will be assembled, poured into the controller, and will stand on the first instruction, and you will have the debug window open.
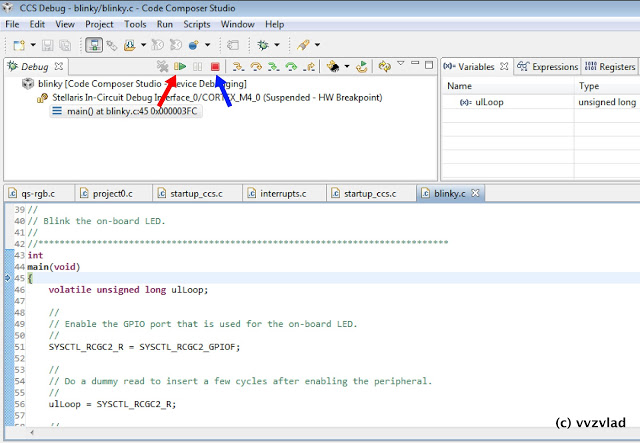
Red arrow - start execution, blue arrow - close the debag box.
Successful debugging! :)
What kind of thing? Texas Instruments debug board with Cortex-M4F processor.
Specifications:
- Core frequency 80 MHz (performance 100 DMIPS)
- Memory: 256 KB flash, 32 KB SRAM, 2KB EEPROM
- 8 UART, 4 SPI, 1 CAN, 6 I²C, the most delicious is full USB (capable of both Device and Host and OTG)
- 3 analog comparator, two 12-bit ADC, temperature sensor.
- 16 PWM, 2 entrances for encoders, 12 timers, a real-time timer with quartz clock, 2 watches.
- 43 pins I / O.
Pay
The package shows a board of the same size as the Launchpad MSP430, and a short USB-MicroUSB cable.What's cool - the board has two absolutely identical LM4F120H5QR. One, with the already wired program, plays the role of a programmer and debugger, and the second is used for its intended purpose - the firmware is poured into it.
So what we have. two clock buttons connected to the pins and one button to reset the controller.
Many, many legs, two MicroUSB connectors connected to each of the two controllers (as I said, they are identical, and if you have a programmer, then you can also flash the first controller too). In the left corner of the
Between the reset button and one of the output columns, a very small (but bright, contagious) three-color LED hid - probably 1x1mm in size.
Fast start
Download the program.
Go here and find a package called EK-LM4F120XL-CCS. This is a Code Composer Studio and a toolkit for working with Stellaris.
Click download. We agree with the agreement that we will not make a warhead out of this board, describe the device and scope (specifically this download is not checked, you can write anything. In some particularly secret information, a specially trained person will check the information entered).
Unpack From the Software \ CCS folder we set up a studio, connect the board, and install drivers from the Software \ ICDI folder.
Launch SW-EK-LM4F120XL-9453 from the Software \ StellarisWare folder. It will be unpacked by default to the root of the system drive, the StellarisWare folder.
Go to the studio:
Project - Import Exiting CSS Eclipse Project, then poke your nose into the folder obtained in the previous step.
Select All - Finish. After the end of copying, open the View - Project Explorer, in which we see examples of programs:
Right-click on any project you like, Debug As. The project will be assembled, poured into the controller, and will stand on the first instruction, and you will have the debug window open.
Red arrow - start execution, blue arrow - close the debag box.
Successful debugging! :)
')
Source: https://habr.com/ru/post/162737/
All Articles