How to write a game in the style of tower defense
Tower Defense Genre is one of the most popular genres of games on iOS. The reason for this is a fun pastime, flavored with the construction of towers to create the last point of defense against hordes of monsters who are trying to break through this very defense.
I present to your attention the translation of an article written by Pablo Ruiz, and found by me on the site raywenderlich.com .
This tutorial will show you how to create a tower defense game from scratch using Cocos2D.
In the process, you will learn the following:
At the end of the lesson, you will have your own framework for creating games of this type, which you can expand by adding new types of enemies, towers and maps.
To understand this lesson, you need a basic understanding of Cocos2D. If you are a beginner, you can take a look at the easier lessons on Ray's website .
If you are not familiar with the genre, Tower Defense is a strategic game where a player buys and positions armed towers at strategic points to stop waves of enemies who are trying to reach the base and destroy it.
Each subsequent wave of enemies is usually stronger than the previous one; this is achieved by increasing the resistance to your weapon and the ability to move faster. The game ends when you have withstood all the waves of the enemies (Victory!), Or if the enemies got to the base and destroyed it (Loss!).
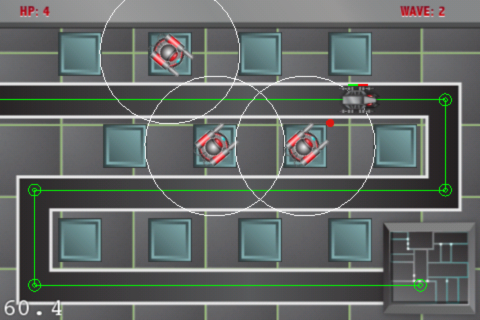
Here is a screenshot of the game that we’ll finish writing at the end of the lesson:

As you can see in the picture, enemies appear from the top left of the screen and follow the green route to the player’s base.
Along the road are many platforms where the player can install a tower. A player can buy exactly as many towers as gold reserves allow. The attack radii of the towers are shown in the white circle, if the enemies are inside this circle, the tower will shoot at them until it is destroyed, or the enemies will not go beyond the attack radius.
')
A starter project has already been prepared for you, containing an empty Cocos2D template and most of the resources that we will use during the lesson.
The start project contains the basic Cocos2D 1.1 template, which provides a working application containing HelloWorldLayer and a line in the middle of the screen. We will not use HelloWorldLayer, because we will create our own interface, and yet this class is provided so that you are sure that everything works at this stage.
Open the project in Xcode, compile and run it. The text “Hello World” has been removed from the project, so you just have to get a black screen and not get errors during the launch process.
Take a look at the project structure. Inside the TowerDefense folder you will find:
Now you can start customizing the map and create towers!
First, add a background image to the scene. Open the HelloWorldLayer.m class and add the following lines of code inside the “if” clause in the init method:
The first line in section # 1 allows the layer to accept touch events. The rest of the code in section # 2 adds a background sprite to our scene.
The background image helps to see where the player can put the tower. Now you need to set several points on the screen, touching which the player can build towers.
To preserve the meaning of our actions, all points will be located in the ".plist" file, in which they can be easily changed. TowerPosition.plist is located in the Resources folder and already contains several positions for building towers inside.
Consider this file, you will find an array of dictionaries that contain only two keys: "x" and "y". Each dictionary represents the position of the tower according to its coordinates on the screen. Now you need to register this file and install the bases for the towers on the map.
Open HelloWorldLayer.h and add the following variable (inside the curly braces after the interface line):
Make the following changes to HelloWorldLayer.m :
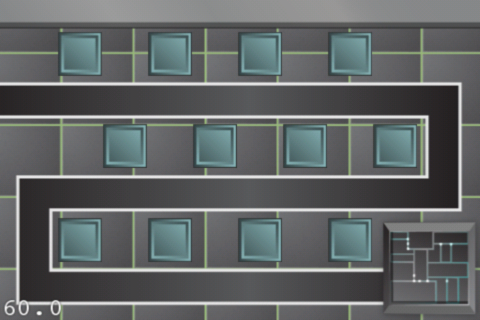
Compile and run the application, you will see the squares on the sides of the road, they will serve as the base for the installation of towers.
Now these bases are ready, let's build some towers!
First, open HelloWorldLayer.h and add the following line after closing the curly braces:
Synthesize the turret variable in HelloWorldLayer.m below the @implementation line:
Then, create a new class that will represent the towers. Add a new file from the iOS \ Cocoa Touch \ Objective-C template. Name the class Tower , and make it a subclass of CCNode .
Replace the contents of Tower.h with the following:
Then replace the contents of Tower.m with this:
The class of towers contains several variables: the sprite is a visual representation of the tower, a link to the parent layer for easy access and three variables:
With these three variables, you can create a huge variety of types of towers with different types of attacks. And finally, the code contains a method for drawing the attack radius of the tower for ease of testing.
It is time to allow the player to add towers!
Open HelloWorldLayer.m and make the following changes:
ccTouchesBegan : captures the touch screen. The code then iterates through the towerBases array and checks to see if any of the tower bases contains a touch point.
But before the towers can be made, you have to check two things:
If all conditions are met, a new tower is created, installed on the base and added to the array of towers.
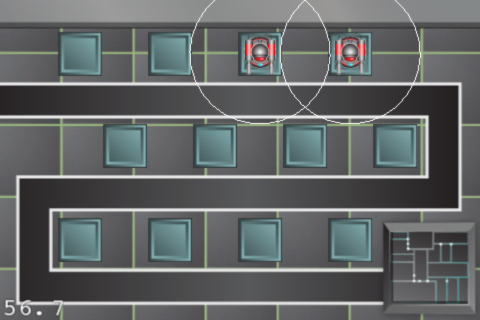
Compile and run the game. Touch any base and you will see that a tower is added with a white circle around it, showing the range of its attack.
But why all this weapons without the "bad guys", let's call them to the party!
Before creating enemies, let's pave the way for them. Enemies will follow the route from the waypoints, which are essentially points connected to each other and determine the path of the enemies in your world. Enemies will appear on the first waypoint, search for the next one in the list, move towards it, and repeat this until they reach the last — your base! If this happens, you will suffer damage.
Create a list of waypoints by creating a new file from the iOS \ Cocoa Touch \ Objective-C class template. Name the class Waypoint and make it a subclass of CCNode .
Replace the contents of Waypoint.h with the following:
Next, replace the contents of Waypoint.m :
First, the code creates a waypoint object, referring to the HelloWorldLayer object and defining a CGPoint, which is the waypoint position.
Each waypoint contains a link to the next one, this creates a linked list of waypoints. Each waypoint “knows” the next one in the list. In this way, you can lead your enemies to their final goal by moving along the waypoint chain.
At the end, the drawing method shows us where the waypoints are and draws a connection line between them, for testing purposes.
Create a list of waypoints. Open HelloWorldLayer.h and add the following variable:
Compile and run the game:
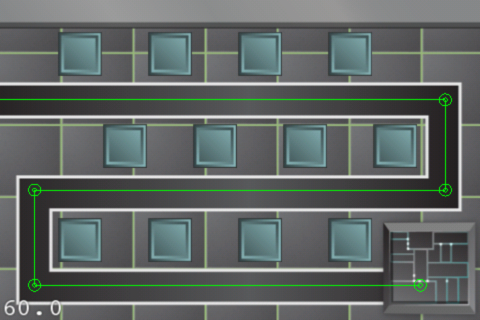
There are six waypoints on the map, the enemies will follow this path. Before you let your friends lose the game, you need to add a few helper methods.
First, add a description of the methods to the header file so that other classes can use these methods without warning from the compiler.
Open HelloWorldLayer.h and add the following method descriptions before the " end " line:
The collisionWithCircle method will help us figure out when two circles collide or intersect. This will help to understand whether the enemy has reached a waypoint, as well as to identify the enemies within the attack radius of the tower.
The ccFillPoly method draws filled polygons using OpenGL. In Cocos2d, you can only draw unfilled polygons. The ccFillPoly method will be used to draw stripes of enemies' health.
It's time to release the enemies.
Open HelloWorldLayer.h and add the following code:
It's time to create a class that will contain all the information about the enemies and control their movement around the screen. Create a new iOS \ Cocoa Touch \ Objective-C file. Name the class Enemy and make it a subclass of CCNode .
Replace the contents of Enemy.h :
Now the contents of Enemy.m :
This is an impressive piece of code, but it is easy to understand. An enemy is created first when HelloWorldLayer refers to it. Inside the init method are several important variables:
The update method is called every frame, first we check if the enemy has reached the next waypoint using the collisionWithCircle method we described earlier. If this happens, we send it to the next one and so on until it reaches the last waypoint, then we inflict damage to the player.
Movement of the sprite along a straight line from one waypoint to another, according to the speed of movement, is achieved by the following algorithm:
Finally, the render method creates a health bar above the sprite. Initially, he draws a red background, then covers it with green, according to the current HP number of the enemy.
The class of enemies is ready, you can show them on the screen!
Open HelloWorldLayer.h and add the following method description:
Switch to HelloWorldLayer.m and describe the method:
Everything written above is worthy of an explanation. The most important part is the LoadWave method; it reads data from the Waves.plist .
Take a look at the Waves.plist and you will notice that it contains 3 arrays. Each of them represents a wave, which is a group of enemies appearing together. The first array contains six dictionaries. Each dictionary represents an enemy. In this lesson, the dictionary stores only the time of appearance of the enemy, but may contain the type of enemy, his abilities, health, etc.
The loadWave method checks whether the next wave should appear, creates corresponding enemies based on the information about the wave, and lists their appearance time accordingly.
The enemyGotKilled method checks the number of enemies on the screen, if they are not there, calls the next wave. Later the same method will be used to verify the player’s victory.
Compile and run the game now. Enemies are moving to your base!

Towers in place? Check it out. Enemies moving? Check back! It's time to overwhelm these insolent.
Each tower checks if there is an enemy within its range. If so, the tower begins to shoot at him, until one of two things happens: the enemy will go beyond the reach, or the enemy will be destroyed. Then the tower will begin to search for a new victim.
Let's start to protect the base!
Open Tower.h and make the following changes:
Finally, replace the empty update method with:
The code is a lot of it. Plus, you probably noticed an increasing number of warnings from the compiler as you add code. First, let's deal with the warnings, adding a few missing bits.
Open Enemy.h and make the following changes:
Now in Enemy.m :
The most important part in the code is the update method in the Tower class. The tower will constantly check for the presence of the enemy within the radius of attack. If there is one, the tower turns to it and starts shooting.
As soon as the enemy is marked as a target, the method sets the shooting schedule of the tower according to its rate of fire. Each enemy contains a list of towers firing at him, if the enemy dies, they will all be notified of this fact and stop shooting.
Compile and run your application. Arrange several towers on the map. You will see how the towers start firing at enemies passing inside their radius, as the stripes of their health change until they die.

It remains to add a few details to get the finished version of tower defense. It would be nice to add sound effects, teach the base to take damage from enemies and limit the amount of player's gold.
Let's start with the display of the number of lives left to the player, and what will happen when they run out!
Open HelloWorldLayer.h and add the following variables:
, , , . , !
getHpDamage , . update Enemy.m .
. . , , .
!
“zero-sum”, . , .
HelloWorldLayer.h :
, (playerGold) (ui_gold_lbl). :
HelloWorldLayer.m :
, , . , , . .
getDamaged: ( “if”) Enemy.m :
Start the game and you will see that you can build exactly as many towers as gold reserves allow. For killing enemies, gold is added. A delightful system, is it not?

Finally add some music!
Open HelloWorldLayer.m :
Now in Enemy.m :
Everything!You are done! Run the game, how do you get retro sounds ?!
Sample project with everything we did above: TowerDefenseFinished.zip
I present to your attention the translation of an article written by Pablo Ruiz, and found by me on the site raywenderlich.com .
This tutorial will show you how to create a tower defense game from scratch using Cocos2D.
In the process, you will learn the following:
- How to create waves of enemies and adjust the time of their appearance.
- How to make these enemies move at given points (waypoints).
- How to build towers on designated areas on the map.
- How to make towers shoot at enemies.
- How to visualize waypoints and attack radii of towers.
At the end of the lesson, you will have your own framework for creating games of this type, which you can expand by adding new types of enemies, towers and maps.
To understand this lesson, you need a basic understanding of Cocos2D. If you are a beginner, you can take a look at the easier lessons on Ray's website .
View from the Ivory Tower
If you are not familiar with the genre, Tower Defense is a strategic game where a player buys and positions armed towers at strategic points to stop waves of enemies who are trying to reach the base and destroy it.
Each subsequent wave of enemies is usually stronger than the previous one; this is achieved by increasing the resistance to your weapon and the ability to move faster. The game ends when you have withstood all the waves of the enemies (Victory!), Or if the enemies got to the base and destroyed it (Loss!).
Here is a screenshot of the game that we’ll finish writing at the end of the lesson:
As you can see in the picture, enemies appear from the top left of the screen and follow the green route to the player’s base.
Along the road are many platforms where the player can install a tower. A player can buy exactly as many towers as gold reserves allow. The attack radii of the towers are shown in the white circle, if the enemies are inside this circle, the tower will shoot at them until it is destroyed, or the enemies will not go beyond the attack radius.
')
Resource Preparation
A starter project has already been prepared for you, containing an empty Cocos2D template and most of the resources that we will use during the lesson.
The start project contains the basic Cocos2D 1.1 template, which provides a working application containing HelloWorldLayer and a line in the middle of the screen. We will not use HelloWorldLayer, because we will create our own interface, and yet this class is provided so that you are sure that everything works at this stage.
Open the project in Xcode, compile and run it. The text “Hello World” has been removed from the project, so you just have to get a black screen and not get errors during the launch process.
Take a look at the project structure. Inside the TowerDefense folder you will find:
- All classes used in the game
- Cocos2D Library Folder
- Resource folder with the necessary graphics and sounds
Now you can start customizing the map and create towers!
Installation of towers
First, add a background image to the scene. Open the HelloWorldLayer.m class and add the following lines of code inside the “if” clause in the init method:
// 1 - self.isTouchEnabled = YES; CGSize wins = [CCDirector sharedDirector].winSize; // 2 - CCSprite * background = [CCSprite spriteWithFile:@"Bg.png"]; [self addChild:background]; [background setPosition:ccp(wins.width/2,wins.height/2)]; The first line in section # 1 allows the layer to accept touch events. The rest of the code in section # 2 adds a background sprite to our scene.
The background image helps to see where the player can put the tower. Now you need to set several points on the screen, touching which the player can build towers.
To preserve the meaning of our actions, all points will be located in the ".plist" file, in which they can be easily changed. TowerPosition.plist is located in the Resources folder and already contains several positions for building towers inside.
Consider this file, you will find an array of dictionaries that contain only two keys: "x" and "y". Each dictionary represents the position of the tower according to its coordinates on the screen. Now you need to register this file and install the bases for the towers on the map.
Open HelloWorldLayer.h and add the following variable (inside the curly braces after the interface line):
NSMutableArray * towerBases; Make the following changes to HelloWorldLayer.m :
Code
// "init" -(void)loadTowerPositions { NSString* plistPath = [[NSBundle mainBundle] pathForResource:@"TowersPosition" ofType:@"plist"]; NSArray * towerPositions = [NSArray arrayWithContentsOfFile:plistPath]; towerBases = [[NSMutableArray alloc] initWithCapacity:10]; for(NSDictionary * towerPos in towerPositions) { CCSprite * towerBase = [CCSprite spriteWithFile:@"open_spot.png"]; [self addChild:towerBase]; [towerBase setPosition:ccp([[towerPos objectForKey:@"x"] intValue],[[towerPos objectForKey:@"y"] intValue])]; [towerBases addObject:towerBase]; } } // init, #2 // 3 - [self loadTowerPositions]; // dealloc, ( super) [towerBases release]; Compile and run the application, you will see the squares on the sides of the road, they will serve as the base for the installation of towers.
Now these bases are ready, let's build some towers!
First, open HelloWorldLayer.h and add the following line after closing the curly braces:
@property (nonatomic,retain) NSMutableArray *towers; Synthesize the turret variable in HelloWorldLayer.m below the @implementation line:
@synthesize towers; Then, create a new class that will represent the towers. Add a new file from the iOS \ Cocoa Touch \ Objective-C template. Name the class Tower , and make it a subclass of CCNode .
Replace the contents of Tower.h with the following:
Code
#import "cocos2d.h" #import "HelloWorldLayer.h" #define kTOWER_COST 300 @class HelloWorldLayer, Enemy; @interface Tower: CCNode { int attackRange; int damage; float fireRate; } @property (nonatomic,assign) HelloWorldLayer *theGame; @property (nonatomic,assign) CCSprite *mySprite; +(id)nodeWithTheGame:(HelloWorldLayer*)_game location:(CGPoint)location; -(id)initWithTheGame:(HelloWorldLayer *)_game location:(CGPoint)location; @end Then replace the contents of Tower.m with this:
Code
#import "Tower.h" @implementation Tower @synthesize mySprite,theGame; +(id) nodeWithTheGame:(HelloWorldLayer*)_game location:(CGPoint)location { return [[[self alloc] initWithTheGame:_game location:location] autorelease]; } -(id) initWithTheGame:(HelloWorldLayer *)_game location:(CGPoint)location { if( (self=[super init])) { theGame = _game; attackRange = 70; damage = 10; fireRate = 1; mySprite = [CCSprite spriteWithFile:@"tower.png"]; [self addChild:mySprite]; [mySprite setPosition:location]; [theGame addChild:self]; [self scheduleUpdate]; } return self; } -(void)update:(ccTime)dt { } -(void)draw { glColor4f(255, 255, 255, 255); ccDrawCircle(mySprite.position, attackRange, 360, 30, false); [super draw]; } -(void)dealloc { [super dealloc]; } @end The class of towers contains several variables: the sprite is a visual representation of the tower, a link to the parent layer for easy access and three variables:
- attackRange: determines the distance from which towers can attack enemies
- damage: determines how much damage the tower deals to enemies
- fireRate: determines how long the towers need to reload
With these three variables, you can create a huge variety of types of towers with different types of attacks. And finally, the code contains a method for drawing the attack radius of the tower for ease of testing.
It is time to allow the player to add towers!
Open HelloWorldLayer.m and make the following changes:
Code
// : #import "Tower.h" //dealloc: [towers release]; // dealloc : -(BOOL)canBuyTower { return YES; } - (void)ccTouchesBegan:(NSSet *)touches withEvent:(UIEvent *)event { for( UITouch *touch in touches ) { CGPoint location = [touch locationInView: [touch view]]; location = [[CCDirector sharedDirector] convertToGL: location]; for(CCSprite * tb in towerBases) { if([self canBuyTower] && CGRectContainsPoint([tb boundingBox],location) && !tb.userData) { // . Tower * tower = [Tower nodeWithTheGame:self location:tb.position]; [towers addObject:tower]; tb.userData = tower; } } } } ccTouchesBegan : captures the touch screen. The code then iterates through the towerBases array and checks to see if any of the tower bases contains a touch point.
But before the towers can be made, you have to check two things:
- Can a player allow such pleasure? The canBuyTower method will check if the user has enough gold to buy a tower. Although, at the moment, the player has all the gold of Fort Knox and the method will always return YES.
- Does the player break the construction rules? If tb.UserData is set, then the tower is already at that place and you cannot build a new one.
If all conditions are met, a new tower is created, installed on the base and added to the array of towers.
Compile and run the game. Touch any base and you will see that a tower is added with a white circle around it, showing the range of its attack.
But why all this weapons without the "bad guys", let's call them to the party!
Game Policy: Enemies, Waves and Waypoints
Before creating enemies, let's pave the way for them. Enemies will follow the route from the waypoints, which are essentially points connected to each other and determine the path of the enemies in your world. Enemies will appear on the first waypoint, search for the next one in the list, move towards it, and repeat this until they reach the last — your base! If this happens, you will suffer damage.
Create a list of waypoints by creating a new file from the iOS \ Cocoa Touch \ Objective-C class template. Name the class Waypoint and make it a subclass of CCNode .
Replace the contents of Waypoint.h with the following:
Code
#import "cocos2d.h" #import "HelloWorldLayer.h" @interface Waypoint: CCNode { HelloWorldLayer *theGame; } @property (nonatomic,readwrite) CGPoint myPosition; @property (nonatomic,assign) Waypoint *nextWaypoint; +(id)nodeWithTheGame:(HelloWorldLayer*)_game location:(CGPoint)location; -(id)initWithTheGame:(HelloWorldLayer *)_game location:(CGPoint)location; @end Next, replace the contents of Waypoint.m :
Code
#import "Waypoint.h" @implementation Waypoint @synthesize myPosition, nextWaypoint; +(id)nodeWithTheGame:(HelloWorldLayer*)_game location:(CGPoint)location { return [[[self alloc] initWithTheGame:_game location:location] autorelease]; } -(id)initWithTheGame:(HelloWorldLayer *)_game location:(CGPoint)location { if( (self=[super init])) { theGame = _game; [self setPosition:CGPointZero]; myPosition = location; [theGame addChild:self]; } return self; } -(void)draw { glColor4f(0, 255, 0, 255); ccDrawCircle(myPosition, 6, 360, 30, false); ccDrawCircle(myPosition, 2, 360, 30, false); if(nextWaypoint) ccDrawLine(myPosition, nextWaypoint.myPosition); [super draw]; } -(void)dealloc { [super dealloc]; } @end First, the code creates a waypoint object, referring to the HelloWorldLayer object and defining a CGPoint, which is the waypoint position.
Each waypoint contains a link to the next one, this creates a linked list of waypoints. Each waypoint “knows” the next one in the list. In this way, you can lead your enemies to their final goal by moving along the waypoint chain.
At the end, the drawing method shows us where the waypoints are and draws a connection line between them, for testing purposes.
Create a list of waypoints. Open HelloWorldLayer.h and add the following variable:
Code
Add the following code to HelloWorldLayer.m :
@property (nonatomic,retain) NSMutableArray *waypoints; Add the following code to HelloWorldLayer.m :
// : #import "Waypoint.h" // synthesise @synthesize waypoints; // init -(void)addWaypoints { waypoints = [[NSMutableArray alloc] init]; Waypoint * waypoint1 = [Waypoint nodeWithTheGame:self location:ccp(420,35)]; [waypoints addObject:waypoint1]; Waypoint * waypoint2 = [Waypoint nodeWithTheGame:self location:ccp(35,35)]; [waypoints addObject:waypoint2]; waypoint2.nextWaypoint =waypoint1; Waypoint * waypoint3 = [Waypoint nodeWithTheGame:self location:ccp(35,130)]; [waypoints addObject:waypoint3]; waypoint3.nextWaypoint =waypoint2; Waypoint * waypoint4 = [Waypoint nodeWithTheGame:self location:ccp(445,130)]; [waypoints addObject:waypoint4]; waypoint4.nextWaypoint =waypoint3; Waypoint * waypoint5 = [Waypoint nodeWithTheGame:self location:ccp(445,220)]; [waypoints addObject:waypoint5]; waypoint5.nextWaypoint =waypoint4; Waypoint * waypoint6 = [Waypoint nodeWithTheGame:self location:ccp(-40,220)]; [waypoints addObject:waypoint6]; waypoint6.nextWaypoint =waypoint5; } // init: // 4 - Add waypoints [self addWaypoints]; // dealloc [waypoints release]; Compile and run the game:
There are six waypoints on the map, the enemies will follow this path. Before you let your friends lose the game, you need to add a few helper methods.
First, add a description of the methods to the header file so that other classes can use these methods without warning from the compiler.
Open HelloWorldLayer.h and add the following method descriptions before the " end " line:
Code
Next, open HelloWorldLayer.m and add the following lines to the end of the file (before the end ):
-(BOOL)circle:(CGPoint)circlePoint withRadius:(float)radius collisionWithCircle:(CGPoint)circlePointTwo collisionCircleRadius:(float)radiusTwo; void ccFillPoly(CGPoint *poli, int points, BOOL closePolygon); Next, open HelloWorldLayer.m and add the following lines to the end of the file (before the end ):
void ccFillPoly( CGPoint *poli, int points, BOOL closePolygon ) { // GL: GL_TEXTURE_2D, GL_VERTEX_ARRAY, GL_COLOR_ARRAY, GL_TEXTURE_COORD_ARRAY // : GL_VERTEX_ARRAY, // : GL_TEXTURE_2D, GL_TEXTURE_COORD_ARRAY, GL_COLOR_ARRAY glDisable(GL_TEXTURE_2D); glDisableClientState(GL_TEXTURE_COORD_ARRAY); glDisableClientState(GL_COLOR_ARRAY); glVertexPointer(2, GL_FLOAT, 0, poli); if( closePolygon ) glDrawArrays(GL_TRIANGLE_FAN, 0, points); else glDrawArrays(GL_LINE_STRIP, 0, points); // restore default state glEnableClientState(GL_COLOR_ARRAY); glEnableClientState(GL_TEXTURE_COORD_ARRAY); glEnable(GL_TEXTURE_2D); } -(BOOL)circle:(CGPoint) circlePoint withRadius:(float) radius collisionWithCircle:(CGPoint) circlePointTwo collisionCircleRadius:(float) radiusTwo { float xdif = circlePoint.x - circlePointTwo.x; float ydif = circlePoint.y - circlePointTwo.y; float distance = sqrt(xdif*xdif+ydif*ydif); if(distance <= radius+radiusTwo) return YES; return NO; } The collisionWithCircle method will help us figure out when two circles collide or intersect. This will help to understand whether the enemy has reached a waypoint, as well as to identify the enemies within the attack radius of the tower.
The ccFillPoly method draws filled polygons using OpenGL. In Cocos2d, you can only draw unfilled polygons. The ccFillPoly method will be used to draw stripes of enemies' health.
It's time to release the enemies.
Open HelloWorldLayer.h and add the following code:
Code
Make the following changes to HelloWorldLayer.m :
// int wave; CCLabelBMFont *ui_wave_lbl; // property @property (nonatomic,retain) NSMutableArray *enemies; Make the following changes to HelloWorldLayer.m :
// Synthesize enemies @synthesize enemies; // dealloc [enemies release]; It's time to create a class that will contain all the information about the enemies and control their movement around the screen. Create a new iOS \ Cocoa Touch \ Objective-C file. Name the class Enemy and make it a subclass of CCNode .
Replace the contents of Enemy.h :
Code
#import "cocos2d.h" #import "HelloWorldLayer.h" #import "GameConfig.h" @class HelloWorldLayer, Waypoint, Tower; @interface Enemy: CCNode { CGPoint myPosition; int maxHp; int currentHp; float walkingSpeed; Waypoint *destinationWaypoint; BOOL active; } @property (nonatomic,assign) HelloWorldLayer *theGame; @property (nonatomic,assign) CCSprite *mySprite; +(id)nodeWithTheGame:(HelloWorldLayer*)_game; -(id)initWithTheGame:(HelloWorldLayer *)_game; -(void)doActivate; -(void)getRemoved; @end Now the contents of Enemy.m :
Code
#import "Enemy.h" #import "Tower.h" #import "Waypoint.h" #import "SimpleAudioEngine.h" #define HEALTH_BAR_WIDTH 20 #define HEALTH_BAR_ORIGIN -10 @implementation Enemy @synthesize mySprite, theGame; +(id)nodeWithTheGame:(HelloWorldLayer*)_game { return [[[self alloc] initWithTheGame:_game] autorelease]; } -(id)initWithTheGame:(HelloWorldLayer *)_game { if ((self=[super init])) { theGame = _game; maxHp = 40; currentHp = maxHp; active = NO; walkingSpeed = 0.5; mySprite = [CCSprite spriteWithFile:@"enemy.png"]; [self addChild:mySprite]; Waypoint * waypoint = (Waypoint *)[theGame.waypoints objectAtIndex:([theGame.waypoints count]-1)]; destinationWaypoint = waypoint.nextWaypoint; CGPoint pos = waypoint.myPosition; myPosition = pos; [mySprite setPosition:pos]; [theGame addChild:self]; [self scheduleUpdate]; } return self; } -(void)doActivate { active = YES; } -(void)update:(ccTime)dt { if(!active)return; if([theGame circle:myPosition withRadius:1 collisionWithCircle:destinationWaypoint.myPosition collisionCircleRadius:1]) { if(destinationWaypoint.nextWaypoint) { destinationWaypoint = destinationWaypoint.nextWaypoint; }else { // . [theGame getHpDamage]; [self getRemoved]; } } CGPoint targetPoint = destinationWaypoint.myPosition; float movementSpeed = walkingSpeed; CGPoint normalized = ccpNormalize(ccp(targetPoint.x-myPosition.x,targetPoint.y-myPosition.y)); mySprite.rotation = CC_RADIANS_TO_DEGREES(atan2(normalized.y,-normalized.x)); myPosition = ccp(myPosition.x+normalized.x * movementSpeed,myPosition.y+normalized.y * movementSpeed); [mySprite setPosition:myPosition]; } -(void)getRemoved { [self.parent removeChild:self cleanup:YES]; [theGame.enemies removeObject:self]; // [theGame enemyGotKilled]; } -(void)draw { glColor4f(255, 0, 0, 255); CGPoint healthBarBack[] = {ccp(mySprite.position.x -10,mySprite.position.y+16),ccp(mySprite.position.x+10,mySprite.position.y+16),ccp(mySprite.position.x+10,mySprite.position.y+14),ccp(mySprite.position.x-10,mySprite.position.y+14)}; ccFillPoly(healthBarBack, 4, YES); glColor4f(0, 255, 0, 255); CGPoint healthBar[] = {ccp(mySprite.position.x + HEALTH_BAR_ORIGIN,mySprite.position.y+16),ccp(mySprite.position.x+HEALTH_BAR_ORIGIN+(float)(currentHp * HEALTH_BAR_WIDTH) / maxHp,mySprite.position.y+16),ccp(mySprite.position.x+HEALTH_BAR_ORIGIN+(float)(currentHp * HEALTH_BAR_WIDTH) / maxHp,mySprite.position.y+14),ccp(mySprite.position.x+HEALTH_BAR_ORIGIN,mySprite.position.y+14)}; ccFillPoly(healthBar, 4, YES); } -(void)dealloc { [super dealloc]; } @end This is an impressive piece of code, but it is easy to understand. An enemy is created first when HelloWorldLayer refers to it. Inside the init method are several important variables:
- maxHP: determines how many blows the enemy can withstand.
- walkingSpeed: determines how fast the enemy is moving
- mySprite: stores the visual representation of the enemy (sprite)
- destinationWaypoint: stores the link to the next waypoint
The update method is called every frame, first we check if the enemy has reached the next waypoint using the collisionWithCircle method we described earlier. If this happens, we send it to the next one and so on until it reaches the last waypoint, then we inflict damage to the player.
Movement of the sprite along a straight line from one waypoint to another, according to the speed of movement, is achieved by the following algorithm:
- The vector running from the current position to the target is calculated, it is assigned the value 1, for convenience of work (normalized variable).
- The normalized vector is multiplied by the speed of movement, to calculate the number of paths to overcome in a given frame. He is assigned the current position for the next one.
Finally, the render method creates a health bar above the sprite. Initially, he draws a red background, then covers it with green, according to the current HP number of the enemy.
The class of enemies is ready, you can show them on the screen!
Open HelloWorldLayer.h and add the following method description:
-(void)enemyGotKilled; Switch to HelloWorldLayer.m and describe the method:
Code
// : #import "Enemy.h" // init: -(BOOL)loadWave { NSString* plistPath = [[NSBundle mainBundle] pathForResource:@"Waves" ofType:@"plist"]; NSArray * waveData = [NSArray arrayWithContentsOfFile:plistPath]; if(wave >= [waveData count]) { return NO; } NSArray * currentWaveData =[NSArray arrayWithArray:[waveData objectAtIndex:wave]]; for(NSDictionary * enemyData in currentWaveData) { Enemy * enemy = [Enemy nodeWithTheGame:self]; [enemies addObject:enemy]; [enemy schedule:@selector(doActivate) interval:[[enemyData objectForKey:@"spawnTime"]floatValue]]; } wave++; [ui_wave_lbl setString:[NSString stringWithFormat:@"WAVE: %d",wave]]; return YES; } -(void)enemyGotKilled { if ([enemies count]<=0) //If there are no more enemies. { if(![self loadWave]) { NSLog(@"You win!"); [[CCDirector sharedDirector] replaceScene:[CCTransitionSplitCols transitionWithDuration:1 scene:[HelloWorldLayer scene]]]; } } } // init: // 5 - enemies = [[NSMutableArray alloc] init]; [self loadWave]; // 6 - ui_wave_lbl = [CCLabelBMFont labelWithString:[NSString stringWithFormat:@"WAVE: %d",wave] fntFile:@"font_red_14.fnt"]; [self addChild:ui_wave_lbl z:10]; [ui_wave_lbl setPosition:ccp(400,wins.height-12)]; [ui_wave_lbl setAnchorPoint:ccp(0,0.5)]; Everything written above is worthy of an explanation. The most important part is the LoadWave method; it reads data from the Waves.plist .
Take a look at the Waves.plist and you will notice that it contains 3 arrays. Each of them represents a wave, which is a group of enemies appearing together. The first array contains six dictionaries. Each dictionary represents an enemy. In this lesson, the dictionary stores only the time of appearance of the enemy, but may contain the type of enemy, his abilities, health, etc.
The loadWave method checks whether the next wave should appear, creates corresponding enemies based on the information about the wave, and lists their appearance time accordingly.
The enemyGotKilled method checks the number of enemies on the screen, if they are not there, calls the next wave. Later the same method will be used to verify the player’s victory.
Compile and run the game now. Enemies are moving to your base!
Attack of the towers
Towers in place? Check it out. Enemies moving? Check back! It's time to overwhelm these insolent.
Each tower checks if there is an enemy within its range. If so, the tower begins to shoot at him, until one of two things happens: the enemy will go beyond the reach, or the enemy will be destroyed. Then the tower will begin to search for a new victim.
Let's start to protect the base!
Open Tower.h and make the following changes:
Code
Now in Tower.m :
// BOOL attacking; Enemy *chosenEnemy; // -(void)targetKilled; Now in Tower.m :
// Enemy #import "Enemy.h" // init: -(void)attackEnemy { [self schedule:@selector(shootWeapon) interval:fireRate]; } -(void)chosenEnemyForAttack:(Enemy *)enemy { chosenEnemy = nil; chosenEnemy = enemy; [self attackEnemy]; [enemy getAttacked:self]; } -(void)shootWeapon { CCSprite * bullet = [CCSprite spriteWithFile:@"bullet.png"]; [theGame addChild:bullet]; [bullet setPosition:mySprite.position]; [bullet runAction:[CCSequence actions:[CCMoveTo actionWithDuration:0.1 position:chosenEnemy.mySprite.position],[CCCallFunc actionWithTarget:self selector:@selector(damageEnemy)],[CCCallFuncN actionWithTarget:self selector:@selector(removeBullet:)], nil]]; } -(void)removeBullet:(CCSprite *)bullet { [bullet.parent removeChild:bullet cleanup:YES]; } -(void)damageEnemy { [chosenEnemy getDamaged:damage]; } -(void)targetKilled { if(chosenEnemy) chosenEnemy =nil; [self unschedule:@selector(shootWeapon)]; } -(void)lostSightOfEnemy { [chosenEnemy gotLostSight:self]; if(chosenEnemy) chosenEnemy =nil; [self unschedule:@selector(shootWeapon)]; } Finally, replace the empty update method with:
Code
-(void)update:(ccTime)dt { if (chosenEnemy){ // CGPoint normalized = ccpNormalize(ccp(chosenEnemy.mySprite.position.x-mySprite.position.x,chosenEnemy.mySprite.position.y-mySprite.position.y)); mySprite.rotation = CC_RADIANS_TO_DEGREES(atan2(normalized.y,-normalized.x))+90; if(![theGame circle:mySprite.position withRadius:attackRange collisionWithCircle:chosenEnemy.mySprite.position collisionCircleRadius:1]) { [self lostSightOfEnemy]; } } else { for(Enemy * enemy in theGame.enemies) { if([theGame circle:mySprite.position withRadius:attackRange collisionWithCircle:enemy.mySprite.position collisionCircleRadius:1]) { [self chosenEnemyForAttack:enemy]; break; } } } } The code is a lot of it. Plus, you probably noticed an increasing number of warnings from the compiler as you add code. First, let's deal with the warnings, adding a few missing bits.
Open Enemy.h and make the following changes:
Code
// NSMutableArray *attackedBy; // -(void)getAttacked:(Tower *)attacker; -(void)gotLostSight:(Tower *)attacker; -(void)getDamaged:(int)damage; Now in Enemy.m :
Code
// initWithTheGame: ( "if") attackedBy = [[NSMutableArray alloc] initWithCapacity:5]; // getRemoved: -(void)getRemoved { for(Tower * attacker in attackedBy) { [attacker targetKilled]; } [self.parent removeChild:self cleanup:YES]; [theGame.enemies removeObject:self]; // , , [theGame enemyGotKilled]; } // -(void)getAttacked:(Tower *)attacker { [attackedBy addObject:attacker]; } -(void)gotLostSight:(Tower *)attacker { [attackedBy removeObject:attacker]; } -(void)getDamaged:(int)damage { currentHp -=damage; if(currentHp <=0) { [self getRemoved]; } } The most important part in the code is the update method in the Tower class. The tower will constantly check for the presence of the enemy within the radius of attack. If there is one, the tower turns to it and starts shooting.
As soon as the enemy is marked as a target, the method sets the shooting schedule of the tower according to its rate of fire. Each enemy contains a list of towers firing at him, if the enemy dies, they will all be notified of this fact and stop shooting.
Compile and run your application. Arrange several towers on the map. You will see how the towers start firing at enemies passing inside their radius, as the stripes of their health change until they die.
It remains to add a few details to get the finished version of tower defense. It would be nice to add sound effects, teach the base to take damage from enemies and limit the amount of player's gold.
Final touches
Let's start with the display of the number of lives left to the player, and what will happen when they run out!
Open HelloWorldLayer.h and add the following variables:
Code
playerHp , CCLabelBMFont , . gameEnded , ! :
HelloWorldLayer.m :
int playerHp; CCLabelBMFont *ui_hp_lbl; BOOL gameEnded; playerHp , CCLabelBMFont , . gameEnded , ! :
-(void)getHpDamage; -(void)doGameOver; HelloWorldLayer.m :
// init: // 7 - playerHp = 5; ui_hp_lbl = [CCLabelBMFont labelWithString:[NSString stringWithFormat:@"HP: %d",playerHp] fntFile:@"font_red_14.fnt"]; [self addChild:ui_hp_lbl z:10]; [ui_hp_lbl setPosition:ccp(35,wins.height-12)]; // : -(void)getHpDamage { playerHp--; [ui_hp_lbl setString:[NSString stringWithFormat:@"HP: %d",playerHp]]; if (playerHp <=0) { [self doGameOver]; } } -(void)doGameOver { if (!gameEnded) { gameEnded = YES; [[CCDirector sharedDirector] replaceScene:[CCTransitionRotoZoom transitionWithDuration:1 scene:[HelloWorldLayer scene]]]; } } , , , . , !
getHpDamage , . update Enemy.m .
. . , , .
!
“zero-sum”, . , .
HelloWorldLayer.h :
int playerGold; CCLabelBMFont *ui_gold_lbl; , (playerGold) (ui_gold_lbl). :
-(void)awardGold:(int)gold; HelloWorldLayer.m :
Code
// init: -(void)awardGold:(int)gold { playerGold += gold; [ui_gold_lbl setString:[NSString stringWithFormat:@"GOLD: %d",playerGold]]; } // init: // 8 - playerGold = 1000; ui_gold_lbl = [CCLabelBMFont labelWithString:[NSString stringWithFormat:@"GOLD: %d",playerGold] fntFile:@"font_red_14.fnt"]; [self addChild:ui_gold_lbl z:10]; [ui_gold_lbl setPosition:ccp(135,wins.height-12)]; [ui_gold_lbl setAnchorPoint:ccp(0,0.5)]; // canBuyTower: -(BOOL)canBuyTower { if (playerGold - kTOWER_COST >=0) return YES; return NO; } // ccTouchesBegan, "if", , : playerGold -= kTOWER_COST; [ui_gold_lbl setString:[NSString stringWithFormat:@"GOLD: %d",playerGold]]; , , . , , . .
getDamaged: ( “if”) Enemy.m :
[theGame awardGold:200]; Start the game and you will see that you can build exactly as many towers as gold reserves allow. For killing enemies, gold is added. A delightful system, is it not?
Finally add some music!
Open HelloWorldLayer.m :
Code
// : #import "SimpleAudioEngine.h" // init: ( 'if') [[SimpleAudioEngine sharedEngine] playBackgroundMusic:@"8bitDungeonLevel.mp3" loop:YES]; // ccTouchesBegan, Tower: [[SimpleAudioEngine sharedEngine] playEffect:@"tower_place.wav"]; // getHpDamage [[SimpleAudioEngine sharedEngine] playEffect:@"life_lose.wav"]; Now in Enemy.m :
Code
// : #import "SimpleAudioEngine.h" // getDamaged: [[SimpleAudioEngine sharedEngine] playEffect:@"laser_shoot.wav"]; Everything!You are done! Run the game, how do you get retro sounds ?!
Sample project with everything we did above: TowerDefenseFinished.zip
Source: https://habr.com/ru/post/162733/
All Articles