Raspberry Pi GPIO Web Control
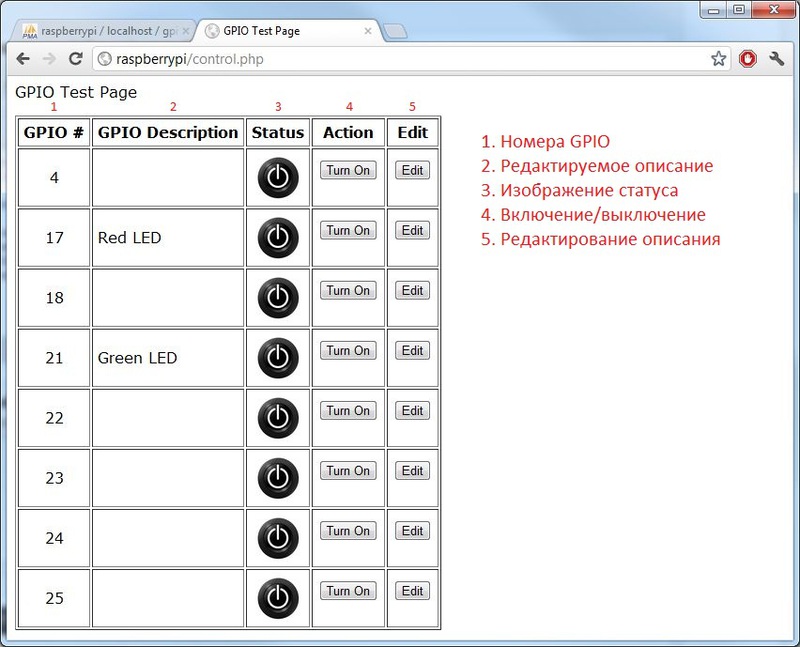
Good day! In this post I want to show how to manage electronics over the Internet using Raspberry Pi. It will look something like this.
Short description :
')
This should already be on your Raspberry Pi:
If you want to know how to set it all up, go here (instructions in English).
Skip this if you already have an account, and if not, continue reading :)
Log into the Raspberry Pi using the following command:
Now enter and confirm the password for the account.
Then you need to close the SSH session and restart it by logging in as root.
This solution is based on MySQL databases, and now we will configure them.
So, first download this file .
Login to the phpMyAdmin control panel and click " Import " in the top menu.
Now, in the " File to Import " item, click the " Choose File " button and select the file you downloaded before (gpio.sql).
Finally click on the " Go " button at the bottom of the page.
This will create all the necessary tables.

Now you need to add a new user to the database using phpMyAdmin. In order to do this, you should:
In the final part of this step, you need to give the user the necessary privileges.

This is the part that starts checking the values in the MySQL database on the Raspberry Pi.
This script is quite simple, but requires configuration.
First download the script by entering the following commands (on Raspberry Pi):
After it downloads, enter
This will allow you to change the script.
You must change the following variables at the beginning of the file:
They need to be changed to the username and password you created earlier in phpMyAdmin.
After you have changed everything, hold down the Ctrl key and press X , then release Ctrl and hit Y. Press Return / Enter.
The final step, before you can use it, is setting up a web page.
To do this, write the following commands, making sure that you are logged in (if not, type
When they download, write this:
Now you need to change a couple of variables before using the file, so type
Modify the following variables:

Now go to the control.php page via the browser (I have raspberryPi / control.php , where raspberryPi is the host name.)
There you will need to enter the following data:
Username: admin
Password: gpio
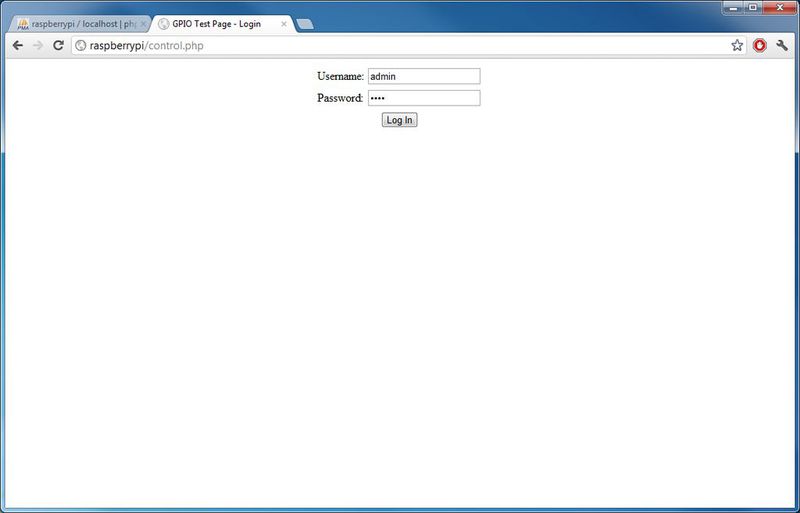
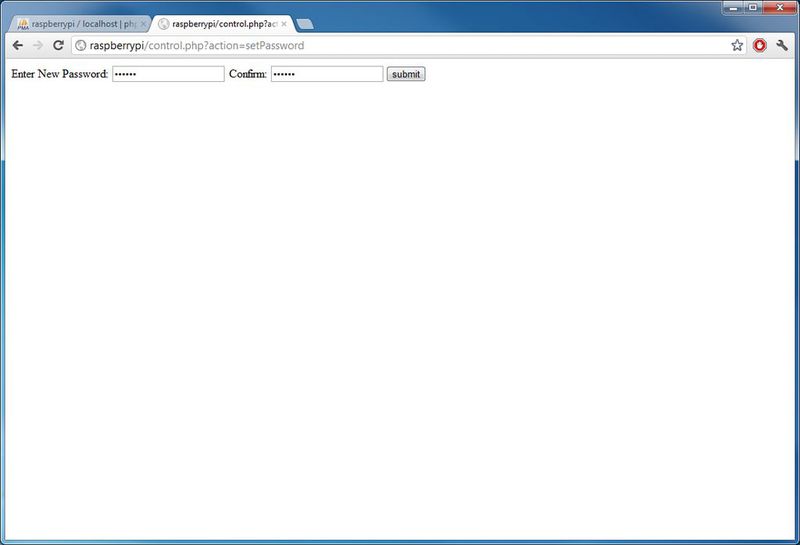
I recommend clicking on the “Change Password” link at the top of the page and changing the password for obvious reasons.

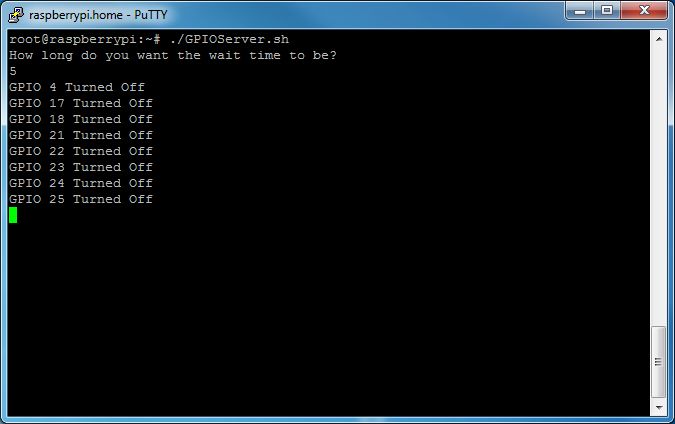
To run GPIO programs, do the following:
Start an SSH session on the Raspberry Pi and
He will ask you to enter a wait time, it will depend on the needs of your applications. But, the shorter the wait time, the more resources the script will use (I usually use 5).
Done! Now go to the control panel (http: // HOST NAME / control.php) and enjoy!
For security, you must delete the root account.
Short description :
- A server program that runs on the Raspberry Pi to read variables
- MySQL databases for storing variables
- Apache2 webpage, in order to control variables
')
Step 1. Knowledge base
This should already be on your Raspberry Pi:
- Apache web server
- PHP5
- MySQL server
- phpMyAdmin
If you want to know how to set it all up, go here (instructions in English).
Step 2. Creating a root account
Skip this if you already have an account, and if not, continue reading :)
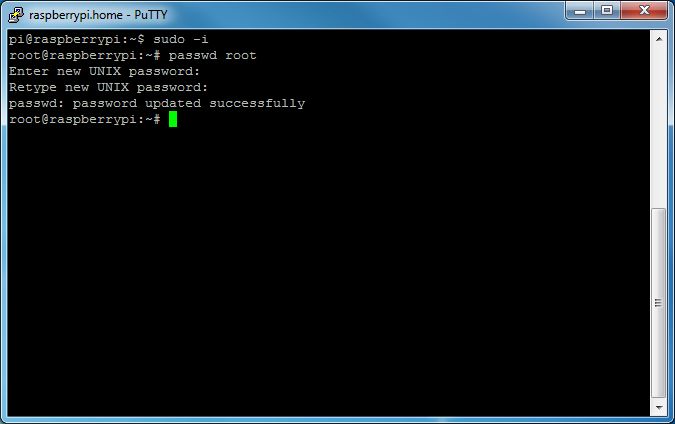
Log into the Raspberry Pi using the following command:
sudo -ipasswd rootNow enter and confirm the password for the account.
Then you need to close the SSH session and restart it by logging in as root.
Step 3. Setting up databases and phpMyAdmin
This solution is based on MySQL databases, and now we will configure them.
So, first download this file .
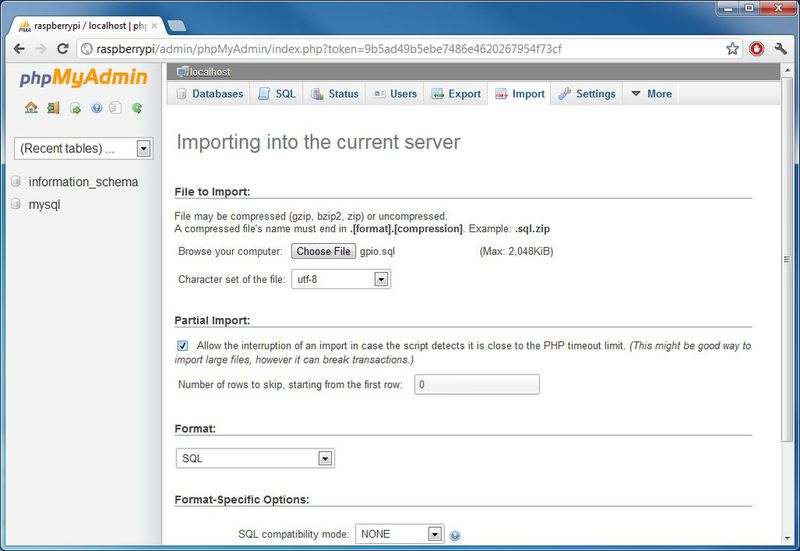
Login to the phpMyAdmin control panel and click " Import " in the top menu.
Now, in the " File to Import " item, click the " Choose File " button and select the file you downloaded before (gpio.sql).
Finally click on the " Go " button at the bottom of the page.
This will create all the necessary tables.
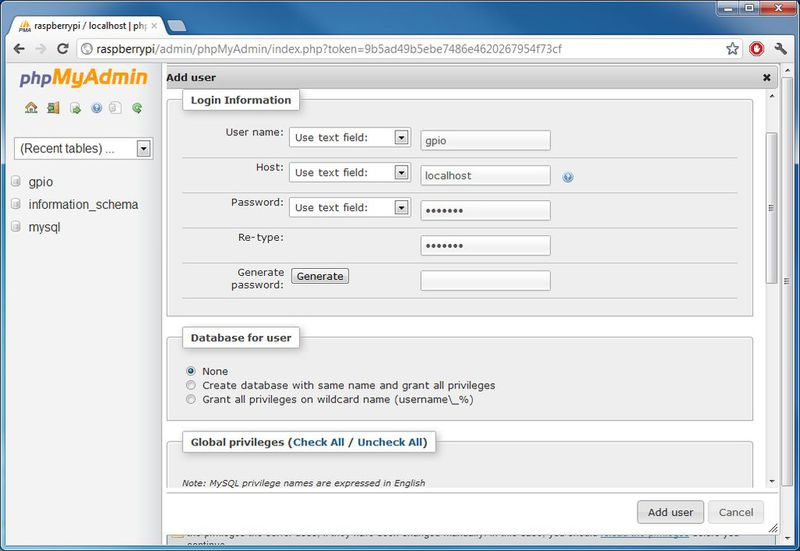
Now you need to add a new user to the database using phpMyAdmin. In order to do this, you should:
- Click on " Users " at the top of the page.
- Now click on the link " Add User ".
- In the field " User name " enter the user name you need. I entered " gpio ".
- In the " Host " field, enter " localhost ".
- Then in the two fields, enter the appropriate passwords. (No spaces, hyphens or special characters). I entered " pr03ND2 ".
- Leave the rest as default, and then click the " Add User " button in the lower right corner.
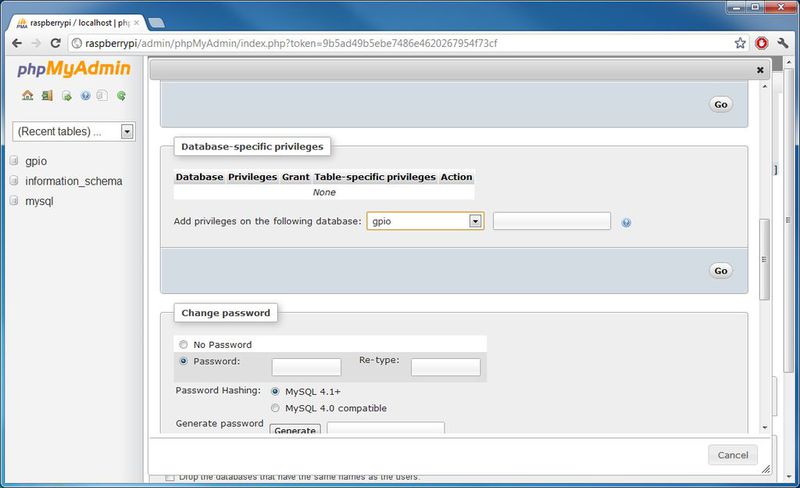
In the final part of this step, you need to give the user the necessary privileges.
- Click on the " Users " button in the top menu, then scroll down until you see the user you just added in the " Users Overview " table.
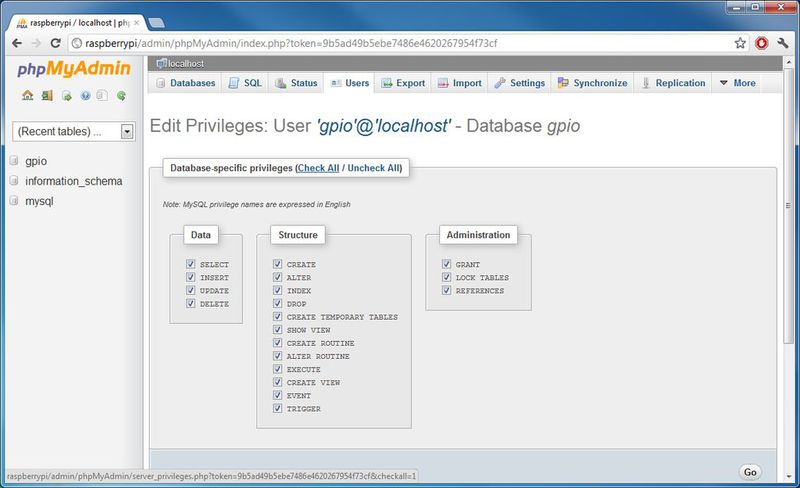
- Next to the username, click on the link " Edit Privileges ".
- Scroll down to the " Database-specific privileges " item and select " gpio " from the drop-down list, click the " Go " button.
- Tick ALL the checkboxes and click the " Go " button on the bottom left.
Step 4. Shell Script
This is the part that starts checking the values in the MySQL database on the Raspberry Pi.
This script is quite simple, but requires configuration.
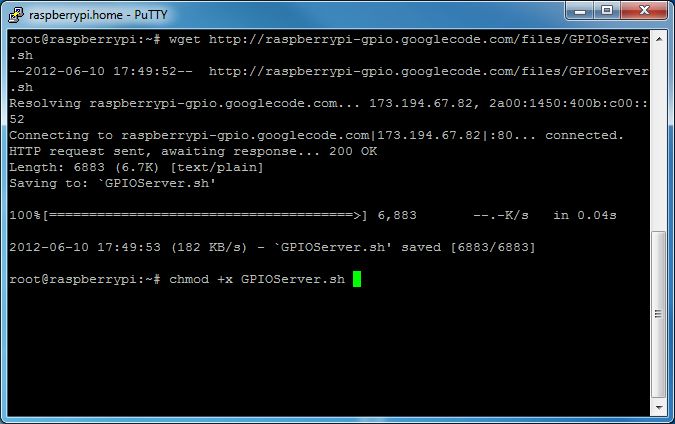
First download the script by entering the following commands (on Raspberry Pi):
sudo -iand press Return / Enterwget raspberrypi-gpio.googlecode.com/files/GPIOServer.shwget raspberrypi-gpio.googlecode.com/files/GPIOServer.shand press Return / Enter
After it downloads, enter
chmod +x GPIOServer.shand press Return / Enternano GPIOServer.shand press Return / Enter
This will allow you to change the script.
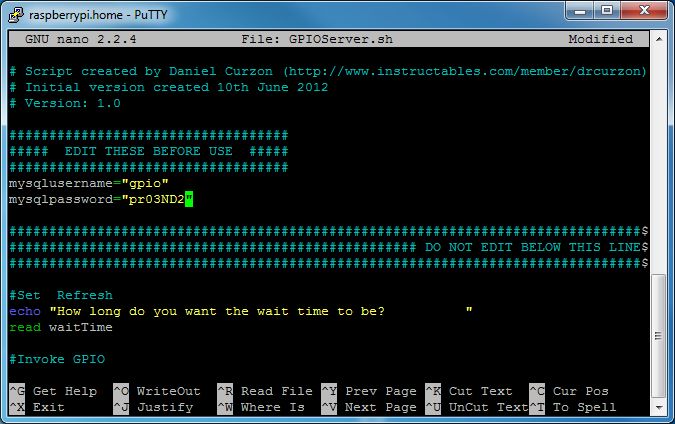
You must change the following variables at the beginning of the file:
mysqlusername=" "mysqlpassword=" "
They need to be changed to the username and password you created earlier in phpMyAdmin.
After you have changed everything, hold down the Ctrl key and press X , then release Ctrl and hit Y. Press Return / Enter.
Step 5. Setting up a web page
The final step, before you can use it, is setting up a web page.
To do this, write the following commands, making sure that you are logged in (if not, type
sudo -i ) .:wget raspberrypi-gpio.googlecode.com/files/control.phpwget raspberrypi-gpio.googlecode.com/files/control.phpand press Return / Enterwget raspberrypi-gpio.googlecode.com/files/off.jpgwget raspberrypi-gpio.googlecode.com/files/off.jpgand press Return / Enterwget raspberrypi-gpio.googlecode.com/files/on.jpgwget raspberrypi-gpio.googlecode.com/files/on.jpgand press Return / Enter
When they download, write this:
mv control.php /var/www/control.phpand press Return / Enter.chmod 755 /var/www/control.phpand press Return / Enter.mv off.jpg /var/www/off.jpgand press Return / Enter.chmod 755 /var/www/off.jpgand press Return / Enter.mv on.jpg /var/www/on.jpgand press Return / Enter.chmod 755 /var/www/on.jpgand press Return / Enter.
Now you need to change a couple of variables before using the file, so type
nano /var/www/control.php and press Return / Enter.Modify the following variables:
$MySQLUsername = " ";$MySQLPassword = " ";
Now go to the control.php page via the browser (I have raspberryPi / control.php , where raspberryPi is the host name.)
There you will need to enter the following data:
Username: admin
Password: gpio
I recommend clicking on the “Change Password” link at the top of the page and changing the password for obvious reasons.
Step 6. Using
To run GPIO programs, do the following:
Start an SSH session on the Raspberry Pi and
./GPIOServer.sh in as root, then type ./GPIOServer.sh and press Return / Enter.He will ask you to enter a wait time, it will depend on the needs of your applications. But, the shorter the wait time, the more resources the script will use (I usually use 5).
Done! Now go to the control panel (http: // HOST NAME / control.php) and enjoy!
For security, you must delete the root account.
Source: https://habr.com/ru/post/162651/
All Articles