We get acquainted with Fabric.js. Part 1
Today I want to introduce you to Fabric.js - a powerful Javascript library for working with HTML5 <canvas> . Fabric includes an object model that is so lacking when working with <canvas>, as well as an SVG parser, an interactive layer, and many other irreplaceable tools. This is a fully open library with an MIT license and many developer contributions over the past few years.
I started working on Fabric 3 years ago, when I realized how hard it was to work with the usual canvas API. At that moment I created an interactive editor - my startup, where we give the opportunity to create a design and print it on clothes or other products. Editor wanted to make it convenient and super interactive. At that time, such functionality could be created only in Flash. But I did not want to use Flash. I prefer Javascript, and I was sure that with him you can achieve a lot. It turned out pretty good. Even now, very few visual editors can do what can be achieved with Fabric.
')
Why do you need it?
Recently, the popularity of Canvas is growing and people are doing quite amazing things on it. The problem is that the native canvas API is terribly low-level . It's one thing to draw a few simple shapes or graphs, and forget about them. The other is interactivity, changing the picture at some point, or drawing more complex shapes.
That's exactly what Fabric.js is for.
The fact is that conventional canvas methods allow us to call only very simple graphic commands, blindly changing the whole canvas bitmap. Need to draw a rectangle? Use
fillRect(left, top, width, height) . Draw a line? Use the moveTo(left, top) and lineTo(x, y) combination. It’s as if we paint with a brush on a canvas , putting more and more paint, almost without any control.Fabric gives us an object model on top of low canvas methods, stores the state of the canvas, and allows you to work with objects directly.
Let's look at the difference between canvas and Fabric. Suppose you need to draw a red rectangle. Using the canvas API, it does something like this:
// canvas (id="c") var canvasEl = document.getElementById('c'); // 2d , ("bitmap" ) var ctx = canvasEl.getContext('2d'); // fill () ctx.fillStyle = 'red'; // 100,100 20x20 ctx.fillRect(100, 100, 20, 20); But the same with Fabric:
// "" canvas (id="c") var canvas = new fabric.Canvas('c'); // var rect = new fabric.Rect({ left: 100, top: 100, fill: 'red', width: 20, height: 20 }); // , canvas.add(rect); 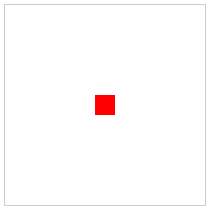
The difference in the size of the code is not yet visible. However, it can be seen that the way of working with canvas is completely different. In the usual canvas API, we work with the context. A context is an object that is essentially a canvas bitmap. With Fabric, we manage exactly the objects - we create, change the parameters, add them to the canvas. As you can see, these objects are full-fledged residents in Fabric (first-class objects).
Drawing a red box is certainly not serious. Let's at least do something interesting with him. For example, rotate 45 degrees.
First, using the usual methods:
var canvasEl = document.getElementById('c'); var ctx = canvasEl.getContext('2d'); ctx.fillStyle = 'red'; <b>ctx.translate(100, 100); ctx.rotate(Math.PI / 180 * 45); ctx.fillRect(-10, -10, 20, 20);</b> and now using Fabric:
var canvas = new fabric.Canvas('c'); // 45 var rect = new fabric.Rect({ left: 100, top: 100, fill: 'red', width: 20, height: 20, <b>angle: 45</b> }); canvas.add(rect); 
What's going on here?
Using Fabric, all you had to do was change the angle value to
45 . But with the usual methods, it's not so simple. First, we cannot manage objects directly. Instead, you have to change the position and angle of the bitmap itself ( ctx.translate , ctx.rotate ). Then we draw a rectangle, while not forgetting to move the bitmap accordingly (-10, -10), so that the rectangle appears at 100,100. You also need to remember to convert the angle from degrees to radians when you turn the bitmap.Now you probably understand why Fabric exists.
Let's look at another example - storing the state of the canvas.
Imagine that at some point we need to move this red rectangle to another place. How to do this without having the ability to manage objects? Call
fillRect again?Not really. Calling another
fillRect command, the rectangle is drawn directly on top of the entire bitmap. That is why I brought an analog brush with paint. To move the figure, we need to first erase the previous result, and then draw in a new place. var canvasEl = document.getElementById('c'); ... ctx.strokRect(100, 100, 20, 20); ... // canvas <b>ctx.clearRect(0, 0, canvasEl.width, canvasEl.height); ctx.fillRect(20, 50, 20, 20);</b> And now with Fabric
var canvas = new fabric.Canvas('c'); ... canvas.add(rect); ... <b>rect.set({ left: 20, top: 50 }); canvas.renderAll();</b> 
Notice the very important difference. We didn't have to wash anything before drawing. Just continue to work with objects, changing their attributes, and then redraw the canvas to see the changes. Thus you can change dozens of objects, and at the end of a single command to update the screen.
Objects
We have already seen how to work with rectangles using thefabric.Rect constructor. But, of course, Fabric provides many other simple shapes: circles, triangles, ellipses, etc. All of them are accessible from fabric objects, respectively, fabric.Circle , fabric.Triangle , fabric.Ellipse , etc.7 basic shapes available in Fabric:
Need to draw a circle? Simply create the appropriate object and add it to the canvas. Same with other forms:
var circle = new fabric.Circle({ radius: 20, fill: 'green', left: 100, top: 100 }); var triangle = new fabric.Triangle({ width: 20, height: 30, fill: 'blue', left: 50, top: 50 }); canvas.add(circle, triangle); 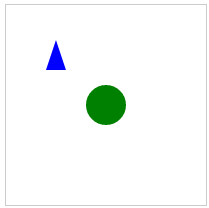
... and now on the canvas there is a green circle at point 100, 100 and a blue triangle at point 50, 50.
Manage objects
Creating visual shapes is just flowers. At some point you will probably need to change them. Perhaps some user actions should affect the state of the picture (canvas), or the animation should be running. Or you need to change the attributes of objects (color, transparency, size, position) depending on the mouse movements.
Fabric takes care of the state of the canvas and redrawing. We are only required to change the objects themselves.
In the previous example, it was seen how the
set method moved the object to a new position set({ left: 20, top: 50 }) . Similarly, you can change any other attributes that are available several.First, there are attributes that change position - left , top ; size - width , height ; rendering itself (object mapping) - fill , opacity , stroke , strokeWidth ; scale and rotation - scaleX , scaleY , angle ; and even a coup (180 degrees) - flipX , flipY .
Yes, it is surprisingly easy to display a mirror-rotated image in Fabric - just assign
true to the flip * attribute.Attributes are read using the
get method, assignment is done using set . Let's change our rectangle somehow. var canvas = new fabric.Canvas('c'); ... canvas.add(rect); rect.set('fill', 'red'); rect.set({ strokeWidth: 5, stroke: 'rgba(100,200,200,0.5)' }); rect.set('angle', 15).set('flipY', true); 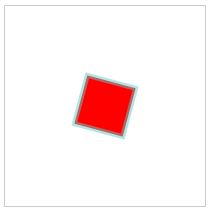
We set “fill” to “red”, changing the color of the object to red. Then “strokeWidth” and “stroke” were changed, which adds to the rectangle a 5-pixel frame in light green. Finally, we change the “angle” and “flipY” attributes. Notice how the three expressions use slightly different syntax.
This shows that
set() is a fairly universal method. It is intended for frequent use, so it is sharpened for convenience.Well, what about reading? I already mentioned that there is a generic
get() , as well as a set of specific get*() methods. For example, to get the “width” of an object, you can use get('width') or getWidth() . For scaleX, get('scaleX') or getScaleX() , etc. Special methods such as getWidth() and getScaleX() exist for all the “public” attributes of the object (“stroke”, “strokeWidth”, “angle”, etc.)You probably noticed that in the previous examples we used configuration hashes, which looked exactly the same as those we just used in the
set method. This is because they are really the same. An object can be “configured” at the time of creation, or later, using the set method. The syntax is absolutely the same: var rect = new fabric.Rect({ width: 10, height: 20, fill: '#f55', opacity: 0.7 }); // var rect = new fabric.Rect(); rect.set({ width: 10, height: 20, fill: '#f55', opacity: 0.7 }); Default Attributes
All objects in Fabric have a set of default values. They are used when we do not specify other values during creation. I give an example.
var rect = new fabric.Rect(); // rect.getWidth(); // 0 rect.getHeight(); // 0 rect.getLeft(); // 0 rect.getTop(); // 0 rect.getFill(); // rgb(0,0,0) rect.getStroke(); // null rect.getOpacity(); // 1 Rectangle received default values. It is located at position 0.0, black, opaque, and has neither frames nor dimensions (width and height are equal to zero). Because of this, we do not see it. As soon as we set the positive width / height, a black rectangle appears in the upper left corner.

Hierarchy and Inheritance
Fabric objects do not exist by themselves. They form a clear hierarchy.
Most objects inherit from
fabric.Object . fabric.Object is an abstract 2-dimensional figure on a plane. It has left / top and width / height attributes, as well as a set of other visual parameters. The attributes we saw earlier (fill, stroke, angle, opacity, flip *, etc.) belong to all Fabric objects that inherit from fabric.Object .Such inheritance is very convenient. It allows us to define methods on
fabric.Object , thus making it available in all “classes” of descendants. For example, if you need a getAngleInRadians method on all objects, simply create it on fabric.Object.prototype : fabric.Object.prototype.getAngleInRadians = function() { return this.getAngle() / 180 * Math.PI; }; var rect = new fabric.Rect({ angle: 45 }); rect.getAngleInRadians(); // 0.785... var circle = new fabric.Circle({ angle: 30, radius: 10 }); circle.getAngleInRadians(); // 0.523... circle instanceof fabric.Circle; // true circle instanceof fabric.Object; // true As you can see, the method is now available to all objects.
Of course, descendant classes can not only inherit from
fabric.Object , but also define their own methods and parameters. For example, in fabric.Circle there is an additional attribute “radius”. Or take for example fabric.Image , with which we will learn more later. It contains getElement / setElement methods for reading / writing HTML <img> element, on which the object of the type fabric.Image .Canvas
We looked at the objects in detail; let's go back to canvas again.
As you can see from the examples, the first is to create the canvas for drawing —
new fabric.Canvas('...') . fabric.Canvas is, in fact, a wrapper around the <canvas> element, responsible for managing all the objects it contains. The constructor takes the id of the element, and returns an object of type fabric.Canvas .Now you can add (
add() ) objects to it, as well as read them ( item() , getObjects() ), or remove() ( remove() ): var canvas = new fabric.Canvas('c'); var rect = new fabric.Rect(); canvas.add(rect); // canvas.item(0); // fabric.Rect, ( ) canvas.getObjects(); // ( ) canvas.remove(rect); // As we already found out, the main task of
fabric.Canvas is to manage the objects that are on it. Also, it can be configured through a set of parameters. Settings such as changing the background of the canvas, hiding objects by mask, changing the overall length / width, turning on / off interactivity - these and other options can be set directly to the fabric.Canvas both during creation and later: var canvas = new fabric.Canvas('c', { backgroundColor: 'rgb(100,100,200)', selectionColor: 'blue', selectionLineWidth: 2 // ... }); // var canvas = new fabric.Canvas('c'); canvas.backgroundImage = 'http://...'; canvas.onFpsUpdate = function(){ /* ... */ }; // ... Interactivity
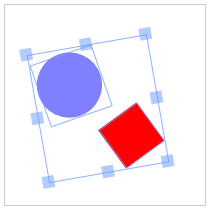
One of the most unique features of Fabric, built right into the kernel, is a layer of interactivity. It allows the user to manipulate the object model with which we have just become familiar.
An object model exists for software access. And what is needed to control objects with a mouse (or touchpad, on mobile devices)? For this, Fabric has user access functionality. As soon as we create a canvas through
new fabric.Canvas('...') , the objects located on it can immediately be selected, moved, scaled, rotated and even grouped together , controlling them as one!
If we want to enable the user to manage objects on the canvas - say, a picture - we just need to create the canvas and add an object to it. No need for any additional settings.
Managing this interactivity is easy. For this, there is a “selection” flag on the canvas, as well as a “selectable” flag on individual objects.
var canvas = new fabric.Canvas('c'); ... canvas.selection = false; // rect.set('selectable', false); // And what to do if interactivity is not needed at all? Then just change the
fabric.Canvas to fabric.StaticCanvas . The syntax (configuration, methods) is absolutely identical, just use the word StaticCanvas instead of Canvas . var staticCanvas = new fabric.StaticCanvas('c'); staticCanvas.add( new fabric.Rect({ width: 10, height: 20, left: 100, top: 100, fill: 'yellow', angle: 30 })); This creates a lightweight version of the canvas, without too much logic for interactivity and event management. Everything else is the same. We get the full object model, we can add, delete and change objects, and, of course, change the options of the canvas itself. Only external event management disappears.
In the future, when we get acquainted with the possibility of custom build Fabric (custom build), you will see that you can create an easier version of the library for your needs. This can be useful if, for example, you just need to display a static graph, SVG figure, or images with filters.
Pictures
By the way, about the pictures ...
Still, the work with simple figures is not as interesting as with more graphically rich pictures. As you probably already guess, in Fabric it is very simple. Create a
fabric.Image object, add it to the canvas:(html)
<canvas id="c"></canvas> <img src="my_image.png" id="my-image"> (js)
var canvas = new fabric.Canvas('c'); var imgElement = document.getElementById('my-img'); var imgInstance = new fabric.Image(imgElement, { left: 100, top: 100, angle: 30, opacity: 0.85 }); canvas.add(imgInstance); Notice how we pass the <image> element to the
fabric.Image constructor. Thus, we create an object of the type fabric.Image , which is a picture of this element. We also set the left / top values to 100/100, the angle to 30, and the transparency to 0.85. Once added to the canvas, the picture is rendered at position 100,100, rotated 30 degrees, and slightly transparent! Not bad...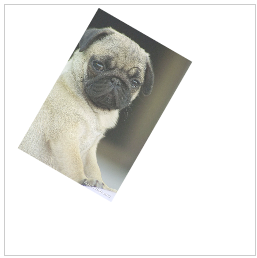
And what to do if the element of the picture in the document does not exist, if there is only its address? It's not scary. In this case, you can use
fabric.Image.fromURL : fabric.Image.fromURL('my_image.png', function(oImg) { canvas.add(oImg); }); There are no surprises here. Call
fabric.Image.fromURL passing the address of the image, as well as the function (callback), which should be called when the picture is loaded. The callback receives the fabric.Image object fabric.Image first argument. At the time of the call, you can do anything with it — change it, or immediately add it to the canvas for display. fabric.Image.fromURL('my_image.png', function(oImg) { // oImg.scale(0.5).setFlipX(true); canvas.add(oImg); }); Path and PathGroup
We got acquainted with simple figures and pictures. We now turn to more complex content.
Meet the powerful and irreplaceable pair: Path and PathGroup.
Path (literally translated "path") in Fabric is a curved figure that can be filled with color, have an outline, be modified in any way. It is depicted as a set of commands that can be compared to drawing with a pen from one point to another. With the help of such commands as “move”, “line” (line), “curve” (curve), or “arc” (arch), Path can reproduce surprisingly complex shapes. And with the help of Path Groups (PathGroup), everything becomes possible.
Fabric paths have similarities with SVG <path> elements . They use the same set of commands, can be created from <path> elements and serialized into them. We will talk about serialization and SVG parsing later. Now it is worth saying that you will hardly be able to work with Path objects manually. Instead, it makes sense to use the SVG parser built into Fabric. To understand what these Path objects are, let's create one of them.
var canvas = new fabric.Canvas('c'); var path = new fabric.Path('M 0 0 L 200 100 L 170 200 z'); path.set({ left: 120, top: 120 }); canvas.add(path); 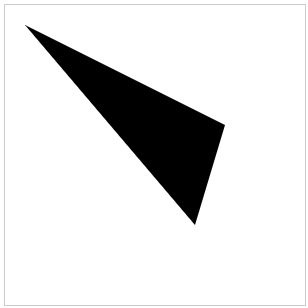
When creating a
fabric.Path object, we pass a string with instructions for “drawing” the curve. This instruction looks, of course, very mysterious, but to understand it is actually quite easy. “M” means “move”, and tells the invisible pen to move to point 0, 0. “L” means “line” (line) and draws a line to point 200, 100. Then the “L” command draws a line to 170 , 200. Finally, “z” causes the invisible handle to close the current path and complete the shape. As a result, this triangular shape is obtained.The
fabric.Path object is the same as the other objects in Fabric, so we easily changed its parameters (left, top). But you can change more: ... var path = new fabric.Path('M 0 0 L 300 100 L 200 300 z'); ... path.set({ fill: 'red', stroke: 'green', opacity: 0.5 }); canvas.add(path); 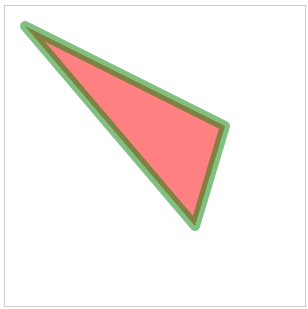
For the sake of interest, let's look at another circuit, this time more complex. You will understand why creating contours manually is not the most fun.
... var path = new fabric.Path('M121.32,0L44.58,0C36.67,0,29.5,3.22,24.31,8.41\ c-5.19,5.19-8.41,12.37-8.41,20.28c0,15.82,12.87,28.69,28.69,28.69c0,0,4.4,\ 0,7.48,0C36.66,72.78,8.4,101.04,8.4,101.04C2.98,106.45,0,113.66,0,121.32\ c0,7.66,2.98,14.87,8.4,20.29l0,0c5.42,5.42,12.62,8.4,20.28,8.4c7.66,0,14.87\ -2.98,20.29-8.4c0,0,28.26-28.25,43.66-43.66c0,3.08,0,7.48,0,7.48c0,15.82,\ 12.87,28.69,28.69,28.69c7.66,0,14.87-2.99,20.29-8.4c5.42-5.42,8.4-12.62,8.4\ -20.28l0-76.74c0-7.66-2.98-14.87-8.4-20.29C136.19,2.98,128.98,0,121.32,0z'); canvas.add(path.set({ left: 100, top: 200 })); Ogogo, what's going on here ?! Let's figure it out.
“M” still means “move” the command, and here the invisible pen begins its journey from the point “121.32, 0”. Then comes the “L” command, which leads it to the point “44.58, 0”. So far, everything is simple. What next? The “C” command means “cubic bezier” (bezier curve ). It forces the pen to draw a curve to the point “36.67, 0”. The curve uses “29.5, 3.22” as the control point at the beginning of the line and “24.31, 8.41” as the control point at the end of the line. This is followed by a whole myriad of the remaining bezier curves, which ultimately creates the final figure.

You probably will not work with such “monsters” manually. Instead, you can use the very convenient method
fabric.loadSVGFromString or fabric.loadSVGFromURL , which loads an entire SVG file. Everything else will be done by the Fabric parser, passing through all SVG elements and creating the corresponding Path objects.By the way, as for SVG documents, Path in Fabric usually represents the SVG <path> element, but the sets of such elements, which can often be found in SVG documents, are usually represented through PathGroup (
fabric.PathGroup objects). PathGroup is just a group of Path objects. Since fabric.PathGroup inherits from fabric.Object , such objects can be added to the canvas like any other Fabric objects. Of course, they can be controlled, like everything else.Directly to work with them is likely not necessary. If you find them while working with Fabric, just keep in mind what you are dealing with and why they are needed at all.
Afterword
We have covered only the most basic aspects of the Fabric. Having dealt with them, you can easily create both simple and complex shapes or pictures. You can show them on canvas, change them (through the attributes of position, scale, angle, color, outline, transparency), and do whatever they wish with them.
In the next part, we will talk about working with groups, animation, text, SVG parsing, rendering and serialization, event management, image filters and other interesting things.
, google group Stackoverflow , , wiki , .
Fabric!
.
Source: https://habr.com/ru/post/162367/
All Articles