Part 1. How to install Oracle Database 11g Release 2 RAC on Linux using VirtualBox - the first step to clustering
RAC on the laptop - it seemed to me an interesting topic for experiments.
Maybe not one will interest me.
Send corrections and corrections in lichku.
Below is a live example of how to get a complete Oracle Enterprise solution (Oracle Real Application Clusters) on a regular computer.
This is Part 1 of the translation, in my opinion very useful, an article in which this issue is considered in great detail (in my opinion, even too detailed).
Official source: lab128.com
Thanks to the author for the work done.
Oracle cluster on the laptop, it's really cool!
Part 2 (installing the necessary packages, setting up the network, shared folders)
')
If you want to go through all the steps of installing Oracle RAC and your laptop or desktop computer has 8 GB or more of RAM, then this is quite possible with the help of Oracle VirtualBox. Follow the instructions in this article and you can get a working RAC system in which you can host a small test database. The created system is not and should not be considered as a complete system. This guide simply allows you to get used to installing and using RAC and testing various administration procedures. The article also explains how to save the image and restore the RAC from the image in a matter of minutes. Even if your test system falls, it will be easy to restore.
This article uses 64-bit versions of Oracle Linux, version 6.3 and Oracle 11g Release 2, version 11.2.0.3. With VirtualBox, you can run multiple virtual machines (VMs) on a single server, which will allow you to run multiple RAC nodes on a single machine. In addition, you can use shared virtual disks. The finished system includes two guest operating systems, two sets of Oracle Grid infrastructures (Clusterware + ASM) and two database instances on a single server. The amount of disk space requires about 32 GB, if you want to save the images of the finished RAC, then you will need another 12 GB of disk space.
This article was written after I was initially inspired by the articles " Oracle Database 11g Release 2 RAC On Linux Using VirtualBox " which was written by Tim Hall and which he published on his blog. Then it was almost completely revised and revised, now these articles, it seems to me, have very little in common.
Everything described in this article has been tested on 64-bit Windows 7. Although there should be no problems with using VirtualBox for other OS and hardware solutions. Please let me know if you have successes or problems in other OSs;
Download the following software:
In this example, we are using VirtualBox installed on 64-bit Windows 7.
Now we need to define two virtual RAC nodes. We can save time by defining a single virtual machine, and when everything is installed, we will clone it
Launch VirtualBox and click the "Create new" button on the toolbar. Click on the “Next” button on the first page of the virtual machine wizard.
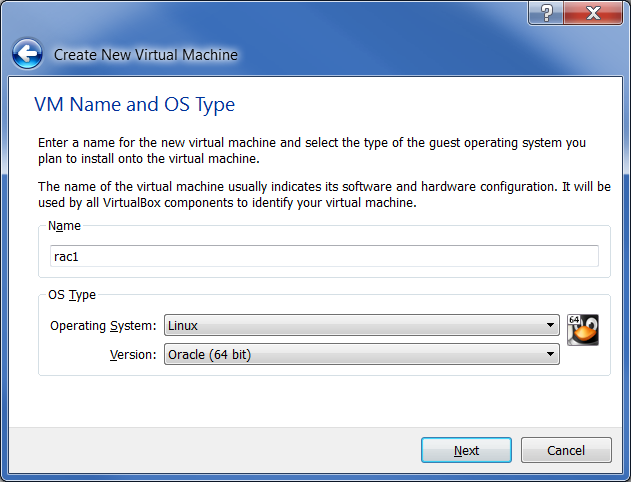
Enter the name "Rac1", the OS "Linux" and the version "Oracle (64 bit)", and then click the button "Next":
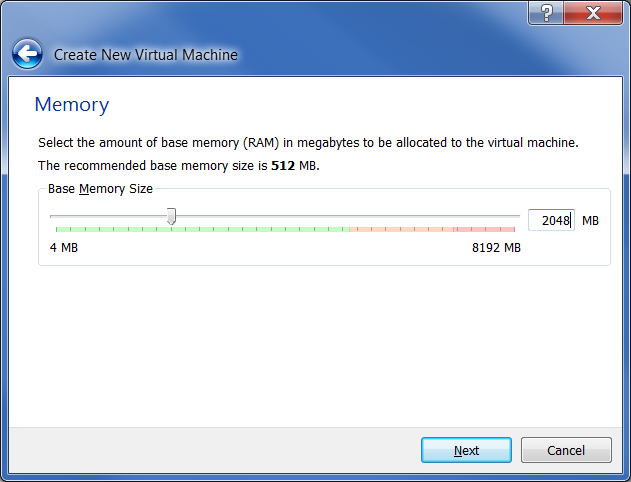
If you have 16 GB of RAM, allocate memory up to 3072 MB, otherwise use 2048 MB, as in the screenshot below, then click "Next":
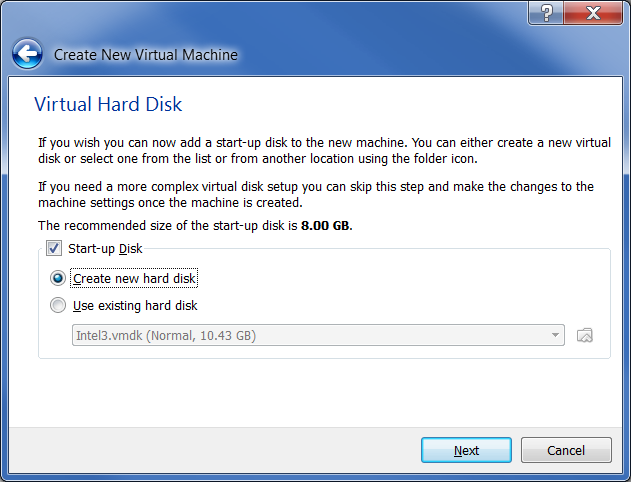
Accept the default selection to create a new virtual hard disk by clicking on the “Next” button:
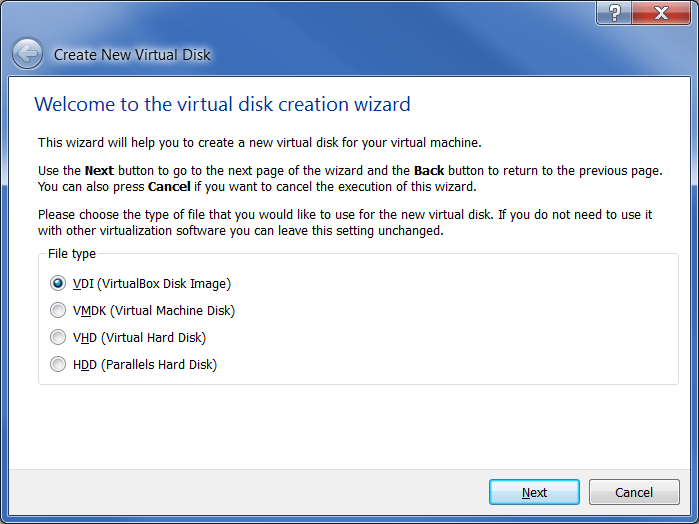
Accept the default VDI type and click the “Next” button in the Virtual Disk Wizard:
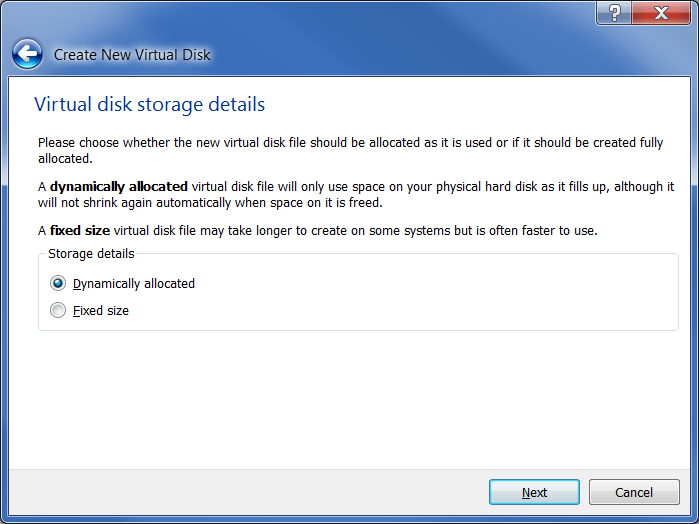
Accept the default “Dynamically allocated” option by clicking on the “Next” button:
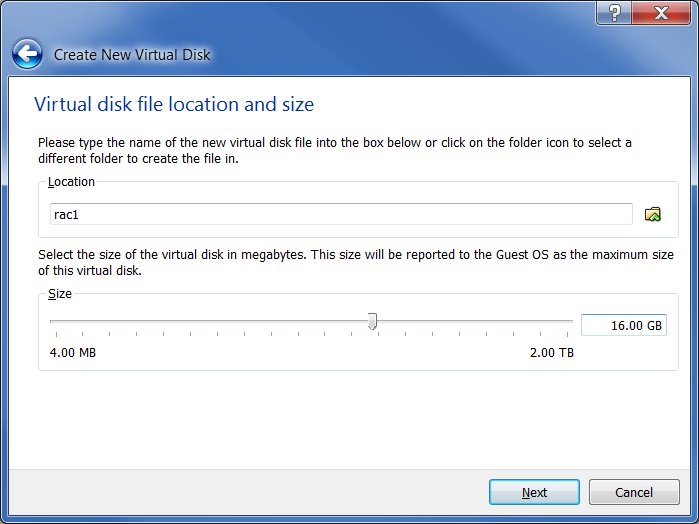
Accept the default and set the size to “16GB” and click the “Next” button:
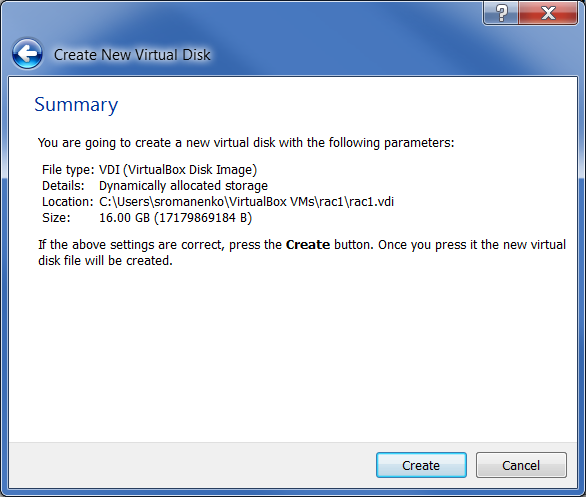
Click the “Create” button on the “Create a new virtual disk” screen:
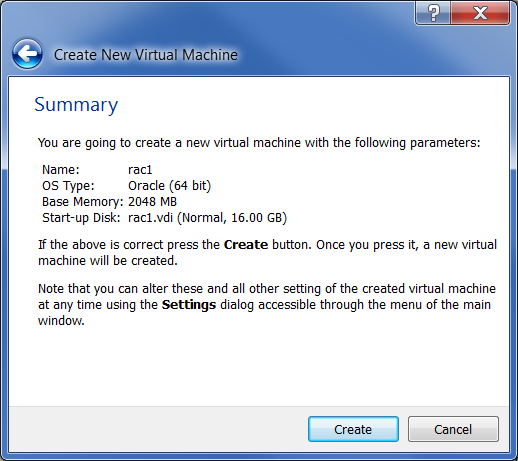
Click the “Create” button on the “Create a new virtual machine” screen:
»Rac1" VM appears in the left pane.
Click on the “Network” button on the right side (highlighted in blue):

Make sure “Adapter 1” is on, and attached to “Bridged Adapter”

Then click on the “Adapter 2” button in the tabs. Make sure that “Adapter 2” is turned on and attached to the “Internal Network”. Then click "OK":

If desired, you can disable the sound card using the “Audio” link. This will probably allow you to save a certain amount of disk space and / or memory and avoid possible problems associated with audio settings. Also, if your system has 4 processor cores or more, it will make sense to allocate 2 processors for the virtual machine. You can do this in the System settings menu.
The virtual machine is configured so that we can start the installation of the guest operating system.
Note that during installation, Virtual Box will hold the mouse pointer inside the VM area. To take control of the mouse, press the right “Ctrl” key on the keyboard.
Put an Oracle Linux 6.3 (or newer) DVD into the DVD drive and skip the following two screenshots.
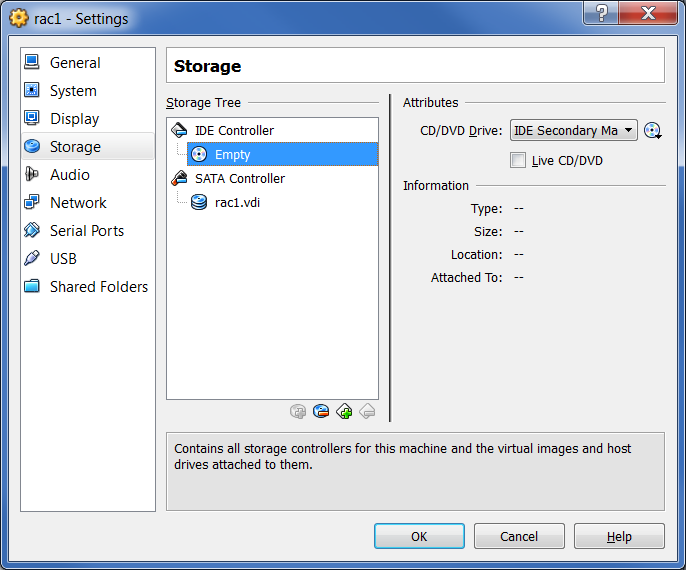
If you do not have a DVD, then you need to download. ISO image and put it in a virtual DVD. Select the “Storage” link in the right pane of the VirtualBox Manager screen to open the “Storage” screen. Then select the DVD disc in the “Storage Tree” section:
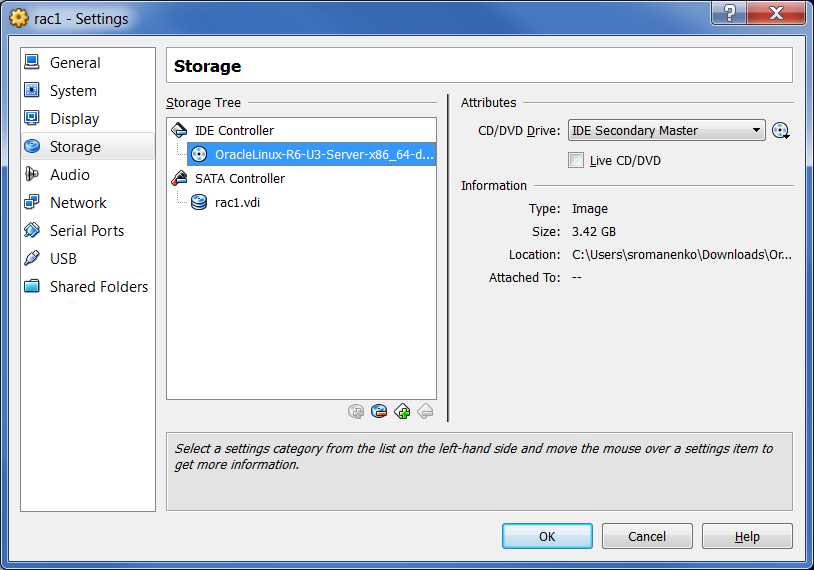
In the "Attributes" section, click on the DVD icon and select the .ISO file. Note that the file name must be visible in the Storage Tree. Click "OK":
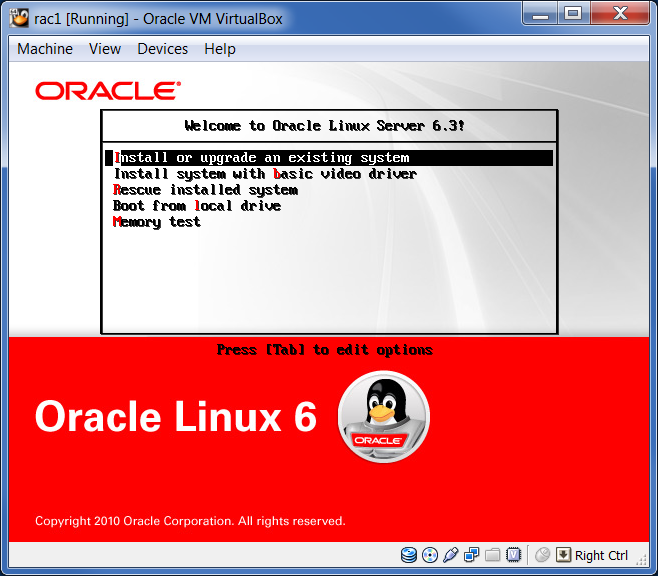
Start the virtual machine by clicking on the “Start” button on the toolbar. As a result, the console window will contain the Oracle Linux startup window. Select "Install or upgrade an existing system":
Do not test the media. Select the “Skip” button:

Continue installing Oracle Linux as you would for a regular server. On the next three screens, you must select a language, keyboard, and primary storage device.
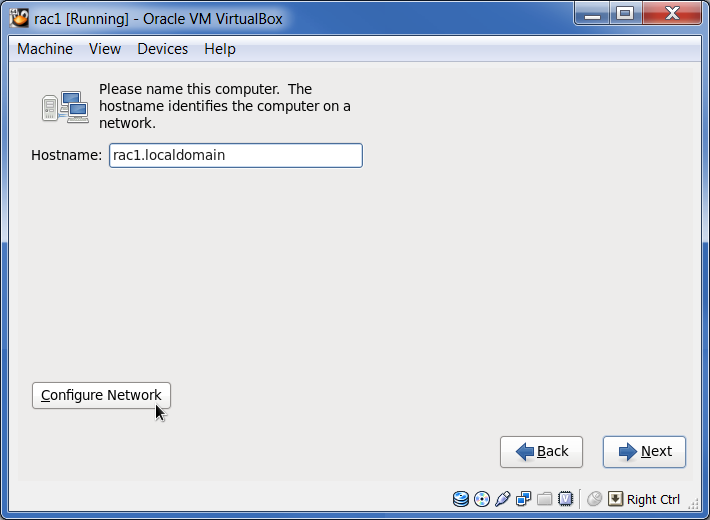
Set the “Hostname” to “rac1.localdomain” and click the “Configure Network” button:
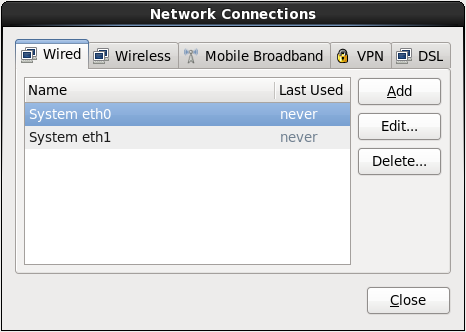
In the network connections window, select the “System eth0” interface and click the “Edit” button:
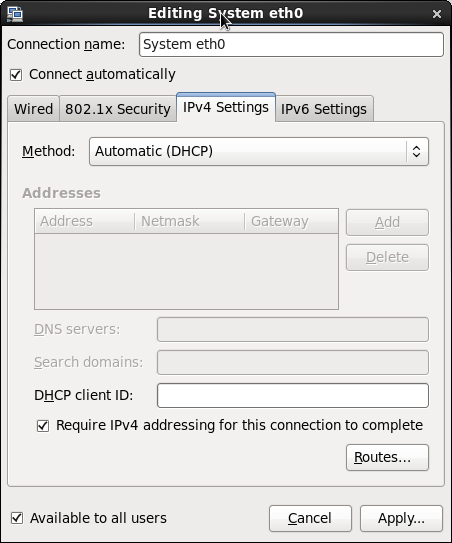
Check the “Connect automatically” box. Select the “IPv4 Settings” tab to ensure that Method is set to “Automatic (DHCP)”. Select “IPv6 Settings”, make sure Method is set to “Ignore”. Click the Apply button:
Close the network connections window and proceed to the next installation screen. Select time zone; Enter root password: oracle
Select “Use All Space” installation type and check the box “Review and modify partitioning layout”:

Resize lv_swap devices up to 1500 MB; then resize lv_root to 14380 MB. Click "Next":

Confirm all warnings and partitioning. Stay on the bootloader screen.
On the software type installation screen, select the “Database Server” and check the “Customize now” box. Click Next:

In the screen settings, select Database and uncheck all items, select Desktops and select the Desktop and Graphical Administration Tools checkboxes, then click Next and finish the installation. Reboot
When the virtual machine reboots, more configuration screens will be available. Do not create an oracle account, we will do this later.
Congratulations! Linux has been installed.
We will need Internet access because the extra packages will be installed from the Internet. Open a terminal and try to ping any site on the Internet, for example:
If the ping fails, fix the problem using the Ifconfig command, launch it and make changes to the Network Connections (Linux desktop Main menu | System | Network Connections).
If you make changes to network connections, reboot the virtual machine or interface.
To restart the interface, use these two commands:
Then check the ping again.
Maybe not one will interest me.
Send corrections and corrections in lichku.
Below is a live example of how to get a complete Oracle Enterprise solution (Oracle Real Application Clusters) on a regular computer.
This is Part 1 of the translation, in my opinion very useful, an article in which this issue is considered in great detail (in my opinion, even too detailed).
Official source: lab128.com
Thanks to the author for the work done.
Oracle cluster on the laptop, it's really cool!
Part 2 (installing the necessary packages, setting up the network, shared folders)
')
Introduction
If you want to go through all the steps of installing Oracle RAC and your laptop or desktop computer has 8 GB or more of RAM, then this is quite possible with the help of Oracle VirtualBox. Follow the instructions in this article and you can get a working RAC system in which you can host a small test database. The created system is not and should not be considered as a complete system. This guide simply allows you to get used to installing and using RAC and testing various administration procedures. The article also explains how to save the image and restore the RAC from the image in a matter of minutes. Even if your test system falls, it will be easy to restore.
This article uses 64-bit versions of Oracle Linux, version 6.3 and Oracle 11g Release 2, version 11.2.0.3. With VirtualBox, you can run multiple virtual machines (VMs) on a single server, which will allow you to run multiple RAC nodes on a single machine. In addition, you can use shared virtual disks. The finished system includes two guest operating systems, two sets of Oracle Grid infrastructures (Clusterware + ASM) and two database instances on a single server. The amount of disk space requires about 32 GB, if you want to save the images of the finished RAC, then you will need another 12 GB of disk space.
This article was written after I was initially inspired by the articles " Oracle Database 11g Release 2 RAC On Linux Using VirtualBox " which was written by Tim Hall and which he published on his blog. Then it was almost completely revised and revised, now these articles, it seems to me, have very little in common.
System requirements
- 8 GB of RAM;
- 32 GB of free hard disk space;
Everything described in this article has been tested on 64-bit Windows 7. Although there should be no problems with using VirtualBox for other OS and hardware solutions. Please let me know if you have successes or problems in other OSs;
Required software
Download the following software:
- Oracle Linux
- VirtualBox (must be version 4.1.14 or later)
- Oracle 11g Release 2 (11.2) Software (64 bit)
Install Virtual Machine (VM)
In this example, we are using VirtualBox installed on 64-bit Windows 7.
Now we need to define two virtual RAC nodes. We can save time by defining a single virtual machine, and when everything is installed, we will clone it
Launch VirtualBox and click the "Create new" button on the toolbar. Click on the “Next” button on the first page of the virtual machine wizard.
Enter the name "Rac1", the OS "Linux" and the version "Oracle (64 bit)", and then click the button "Next":
If you have 16 GB of RAM, allocate memory up to 3072 MB, otherwise use 2048 MB, as in the screenshot below, then click "Next":
Accept the default selection to create a new virtual hard disk by clicking on the “Next” button:
Accept the default VDI type and click the “Next” button in the Virtual Disk Wizard:
Accept the default “Dynamically allocated” option by clicking on the “Next” button:
Accept the default and set the size to “16GB” and click the “Next” button:
Click the “Create” button on the “Create a new virtual disk” screen:
Click the “Create” button on the “Create a new virtual machine” screen:
»Rac1" VM appears in the left pane.
Click on the “Network” button on the right side (highlighted in blue):
Make sure “Adapter 1” is on, and attached to “Bridged Adapter”
Then click on the “Adapter 2” button in the tabs. Make sure that “Adapter 2” is turned on and attached to the “Internal Network”. Then click "OK":
If desired, you can disable the sound card using the “Audio” link. This will probably allow you to save a certain amount of disk space and / or memory and avoid possible problems associated with audio settings. Also, if your system has 4 processor cores or more, it will make sense to allocate 2 processors for the virtual machine. You can do this in the System settings menu.
The virtual machine is configured so that we can start the installation of the guest operating system.
Installing the guest operating system
Note that during installation, Virtual Box will hold the mouse pointer inside the VM area. To take control of the mouse, press the right “Ctrl” key on the keyboard.
Put an Oracle Linux 6.3 (or newer) DVD into the DVD drive and skip the following two screenshots.
If you do not have a DVD, then you need to download. ISO image and put it in a virtual DVD. Select the “Storage” link in the right pane of the VirtualBox Manager screen to open the “Storage” screen. Then select the DVD disc in the “Storage Tree” section:
In the "Attributes" section, click on the DVD icon and select the .ISO file. Note that the file name must be visible in the Storage Tree. Click "OK":
Start the virtual machine by clicking on the “Start” button on the toolbar. As a result, the console window will contain the Oracle Linux startup window. Select "Install or upgrade an existing system":
Do not test the media. Select the “Skip” button:
Continue installing Oracle Linux as you would for a regular server. On the next three screens, you must select a language, keyboard, and primary storage device.
Set the “Hostname” to “rac1.localdomain” and click the “Configure Network” button:
In the network connections window, select the “System eth0” interface and click the “Edit” button:
Check the “Connect automatically” box. Select the “IPv4 Settings” tab to ensure that Method is set to “Automatic (DHCP)”. Select “IPv6 Settings”, make sure Method is set to “Ignore”. Click the Apply button:
Close the network connections window and proceed to the next installation screen. Select time zone; Enter root password: oracle
Select “Use All Space” installation type and check the box “Review and modify partitioning layout”:
Resize lv_swap devices up to 1500 MB; then resize lv_root to 14380 MB. Click "Next":
Confirm all warnings and partitioning. Stay on the bootloader screen.
On the software type installation screen, select the “Database Server” and check the “Customize now” box. Click Next:
In the screen settings, select Database and uncheck all items, select Desktops and select the Desktop and Graphical Administration Tools checkboxes, then click Next and finish the installation. Reboot
When the virtual machine reboots, more configuration screens will be available. Do not create an oracle account, we will do this later.
Congratulations! Linux has been installed.
Check Internet access
We will need Internet access because the extra packages will be installed from the Internet. Open a terminal and try to ping any site on the Internet, for example:
ping ya.ruIf the ping fails, fix the problem using the Ifconfig command, launch it and make changes to the Network Connections (Linux desktop Main menu | System | Network Connections).
If you make changes to network connections, reboot the virtual machine or interface.
To restart the interface, use these two commands:
# ifdown eth0# ifup eth0Then check the ping again.
Source: https://habr.com/ru/post/162147/
All Articles