It’s possible to take and make an MFP from a cheap scanner in GNU \ Linux
The challenge is to help your company save money. Do not buy expensive xerox 3300mfp MFPs for ~ 22 thousand rubles, but do with improvised or cheaper means.
Tasks:
1. Scan to a network folder
2. Photocopy documents
3. Make pdf from scanned image
What we have:
1. PC running Kubuntu 12.04.1x64 (Test version. In the future there will be a transfer to a diskless nettop on an atom'e + Ubuntu (Centos?) Server)
2. Already old HP p1505n printer
3. HP Scanjet G2710 Scanned Trial
')
Before taking on the task, it was necessary to find out what the cheapest scanners are in stock in my city, and whether SANE has them in the list of supported models .
The choice fell on 2 scanners, G2710 and BearPaw. HP was chosen based on the fact that under BearPaw it is necessary to upload a file with drivers, and we need the easiest option. It is not known how much this file will be stored on file hosting services, but if suddenly what happens, it is better to have a “sparse” solution.
After studying the forums, the solution was found quickly. A bunch of sane + scanbuttond is required . Despite outdated information on the official website scanbuttond , the latest builds, at least in turnips, are more recent. Both utilities are in standard repositories. Used them without any PPA.
Versions of utilities:

Through sane, the scanner earned without any dancing with a tambourine. But the question arose - how to use the 3 buttons on the board? This is where scanbuttond helps us. We put the utility. Rule the config. In default Ubunt, it is located in /etc/scanbuttond/initscanner.sh.example. Copy the example to the working version (I use vi, so copy-paste carefully, don't forget to change vi to the name of your favorite editor):
We save.
We connect the scanner, we do sane-find-scanner. If everything is ok, we run scanbuttond in the terminal with the -f key and press the buttons on the scanner (after running scanbuttond -f, I have ~ 7 seconds to go before it starts processing clicks).

By "exhaust" you can see what number each button has. We write or memorize their numbers, after which we edit the configuration of handling clicks.
The developer (s) tried and threw us some ready-made examples that will help us implement our plans.
On line 16 we have two variables of interest - TMPFILE and TMPFILE_PDF. For them we prescribe the path to where the scanned documents and documents converted into pdf will be placed, respectively.
For example:
The variables $ DATE1, $ DATE2 and $ SAVEPATH are written by me above and look like this:
SAVEPATH, of course, can be anything. Well, or almost any. It is planned to use the connected network folder via fstab, so there should be no problems.
I did not touch the remaining 2 variables TMPFILE_PS and LOCKFILE, because their default values completely suit me.
Now for the button settings. I have it as follows
From the code it is clear that the first button makes a PDF from the received image, the second one scans and prints to the printer by default (photocopy), and the third one simply scans.
Note: It should be noted that when scanning I use the convert utility included in the imagemagic package. Through it we get jpeg with an acceptable image size.
I also have type events on each button.
and
The first beeps speaker (which is relevant for the server without X), and the second through mplayer displays an audio notification (relevant for machines with X, since the first item for some reason works only from tty {1-6}). This is done in order to understand that the button on the scanner was pressed. Because the buttons are different, sometimes they are crooked and it is not clear if the button is pressed or not. It is clear that all this can be commented out or left to taste.
You can enable beeper by commenting out lines in /etc/modprobe.d/blacklist.conf
and
Those. should look like this:
and
or install the beep package and invoke it in a script.
It remains to write all this miracle in autorun. Create the /etc/init.d/scan file and write to it:
I made myself logging, which looks like this:
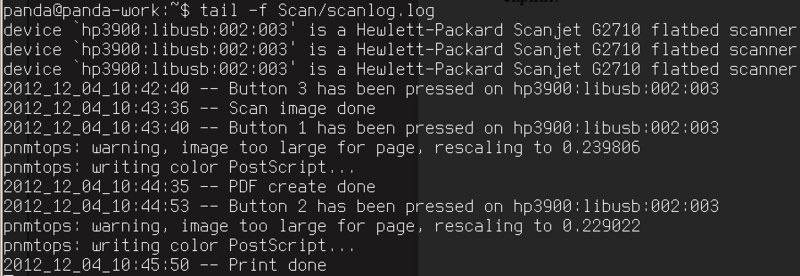
You can redirect output to / dev / null, and to / var / log / as you wish. My business is to offer;)
We give the right to perform and write in rc.d:
Actually on this setting is over. Where to put images, logging format, the availability of it - it all depends on your imagination, the benefit of any script can be specified in scanbuttond.
Total:
This method is suitable for those places where there is already a printer and a PC on which this whole thing can be hung. In order not to buy more expensive multifunction devices, it is easier to buy a scanner. If you buy a nettop + printer + scanner, then the prices in our city are:
Nettop ~ 10 000 r
Printer ~ 1 550 r
Scanner ~ 3500 r
Total ~ 15 000 rubles (if you take everything from scratch) against ~ 22 000 rubles for a network multifunction device (with the function to scan into a network folder) that we took to the departments. For myself, I solved the problem with savings, because took only a scanner.
Thanks for attention.
PS Full listing /etc/scanbuttond/buttonpressed.sh cleared of all superfluous:
Tasks:
1. Scan to a network folder
2. Photocopy documents
3. Make pdf from scanned image
What we have:
1. PC running Kubuntu 12.04.1x64 (Test version. In the future there will be a transfer to a diskless nettop on an atom'e + Ubuntu (Centos?) Server)
2. Already old HP p1505n printer
3. HP Scanjet G2710 Scanned Trial
')
Before taking on the task, it was necessary to find out what the cheapest scanners are in stock in my city, and whether SANE has them in the list of supported models .
The choice fell on 2 scanners, G2710 and BearPaw. HP was chosen based on the fact that under BearPaw it is necessary to upload a file with drivers, and we need the easiest option. It is not known how much this file will be stored on file hosting services, but if suddenly what happens, it is better to have a “sparse” solution.
After studying the forums, the solution was found quickly. A bunch of sane + scanbuttond is required . Despite outdated information on the official website scanbuttond , the latest builds, at least in turnips, are more recent. Both utilities are in standard repositories. Used them without any PPA.
Versions of utilities:
Through sane, the scanner earned without any dancing with a tambourine. But the question arose - how to use the 3 buttons on the board? This is where scanbuttond helps us. We put the utility. Rule the config. In default Ubunt, it is located in /etc/scanbuttond/initscanner.sh.example. Copy the example to the working version (I use vi, so copy-paste carefully, don't forget to change vi to the name of your favorite editor):
cp /etc/scanbuttond/initscanner.sh{.example,} && vi /etc/scanbuttond/initscanner.sh scanimage -L We save.
We connect the scanner, we do sane-find-scanner. If everything is ok, we run scanbuttond in the terminal with the -f key and press the buttons on the scanner (after running scanbuttond -f, I have ~ 7 seconds to go before it starts processing clicks).
By "exhaust" you can see what number each button has. We write or memorize their numbers, after which we edit the configuration of handling clicks.
cp /etc/scanbuttond/buttonpressed.sh{.example,} && vi /etc/scanbuttond/buttonpressed.sh The developer (s) tried and threw us some ready-made examples that will help us implement our plans.
On line 16 we have two variables of interest - TMPFILE and TMPFILE_PDF. For them we prescribe the path to where the scanned documents and documents converted into pdf will be placed, respectively.
For example:
TMPFILE="${SAVEPATH}${DATE1}scan.jpeg" TMPFILE_PDF="${SAVEPATH}${DATE1}scan.pdf" The variables $ DATE1, $ DATE2 and $ SAVEPATH are written by me above and look like this:
DATE1=$(date +%Y_%m_%d_%H%M%S) DATE2=$(date +%Y_%m_%d_%H:%M:%S) SAVEPATH="/home/panda/Scan/" SAVEPATH, of course, can be anything. Well, or almost any. It is planned to use the connected network folder via fstab, so there should be no problems.
I did not touch the remaining 2 variables TMPFILE_PS and LOCKFILE, because their default values completely suit me.
Now for the button settings. I have it as follows
case $1 in 1) echo "$DATE2 -- Button 1 has been pressed on $2" echo -ne '\007' > /dev/null 2>&1 mplayer /usr/share/sounds/KDE-K3B-Insert-Medium.ogg > /dev/null 2>&1 scanimage --resolution 300 --device-name $2 --mode Color -x 210 -y 297 | pnmtops -width=8.27 -height=11.69 > $TMPFILE_PS ps2pdf $TMPFILE_PS $TMPFILE_PDF echo "$DATE2 -- PDF create done" ;; 2) echo "$DATE2 -- Button 2 has been pressed on $2" echo -ne '\007' > /dev/null 2>&1 mplayer /usr/share/sounds/KDE-K3B-Insert-Medium.ogg > /dev/null 2>&1 SCAN_OPTIONS="--resolution 300" scanimage --device-name $2 $SCAN_OPTIONS | pnmtops -width=8.27 -height=11.69 | lpr -J $2 $PRINTER lockfile-remove $LOCKFILE echo "$DATE2 -- Print done" ;; 3) echo "$DATE2 -- Button 3 has been pressed on $2" echo -ne '\007' > /dev/null 2>&1 mplayer /usr/share/sounds/KDE-K3B-Insert-Medium.ogg > /dev/null 2>&1 scanimage --resolution 300 --mode Color --format=jpeg -x 210 -y 297 --device-name $2 > $TMPFILE convert $TMPFILE -quality 70 $TMPFILE echo "$DATE2 -- Scan image done" ;; esac From the code it is clear that the first button makes a PDF from the received image, the second one scans and prints to the printer by default (photocopy), and the third one simply scans.
Note: It should be noted that when scanning I use the convert utility included in the imagemagic package. Through it we get jpeg with an acceptable image size.
I also have type events on each button.
echo -ne '\007' > /dev/null 2>&1 and
mplayer /usr/share/sounds/KDE-K3B-Insert-Medium.ogg > /dev/null 2>&1 The first beeps speaker (which is relevant for the server without X), and the second through mplayer displays an audio notification (relevant for machines with X, since the first item for some reason works only from tty {1-6}). This is done in order to understand that the button on the scanner was pressed. Because the buttons are different, sometimes they are crooked and it is not clear if the button is pressed or not. It is clear that all this can be commented out or left to taste.
You can enable beeper by commenting out lines in /etc/modprobe.d/blacklist.conf
blacklist snd_pcsp and
blacklist pcspkr Those. should look like this:
#blacklist snd_pcsp and
#blacklist pcspkr or install the beep package and invoke it in a script.
It remains to write all this miracle in autorun. Create the /etc/init.d/scan file and write to it:
#!/bin/bash killall scanbuttond scanbuttond -f >> /home/panda/Scan/scanlog.log 2>&1 & I made myself logging, which looks like this:
You can redirect output to / dev / null, and to / var / log / as you wish. My business is to offer;)
We give the right to perform and write in rc.d:
chmod +x /etc/init.d/scan && update-rc.d scan defaults 80 Actually on this setting is over. Where to put images, logging format, the availability of it - it all depends on your imagination, the benefit of any script can be specified in scanbuttond.
Total:
This method is suitable for those places where there is already a printer and a PC on which this whole thing can be hung. In order not to buy more expensive multifunction devices, it is easier to buy a scanner. If you buy a nettop + printer + scanner, then the prices in our city are:
Nettop ~ 10 000 r
Printer ~ 1 550 r
Scanner ~ 3500 r
Total ~ 15 000 rubles (if you take everything from scratch) against ~ 22 000 rubles for a network multifunction device (with the function to scan into a network folder) that we took to the departments. For myself, I solved the problem with savings, because took only a scanner.
Thanks for attention.
PS Full listing /etc/scanbuttond/buttonpressed.sh cleared of all superfluous:
#!/bin/sh DATE1=$(date +%Y_%m_%d_%H%M%S) DATE2=$(date +%Y_%m_%d_%H:%M:%S) SAVEPATH="/home/panda/Scan/" TMPFILE="${SAVEPATH}${DATE1}scan.jpeg" TMPFILE_PDF="${SAVEPATH}${DATE1}scan.pdf" TMPFILE_PS="/tmp/scan.ps" LOCKFILE="/tmp/scan.lock" # Lock file handling and GNOME examples for buttons 2, 3, 4 below contributed # by Lutz Müller <lutz@topfrose.de>. if ! lockfile-create --retry 2 $LOCKFILE; then echo "$DATE1 -- Error: scanning already in progress for $2" exit fi rm -f $TMPFILE rm -f $TMPFILE_PDF rm -f $TMPFILE_PS case $1 in 1) echo "$DATE2 -- Button 1 has been pressed on $2" echo -ne '\007' > /dev/null 2>&1 mplayer /usr/share/sounds/KDE-K3B-Insert-Medium.ogg > /dev/null 2>&1 scanimage --resolution 300 --device-name $2 --mode Color -x 210 -y 297 | pnmtops -width=8.27 -height=11.69 > $TMPFILE_PS ps2pdf $TMPFILE_PS $TMPFILE_PDF echo "$DATE2 -- PDF create done" ;; 2) echo "$DATE2 -- Button 2 has been pressed on $2" echo -ne '\007' > /dev/null 2>&1 mplayer /usr/share/sounds/KDE-K3B-Insert-Medium.ogg > /dev/null 2>&1 SCAN_OPTIONS="--resolution 300" scanimage --device-name $2 $SCAN_OPTIONS | pnmtops -width=8.27 -height=11.69 | lpr -J $2 $PRINTER lockfile-remove $LOCKFILE echo "$DATE2 -- Print done" ;; 3) echo "$DATE2 -- Button 3 has been pressed on $2" echo -ne '\007' > /dev/null 2>&1 mplayer /usr/share/sounds/KDE-K3B-Insert-Medium.ogg > /dev/null 2>&1 scanimage --resolution 300 --mode Color --format=jpeg -x 210 -y 297 --device-name $2 > $TMPFILE convert $TMPFILE -quality 70 $TMPFILE echo "$DATE2 -- Scan image done" ;; esac lockfile-remove $LOCKFILE Source: https://habr.com/ru/post/161579/
All Articles