We continue testing Cloud servers: management via GUI
In the first post of the series, we mentioned the main features available in the Cloud on the Parallels Automation for Cloud Infrastructure (PACI) platform. Including:
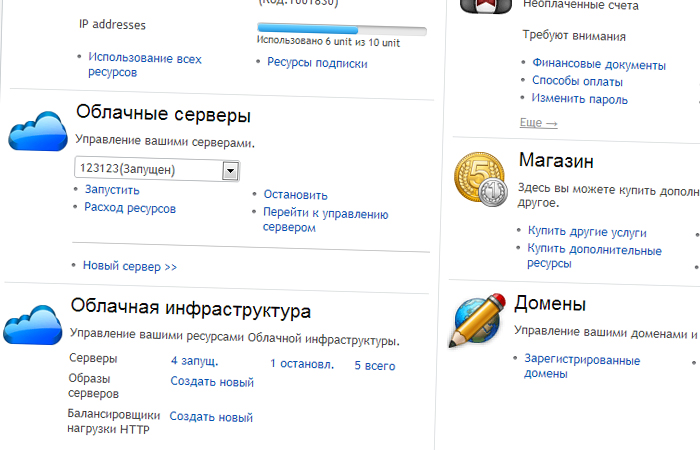
All of them are available at the non-commercial testing stage. Open the control panel of the “Cloud Servers” service and see how they are implemented in its interface. In fact, the control panel is all just a GUI shell over API methods that we talked about last time .
')
If we have once created a server, the parameters of which we are completely satisfied with, they do not need to be written down on a piece of paper. Any of the Cloud servers can be saved as an image. This is very convenient if you need to create some "reference" images of servers and quickly deploy machines from them.
Go to the control panel and select the item "Cloud Servers" → Go to server management. In the list of servers, select the desired one → by the name go to the basic information about the server (tab "Summary") → click on the button "Create image".

We will be required to enter only 2 parameters - the image name and its description (optional). Please note that during the creation of the image, the “original” automatically stops, and immediately after the process is completed, it also automatically starts . At the same time, the notification “Image creation operation scheduled” appears in the panel. Our test server image was created in less than a minute.
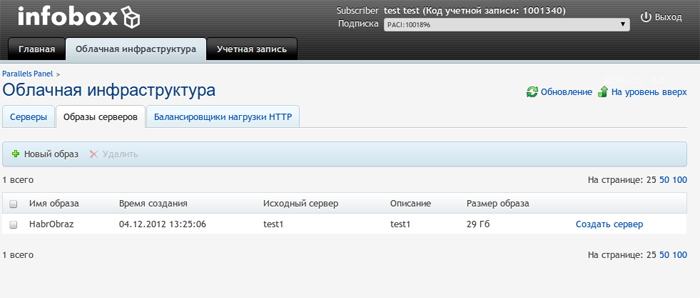
The image completely repeats the parameters of the server chosen by us with the exception of IP addresses. A complete list of the created images can be viewed in the Cloud Infrastructure control panel → Server images. You can deploy a server from an image with a single click.
If you need to create multiple copies of a working server (for example, to add to the balancer), you can save time by cloning them. Clones will repeat all settings of the original, except for IP addresses.
We continue to work in the "Cloud Infrastructure" panel. In the list of servers, select the desired → by name go to its properties ("Summary") → click the "Clone" button.
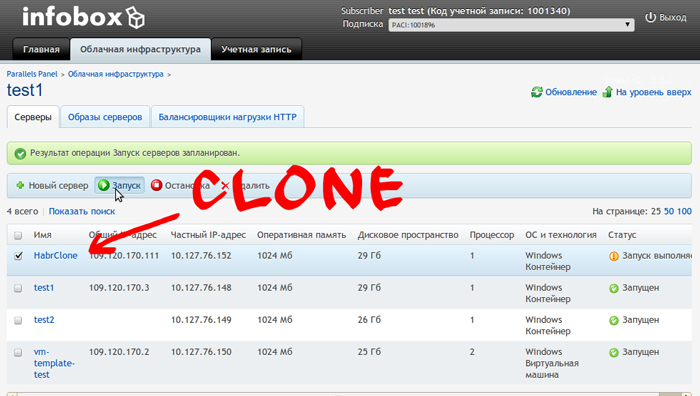
For cloning, as well as for creating an image, the “original” automatically stops and starts after the completion of the operation. The clone we received will be turned off. To start it, let's go back to the list of servers, select the checkbox in the checkbox and press the “Start” button.
For stable operation of sites, you can use several copies of it on different servers. Traffic between them will distribute the load balancer. It will automatically send visitors requests to a more free node. The cloud on the Parallels Operations Automation Cloud Infrastructure (PACI) platform uses HAProxy software.
The balancer will be useful not only for advanced users, but also for those who plan to use the cloud just to host the site. For example, if you have an online store on a cloud hosting, before the holidays you will need not only to prepare special offers and advertise, but also to clone your Cloud server, connect all clones to a load balancer. Then for sure there will be no problems with the availability of the site in attendance peaks.
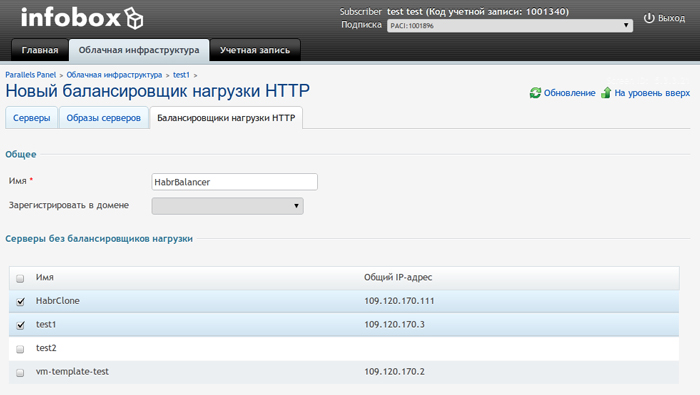
You can create and manage a balancer through the tab of the Cloud Servers panel → HTTP Load Balancers → Add.
We need to specify the name of the balancer and select the servers that will be connected to it. The "Register in domain" field is optional. If we need support for DNS hosting, here we can choose one of the domains associated with the account.
To verify that the balancer is working correctly, you can display the server’s IP address on the pages it creates. When contacting the balancer, we will receive a response variably from all the norths connected to the balancer.
We proceed to the balancer parameters in the same way as to the server parameters, by clicking on the object name. By adding or unchecking checkboxes, you can change the composition of the servers in the traffic distribution scheme.
The frequency of backups is configured for each server separately. Backup is performed automatically on a schedule. So far we have got 2 schedule options - daily or weekly. If someone from the testers needs a different schedule, we are waiting for feedback.
If backups were not configured when choosing a server configuration, the option must be enabled. To do this, go to the “Cloud Infrastructure” control panel → select the required server and click on its name → on the “Summary” tab, click “Configure”. In the server configuration, choose from three (currently) options: do not save server backups, save daily or weekly.
From our choice will depend on the amount of resources (hard disk), and, accordingly, in commercial operation, the price. The schedule will take effect after the configuration changes are saved.
In order to view information about saved backups, go to the “Backups and Images” tab in the server properties. Here you can restore the server using one of the saved copies. However, any changes made after the date of the copy will be lost. Just in case, before experimenting with the settings, it makes sense to save a good version in the form of a server image.
For the newly created server, the default security settings apply. They allow all incoming and outgoing traffic. You can make working with the server more secure by configuring Firewall.
To create a firewall rule, we need to:
go to the “Cloud Infrastructure” panel → select a server for which we will set the Firewall rule → click on the server name, go to its parameters → on the “Firewall” tab click the “Add” button.
In the settings, we can specify specific IPs from which incoming and (separately) outgoing traffic will be allowed. You can also select the access protocol and register secure remote and local ports.

Settings are applied immediately after clicking the "Save" button. The confirmation message “The result of the operation Firewall rules applied” will appear in the panel.
For the security of the Cloud server network you created, it is recommended to open access via external IP to only one of the servers. In this case, all the subscription servers will be accessible to each other via the internal network, and you - through a server with an external IP acting as a router.
When creating at least 1 firewall rule, the rest of the traffic is “cut”. If you create a rule, for example, for traffic on port 3389, then traffic on port 80 will be “cut”.
You can test these and other features of Cloud servers for free. Non-commercial testing will last until February 1, 2013 . Join now !
Attention! For authors of the best reviews of the service, we have prepared prizes .
- Creating server images
- Server cloning
- Creating and managing a load balancer
- Backup Setup
- Firewall Setup
All of them are available at the non-commercial testing stage. Open the control panel of the “Cloud Servers” service and see how they are implemented in its interface. In fact, the control panel is all just a GUI shell over API methods that we talked about last time .
')
Creating server images
If we have once created a server, the parameters of which we are completely satisfied with, they do not need to be written down on a piece of paper. Any of the Cloud servers can be saved as an image. This is very convenient if you need to create some "reference" images of servers and quickly deploy machines from them.
Go to the control panel and select the item "Cloud Servers" → Go to server management. In the list of servers, select the desired one → by the name go to the basic information about the server (tab "Summary") → click on the button "Create image".
We will be required to enter only 2 parameters - the image name and its description (optional). Please note that during the creation of the image, the “original” automatically stops, and immediately after the process is completed, it also automatically starts . At the same time, the notification “Image creation operation scheduled” appears in the panel. Our test server image was created in less than a minute.
The image completely repeats the parameters of the server chosen by us with the exception of IP addresses. A complete list of the created images can be viewed in the Cloud Infrastructure control panel → Server images. You can deploy a server from an image with a single click.
Server cloning
If you need to create multiple copies of a working server (for example, to add to the balancer), you can save time by cloning them. Clones will repeat all settings of the original, except for IP addresses.
We continue to work in the "Cloud Infrastructure" panel. In the list of servers, select the desired → by name go to its properties ("Summary") → click the "Clone" button.
For cloning, as well as for creating an image, the “original” automatically stops and starts after the completion of the operation. The clone we received will be turned off. To start it, let's go back to the list of servers, select the checkbox in the checkbox and press the “Start” button.
Creating and managing a load balancer
For stable operation of sites, you can use several copies of it on different servers. Traffic between them will distribute the load balancer. It will automatically send visitors requests to a more free node. The cloud on the Parallels Operations Automation Cloud Infrastructure (PACI) platform uses HAProxy software.
The balancer will be useful not only for advanced users, but also for those who plan to use the cloud just to host the site. For example, if you have an online store on a cloud hosting, before the holidays you will need not only to prepare special offers and advertise, but also to clone your Cloud server, connect all clones to a load balancer. Then for sure there will be no problems with the availability of the site in attendance peaks.
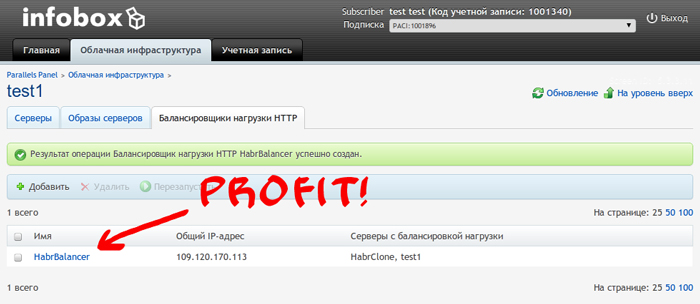
You can create and manage a balancer through the tab of the Cloud Servers panel → HTTP Load Balancers → Add.
We need to specify the name of the balancer and select the servers that will be connected to it. The "Register in domain" field is optional. If we need support for DNS hosting, here we can choose one of the domains associated with the account.
To verify that the balancer is working correctly, you can display the server’s IP address on the pages it creates. When contacting the balancer, we will receive a response variably from all the norths connected to the balancer.
We proceed to the balancer parameters in the same way as to the server parameters, by clicking on the object name. By adding or unchecking checkboxes, you can change the composition of the servers in the traffic distribution scheme.
Backup Setup
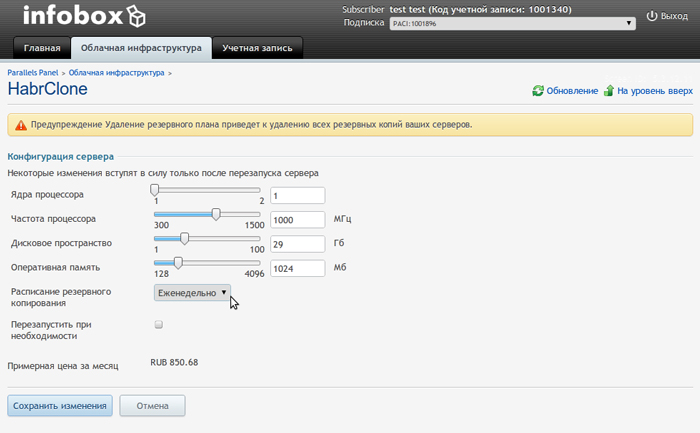
The frequency of backups is configured for each server separately. Backup is performed automatically on a schedule. So far we have got 2 schedule options - daily or weekly. If someone from the testers needs a different schedule, we are waiting for feedback.
If backups were not configured when choosing a server configuration, the option must be enabled. To do this, go to the “Cloud Infrastructure” control panel → select the required server and click on its name → on the “Summary” tab, click “Configure”. In the server configuration, choose from three (currently) options: do not save server backups, save daily or weekly.
From our choice will depend on the amount of resources (hard disk), and, accordingly, in commercial operation, the price. The schedule will take effect after the configuration changes are saved.
In order to view information about saved backups, go to the “Backups and Images” tab in the server properties. Here you can restore the server using one of the saved copies. However, any changes made after the date of the copy will be lost. Just in case, before experimenting with the settings, it makes sense to save a good version in the form of a server image.
Firewall Setup
For the newly created server, the default security settings apply. They allow all incoming and outgoing traffic. You can make working with the server more secure by configuring Firewall.
To create a firewall rule, we need to:
go to the “Cloud Infrastructure” panel → select a server for which we will set the Firewall rule → click on the server name, go to its parameters → on the “Firewall” tab click the “Add” button.
In the settings, we can specify specific IPs from which incoming and (separately) outgoing traffic will be allowed. You can also select the access protocol and register secure remote and local ports.
Settings are applied immediately after clicking the "Save" button. The confirmation message “The result of the operation Firewall rules applied” will appear in the panel.
For the security of the Cloud server network you created, it is recommended to open access via external IP to only one of the servers. In this case, all the subscription servers will be accessible to each other via the internal network, and you - through a server with an external IP acting as a router.
When creating at least 1 firewall rule, the rest of the traffic is “cut”. If you create a rule, for example, for traffic on port 3389, then traffic on port 80 will be “cut”.
Test Cloud Servers for Free
You can test these and other features of Cloud servers for free. Non-commercial testing will last until February 1, 2013 . Join now !
Attention! For authors of the best reviews of the service, we have prepared prizes .
Our previous posts on the topic
Source: https://habr.com/ru/post/161513/
All Articles